Vaonis Vespera - Topaz DeNoise AI
Introduction | Short Overview of Topaz DeNoise | De-Noising | Downsizimng the Stars | Sharpening the Object | Homogenisation of Coloured/Black Areas | Test Case: NGC 2244 with and without Filter | Test Case: NGC 2174 with and without Filter | Conclusions | Links
Archive
On this page, I compile my first experiences with the noise reduction application Topaz DeNoise AI when processing Vaonis Vespera photos.
For tests with eVscope photos siehe page Unistellar eVscope - Topaz DeNoise AI.
Note: In June 2024, I sold my Vaonis Vespera smart telescope. I therefore cannot report any further experiences with it here. |
Introduction
On this page, I would like to present my first experiences that I collected when processing photos taken with the Vaonis Vespera with the noise reduction application Topaz DeNoise AI (hereafter DeNoise or DN). I bought this application in March 2023 and applied it at first to various photos that I had taken in the past in order to gain an understanding of the apps usefulness and "side effects".
Note: Even though Topaz recommends de-noising photos first and then process them further, I de-noised most of the images in an already processed version in order to save work (and keep the undocumented post-processing...).
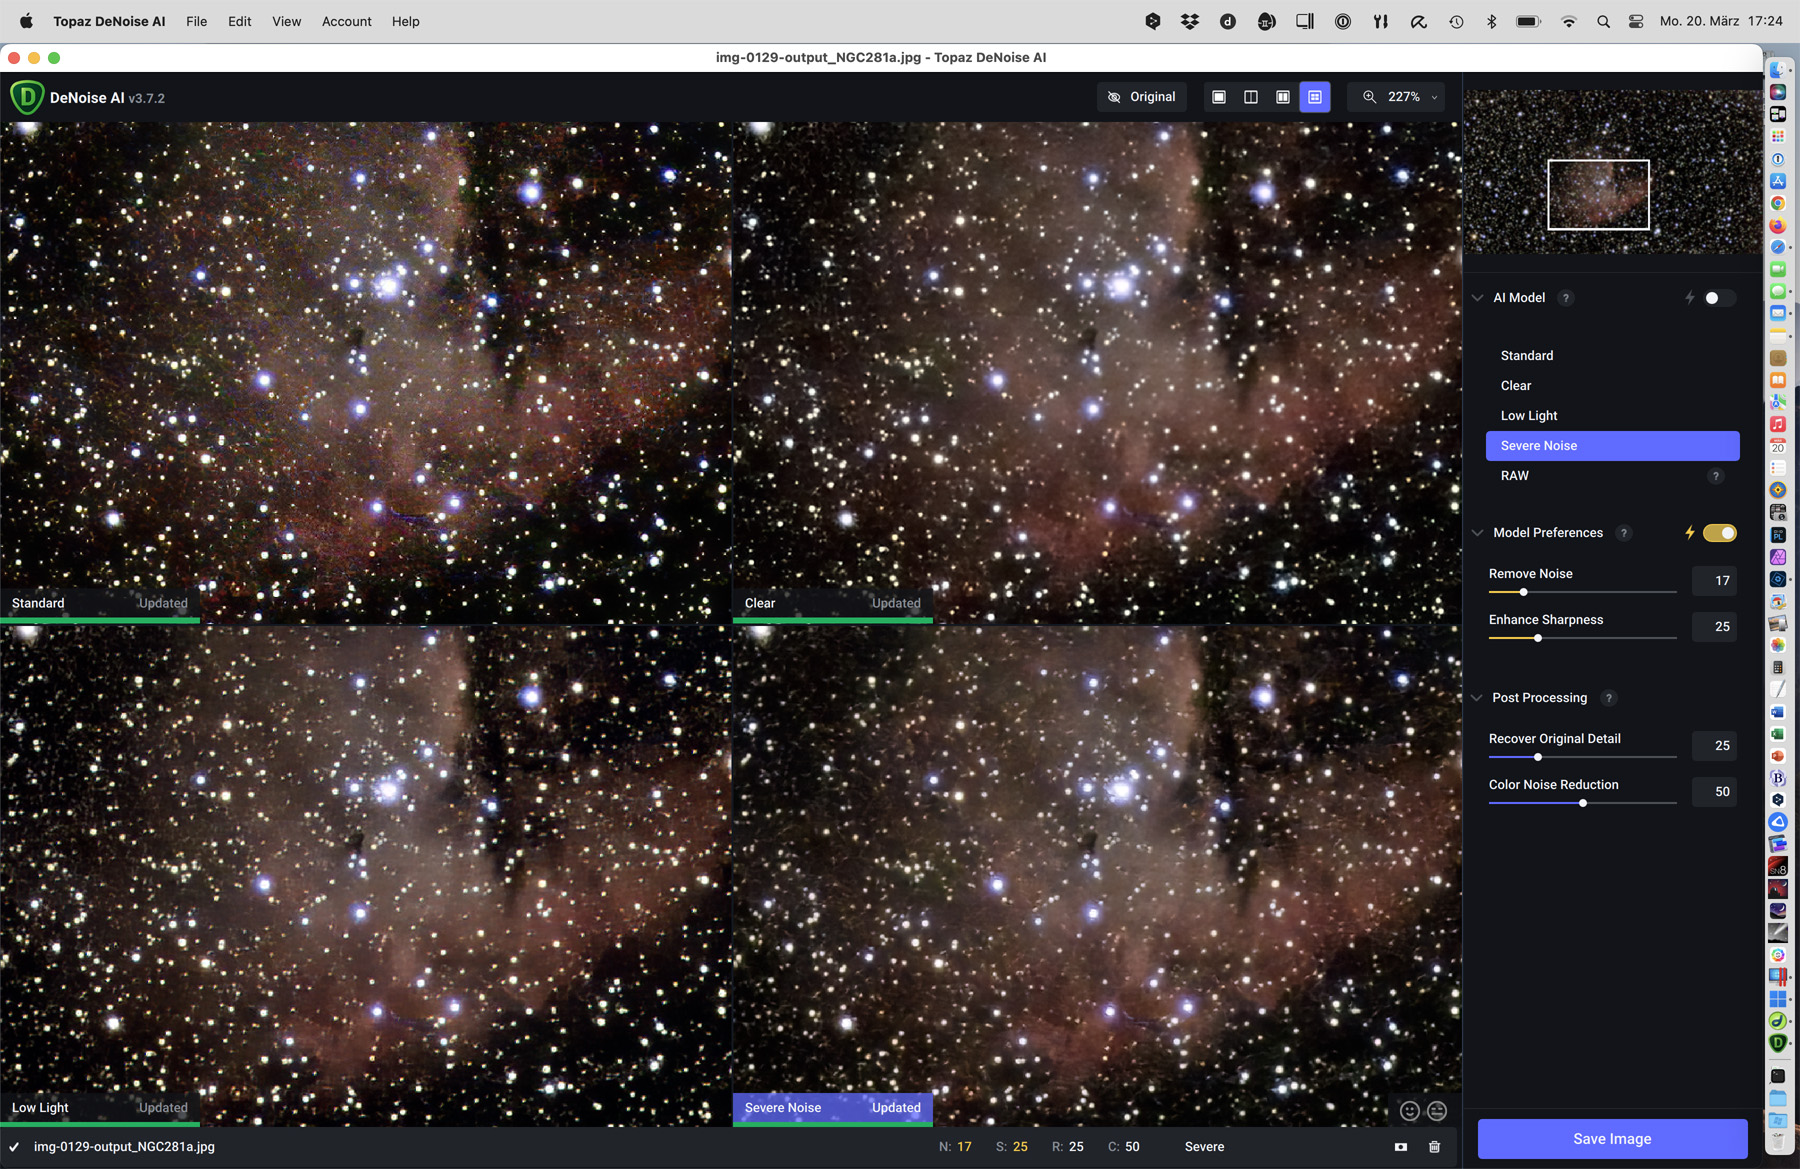
DeNoise offers 4 alternative AI models for noise reduction: Standard, Clear, Low Light and Severe Noise. The Clear variant is said to be best suited for smooth surfaces, as they occur in galactic nebulae. That is why I initially used this model only. On closer inspection, however, it became clear to me that one should look each time to find out which model provides the best results (and with which settings...). Besides the effect of de-noising, however, processing with DeNoise can have further effects:
- A slight reduction in the size of the stars (e.g. in the case of M 16)
- A sometimes astonishing sharpening of the object (e.g. with M 42/43)
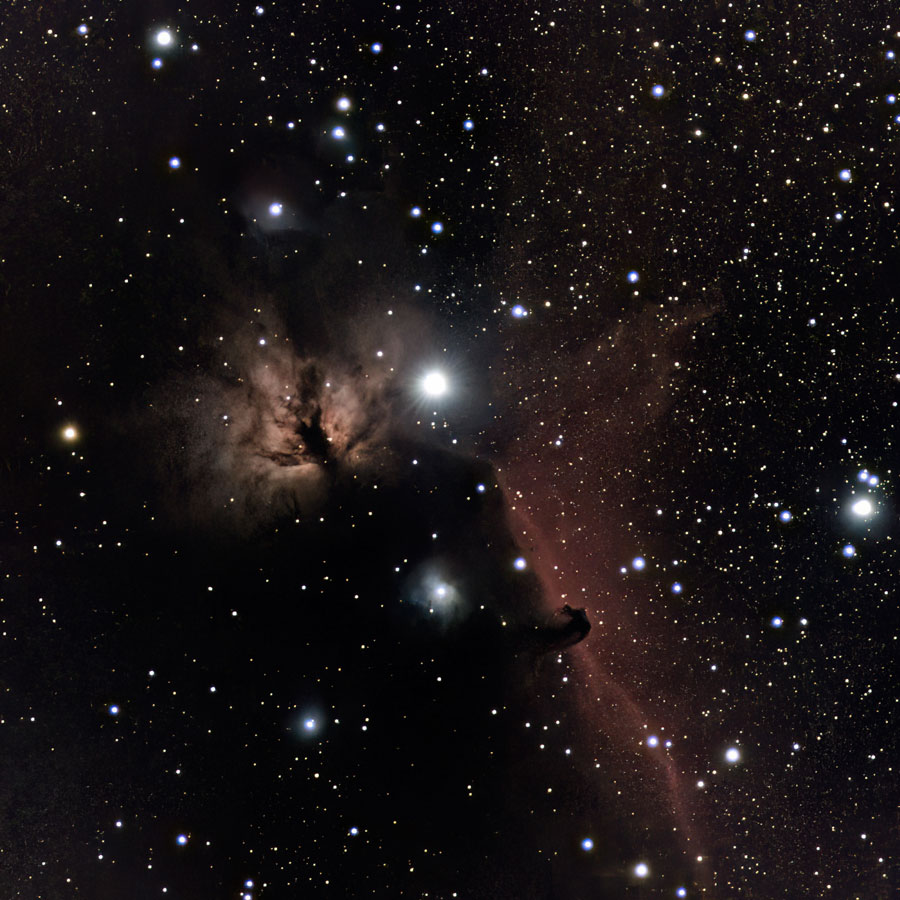
- A "homogenisation" of colored/black areas (e.g. for B 33/NGC 2024)
The degree of these effects depends on the model used, and in my opinion it is worth paying attention to these effects.
By the way, you should also note that DeNoise can produce artifacts, especially the AI model Severe Noise! To check this, you should enlarge the objects sufficiently.
In the following, I do not want to give instructions on how to use DeNoise (it is fairly easy to use...), but only show its effects with the help of photo examples.
Note: It is best to click on the "before" and "after" photos in order to display them in different browser tabs. You can then compare the photos by switching between the browser tabs.
Short Overview of Topaz DeNoise
After loading a photo into DeNoise, it is easiest to first display all 4 AI models in parallel:
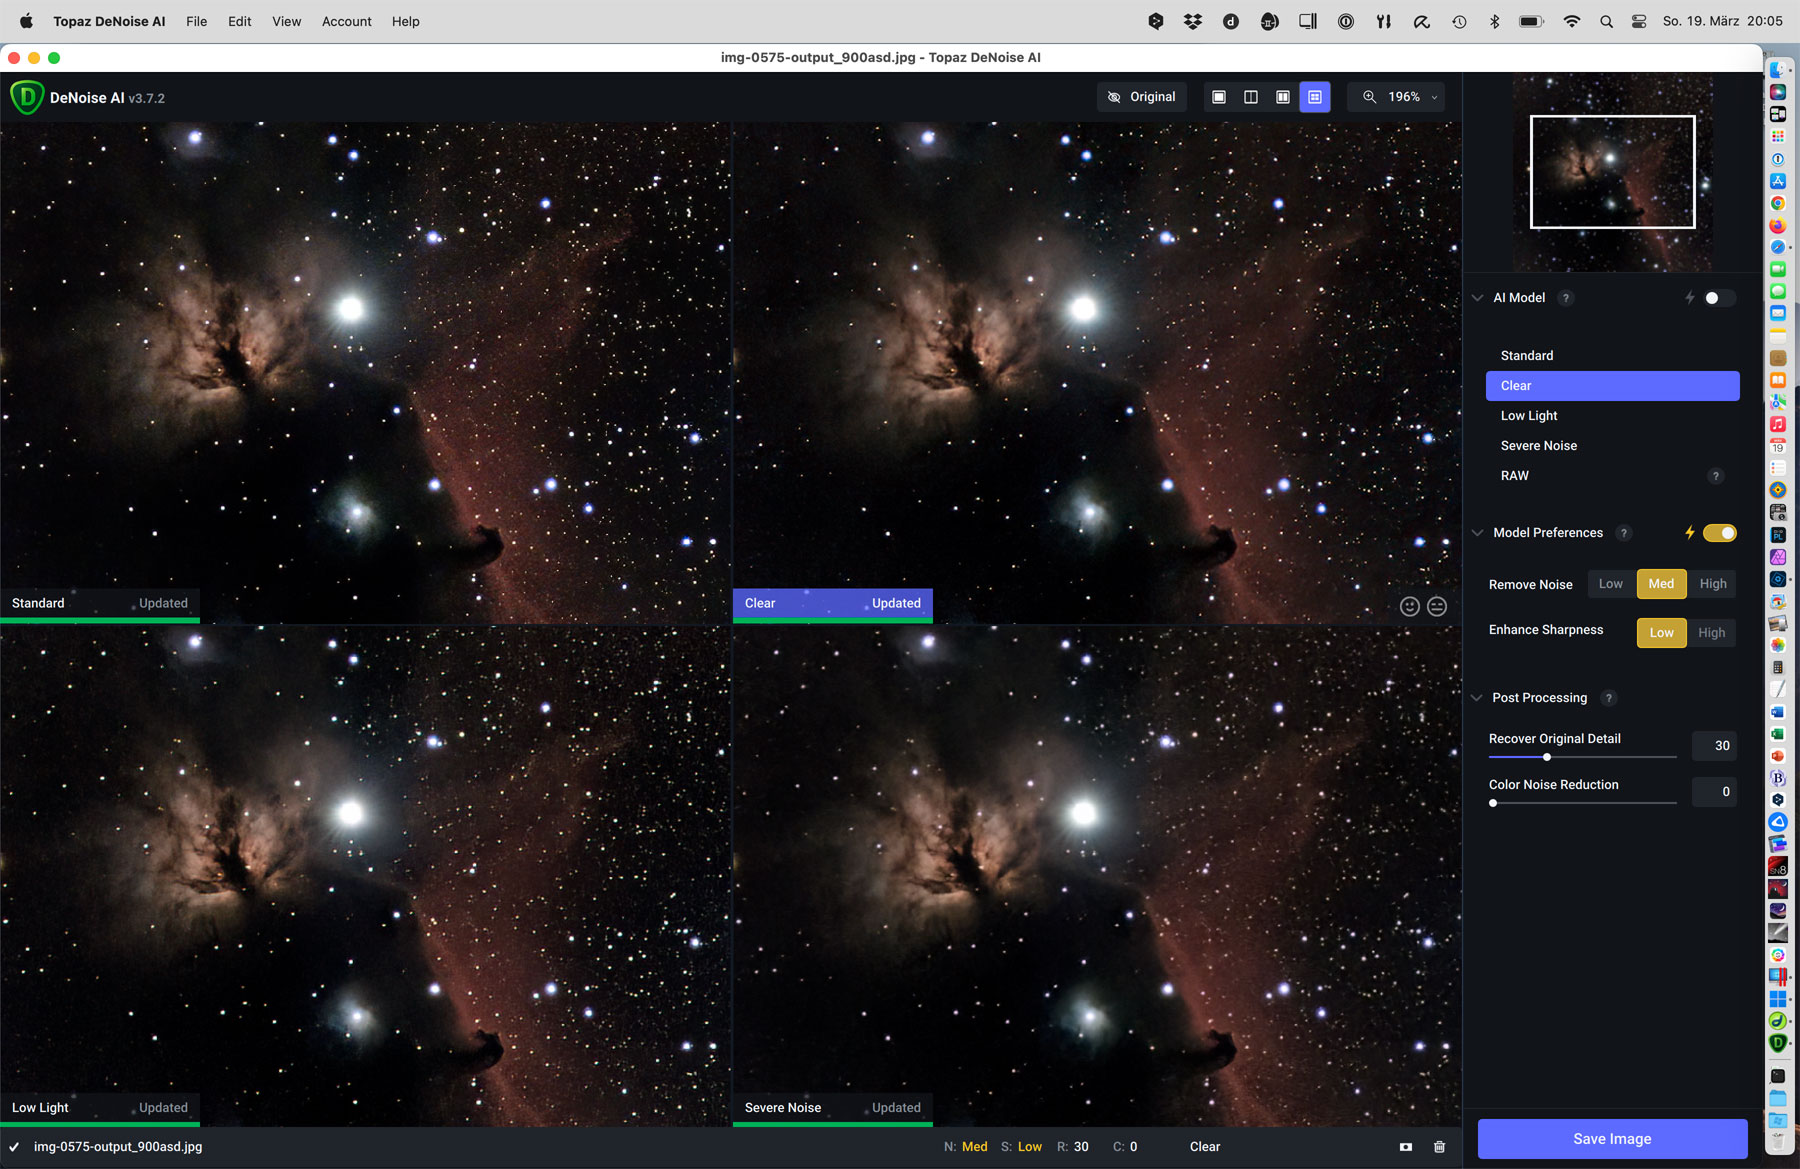
Here I show the model previews a little larger, so that perhaps differences between them can already be recognized:
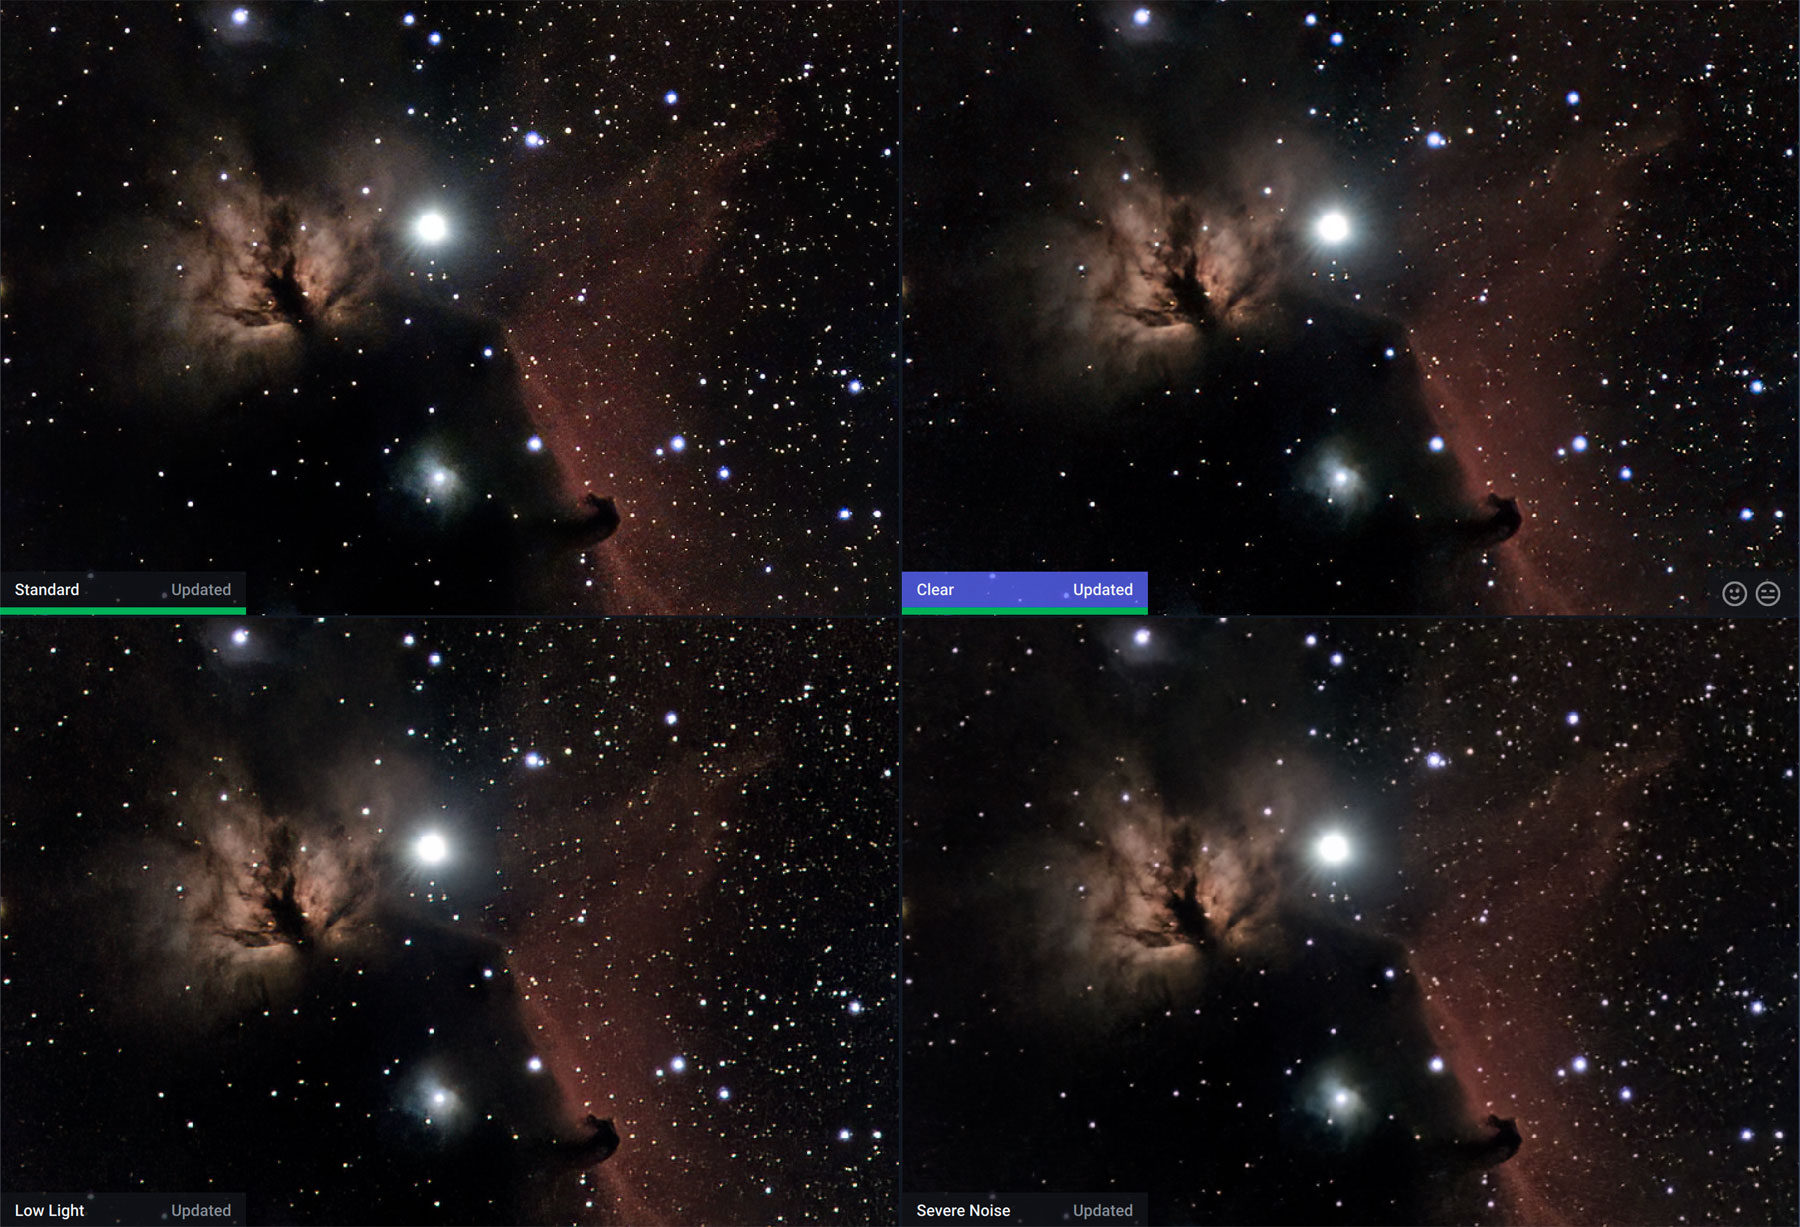
In this case, I chose the Clear model in an automatic setting (see top picture). It is not always easy to decide on one of the models, and it helps a lot to view the objects in different sizes. After selecting the model, you can then save the corresponding variant; the file name is supplemented by the model variant (does not always work...).
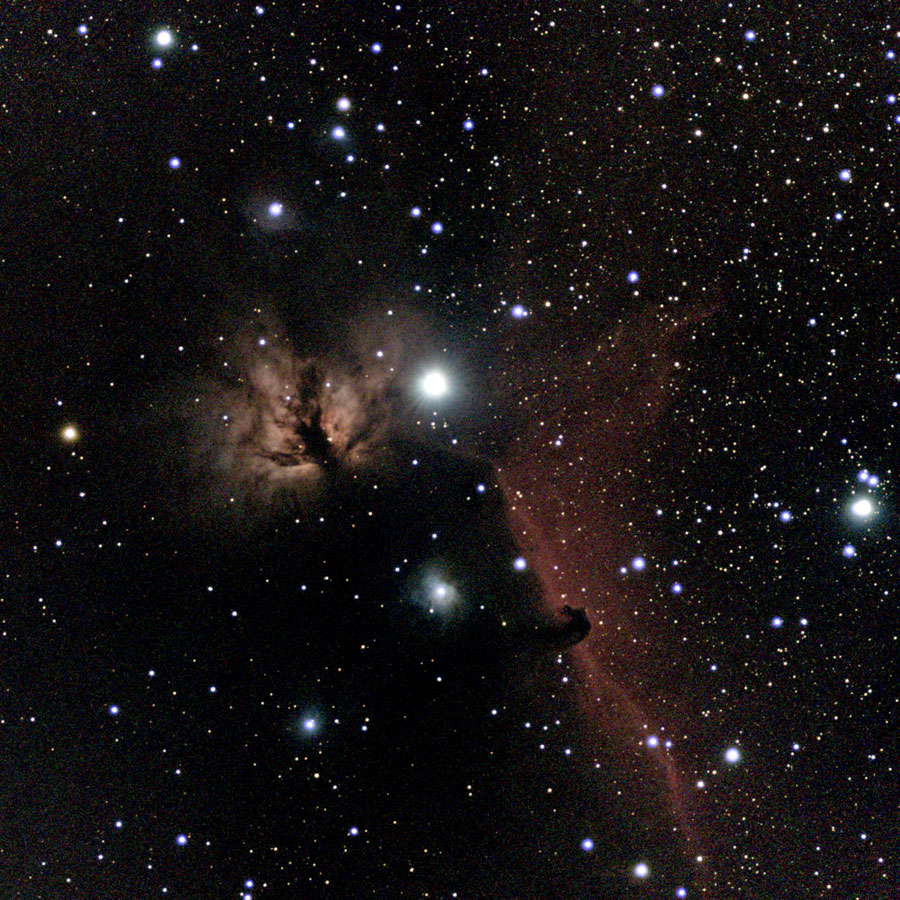
In my gallery, however, I had chosen the Low Light model. Here is the "original" processed in PSE and the result of the editing with DeNoise:
 |
 |
|
B 33 and NGC 2024, Jan 29, 2023 - large, 5700s, processed, rotated |
Ditto - large, photo left processed with DeNoise |
De-Noising
I bought Topaz DeNoise AI because of its "main function", noise reduction. Compared to the noise reduction in PSE, DeNoise goes much more "to the point" and makes suggestions for it with its 4 AI models, which can still be optimized by changing parameters (mostly, I choose the automatic setting). In the following, I present some examples of noise reduction (for more examples, see page Photo Gallery (Nicest Photos)).
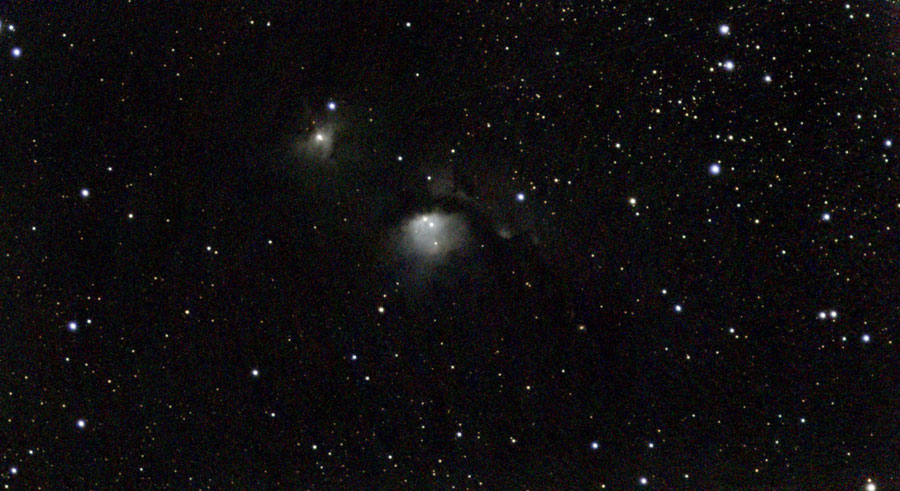
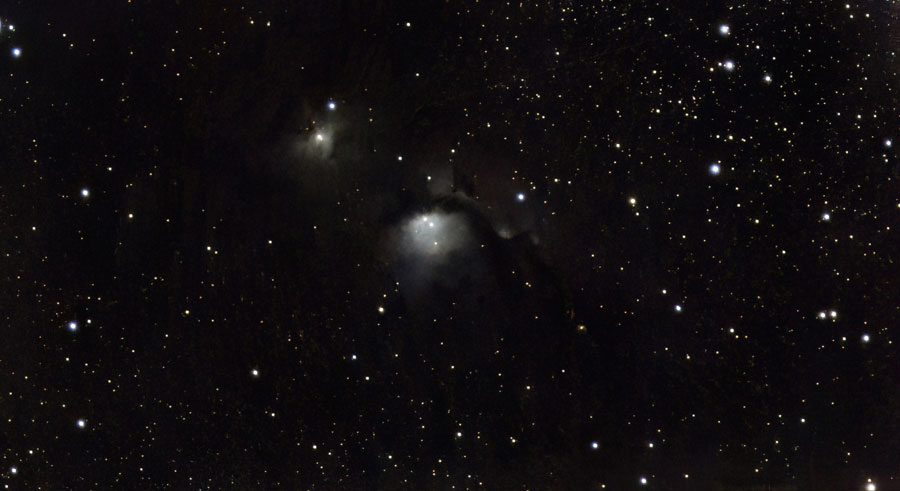
M 78 (Orion)
 |
 |
|
M 78, Feb 7, 2023 - original, 2120s |
Ditto - large, photo left processed (DN) |
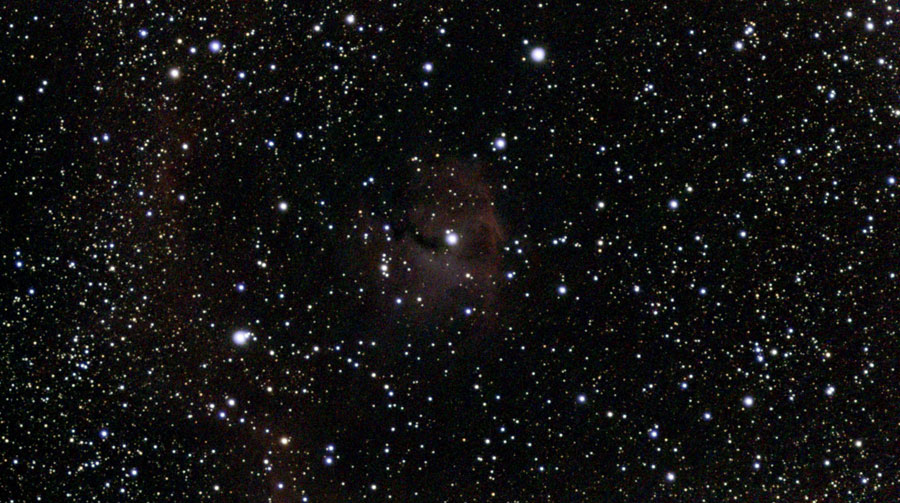
IC 2177 (Seagull Nebula, Monoceros)
 |
 |
|
IC 2177, Feb 8, 2023 - original, 1430s |
Ditto, large, photo left processed (PSE, DN) |
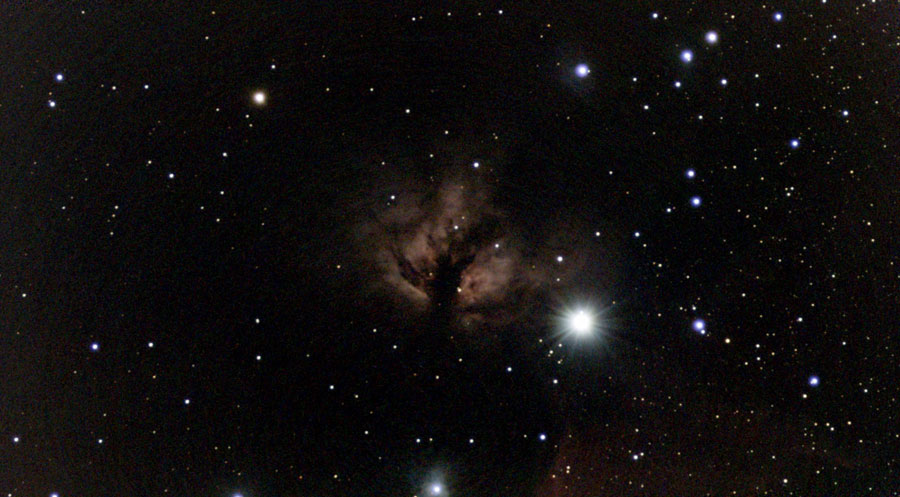
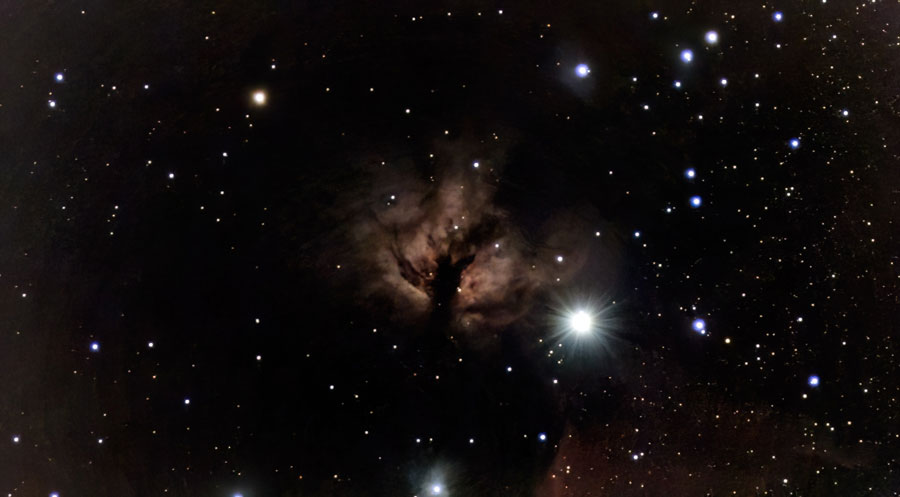
NGC 2024 (Flame Nebula; Orion)
 |
 |
|
NGC 2024, Jan 29, 2023 - original 880 s |
Ditto - large, photo left processed (PSE, DN) |
NGC 7293 (Helix Nebula; Aquarius)
 |
||
NGC 7293, Nov 1, 2022 - original, 1800s |
Ditto - large, photo left processed (PSE, DN) |
Downsizing the Stars
When I compare my Vespera photos with those published by Vaonis, I immediately notice that the stars are smaller in the Vaonis photos. (A request of mine was also answered accordingly.) In the meantime, I watched some videos to learn how to do this in Photoshop or GIMP. And I have to admit that this is a bit too much effort for me....
So how can you reduce stars without much effort? The first method that I discovered by accident was to apply noise filters from Adobe PSE (interpolate brightness...; dust and scratches...) to a photo at the weakest strength. This helps a bit, but I am not sure what the "side effects" are.
In the meantime, I found out that DeNoise can also reduce stars (but not necessarily). For this you have to compare the different models and choose the most suitable photo (again, "side effects" are possible...). In comparison, the first-mentioned method seems to have a stronger effect...
The simplest, but not quite cheap variant that I came across is the Dual Band Filter for the Vespera, which reduces the stars noticeably. However, this is primarily intended for nebulae; but it should also show a corresponding effect with globular clusters. First tests indicate that the Vaonis Light Pollution Filter for the Vespera does not seem to reduce stars.
In the following, I present examples of the effect DeNoise has on the size of stars (possibly caused by sharpening in DeNoise). Sometimes the round stars become a bit "square"...
M 16 (Eagle Nebula; Serpens)
 |
 |
|
M 16, Nov 1, 2022 - original, 1800s |
Ditto - large, photo left processed (DN) |
You can find a weak effect when you switch back and forth between the images. You can see an effect especially with the small background stars.
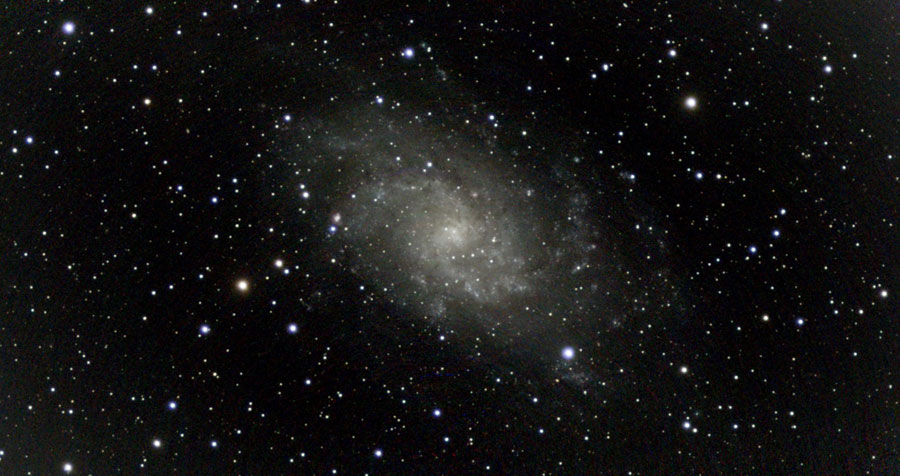
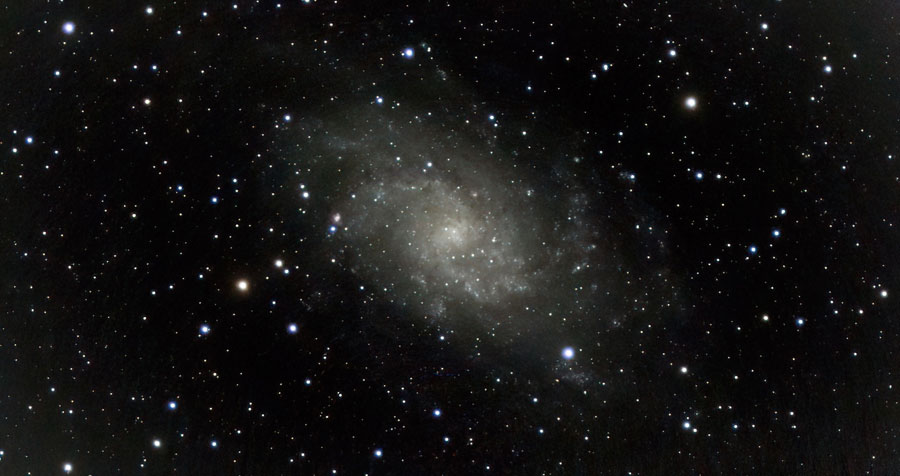
M 33 (Triangulum Galaxy; Triangulum)
 |
 |
|
M 33, Oct, 30, 2022 - original, 2690s |
Ditto - large, photo left processed (DN) |
You can find a weak effect when you switch back and forth between the images. You can see an effect especially with the small background stars.
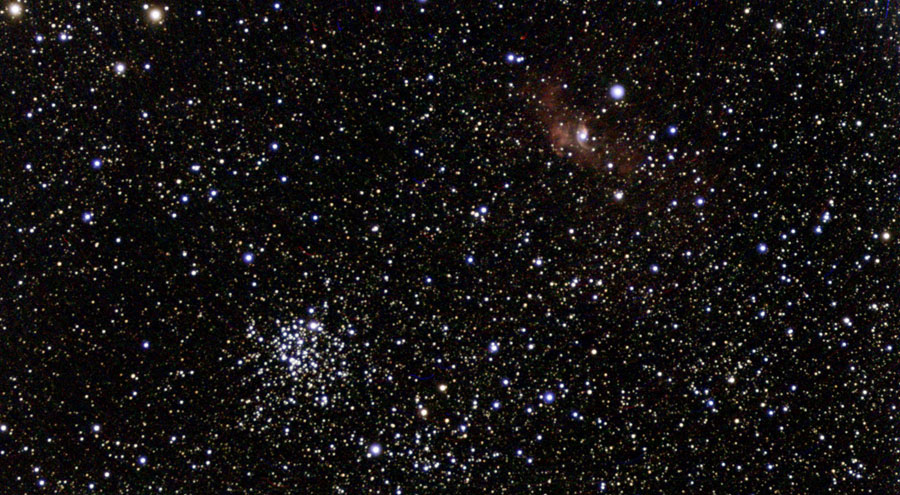
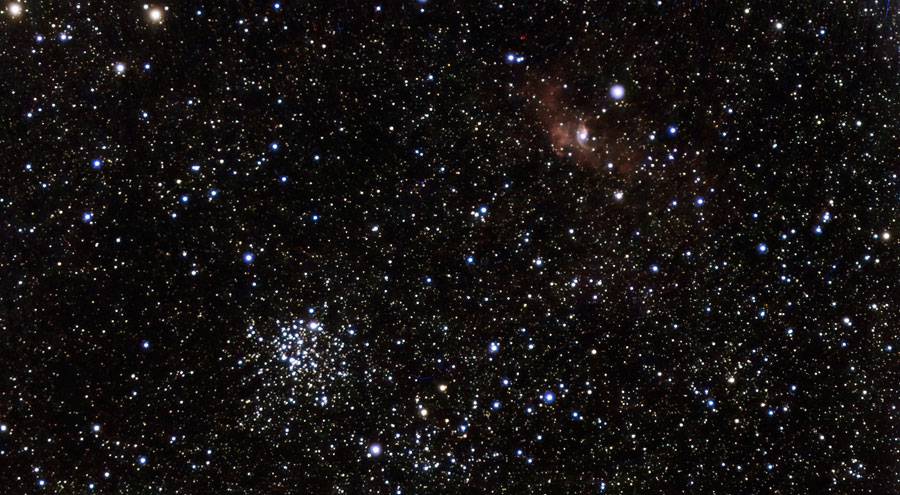
NGC 7635 (Bubble Nebula; Cassiopeia) and M 52 (Casiopeia)
 |
 |
|
NGC 7635 and M 52, Aug 25, 2022 - original, 940s |
Ditto - large, photo left processed (PSE, DN) |
You can find a weak effect when you switch back and forth between the images. You can see an effect especially with the small background stars.
Sharpening the Object
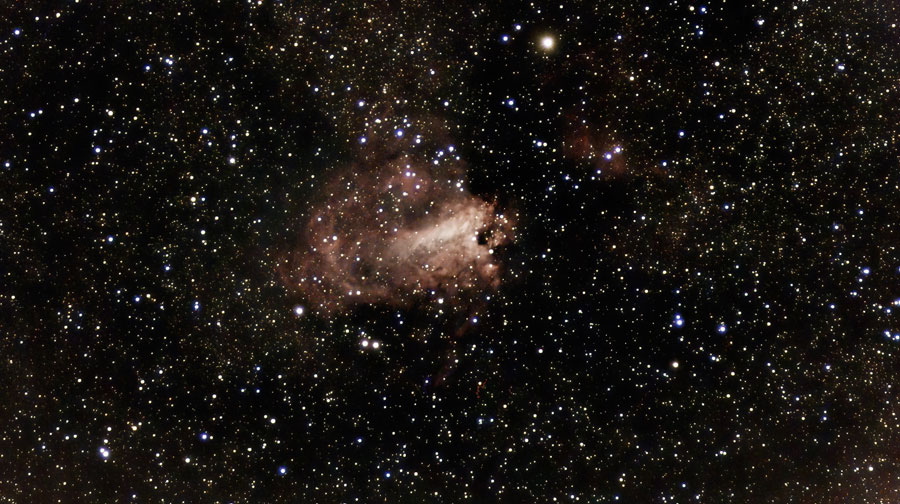
I found some nebulae (M 17, M 42) a bit "fuzzy" when I looked at my Vespera photos. When I processed these photos in DeNoise, I noticed that they often looked much sharper than before after applying a DeNoise AI model (probably also connected with a slight reduction in the size of the stars). Thus, rather disappointing photos turned into ones that I found quite acceptable. Here are some examples! The effect is more obvious when you open the large versions.
M 17 (Omega/Swan Nebula; Sagittarius)
 |
 |
|
M 17, Aug 16, 2022 - original, 920s |
Ditto - large, photo left processed (DN) |
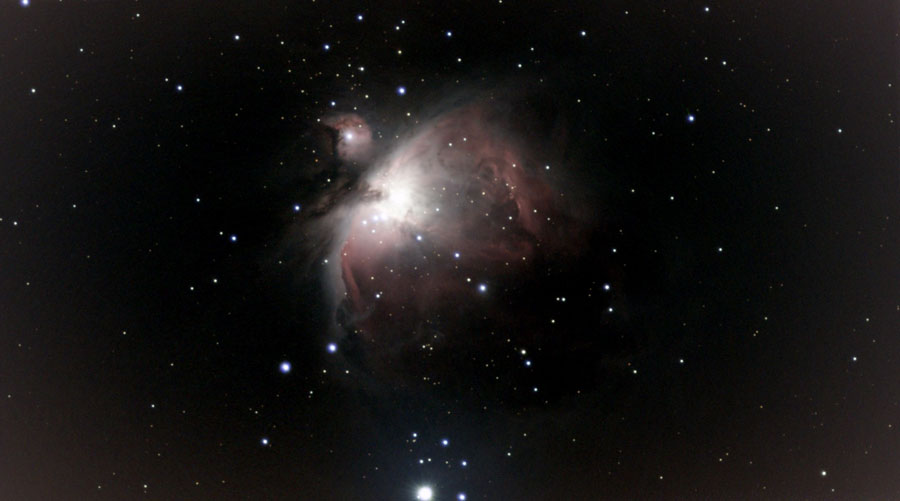
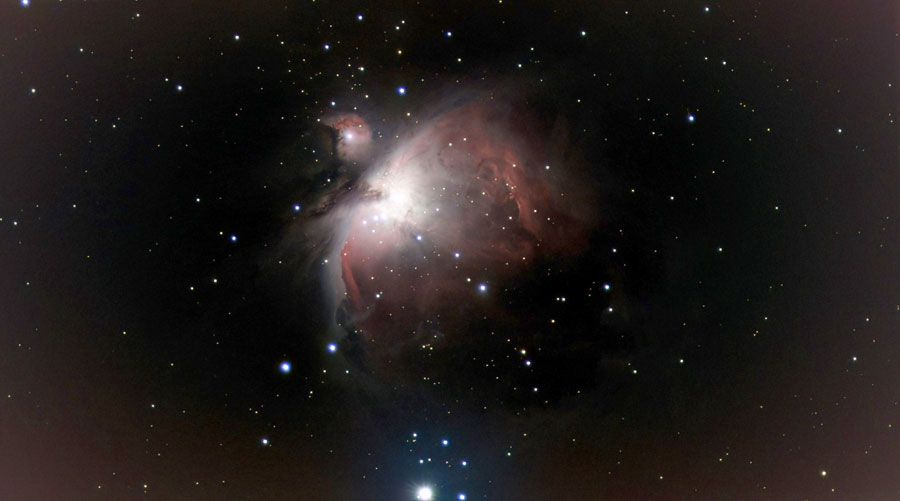
M 42/43 (Orion Nebula; Orion)
 |
 |
|
M 42/43, Jan 18, 2023 - original, 640s |
Ditto - large, photo left processed (PSE, DN) |
B 33 (Horse Head Nebula; Orion) with NGC 2024 (Flame Nebula; Orion)
|
|
|
B 33 and NGC 2024, Jan 29, 2023 - large, 5700s, processed, rotated |
Ditto - large, photo left processed with DeNoise |
Homogenisation of Coloured/Black Areas
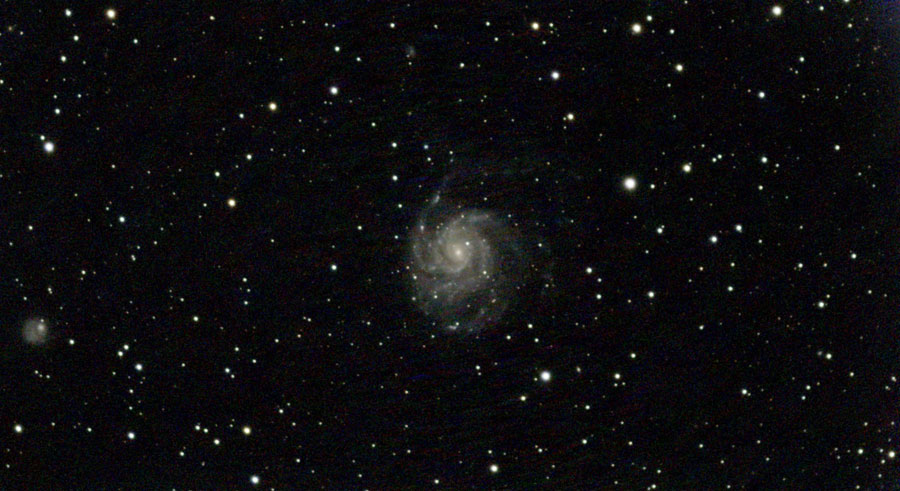
In nebula photos with a lot of noise, the coloured nebula areas often look "granulated". DeNoise homogenises these areas because it can complete patterns due to the AI models used. Of course, one can argue about what is still real, but everyone has to decide for him- or herself... This effect also has an impact on the dark background and furthermore reduces the traces a little that arise from the compensation of the field rotation (walking pattern noise; see M 101). Here are some examples!
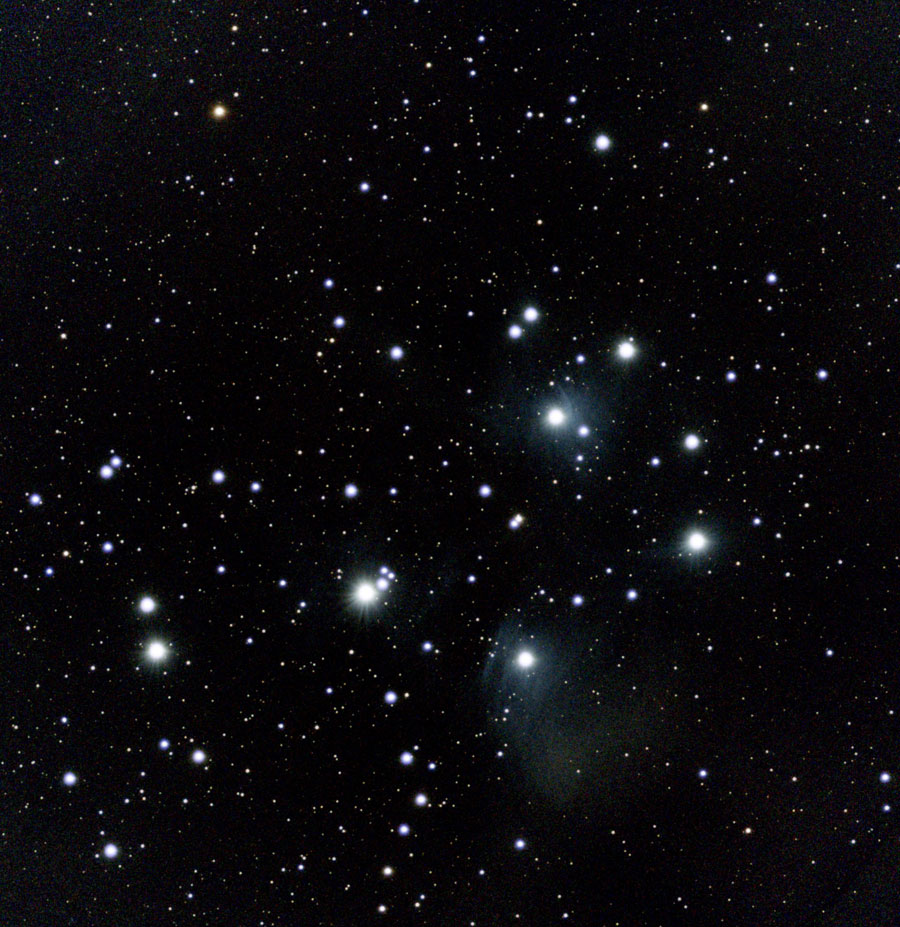
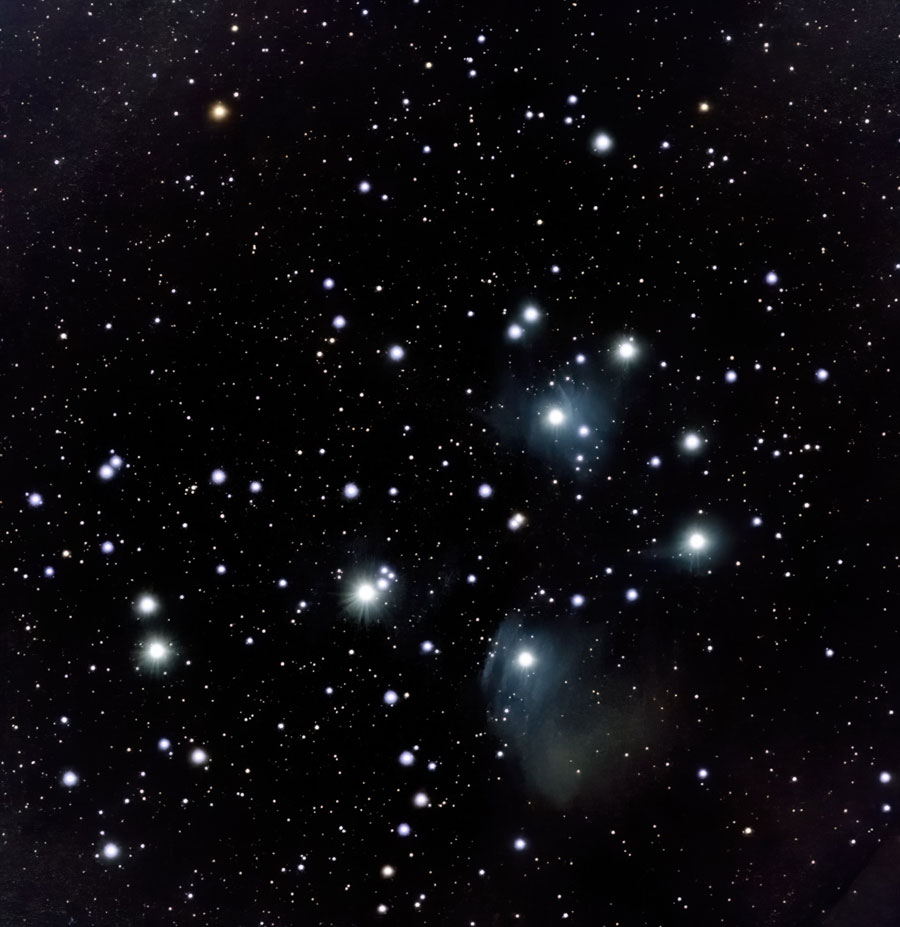
M 45 (Pleiades; Taurus)
 |
 |
|
M 45, Feb 6, 2023 - original, 2440s, mosaic |
Ditto - large, photo left processed (PSE, DN) |
M 101 (Pinwheel Galaxy; Ursa Major)
 |
||
M 101, Aug 7, 2022 - original, 1910s |
Ditto - large, photo left processed (DN) |
B 33 (Horse Head Nebula; Orion) with NGC 2024 (Flame Nebula; Orion)
|
|
|
B 33 and NGC 2024, Jan 29, 2023 - large, 5700s, processed, rotated |
Ditto - large, photo left processed with DeNoise |
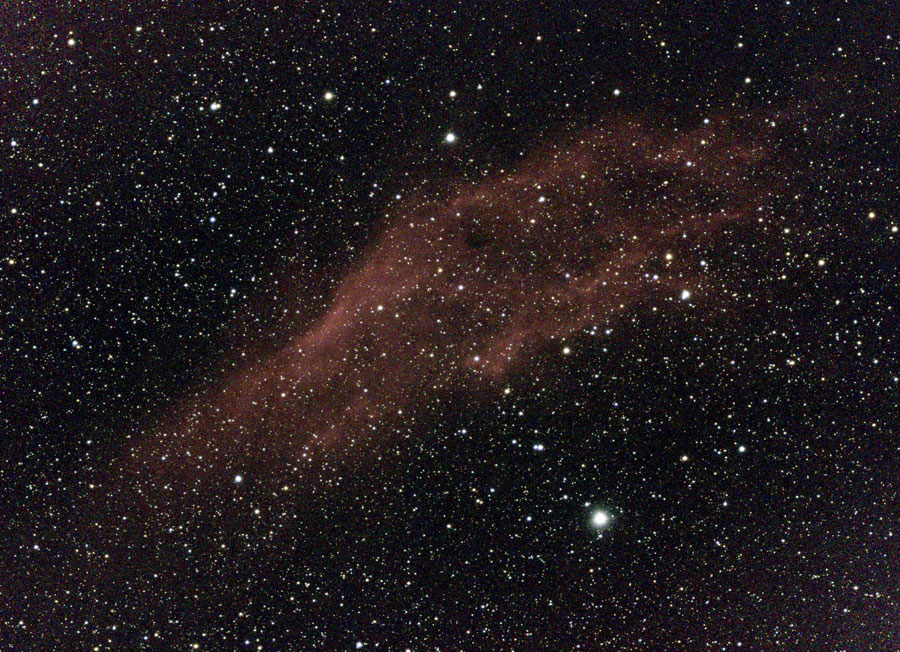
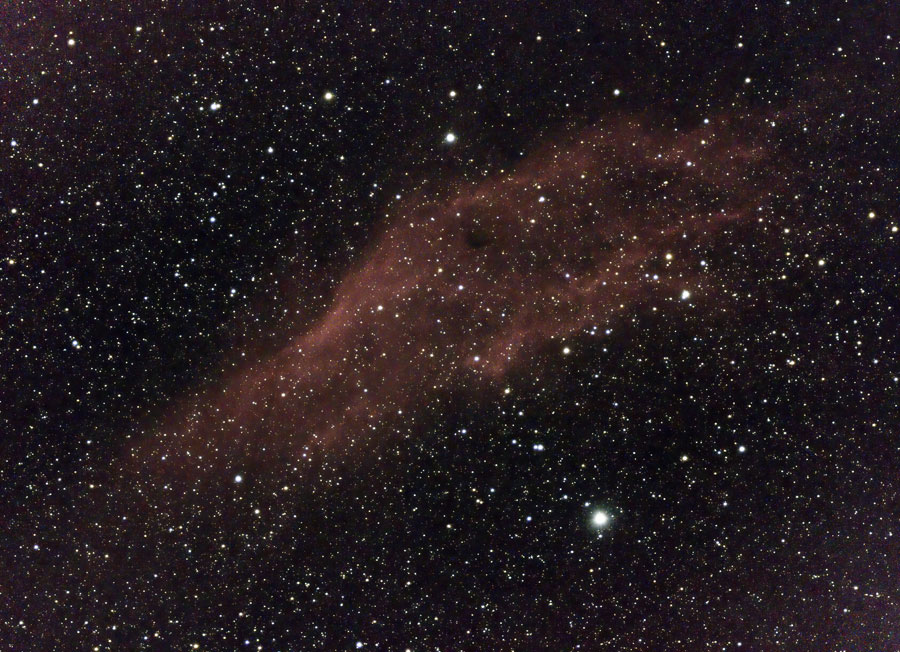
NGC 1499 (California Nebula; Perseus)
 |
 |
|
NGC 1499, Feb 7, 2023 - large, mosaic, 4160s, processed (PSE) |
Ditto - large, photo left processed (DN) |
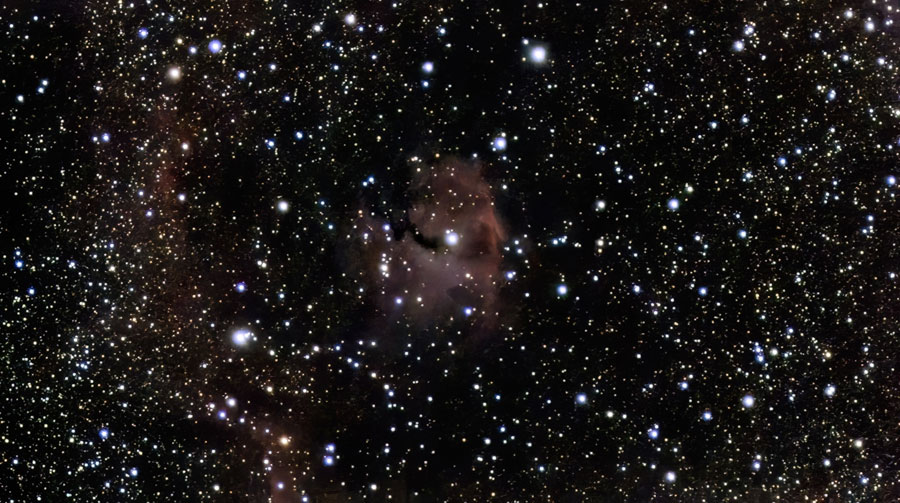
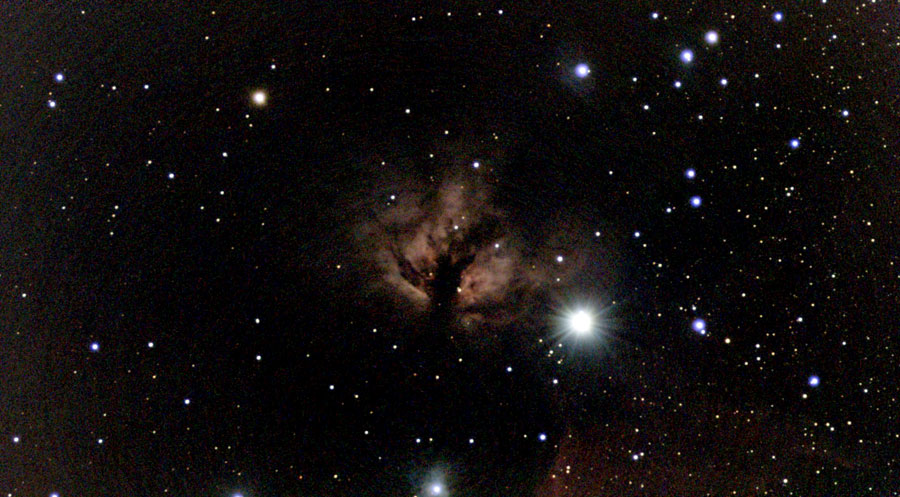
NGC 2024 (Flame Nebula; Orion)
 |
|
|
NGC 2024, Jan 29, 2023 - large, 880s, processed (PSE) |
Ditto - large, photo left processed (DN) |
Test Case: NGC 2244 with and without Filter
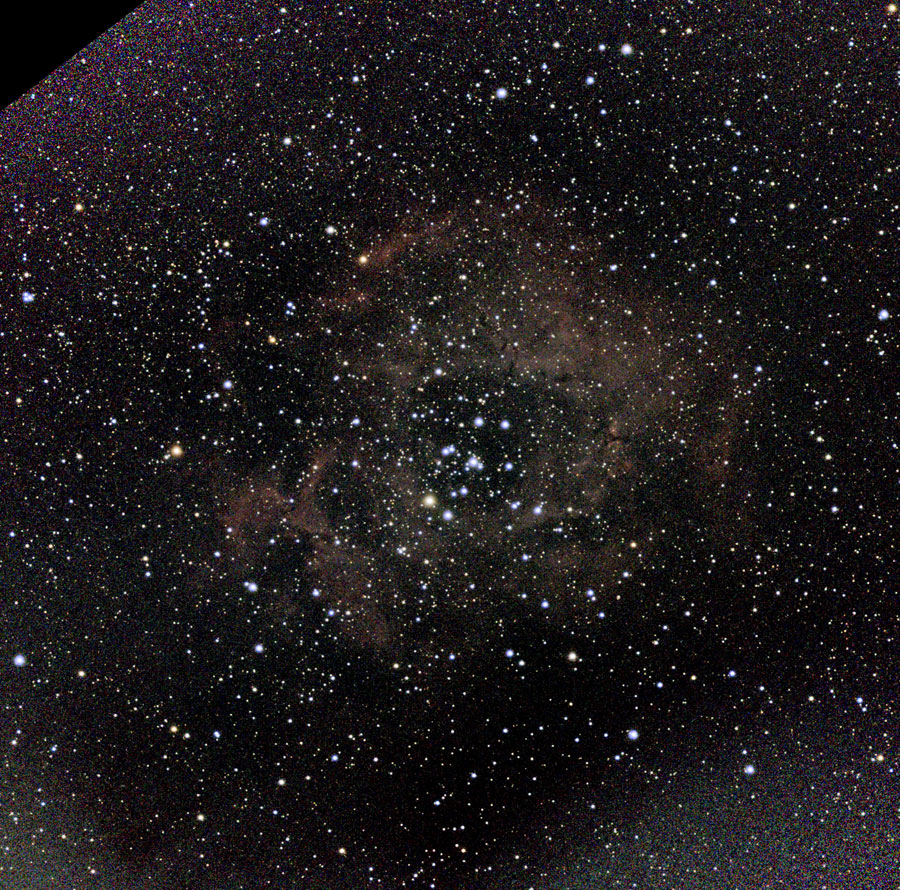
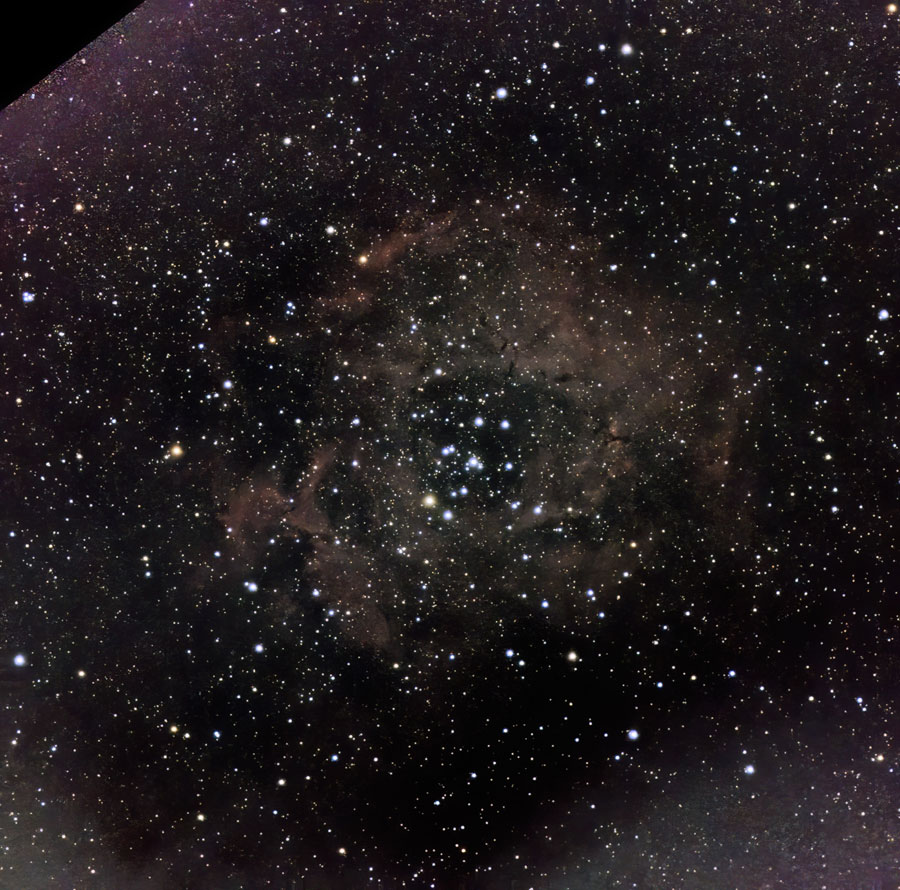
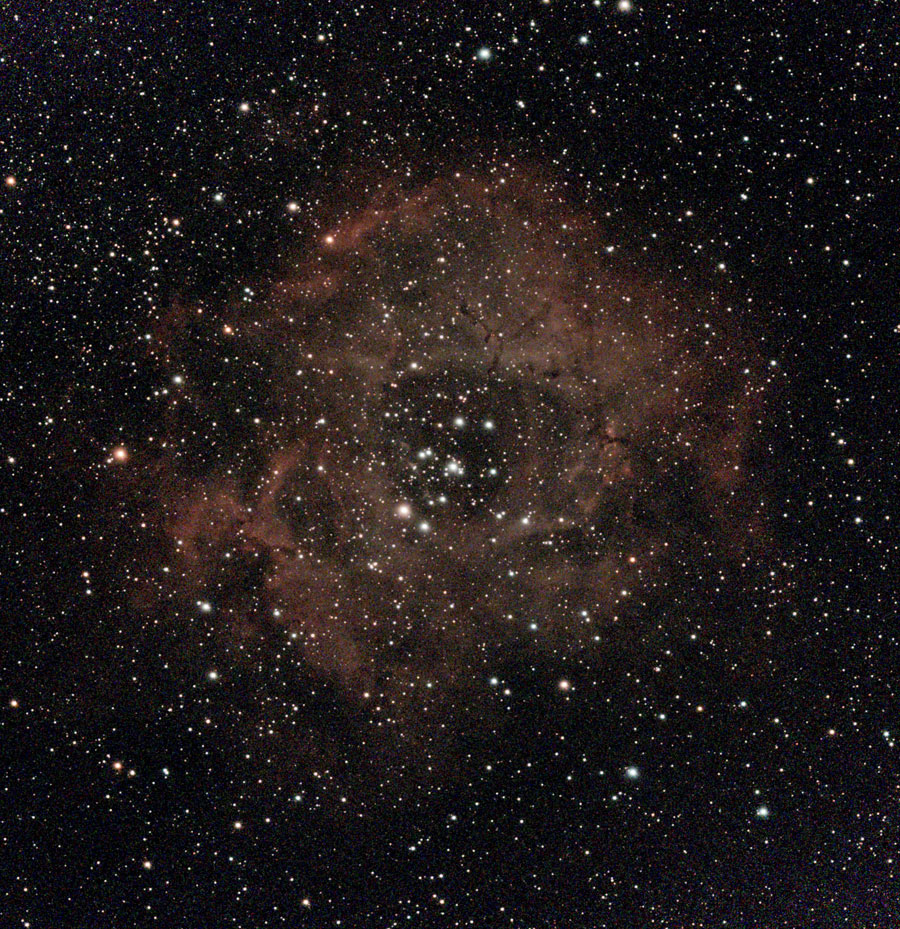
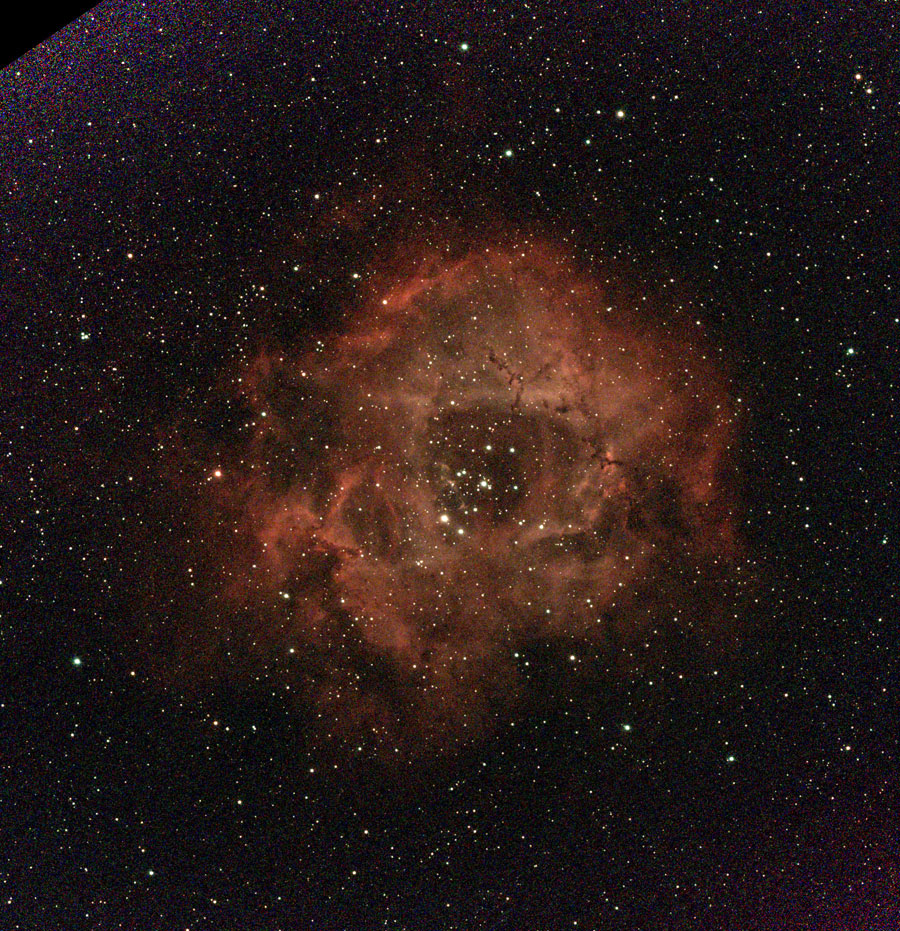
In the following, I present photos of NGC 2244 (OC in Rosette Nebula plus the Nebula), which I took without and with a filter (CLS, Dual Band) and which I post-processed with Topaz DeNoise AI.
 |
 |
|
NGC 2244 + Rosette Nebula, Apr 3, 2023 - large, mosaic, no Filter, processed |
Ditto - large, photo left post-processed with DN |
|
 |
 |
|
NGC 2244 + Rosette Nebula, Apr 3, 2023 - large, mosaic, CLS Filter processed |
Ditto - large, photo left post-processed with DN |
|
 |
 |
|
NGC 2244 + Rosette Nebula, Apr 3, 2023 - large, mosaic, Dual Band Filter, processed |
Ditto - large, photo left post-processed with DN |
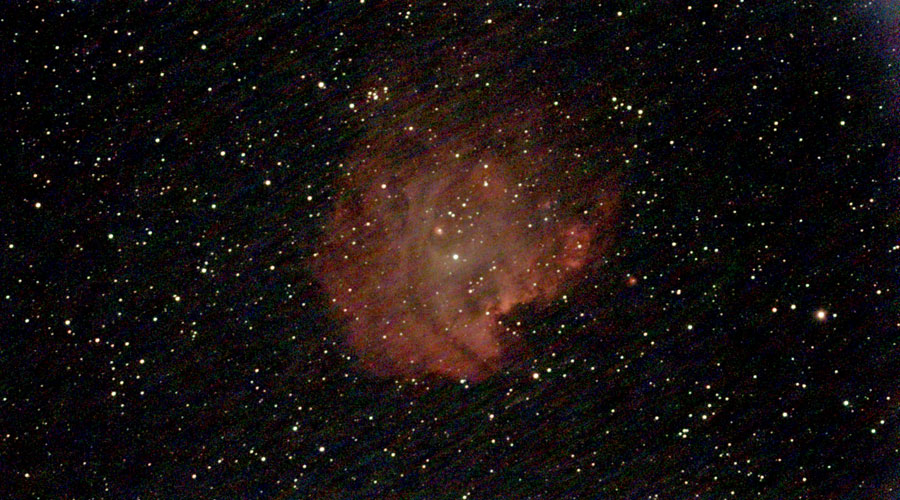
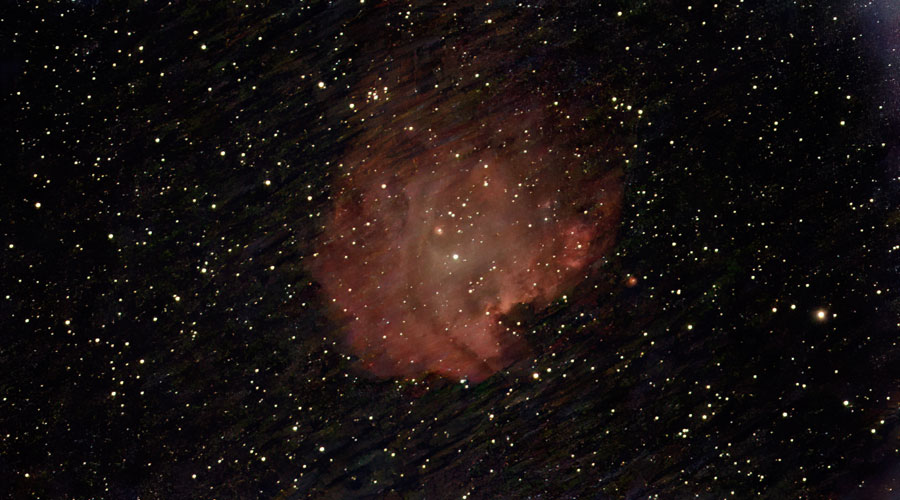
Test Case: NGC 2174 with and without Filter
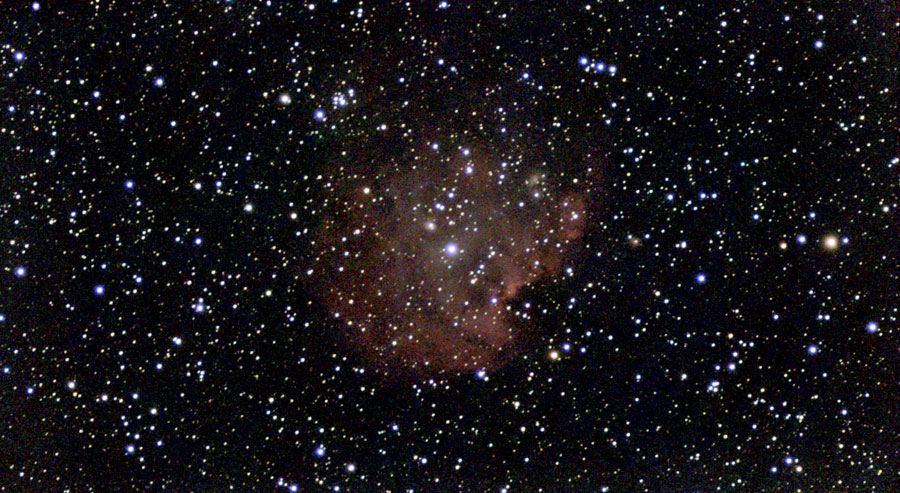
In the following, I present photos of NGC 2174 (Monkey Head Nebula), which I took without and with a filter (CLS, Dual Band) and which I post-processed with Topaz DeNoise AI.
 |
 |
|
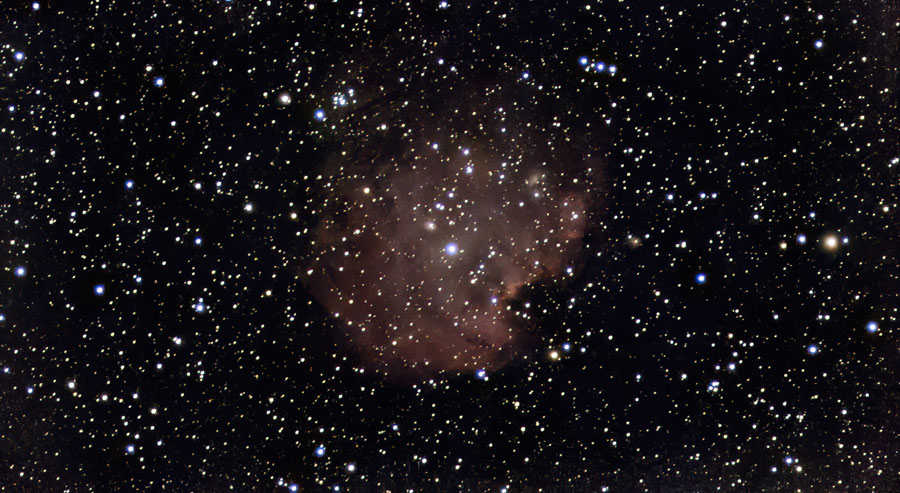
NGC 2174, Apr 5, 2023 - large, mosaic, 35min, processed |
Ditto - large, photo left post-processed with DN |
|
 |
 |
|
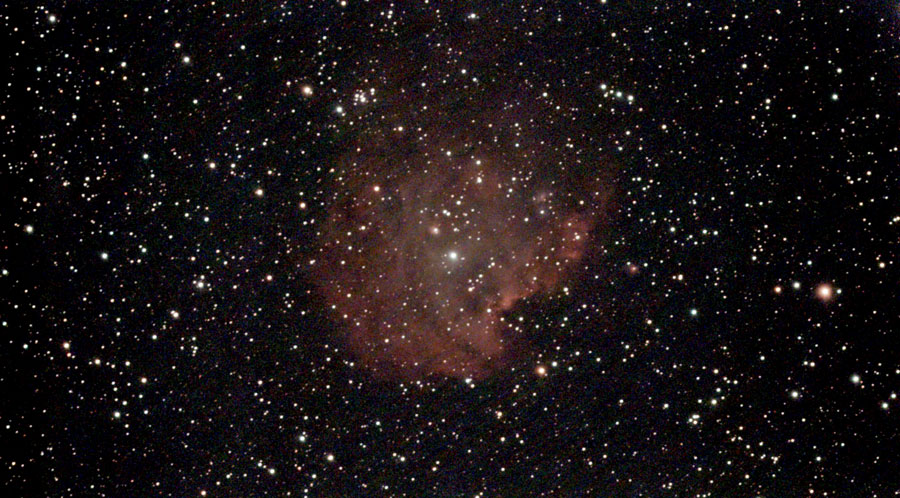
NGC 2174, Apr 5, 2023 - large, mosaic, CLS Filter, 35min, processed |
Ditto - large, photo left post-processed with DN |
|
 |
 |
|
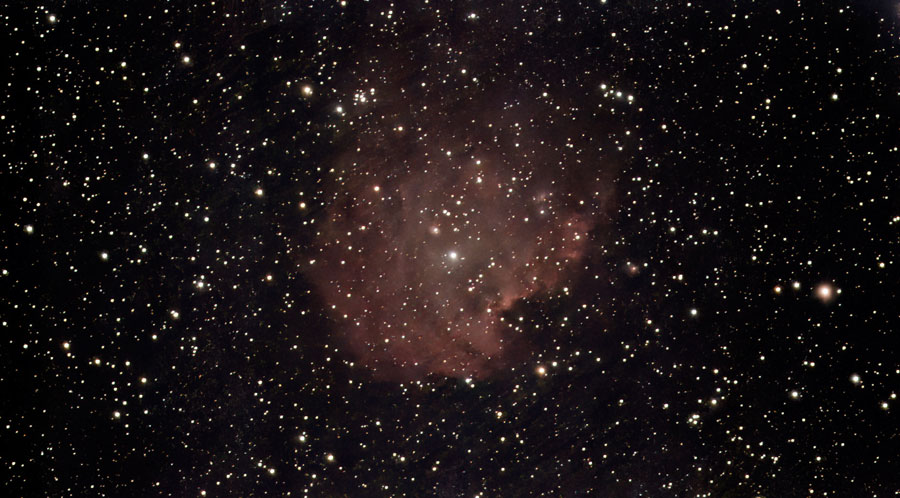
NGC 2174, Apr 5, 2023 - large, mosaic, Dual Band Filter, 35min, processed |
Ditto - large, photo left post-processed with DN |
When applied to the photo taken with the Dual Band Filter, DeNoise is not able to remove the noise pattern.
Conclusions
Topaz DeNoise AI can significantly improve Vespera photos thanks to a range of "effects", but it can also introduce new artifacts. So you should "play around" a bit with the individual models to find the best solution. In any case, DeNoise can improve not only the object but also the background and, to a lesser extent, the stars, all of which is very welcome if you do not want to put too much effort into post-processing your astronomy photos.
Note: In June 2024, I sold my Vaonis Vespera smart telescope. I therefore cannot report any further experiences with it here. |
Links
- Vaonis: vaonis.com/fr/ (FR), vaonis.com (EN)
- Vaonis Vespera: vaonis.com/vespera
- Topaz Labs DeNoise AI: www.topazlabs.com/denoise-ai
- See also my page offering Astronomy Links.
|
made by |
| 11.06.2024 |