Astronomy | GXR · GR · RX100 M1 · RX100 M4 · RX10 M3/4 · TZ202 · X Vario · M240 · General | Photos | Conf. Places | Calendars | Art
Ricoh GXR: Hidden Functions
This page lists some "prominent" hidden functions of the Ricoh GXR, as well as some functions that are not so evidently implemented as I would have expected. Note that many functions are only briefly introduced, because they are described elsewhere in more detail.
Note: For an introduction to the topic, please read page Hidden Functions in Digital Cameras.
Hidden GXR Functions
This is my personal list of "hidden" GXR functions:
- Magnification
- Magnifying the Review Image
- Manual Focusing (S10, P10)
- Manual Override of Autofocus (A12-50, A12-28)
- ISO Setting on Adjust Lever
- Full Press Snap
- Focus Assist
Many of the hidden GXR functions are also described elsewhere. In these cases, I provide links to places where the function is presented in more detail or its current implementation. Nevertheless, there may be some overlap between the pages...
Magnification (Enlargement)
Notes:
- I cover this topic based on the current implementation in the context of manual focusing for the standard Ricoh camera units and for the M-mount expansion unit. So, this information provides the history of how the functionality evolved.
- The Ricoh GXR manual as well as the menus sometime use the term "magnification" and sometime speaks of "enlarge"...
I took me a long time until I finally was able to find in the manual, how I could magnify the view in the viewfinder or on the LCD screen. This feature is mostly useful for manual focusing, but may also be helpful when taking macro shots with autofocus (for confirming that the focus is on the correct spot). In addition, the way how this feature is turned on and off is by no means intuitive (despite the highly praised "intuitive" Ricoh user interface...) and easy to memorize for me (as a usability person...). Therefore, I decided to mention this feature here in order to prevent you from pressing the "zoom" lever again and again, just to start the digital zoom - and get frustrated in the end:
- To turn magnification on, press the "Menu/OK" button for a while (let's say, for about a second) - now the magnified section fills a section of the screen ("Enlarge Part").
- After firmware update 1.40: To change the magnification mode, press the "Menu/OK" button for a while (let's say, for about a second) - now the magnified section fills the full screen ("Enlarge All").
- To turn magnification off, press the "Menu/OK" button for a while (let's say, for about a second)
Thus, by repeatedly pressing the "Menu" button for a about a second, you can cycle through the magnification modes. The magnified section can also be moved.
Tip for Ricoh: In a future firmware update, the "zoom" lever might be used to change the magnification.
History of the Functionality
A few more things to mention:
- Before firmware 1.29, magnification was fixed and set to 2x.
Firmware 1.29 introduced three magnification steps: 2x, 4x,
and 8x. 4x seemed to be the most useful magnification, 8x
was often fuzzy and therefore did not add any real advantage. This improved,
however, considerably after firmware update 1.40.
Magnification is changed by pressing and holding down the self-timer button for a while (similar to switching magnification on and off). Then, a menu appears from which the magnification can be selected. Magnification can also be set in the menus. - Before firmware update 1.40 only a section of the screen was magnified, allowing to see the context around the magnified center section and to keep the section stable. This is a useful feature, but its usefulness depends a lot on the object or scene that is photographed. In some cases, it helped me to keep the section stable, in others, I was lost... Since firmware update 1.40 you can choose between displaying the magnified area in a section of the screen ("Enlarge Part") or full screen ("Enlarge All"). There are also quality differences between the two magnification modes: Fullscreen view ("Enlarge All") offers a much better image quality.
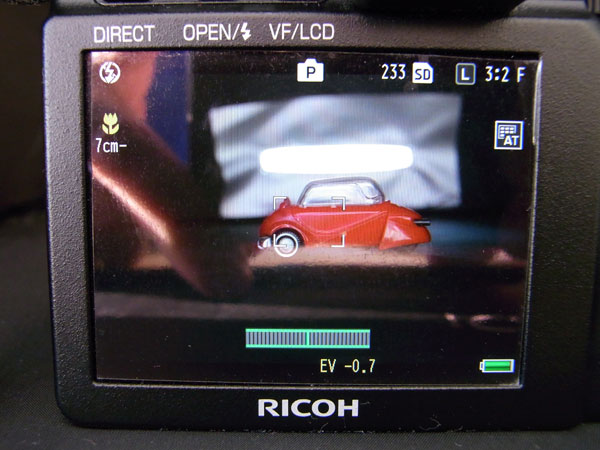
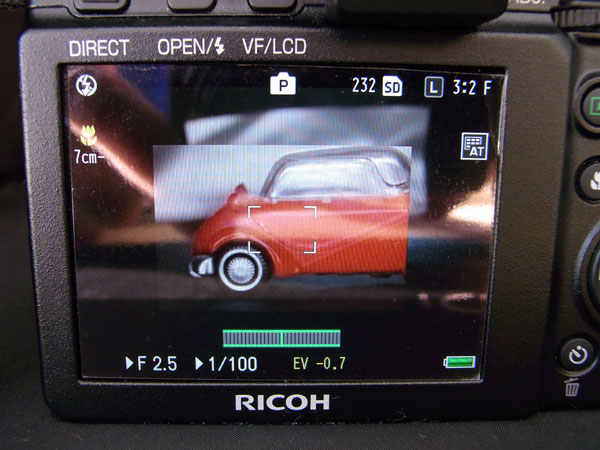
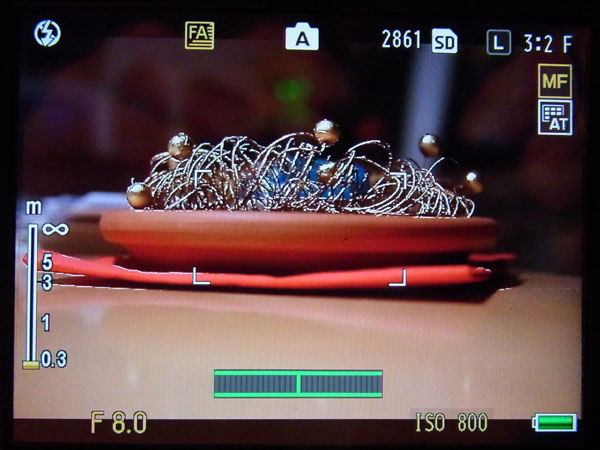
Here is a demonstration of a scene with magnification off and on (the photos show the LCD screen, the EVF views are identical) before firmware update 1.40:
 |
 |
|
| Magnification off | Magnification on (a section of the screen shows the magnified area) |
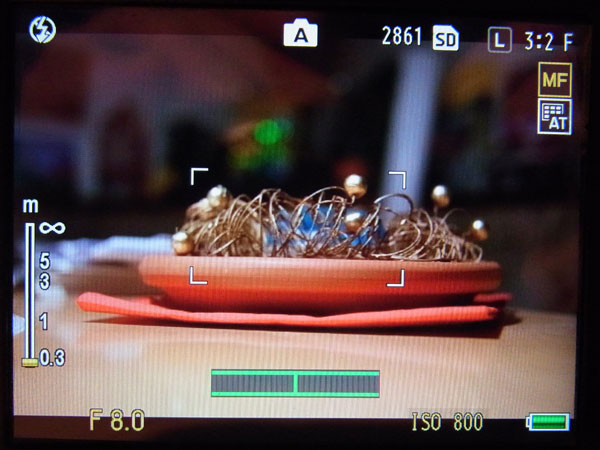
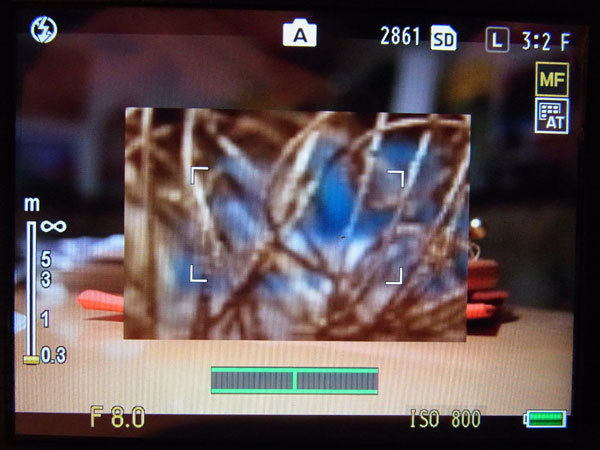
Here is a demonstration of a scene with magnification off and on in two variants ("Enlarge Part", "Enlarge All") after firmware update 1.40:
 |
 |
 |
Photos: No magnification (left), "Enlarge Part" (center), and "Enlarge All" (right); in the latter case, a small display indicates where the enlargement is located in the image
Magnifying the Review Image
In review mode, the image can be magnified up to 16 times using the zoom in button (alternatively, you can rotate the up-down dial next to the shutter-release button). The buttons of the directional pad can be used to pan the image not only in four, but in eight directions. Pressing the MENU/OK button (or the Adjust lever button) resets the view to the complete image; the zoom out button allows you to decrease image size.
These are the things that I knew all the time. However, I did not know for a long time that pressing the adjust lever instantly magnifies the view to a certain size (5.7x, 9.8x, 16x), which can be defined in the menu: Setup -> One Press Zoom Ratio. It is also possible to use the MENU/OK button for this as long the image has already been magnified, otherwise this button resets size as mentioned above.
There are so many other options for the review of images, that I have to refer you to the manual. The basic issue with all these options is, however, that they are hard to remember.
Manual Focusing (S10, P10)
While the A12 camera units have a by-wire focus ring, the P10, S10, and A16 camera units have to be focused manually in a different way. In my opinion, this is a cumbersome way (see below), and a way that I tend to forget because it is not obvious:
- While pressing the macro button, rotate the up-down dial to focus (manual p. 65).
Of course, manual focus (MF) has to be selected first.
This procedure is OK if you use the LCD as viewfinder. However, I find it cumbersome when using the EVF with my left eye, because I have to fumble around between the camera and my cheek.
Manual Override of Autofocus (A12-50, A12-28)
The A12 camera units have a by-wire focus ring that you can use to override (or fine tune) the current autofocus setting after having pressed the shutter button half down.
This function has to be enabled in the menu: Settings > Focus Ring Settings. Also note that releasing the shutter button and pressing it again cancels the manual fine tuning (which may be unwanted).
ISO Setting on Adjust Lever
Since firmware update 1.17, the adjust lever can be used to change the ISO setting. This function can be enabled or disabled in the menu: Key Custom Options > ADJ. Direct ISO Control. If this function is set to ON, in situations where shooting is possible, moving the ADJ. lever right/left changes the ISO sensitivity.
As a result, I removed the ISO setting from the "Adjust lever" menu and added another setting to it, instead.
Full Press Snap
Full press snap allows users to press the shutter button in one motion when Multi AF or Spot AF is selected as focus mode and switches the mode to snap focus at a preselected distance. It is intended as a means not to miss a shot due to slow autofocus. The default distance of 2.5 m is useful for street photography and many indoor situations, but less useful for landscape shots.
Note that full press snap is enabled (ON) by default (indicated by an undocumented "FS" in the viewfinder/LCD screen). It can be disabled or enabled in the menu: Shooting > Full Press Snap (default: ON). Snap focus distance can be set in the menu: Settings > Snap Focus Distance (default: 2.5m).
Since full press snap is activated by default, this function can puzzle users who do not know of its existence and get fuzzy images because they pressed the shutter-release button too fast - as was the case for me. I therefore decided to disable this function for the moment. I discuss this issue particularly on page Pitfalls of Full Press Snap.
See also page Specialties for more information on snap focus and full press snap.
Focus Assist
Since firmware update 1.40, the Ricoh GXR offers two methods for supporting manual focusing through a function called "focus assist" that can be enabled through the menu or a functions key if you assign one to this function:
- Mode 1 creates "sparkling" edges in a colored image, or as the manual states: Shape outlines for subjects/objects in focus are enhanced.
- Mode 2 emphasizes edges in a B&W image (highpass filter), or as the manual states: The picture display switches to black and white, and the area in focus glows in white.
There is no cycling through the focus assist modes as there is for the screen magnification mode and macro modes. You have to select the mode in the "Setup" menu, item "Focus assist selection" (Mode 1 or 2). There is also no button for selecting a focus assist mode (after pressing it for a second). Actually, there is no button available any more, but maybe Ricoh will find a solution... As you can see, Ricoh is inconsistent here in comparison with the magnification and macro modes...
Here are sample photos without and with focus assist:
 |
 |
 |
Photos: No focus assist (left, focus assist mode 1 (center) and mode 2 (right)
For details, see page Manual Focusing and Focus Support and Manual Focusing Methods.
Not-So-Evident GXR Functions
The following functions may not be as hidden as the ones listed above, but they seems to include on or the other mystery as well...
Self-Timer
I struggled several times with using the self-timer - until I read the manual. As it is described in the manual, the self-timer function has been implemented very efficiently - but somehow this implementation clashes with my "user" expectations. Moreover, being in a hurry I did not realize that the self-timer had already been set correctly and tried to set it again - once again with puzzling results that did not conform with my expectations. So, there may be nothing wrong with the implementation of the self-timer function on the GXR, but nevertheless other people might struggle with it like me... Therefore, I will first describe how I struggled and then show how the self-timer is to be used.
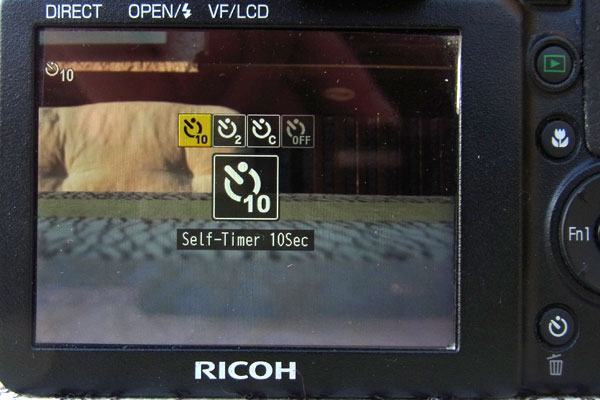
When you press the self-timer button (at the bottom right in the photo) a menu comes up for selecting the self-timer mode. 10 seconds delay are pre-selected:
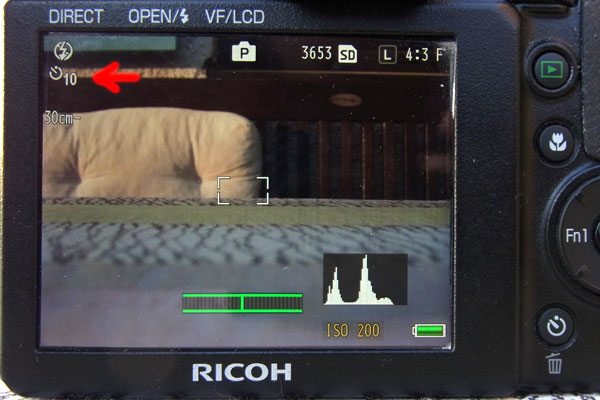
However, as the menu disappears quickly, and I was not sure whether 10 seconds were actually selected. Somehow, I expected that I would have to confirm my choice. In addition, I did not realize that the self-timer mode had been activated and indicated on the screen, as the following photos shows:
So I pressed the self-timer button once again. This time, 2 seconds were selected. Quickly, I tried to reselect the 10 seconds which was not always successful as the menu disappeared so fast. In the end, I somehow managed to reach my goal, but I was unsure about whether this was the way to go for using the self-timer.
Finally, I consulted the manual, which I should have done earlier, and now the scales fell from my eyes. Actually, you do not need the menu at all. Pressing the self-timer button once (the menu comes up and disappears...) gives you a delay of 10 seconds, pressing it twice (obviously the delay between two presses does not matter) gives you a delay of two seconds, pressing it three times offers you the creation of a custom delay, and four presses turn the self-timer off.
For me, it was also unexpected that the self-timer has to be turned off explicitly (or the camera is turned off). I owned cameras, where the self-timer worked only for one shot...
All in all, just press the self-timer the required number of times and watch out for the indicator - and you are done. I also like that the self-timer applies to several photos until you turn it off.
Flash Settings
Note: The following text can also be found in the FAQ.
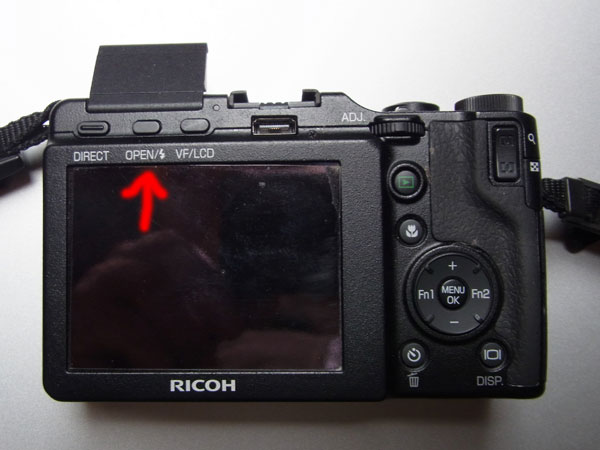
A new GXR owner asked in a forum where he can find the flash settings for the GXR. On other Ricoh cameras these are usually on the direction wheel - but there are no such settings. I could not find them in the beginning and consulted the manual. And then the scales fell from my eyes: The settings are now incorporated in the button that opens the flash (see photos below):
 |
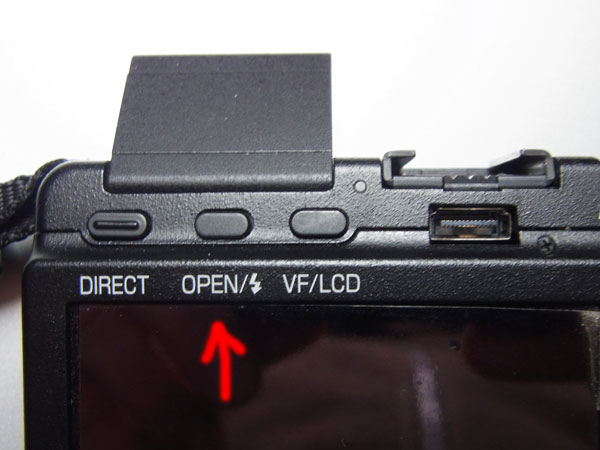 |
|
| GXR back with flash button indicated | Close up of position of flash button |
There are three buttons at the top left of the back of the body. The center button "OPEN/Flash symbol" is the one to use!
A first press opens the flash, starting with the second press you can cycle through the flash settings. Or you press the button and turn the front wheel to change the settings (a second press is also needed!).
Note: The other flash settings (flash exposure compensation, manual flash amount) are located in the shooting menu and can be assigned to one of the "adjust" menu positions or one of the Fn keys.
|
made by |
| 19.11.2020 |