ZWO Color Cameras - ASILive
Introduction | ASI Studio and ASILive | Operating ASILive | ASILive and ASIFitsView | Final Words | Links
Archive
This page is about the software ASI Studio provided free of charge by ZWO and its components ASILive and ASIFitsView, which are dedicated to live stacking and viewing FITS fles. For the software SharpCap, I created an extra page ZWO Color Cameras - SharpCap.
Note: This page is largely outdated, because it describes version 1.3.2 of ASI Studio. At the end of July 2023, the current version had already the number 1.9.1 (but ASILive still looks similar...).
Introduction
To be able to operate an astronomy camera at a telescope, a software for controling the camera is needed. With the Atik Infinity, Atik provides the easy-to-use Infinity software, which I used to operate that camera. Of course, this software only works with Atik cameras. And so most users of ZWO cameras use different programs, of which the universal program SharpCap is probably the best known. For some time now, ZWO also offers a few software applications to operate its cameras. These were initially intended for planets and for astrophotography only. At the beginning of 2020, ZWO introduced the software ASILive (beta versions appeared already at the end of 2019), which is specifically dedicated to EAA by offering "live stacking". ASILive is kept very simple and competes in this respect with the Atik software (but works only for ZWO cameras...). The whole software package, supplemented by a new FITS viewer, is offered as ASI Studio. More about ASI Studio and ASILive in the following!
Alternatively, you can use the universal software SharpCap (and many other dedicated software packages) that can control most astronomy cameras and DSLRs.
ASI Studio and ASILive
ASILive is part of the software package ASI Studio, but can also be operated on its own. ASI Studio is just the "frame" or "launch base" for ASI's applications:
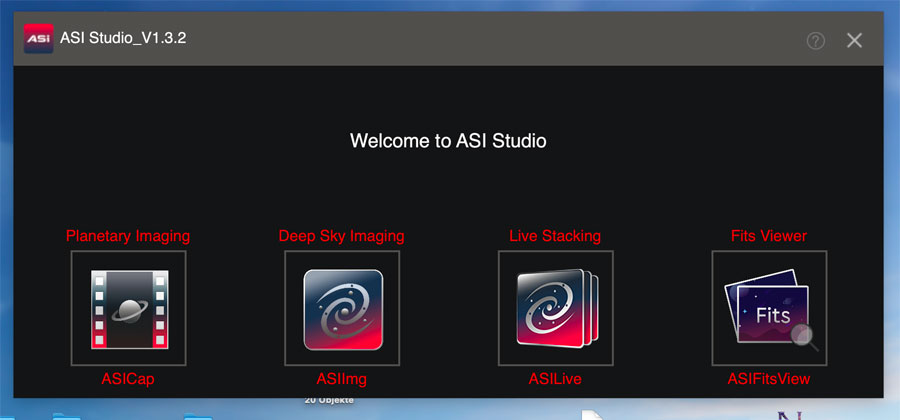 |
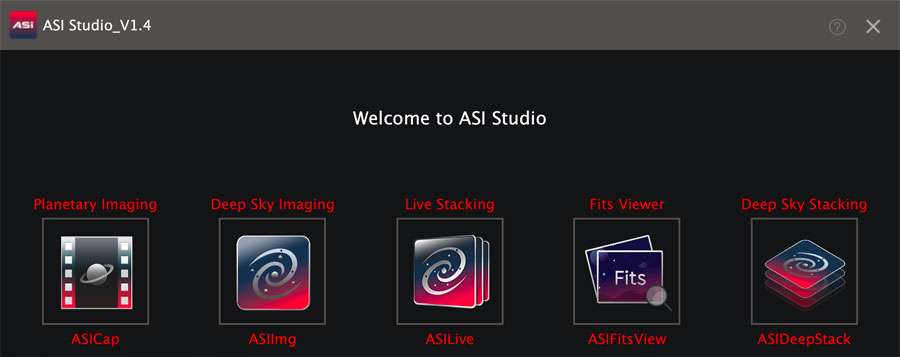 |
Figure: ASI Studio as a "lauch base" offers access to all the ASI applications (left: version 1.3.2, right: version 1.4; version 1.5 looks, except for the version number, identical)
For me, besides ASILive for live stacking, the FITS viewer ASIFitsView is interesting in this package, because it allows to fast and easily view FITS files. For example, you can quickly browse through the frames if you have saved them. In the meantime, I found out how you can save images from this application, for example, for further processing; photos can be saved in PNG, TIFF, or JPG format. More on this further below. It would be even more ingenious if this program allowed you to stack "remotely," as is possible with the Infinity software. This is actually made possible by the new ASIDeepStack application, which was added to ASIStudio with version 1.4!
In the following, I would like to address some items that are important for working with ASILive. Note that my report is based on version 1.3.2!
Update: On May 13, 2021, version 1.4 was, which offers a further application for offline stacking, called ASIDeepStack. The other changes seem to be "marginal". The promised manuals are still very rudimentary or missing...
Update: On July 21, 2021, version 1.5 has been released, where the application for offline stacking, called ASIDeepStack, seems to work. The other changes seem again to be "marginal". The promised manuals are still very rudimentary or missing... Later, I updated to version 1.5.6, but did not use it for a long time (because of StellarMate)...
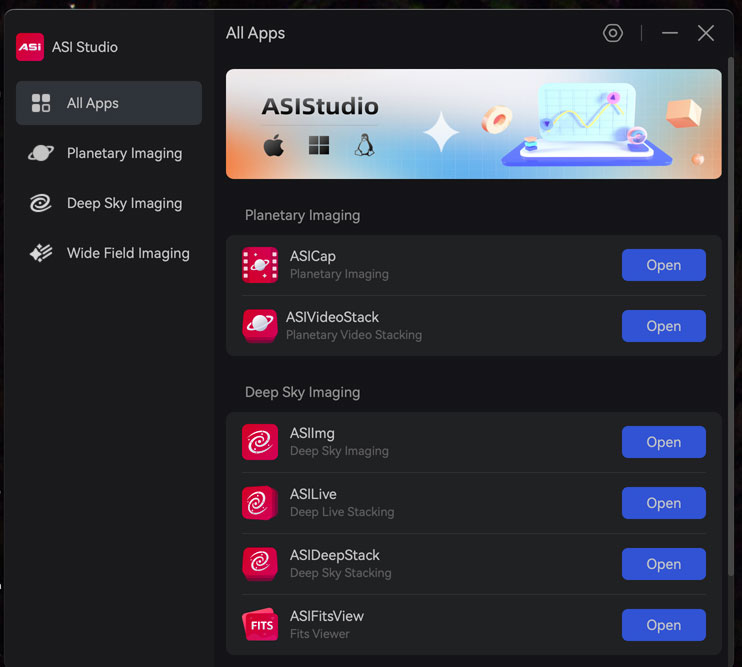
Update: End of July 2023, the current version of ASI Studio has the number 1.9.1, consists of 7 applications (ASIMeteorCap is not visible), and looks as follows:
Download and Information
The first question is where to download the program and what sources of information are available. Here is a selection:
- Download (Windows, Mac, Linux)
- ASI Studio - ZWO Support - Software and Drivers: astronomy-imaging-camera.com/software-drivers
- Information Sources
- Discussion forum about ASI Studio (ASI): bbs.astronomy-imaging-camera.com/t/asistudio
- At The Eyepiece Tonight - ASILive DEMO! (At The Eyepiece): www.youtube.com/watch?v=e2CygXmJVto&t=94s
- ASILive - new EAA software (CloudyNights thread, started by mclewis1): www.cloudynights.com/topic/684951-asilive-new-eaa-software
- ASIStudio v1.3.1 12.10.2020 (CloudyNights thread, started by bouvier_1): www.cloudynights.com/topic/746826-asistudio-v131-12102020
In the following, I discuss only the Apple Macintosh version for OS X of ASILive. At first glance, I was not able to find any functional differences to the Windows version (both compared in version 1.3.2).
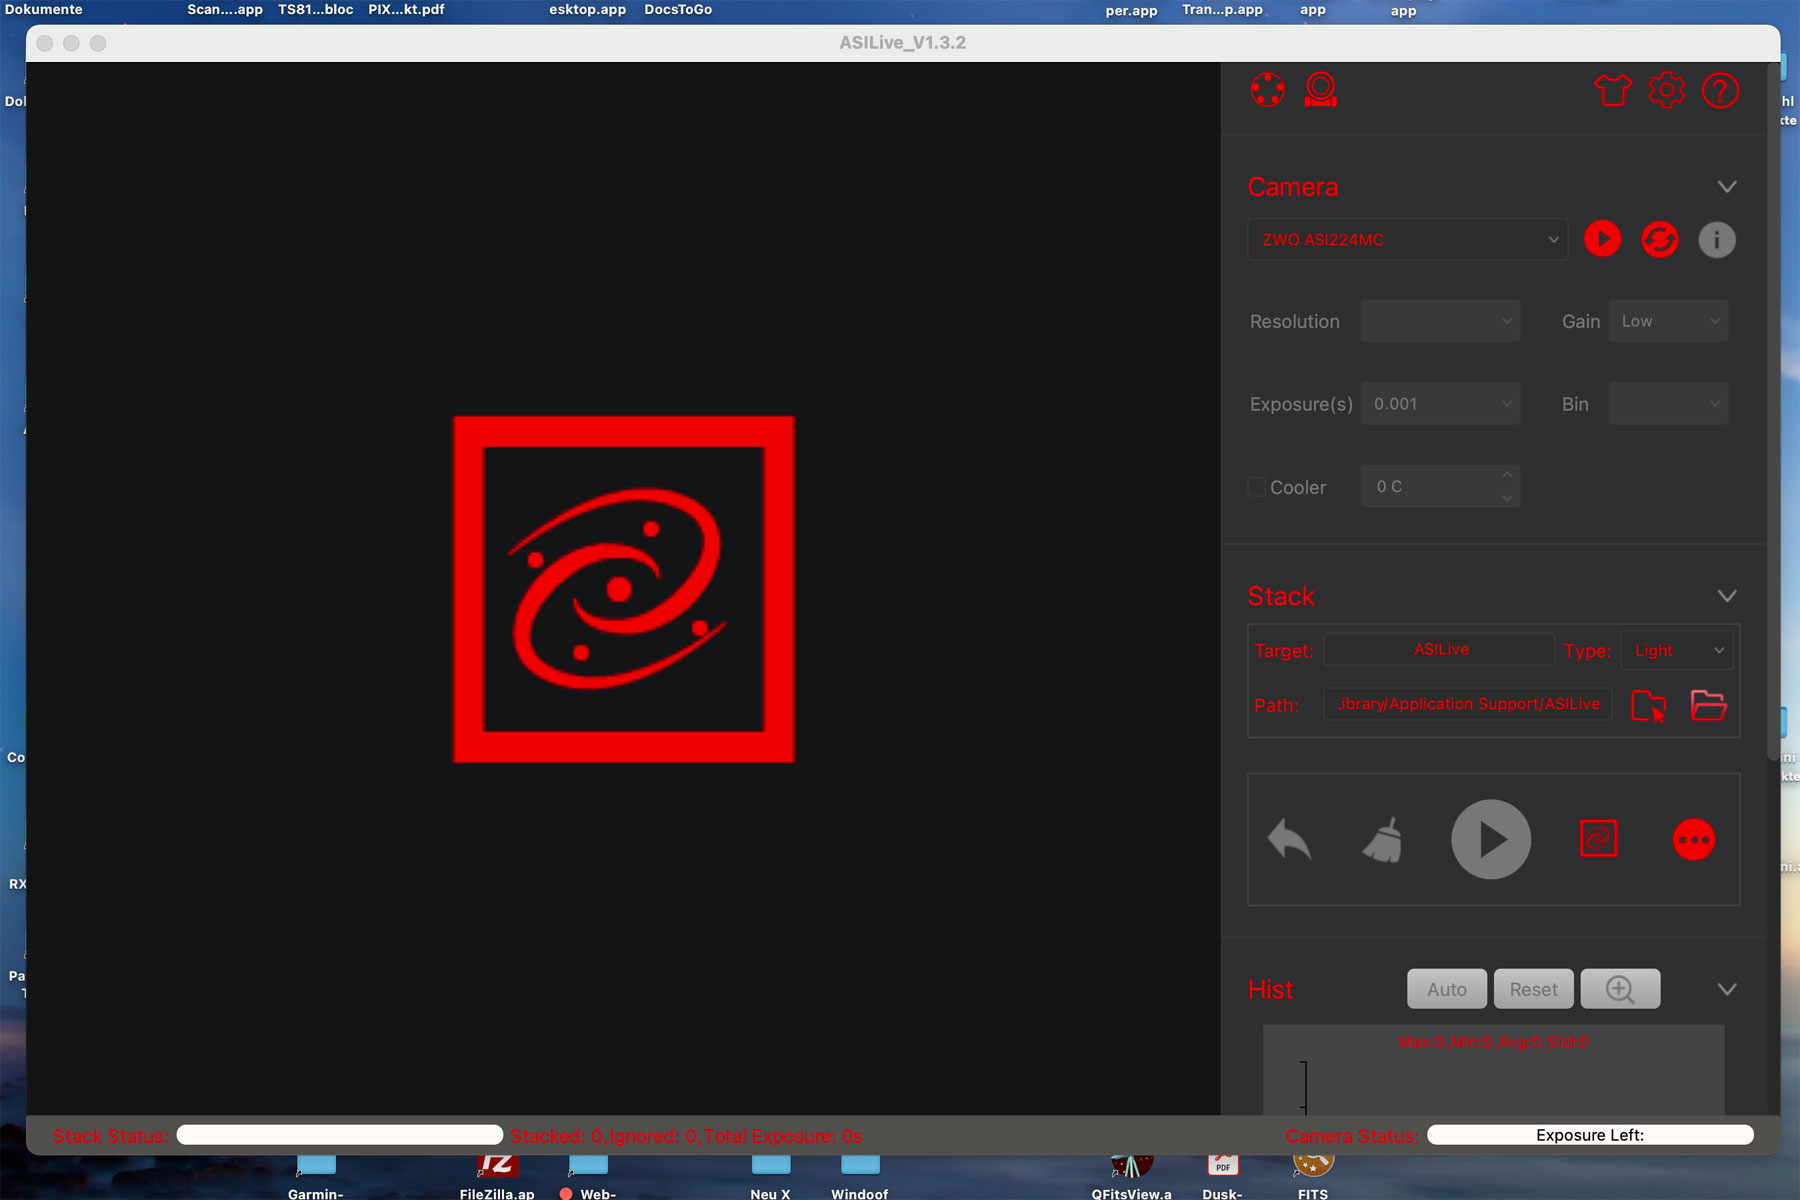
Overview of the ASILive Application Window
Here is an overview of the ASILive application window:
 |
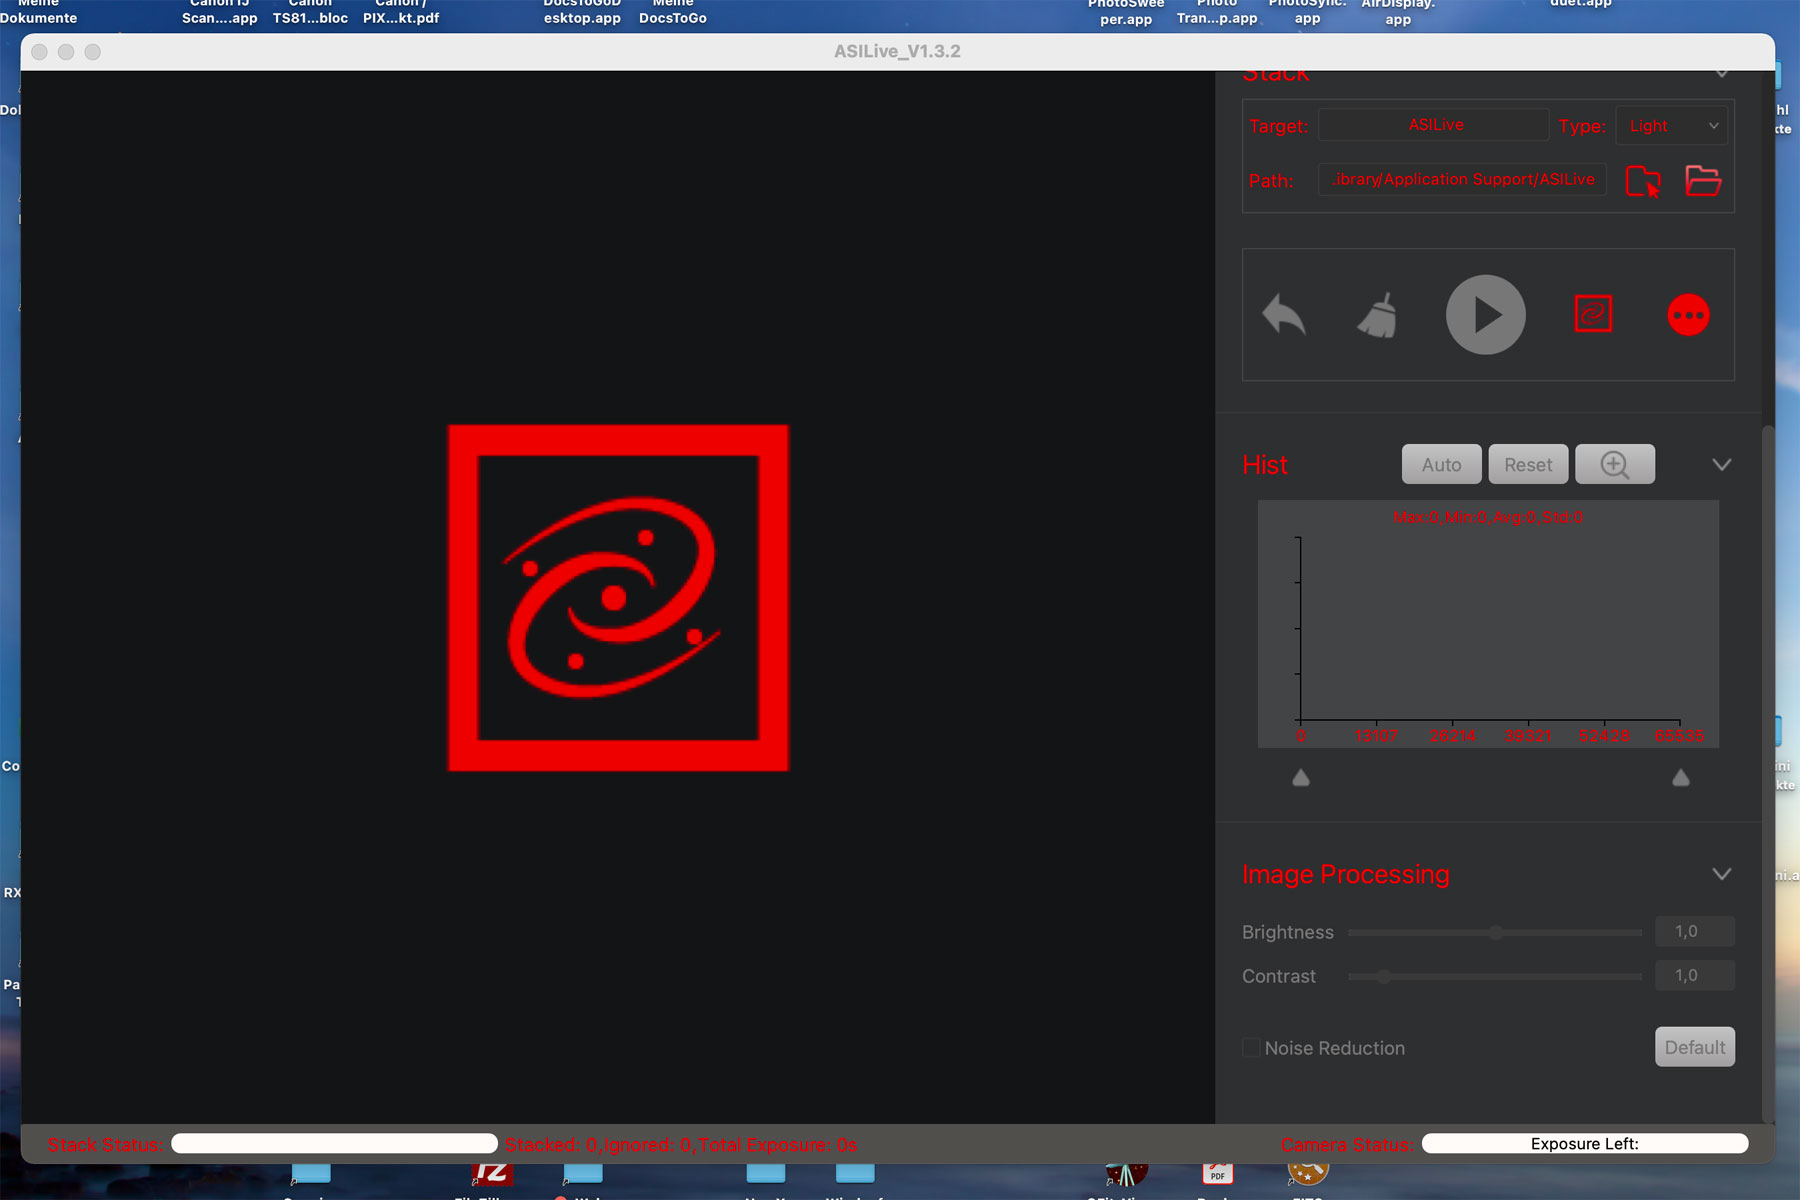 |
Figures: The application window of ASILive without an image from the camera; on the right, I scrolled down to the end of the work area. Please click the views for larger views and details.
On the left, the observation object appears once the camera has been activated. On the right are the controls, and the area must be scrolled to reach all of them. Status displays are located at the bottom.
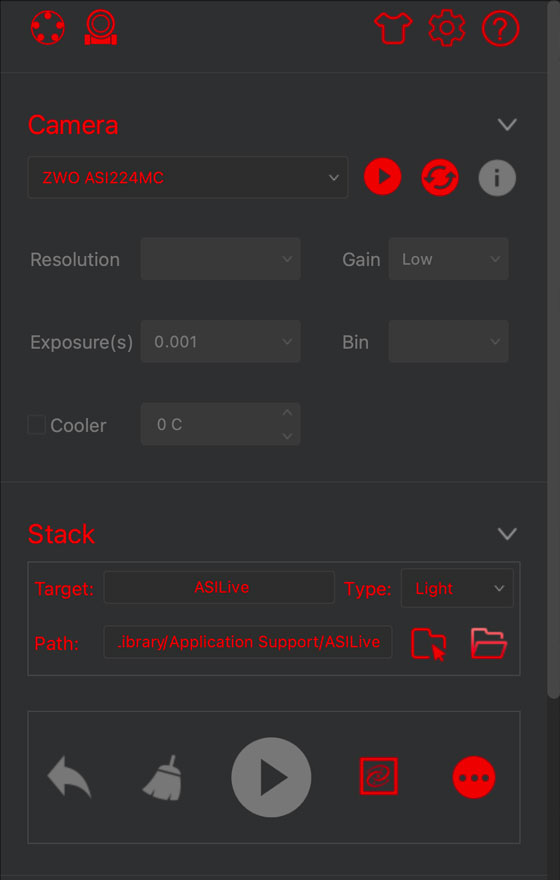
Details of the work area:
 |
 |
Status area (at the bottom):

Operating ASILive
For a simple EAA operation with ASILive, two things are important:
- The generation of suitable dark frames (master darks),
- The "live stacking" during the observation and thereby the optimal adjustment of the view of the observation object, as well as the saving of selected views.
Both will be discussed in the following. Otherwise I do not plan to offer a "replacement manual" here...
Generating Master Darks
To suppress "hot pixels" and amp glow in the image and on photos, darkframes must be generated. These are "subtracted" from the current frame or stack by the program during live stacking. For best results, a dark frame should be taken with the same gain and exposure time (and ideally at the same temperature; some users therefore generate the dark frames directly before they start observing) as the current frames. Typically, one generates several darkframes and then selects the appropriate one. Please note that the darkframes are actually not single images, but "stacks"; they are therefore called "master darks".
Since there was no manual available at this point in time, my first question was, how do I record "master darks" at all? Because with the Atik Infinity software, no darkframes are considered at all, and with the eVscope, only one is created. After a very long search, I finally found the solution in a ZWO forum. In the end, this is done similarly to normal stacking, except that in the stacking section you select "Dark" as the frame type instead of "Light". I also wondered how many images are needed for a master dark. Here, my star friend gave me the number "25", which works for him. Of course, it is important that the camera or the telescope (if the camera is already connected) is covered (with a lid or blanket) when taking the darkframes. Further, it is to be noted that one takes darkframes for all combinations of exposure times and gain values, which one would like to use. Here, I first chose 5 and 10 seconds exposure time and gain "Midle" (135) and "High" (300), resulting in 4 master darks. I found in a discussion at CloudyNights a corresponding, but incomplete instruction for the procedure, which I have supplemented.
Instruction
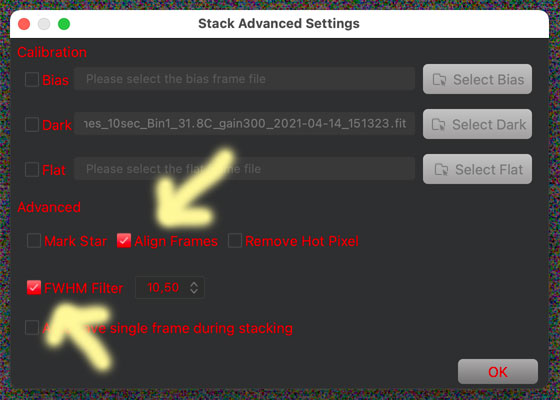
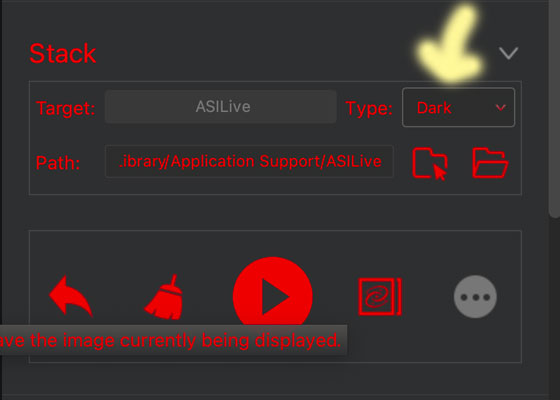
First click on the round button with three dots in the "Stack" area, open the "Advanced Stacking Settings" dialog and deactivate the checkboxes for "Align Frames" and for "FWHM Filter" in the "Advanced" section of the dialog.
Note that the button is only active if "Light" is set as the type!

Set the frame type to "Dark".
Cover the telescope or the camera (if it is not yet connected to the telescope).
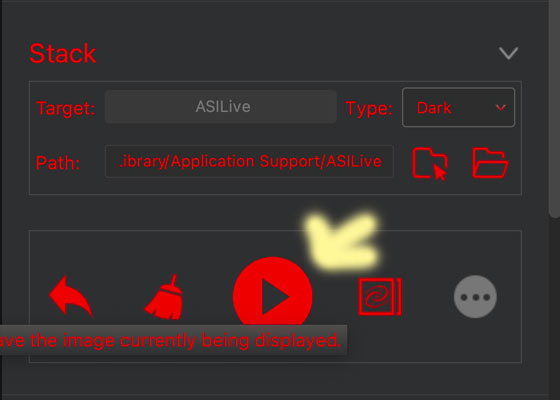
Then repeat the following steps for each Master Dark:
- Start the camera with the desired exposure time and gain.
- Press the "Stack" button with the above settings to start stacking
(this creates a stack = master dark from a series of individual darks).
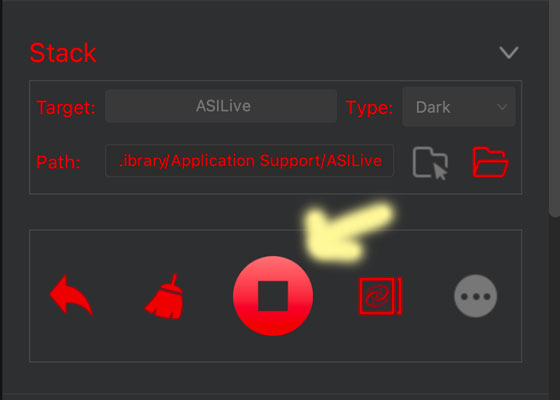
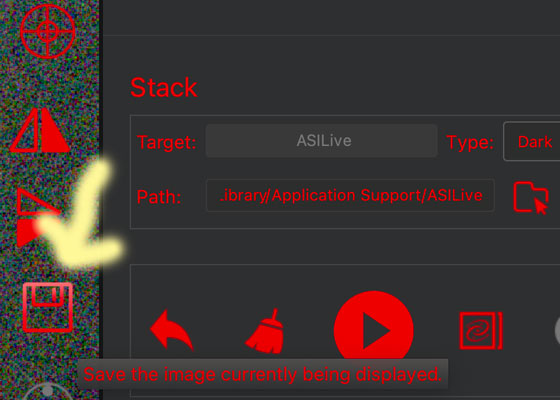
- After you have captured a sufficient number of images in the stack (I was
given the recommendation of 25 individual darks), pause the stacking by clicking
the "Stack" button again, then click the "Save" button
(appears after you move the cursor over the image). The saved .fits file
is one of your master darks; you can rename it appropriately later.
 =>
=> 
To use the master darks later, you will need to adjust the settings in the "Stack" menu so that they point to the location of your master darks, wherever you saved them on your computer.
Remember that after you have created "master darks" and then want to use live stacking with your light frames, set "Light" as the frame type again. Also, click once more on the round button with three dots in the "Stack" area, open the "Advanced Stacking Settings" dialog and activate the checkboxes for "Align Frames" and, if wanted, for "FWHM Filter" in the "Advanced" area of the dialog so that these functions are used in live stacking.
"Live Stacking" during the Observation
Only a few remarks on "live stacking"! Before you start stacking, you first observe the accessed sky object in single frame mode and with short exposure times, among other things to correct the sharpness or to place the object (or objects) optimally in the field of view.
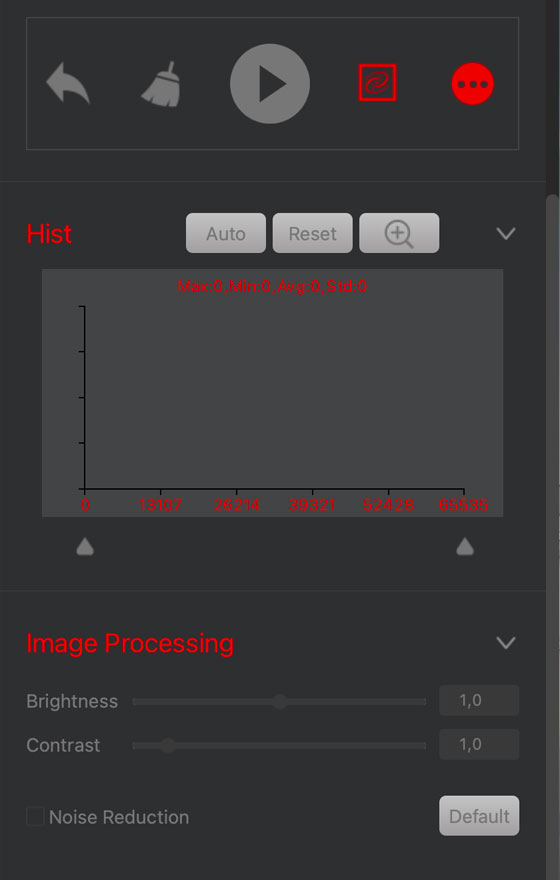
Then select a suitable exposure time and gain for stacking (to change these values, you have to leave live stacking!). If you have not already done so, select the type "Light" in the "Stack" area and start the stacking. It is recommended to set the histogram to "Auto" first, which usually leads to usable image results. After a few frames have been processed in the stack, you can start making manual corrections to the histogram and image processing in order to optimize the image. Some ASILive users recommend activating the noise reduction!
 |
 |
Figures: Histogram and image processing section; left: histgram in "Auto" mode
Saving the Stack and Single Frames
If you want to save the current stack, move the cursor to the image area, where a toolbar will appear, and click on the disk icon to save the current stack:
If the image result is not satisfactory, one can leave the stacking mode, change exposure time and gain, and start a new stacking process.
Note: One can set that also the single frames are saved automatically. This would allow you to edit the stacks afterwards with suitable software application, for example, remove frames from the stack. Since version 1.4 of ASIStudio, the application ASIDeepStack is available for this purpose.
Remarks
Unfortunately, I have to observe a certain loss of useful features in ASILive. In the video for the new version 1.0 it is described that you can enter the object name so that it can be added to the file name, which would be really very handy. Unfortunately, this feature has disappeared in version 1.3.2 and 1.4 (Mac and Windows version). I do not know when it actually disappeared; in any case, at some point in time there was still a discussion about placing the object name at the beginning of the filename...
In the CloudyNights discussion about ASILive it is mentioned that you can not only select exposure times from a drop-down list, but also enter them manually and thus choose your own values as well. This again does not work in either the Mac or the Windows version 1.3.2 of ASILive. I find the step from 10 to 30 seconds in the folding list in any case much too large!
ASILive and ASIFitsView
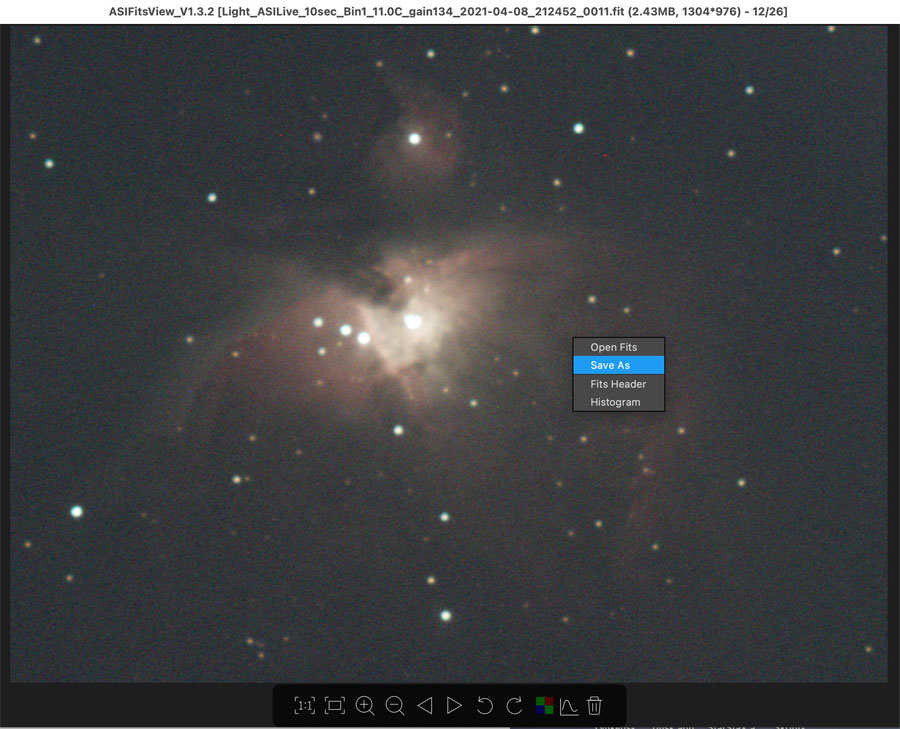
When you save an image in ASILive, it is saved in both, the JPG format and the FITS format. The JPG image corresponds to the image that you see on the screen, including all the histogram and image processing settings. This may not always be optimal for the further use of an image. The FITS image does not contain these settings, but it cannot be edited in normal image editing applications. In the FITS viewer ASIFitsView, you can view the image and also change the histogram settings, but at first I did not find a way to save an image in the common image formats from this application. More or less by chance, I pressed the right mouse button in the image area in ASIFitsView - and lo and behold, a menu appeared that also offers the possibility to save the current image (see figure below on the left)!
 |
 |
|
The right-mouse menu offers the option to save the current image. |
An image can be saved in three different image file formats: PNG, TIFF und JPG |
And when you select "Save As ", you are offered the option to save the image in the common image formats PNG, TIFF, and JPG (see figure above to the right)! Further details are not known to me, but I assume that in all cases the image is saved in 8-bit format. In any case, I was not able to notice any differences between the TIFF and JPG versions of an image in Adobe PSE.
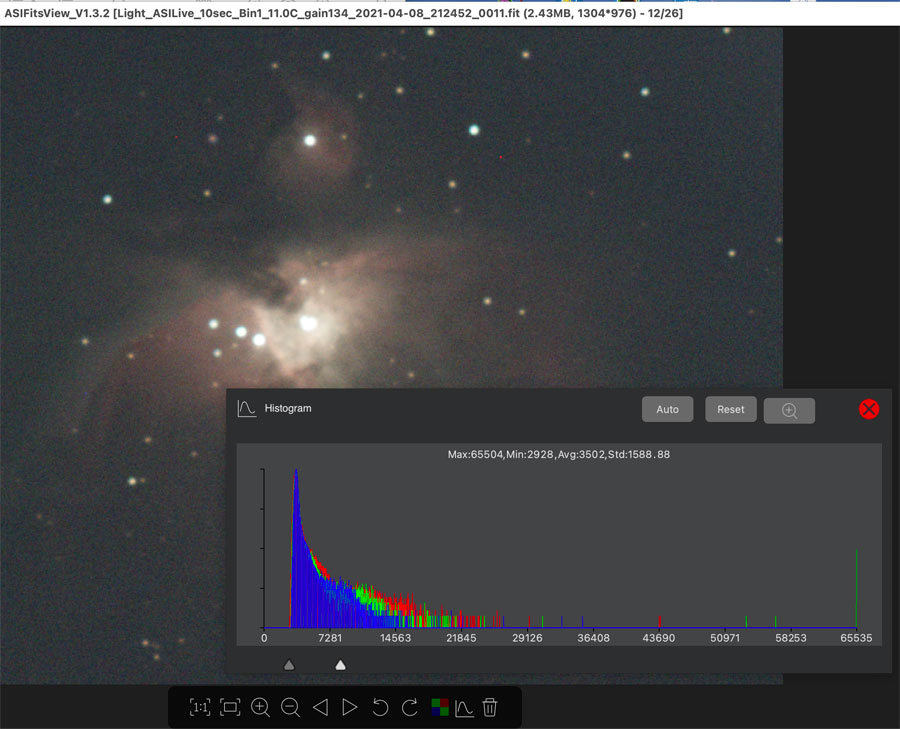
ASIFitsView offers a histogram function (see figure below on the left), but it does not work "live" (while dragging the sliders) and is therefore a bit "fiddly" for me. Nevertheless, it seems to me useful to adjust images a bit and save them that way. In my opinion, this makes further processing in image editing applications easier, especially since you are still in 16-bit mode in ASIFitsView.
 |
 |
|
The histogram function in ASIFitsView offfers only two sliders, but this is sufficient for me. |
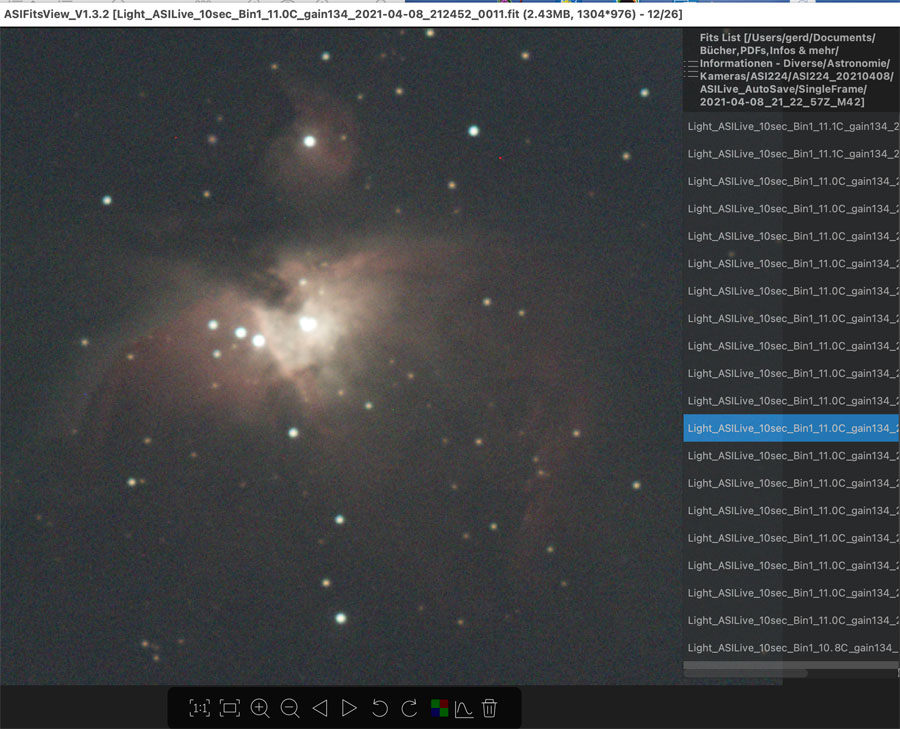
If you move the mouse pointer to the right of the application window, a list of FITS files appears, which are all in the same folder, for example, the single frames of a stack. |
Note: You can set ASILive to save the single frames when stacking. This is done in FITS format and you can view the images in ASIFitsView (see figure above on the right). For this, it is sufficient to load one file from a stack. The whole stack is then available via arrow keys.
However, a "remote" stacking function was regrettably missing in ASIFitsView, which would allow you to exclude images from stacking and thus to optimize the stack. With version 1.4 of ASIStudio, ZWO has added this feature (but initially still buggy) with the ASIDeepStack component! However, I think I will forgo saving the single frames in the future, especially since they take up a lot of disk space. It is enough for me if I can use the stack in FITS format as a basis for further quick & dirty editing!
Final Words
I would like to point out that I only describe here how to use the applications ASILive and ASIFitsView, but not my results when using the ASI224MC, ASI462MC, or ASI294MC with this software. I describe my results in practice elsewhere.
Links
- ASI224MC (color) (ZWO Website): astronomy-imaging-camera.com/product/asi224mc
- ASIStudio - ZWO Support - Software and Drivers: astronomy-imaging-camera.com/software-drivers
- Discussion forum about ASIStudio (ASI): bbs.astronomy-imaging-camera.com/t/asistudio
- At The Eyepiece Tonight - ASILive DEMO! (At The Eyepiece): www.youtube.com/watch?v=e2CygXmJVto&t=94s
- ASILive - new EAA software (CloudyNights thread, started by mclewis1): www.cloudynights.com/topic/684951-asilive-new-eaa-software
- ASIStudio v1.3.1 12.10.2020 (CloudyNights thread, started by bouvier_1): www.cloudynights.com/topic/746826-asistudio-v131-12102020
- See also my page offering Astronomy Links.
|
made by |
| 28.11.2024 |