Wedge for Sky-Watcher AZ-GTi AZ GoTo Mount - First Experiences
Introduction | Update of the AZ-GTi Software | Balancing | Polar Alignment | Home Position | First Experiences | Preliminary Conclusions | Links
Archive
On this page, I present first experiences about my Sky-Watcher wedge for my Sky-Watcher AZ-GTi mount head (ordered on February 8, 2021, arrived on February 9). Together with the tripod of the Sky-Watcher AZ Pronto mount (or any other tripod) both form a parallactic (or EQ) GoTo mount, controlled via a smartphone using the Sky-Watcher SynScan app or using the SynScan handbox. I plan to use the Celestron C5 and Omegon PS 72/432 tubes on this mount.
Note: The internal software of the AZ-GTi mount has to be updated in order to allow to be used as both an AZ and a EQ mount. For details see Update of the AZ-GTi Software.
See also:
- Sky-Watcher AZ-GTi AZ GoTo Mount - Information Archive
- Sky-Watcher AZ-GTi AZ GoTo Mount - Further Experiences Archive
- Wedge for Sky-Watcher AZ-GTi AZ GoTo Mount - Information Archive
- Wedge for Sky-Watcher AZ-GTi AZ GoTo Mount - First Experiences Archive
- Sky-Watcher Star Discovery AZ GoTo Mount - SynScan WLAN Information Archive
- Sky-Watcher AZ Pronto Mount - Information
- Sky-Watcher Stainless Steel Tripod (AZ5) Archive
| Note: In the beginning of October 2024, I sold my Sky-Watcher AZ-GTi mount head, including the Sky-Watcher wedge. I therefore can no longer report any experiences with this mount here. |
Introduction
Software
In 2018, Sky-Watcher released new internal software for the AZ-GTi mount that allows this mount to be operated not only in AZ mode, but either in AZ or in EQ mode. How to perform this update is covered below. Apparently, after this update, you can also insert the telescope tube in any direction. Initially, I thought that this would be important for an optimal placement of the finder, as it is in the AZ mode. But later, I found out that the dovetail lies horizontally in the home position so that the direction of the tube does not depend on its orientation. More on this later (or elsewhere)!
Which further Equipment Is Needed?
For EQ mode, the AZ-GTi mount head must be placed on a wedge and "polar aligned". This is also discussed below. In principle, any wedge of suitable size can be used, but of course a Sky-Watcher wedge recommends itself, namely the one matching the Sky-Watcher Star Adventurer. Only this one is discussed on my pages. You also need a counterweight and a bolt for carrying it. And finally, the head of the clamping screw for the Vixen rail is too large, so that the clamping screw has to be replaced with another one. These part are presented on page Wedge for Sky-Watcher AZ-GTi AZ GoTo Mount - Information.
What Can You Find on this Page?
On the one hand, this page provides information about the additional things that are needed or that you have to do to operate the AZ-GTi mount in EQ mode. I try to present these matters in a way that they can be read quickly.
On the other hand, I report about my own experiences in trying to get the AZ-GTi mount to work in EQ mode. In this process, many erroneous paths are also described, and this section is intended only for those readers who are interested in what possible problems can occur.
Update of the AZ-GTi Software
For information on how to update the internal software of the Sky-Watcher AZ-GTi mount, watch the following video:- Sky-Watcher AZ-GTi Mount with new dual mode AZ/EQ Firmware (Wolfie6020, video): www.youtube.com/watch?v=By6mBcMspGQ
- AZ-GTi update AZ to EQ (Astronomy and Nature TV): www.youtube.com/watch?v=bLdkgLIGDfc
- Setting up the AZ-GTi Mount in Equatorial mode - for portable Astrophotography! (Cuiv, The Lazy Geek, video): www.youtube.com/watch?v=xJmntIr50lk
See the videos for details!
Since I use the mobile iOS version of the SynScan app, I only needed to download the following software from the Sky-Watcher Website:
- Windows program: Motor Controller Firmware Loader - WiFi, Version 1.74 (transfers the firmware to the mount) (link)
- Firmware: AZ-GTi Mount, Right Arm, AZ/EQ Dual Mode, Version 3.26 (the firmware itself; meanwhile it is version number 3.37) (link)
Both Zip files have to be unpacked in Windows and best placed on the desktop. Then start the firmware loader, select the firmware (in an extra folder), and transfer the firmware to the mount. For all this, it is important that
- either the computer is connected to the WiFi of the mount (which acts as hotspot),
- or the mount and the computer are connected via the Sky-Watcher USB dongle and a printer cable.
For me, only the WiFi transfer worked; the USB dongle transfer failed several times (it looks as if if does not find the Prolific driver even though I installed it)...
Figure: The Prolific driver, that I downloaded from the Sky-Watcher Website and installed on my "virtual" PC.
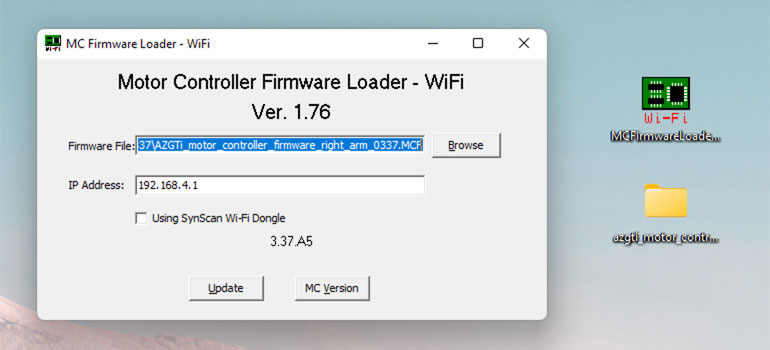
Figure: Firmware Loader dialog
Balancing
According to the Sky-Watcher documentation for its equatorial mounts, the telescope should be balanced before each observing session to reduce stress on the mount and motor drives, if applicable. The telescope should be balanced after all accessories (eyepiece, camera, etc.) have been attached. Before balancing the telescope, it should be in a balanced level and stand on a stable surface. For photography, it is recommended to point the telescope in the direction that you will be taking photos before performing the balancing steps.
In the following, I describe the steps in a simplified manner following the Sky-Watcher instructions.
Right Ascension Balancing
The R.A. balancing should be done before proceeding with Declination balancing. Rotate the telescope until both the optical tube and counterweight rod are horizontal to the ground and the telescope tube is to the side of the mount. Move the counterweight along the counterweight rod until the telescope is balanced and remains stationary when released. Tighten the counterweight thumb screw to hold the counterweight in its new position.
|
|
Photos: R.A. balancing: the telescope seems balanced or the friction of the axis is a little bit strong...
Declination Balancing
All accessories should be attached to the telescope before balancing around the declination axis. The counterweight rod should be in a horizontal position and the telescope tube parallel to the ground. Slowly release the telescope and determine in which direction it rotates. Depending on your telescope, either loosen the telescope tube rings and slide the telescope tube forward or backward in the clamps until it is balanced, or move the Vixen rail until the telescope no longer rotates from its parallel starting position. By the wy, in the case of my Omegon PS72 refractor, the Vixen rail is far too short, and I cannot balance the tube (I would have to use weights or magnets...).
|
|
Photos: Declination balancing: The Vixen rail of the PS72 is far too short for balancing the tube
Polar Alignment
See: Sky-Watcher AZ-GTi Mount with new dual mode AZ/EQ Firmware (Wolfie6020, video): www.youtube.com/watch?v=By6mBcMspGQ
If one of the two rotation axes of the mount is aligned parallel to the Earth's axis, as is the case with parallactic/equatorial mounts, you only need to move the other axis for tracking. This simplifies manual tracking and increases the accuracy of motorized tracking, which is especially important for long exposure photos.
In order for the R.A. axis to be aligned parallel to the Earth's axis, one must point it to the pole (to the geographic pole, not the magnetic pole),that is, perform a polar alignment. This can be done in different ways, from simple to complex, and accordingly the accuracy meets low (visual observations, photos with short focal lengths and exposure times) to higher demands (photos with longer focal lengths and exposure times). For higher demands there is no way around a polar finder, for lower ones a compass (or smartphone with compass) or the view through the viewfinder or the eyepiece are sufficient.
Some interesting information about simple polar alignment can be found in the video "Polar align without looking through polar scope" by Kamil Pekala (www.youtube.com/watch?v=X2jagTiDZ6k).
It is important to know that neither the magnetic pole nor the star Polaris correspond exactly to the geographic pole. In many cases, it is nevertheless sufficient to align to one of the two targets. Polaris rotates once in 24 hours around the geographic pole (in about 1° distance (currently at about 1.3°); I also read about 2° difference), which can be taken into account with pole finders and thus leads to higher accuracy.
|
|
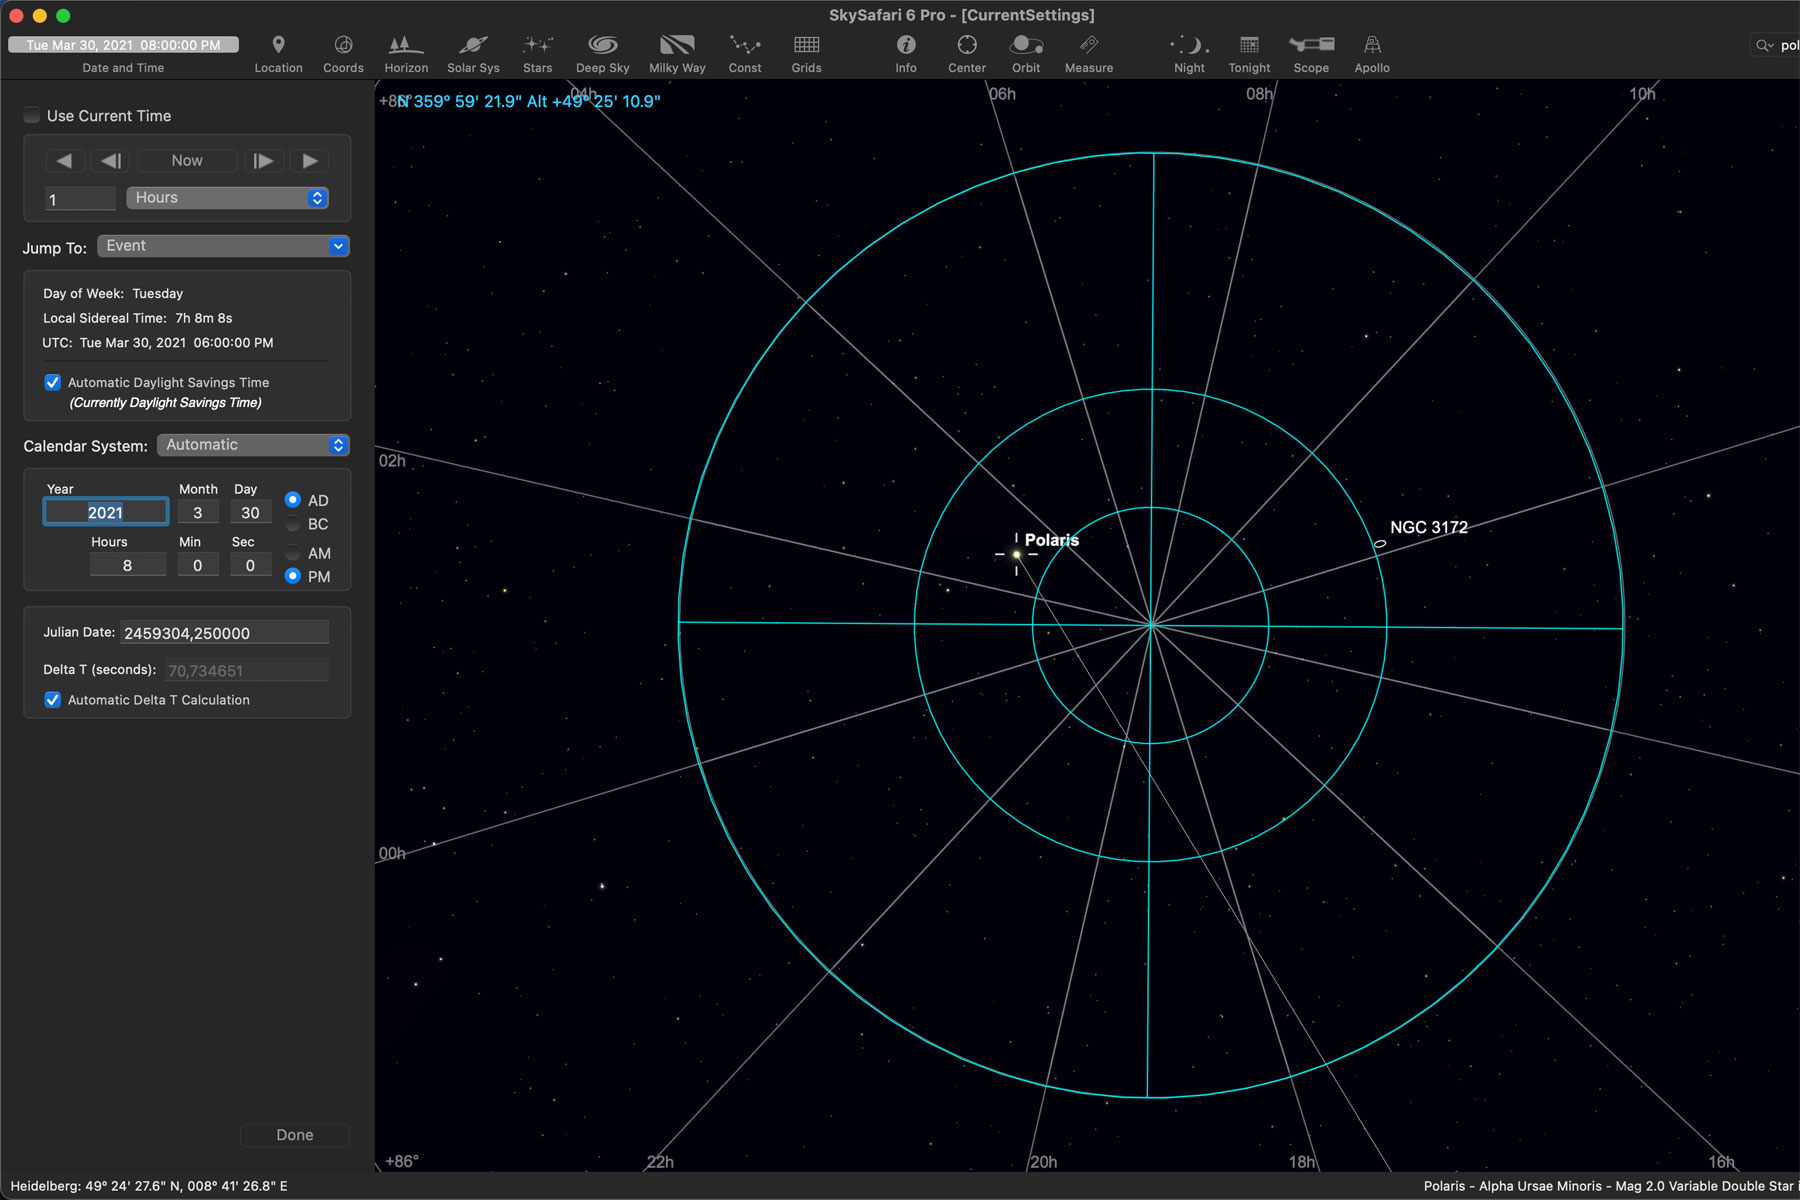
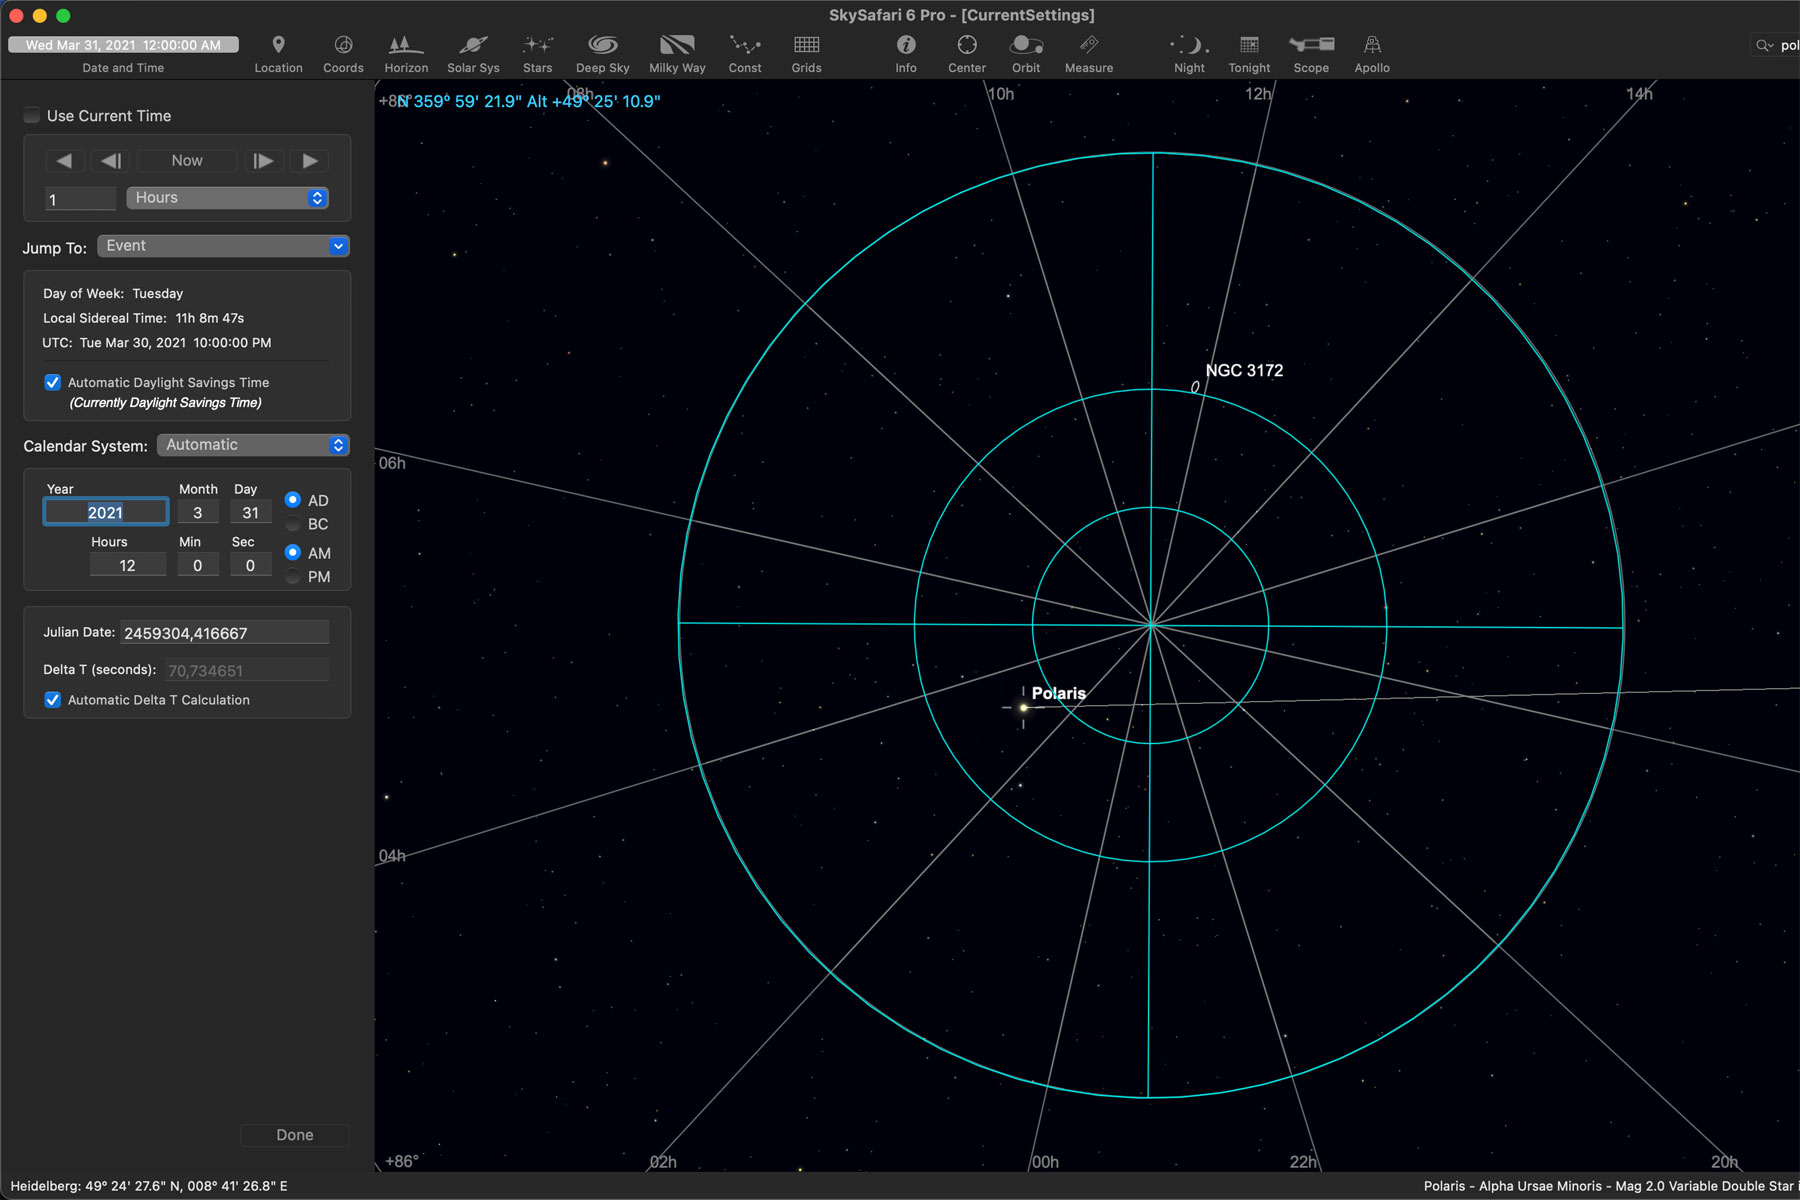
Photos: Polaris at 8 p.m. and at midnight (Mar 29, 2021)
When aligning with a compass or smartphone, keep in mind that the compass needle can often be deflected considerably by metal and magnetic interference sources. I have checked this and really do not know whether I can trust these devices. You can also set the compass to "true north" in the iPhone, but that does not eliminate the problems that I mentioned.
Therefore, it seems to me that, for simple polar alignment, it is safer to center Polaris in the finder or eyepiece of the telescope. This is recommended in the instructions for Sky-Watcher's manual EQ mounts and is certainly sufficient for visual observation. In the video of Kamil Pekala this case is not treated, because he is primarily concerned with photos taken with normal digital cameras. I do not cover the polar alignment with polar finders for the time being, particularly, because I do not own one!
Home Position
I knew from AZ mounts that, at least with certain alignment methods, they must be in the "home" position (tube level and facing north) when the mount is turned on. It was not clear to me whether this is also necessary for EQ mounts and if so, what it would look like. A look into the Sky-Watcher SynScan manual told me the following:
HOME POSITION OF AN EQUATORIAL MOUNT
- Mount tripod is leveled as indicated by its bubble level
- RA axis points towards the northern or southern celestial pole, whichever is visible at your location
- The telescope tube points towards the visible celestial pole
- Counterweight rod point as close to the ground as possible
It took me some time to search and find this information... All in all, it states that the position for the polar alignment is exactly the home position you need for the "normal" alignment. How convenient!
First Experiences (March 26 to April 4, 2021)
I experimented for several days with the AZ-GTi on the wedge to find out how to proceed with the EQ mode. Since the EQ mode for the AZ-GTi is only "unofficially" supported by Sky-Watcher, there is no documentation for it. And I could not figure it out from the reports of hobby astronomers who use it, because I was missing (or seemed to be missing) the crucial information.
In the following I try to reconstruct this phase (from my own records, memories, and e-mails) to show how one can go astray...
March 26, 021
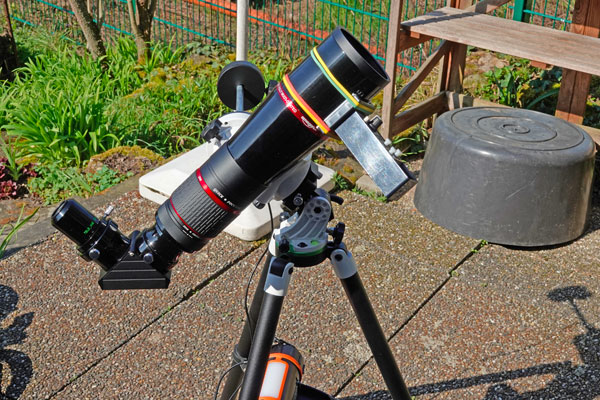
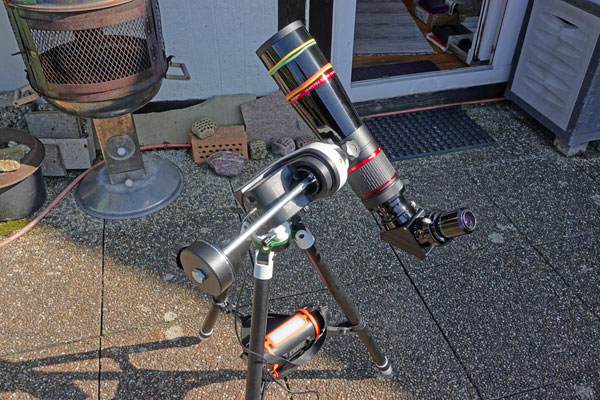
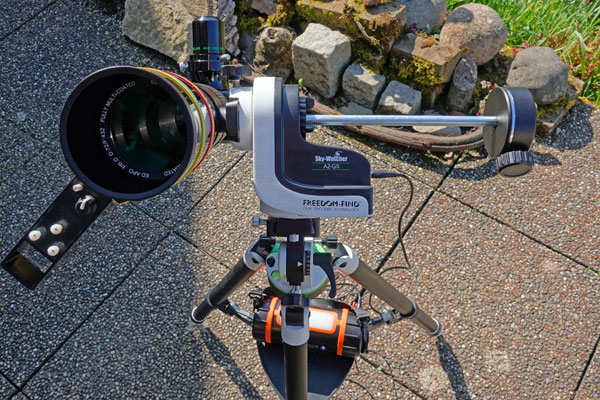
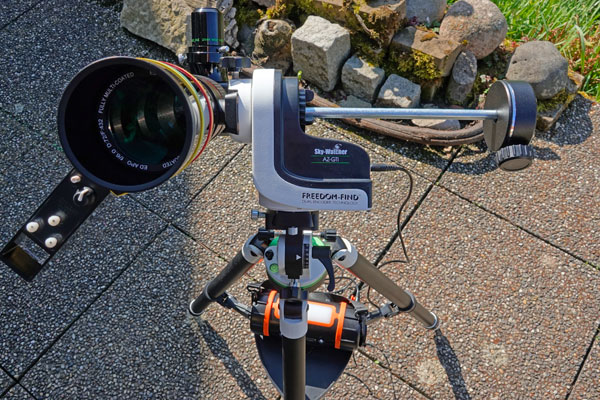
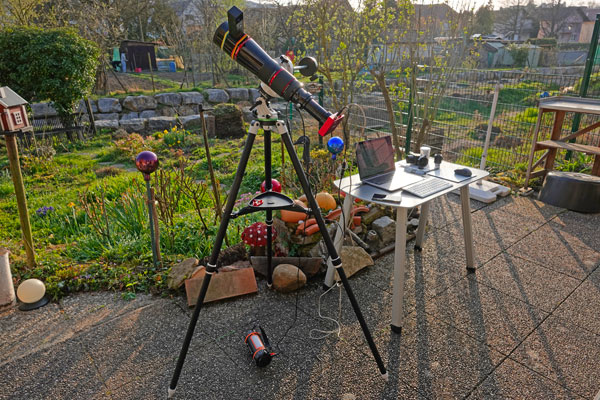
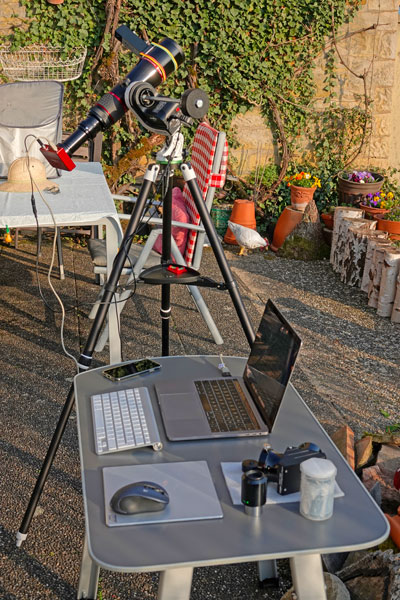
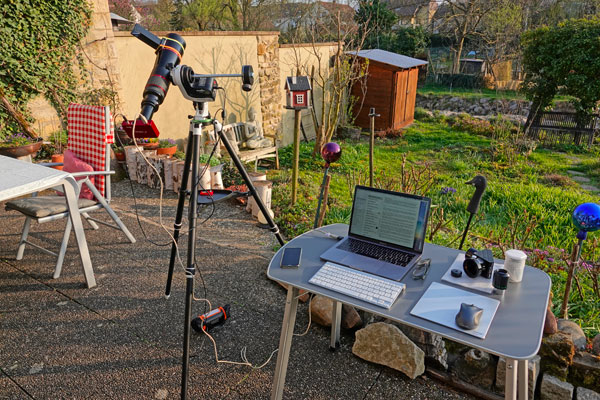
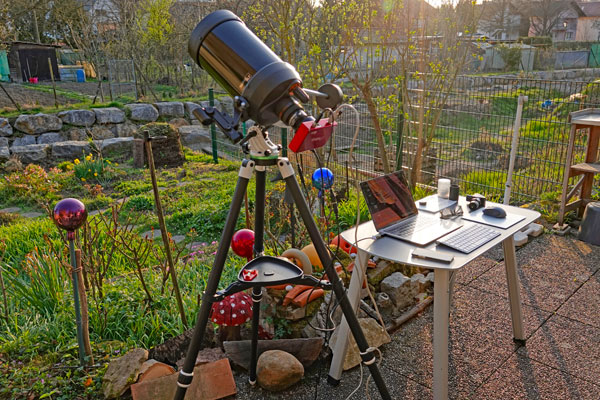
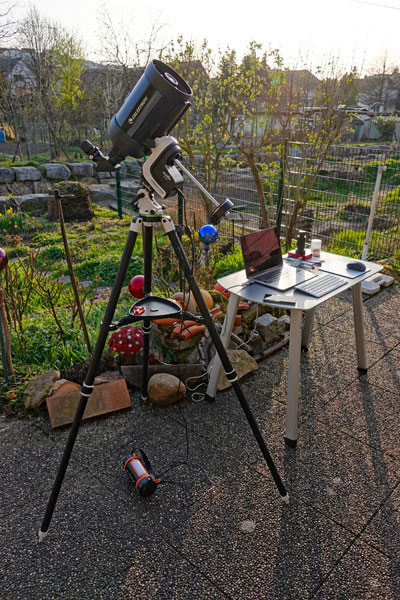
On March 26, 2021, the counter weight for the mount arrived at my home (bolt and screw came earlier), and so I tried in the afternoon to set up the mount in EQ mode. I had no idea whether I would do everything correctly, because unfortunately I did not find many photos on the Internet, or I was able to find any useful photos (with explanations)... In fact, my setup was correct, as I found out much later. But the angle of attack of the RA axes was not quite correct, because the wedge pointed to the south, when the tube pointed to the north. Then for the inclination of the wedge, as I found out also only later, instead of an angle of attack of the geographical longitude one of 90° minus longitude is valid!
|
|
|
|
|
|

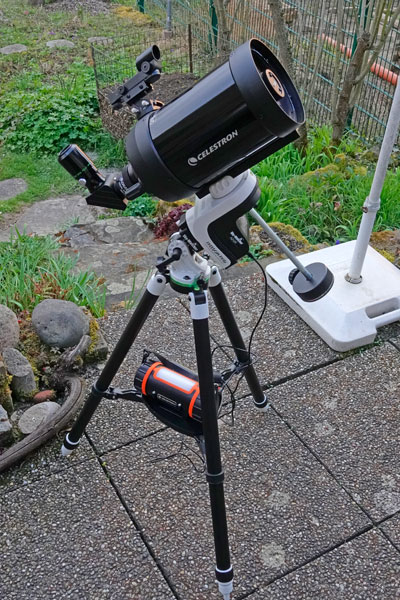
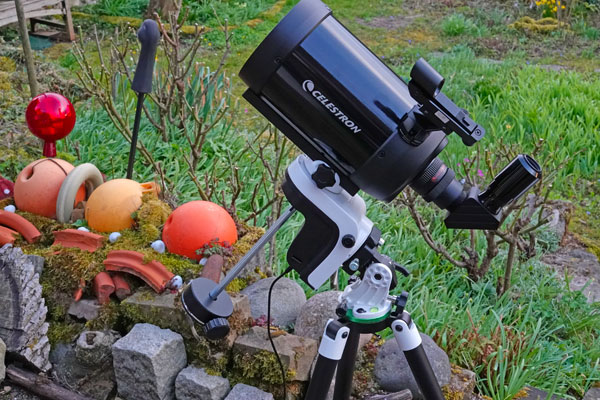
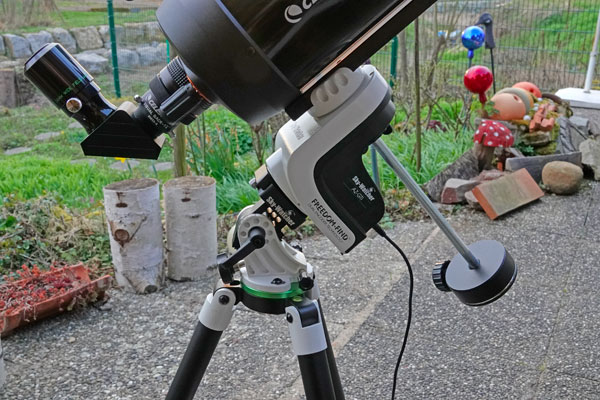
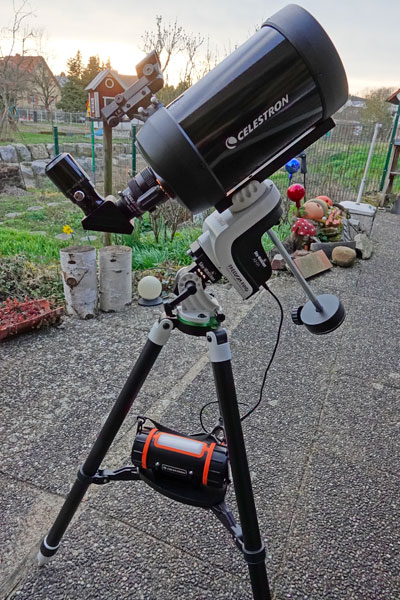
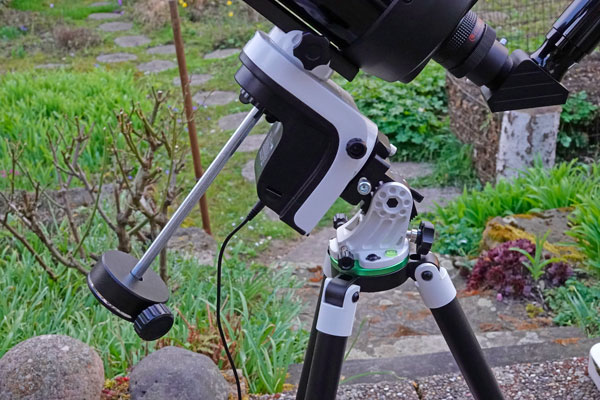
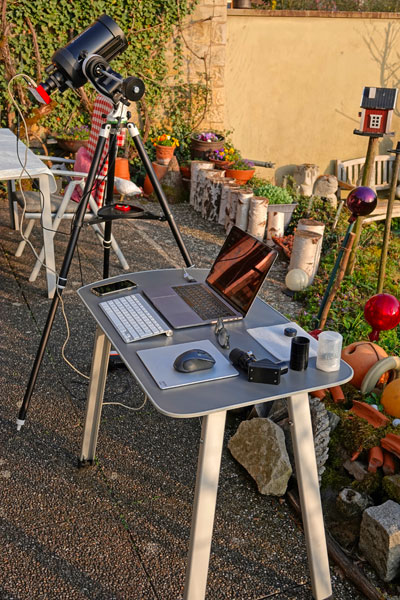
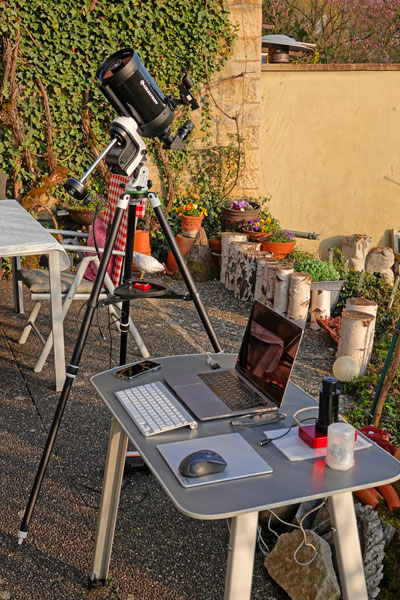
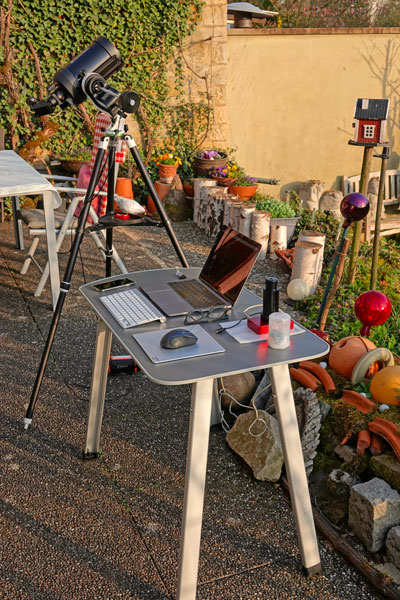
Photos: "Example photos" of the equipment (mostly not polar aligned)
And now that everything was connected, I just wanted to see how the mount could be moved. It worked quite differently than I was used to from my AZ mounts! I found it extremely difficult to move the mount to a target, in this case the moon, with both motors. It took a fairly long time until I succeeded! Then I simply let the mount track the moon. It was still in the eyepiece after a few minutes, but not as good as at the beginning. OK, I had not "polar aligned" the mount (I did not know yet how to do that...), but an approximate north alignment and an (almost) correct wedge inclination angle were sufficient for a rough tracking!
March 27, 2021
The next day (March 27, 2021) I tried to get more information about the polar alignment and the setup, collected links, and took a look at the corresponding information. From a Finnish video I learned that a simple polar alignment by compass or smartphone is possible (but you have to take into account the misalignment by metal, which can be considerable!). According to Sky-Watcher instructions for its EQ mounts, it is also sufficient to center the polar star in the finder/eyepiece. For visual observations this is obviously sufficient, even though neither Polaris nor the magnetic pole coincide exactly with the geographic North Pole. If you want to take good photos with long exposure times and focal lengths, however, you need a polar finder. The SynScan app and handbox offer a polar alignment via stars, but it is so poorly documented that I will have to try it out at my leisure. But the result is not supposed to be too accurate either...
The other problem for me was to understand parallactic mounts first, especially the rotation axes and the balancing. And when I thought about how to move from the north position to a target in the south or west, this seemed to me to become adventurous, at least with the AZ-GTi (as already the first attempt the day before showed...). I tried out this movement again "manually" in daylight and also in the evening with stars.
In the evening, I first pointed the wedge to the north and set the azimuth to our longitude (as best as I could with the coarse scale of the wedge...), as described in the Sky-Watcher Star Adventurer manual. This assumes that the wedge is pointing north and the angle of attack is equal to the longitude.
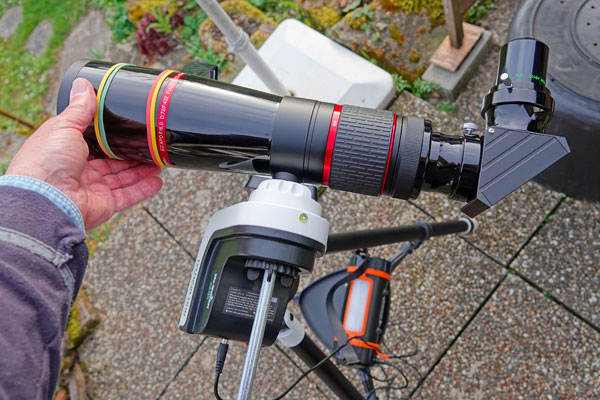
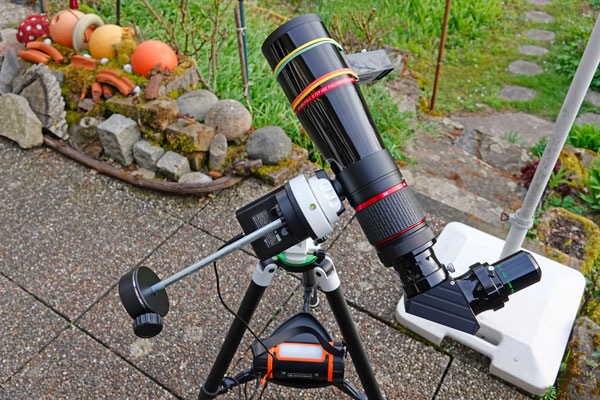
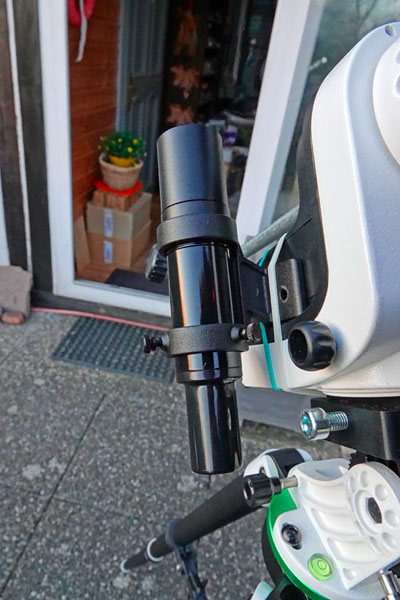
As a "temporary polar finder" I used the erecting 6x finder of my C5 and fixed it in the prism shoe of the wedge with rubber bands. With this, I aligned the wedge to the polar star! But with my "construction" there was the problem that the polar finder had to be removed again, so that the AZ-GTi mount and the telescope could be mounted. With such a light mount, however, there is the constant danger of losing the alignment again!
|
|
|
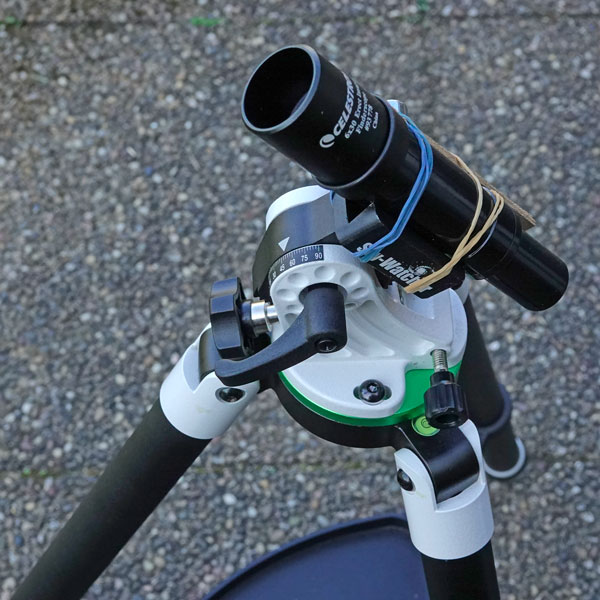
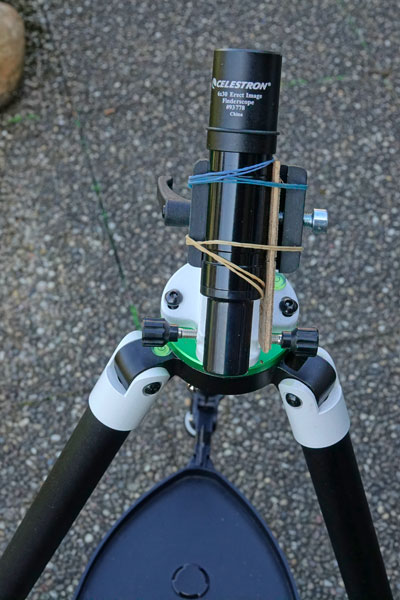
Photos: First attempt at a provisional polar finder using the C5 finder (photos taken March 31, 2021)
But after the "installation" of mount and tube, the tube was now facing south! For the setup to look like it does in many (unexplained photos), and for the tube to point north (for the "home position" that I assume the alignment needs...), however, the wedge must point south, not north, so that the telescope and its finder point north. Now, after I had rotated the wedge and inserted the tube, there was the problem that Polaris was much higher than where my telescope finder thought it was (i.e., pointed to)... So there was a problem, which I did not understand at first! Nevertheless, I subsequently performed a 1-star alignment and somehow "muddled my way" to Sirius and Orion Nebula M 42. After all, M 42 stayed in the eyepiece for 15-20 minutes (or even a bit longer) during two tracking attempts, but kept moving to the left...
Afterwards, I took care of the height scale of the wedge, because the angle did not fit. The scale was glued on fairly correctly, as I was able to check with a protractor; possibly the scale was wrong by one graduation mark... However, one graduation mark corresponds to 3°, so the scale is quite rough. All in all, I assumed that possibly the scale was responsible for the observed altitude discrepancy, but actually the difference was greater than one graduation mark.
In the following days, I bought the app "Polar Scope Align Pro", which was recommended in the Finnish video mentioned above. I, however, found that for a correct alignment to the north, the bias generated by the mount and telescope is too large. At least I can use the app to determine the tilt angle of the wedge reasonably accurately...
After that, some things have been forgotten and I just continue with March 30, 2021!
March 30, 2021
On March 30, 2021, I decided, after I had already "practiced" during the day, to set up the mount because of the "angle problem" for the polar alignment in such a way that the wedge as well as the tube point to the north. For this, the weight rod has to be aligned horizontally (parallel to the ground)! This setup now seemed to me, after all the trial and error, to be the "ideal home position" for the telescope!
|
|
|
|
|
|
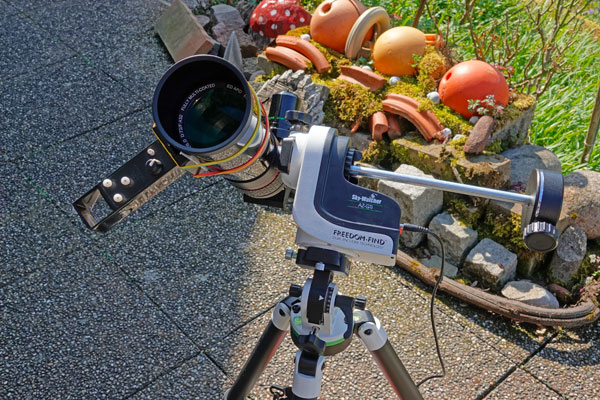
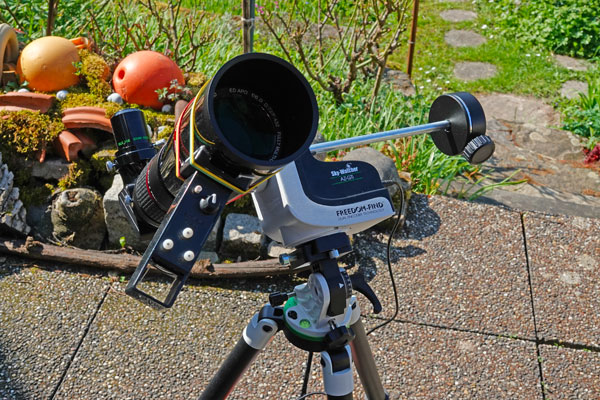
Photos: The arramgement...
However, various alignment attempts in the evening failed, the tube rammed the tripod or went somewhere else. So this was obviously not the solution! I still did an alignment with Sirius (how ever...), but the tracking was poor and only lasted for a few minutes. Possibly this was due to the "wrong setup"...
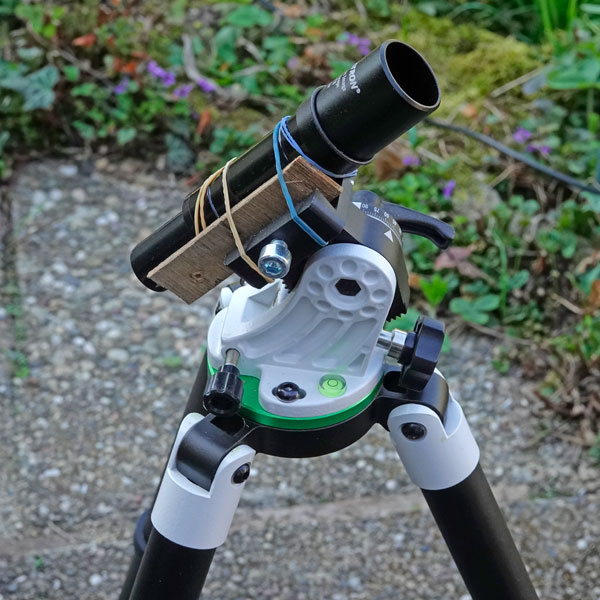
Also I redesigned the "polar finder" because of the changed setup, and now I also included its holder in the design. I tried to attach it to the mount so that it could be used with the fully assembled equipment. It might be screwed to the battery compartment, but first I decided to use rubber bands - which was useless in practical use!
|
|
|
Photos: New polar finder design (photos taken on April 2, 2021)
March 31, 2021
Because of the poor results on the previous day and after some consideration, I stepped, however, back on the next day (March 31, 2021) to let the wedge point to the south for the polar alignment. Then the RA rotation axis of the mount is also parallel to the earth's rotation axis! But now Polaris once again did not fit the height for the polar alignment, when I looked through the finder or the eyepiece. Thereupon I thought: never mind, I change the RA angle until Polaris appears in the finder/eyepiece and watch out what will happen! That apparently worked; however, the tracking was still poor. This time I timed it, and it took about 6 minutes for M 42 to be at the edge of the field of view of the eyepiece - with and without tracking enabled (the drift directions differed slightly)!
April 1, 2021
The next morning, April 1,2021, I realized that what I had done was exactly right. This is because if the wedge points to the south, the angle of attack of the wedge and the RA rotation axis including the tube are offset by 90°. In order to get the correct angle of attack, you now have to set 90° minus the geographical length on the wedge!!! Instead of 48°, I now had to set 90°-48° = 42° (which I had more or less set when centering Polaris). Thus the "angle problem" was solved (later I found on the Website of a Spaniard at least a "cryptic confirmation" for this (on April 2, 2021)
In the evening, I tried again - with moderate success regarding the alignment. I fumbled the whole thing again for M 42. But this time, the tracking worked for up to one hour (I did not check it exactly, but M 42 was still inside the field of view)!
April 2, 2021
I spent the evening of of April 2, 2021 with replicating the tracking result from the previous day. The alignment worked reasonably well on the second try, suggesting to me that the position of the equipment was correct. After 45 minutes, M 42 was still in the eyepiece and after more than an hour still more or less centered (but I could not see M 42 that well anymore)....
During polar alignment, however, it became apparent that the polar finder was not usable as I had designed it, because I was not able to place my head behind the finder!!!! On the days before, I had not used it and therefore not realized this issue...
April, 3, 2021
In the morning of April 3, 2021, I looked again into the Sky-Watcher SynScan manual to find out whether there is some mentioning of the home position and whether the telescope should be in it when being switched on (as with AZ mounts). I was able to answer both questions in the affirmative. And it is indeed the home position, when the telescope is assembled the way I do it, that is, with the wedge facing south (this is not mentioned in the manual, but there is no other way...). I do not know why the mount sometimes goes into the wrong direction with this orientation. But there are again and again reports that the mount "likes" to do that sometimes! So you have to try it again and again when it goes wrong (and reset the old alignment = reset alignment (as the Spaniard mentioned above advises) or tunr the mountn off and on again). That eventually solved my last puzzle!
With this knowledge, I did some 1- and 2-star alignments in the morning, and they seemed to work every time. Measuring the angles for Jupiter and other targets with the iPhone and the alignment app did not work because of the bias caused by the telescope - the values were clearly off on the horizontal axis. When I stepped further back, the value improved towards the desired one.
 |
 |
 |
Photos: Equipment with PS 72/432 and Atik Infinity (photos taken afterwards on April 4, 2021)
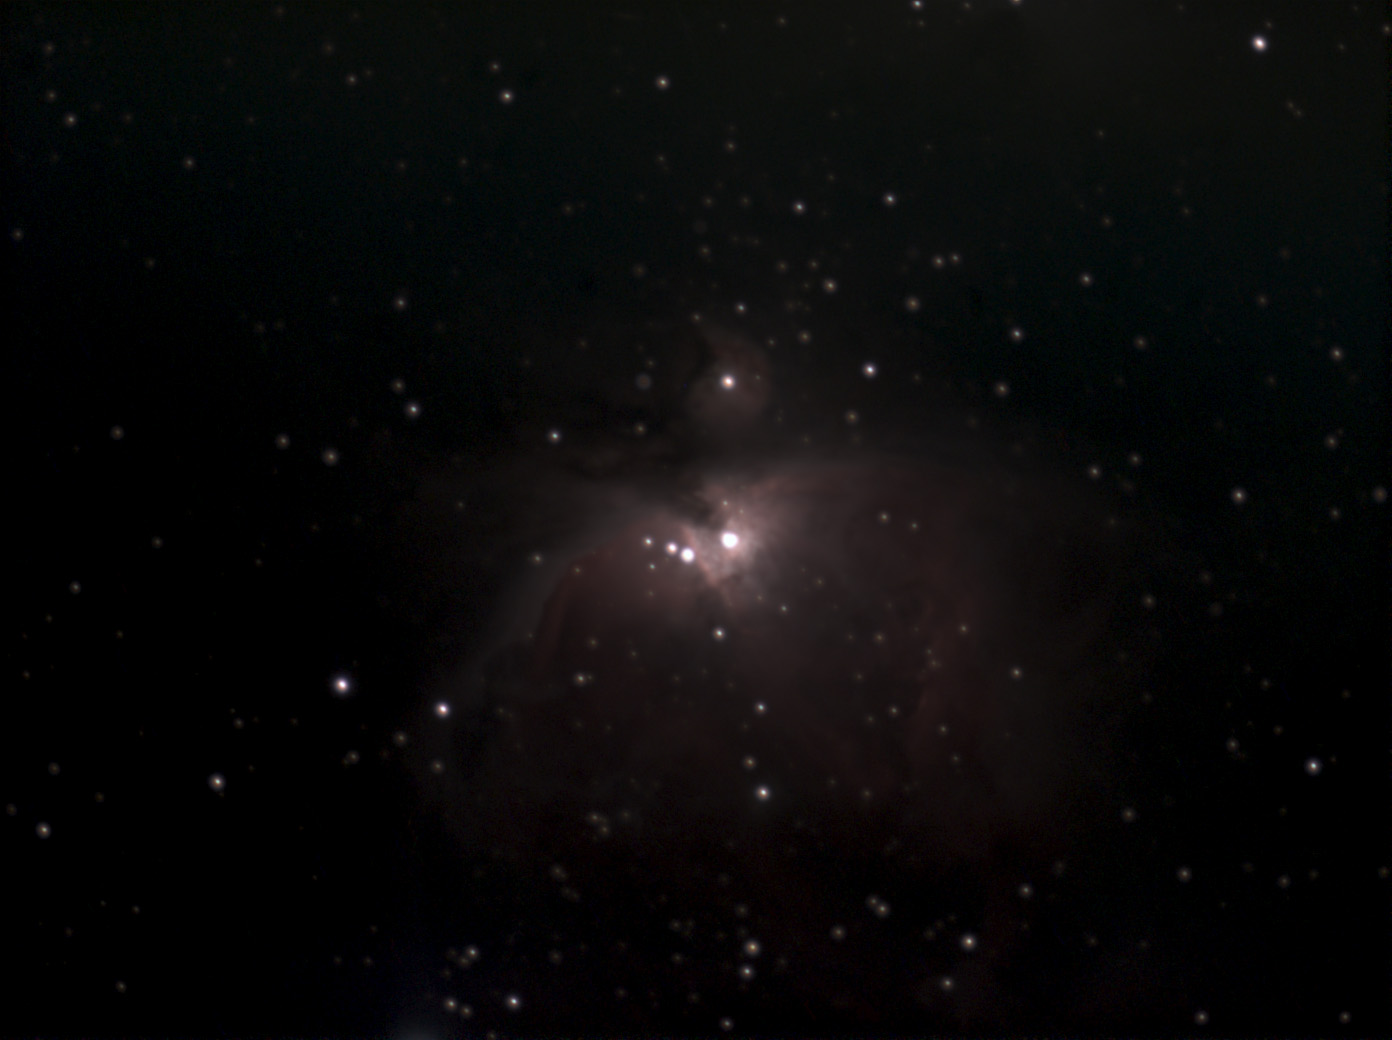
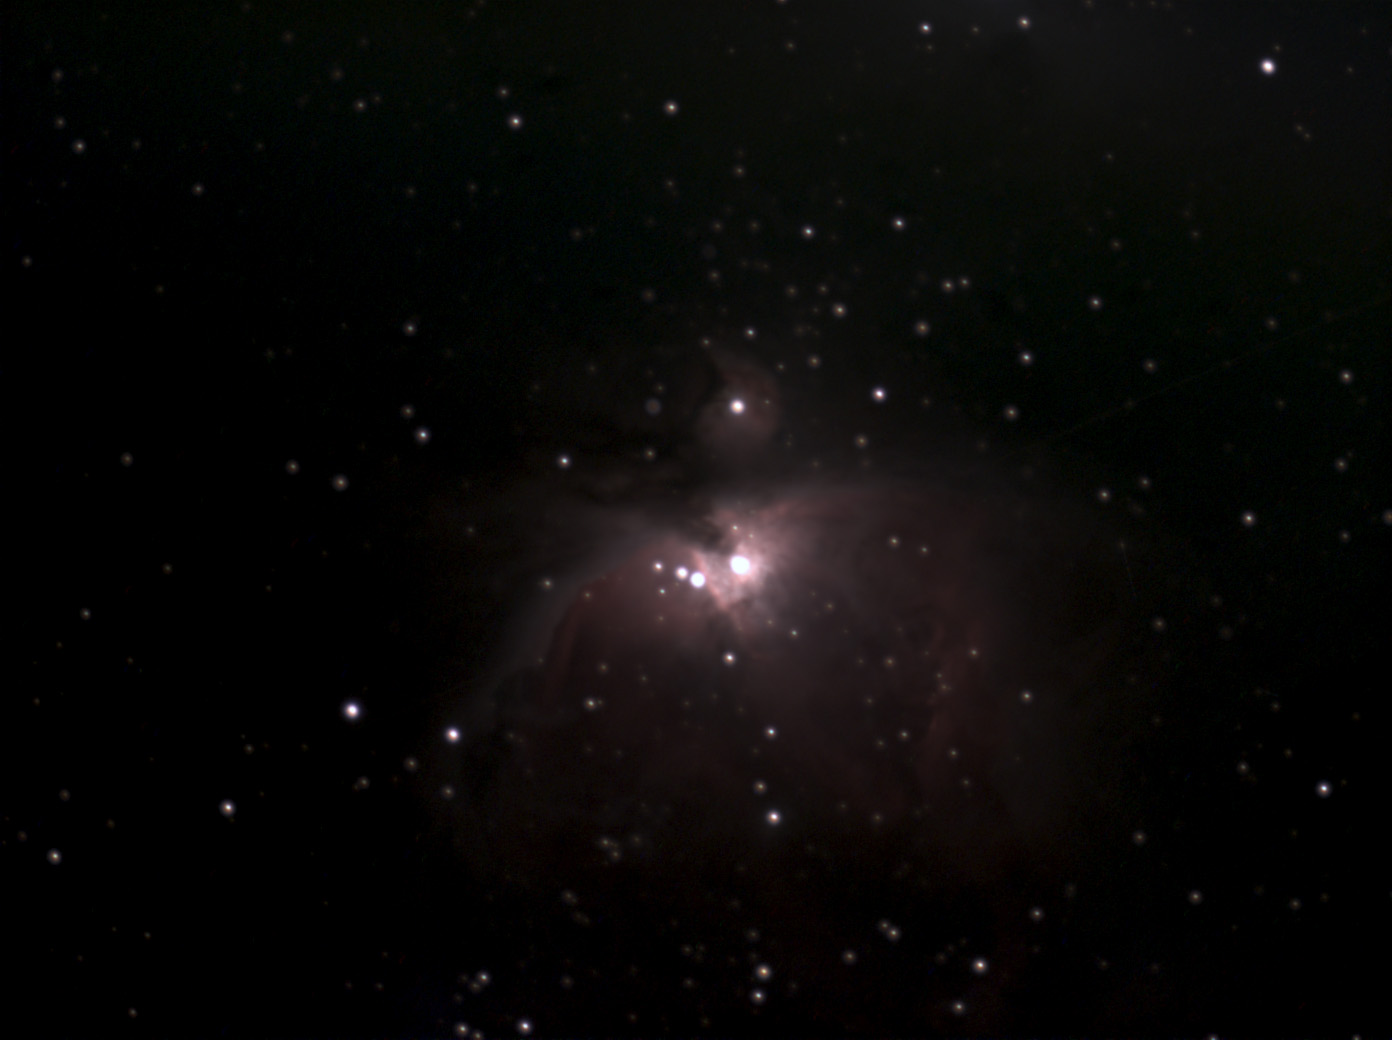
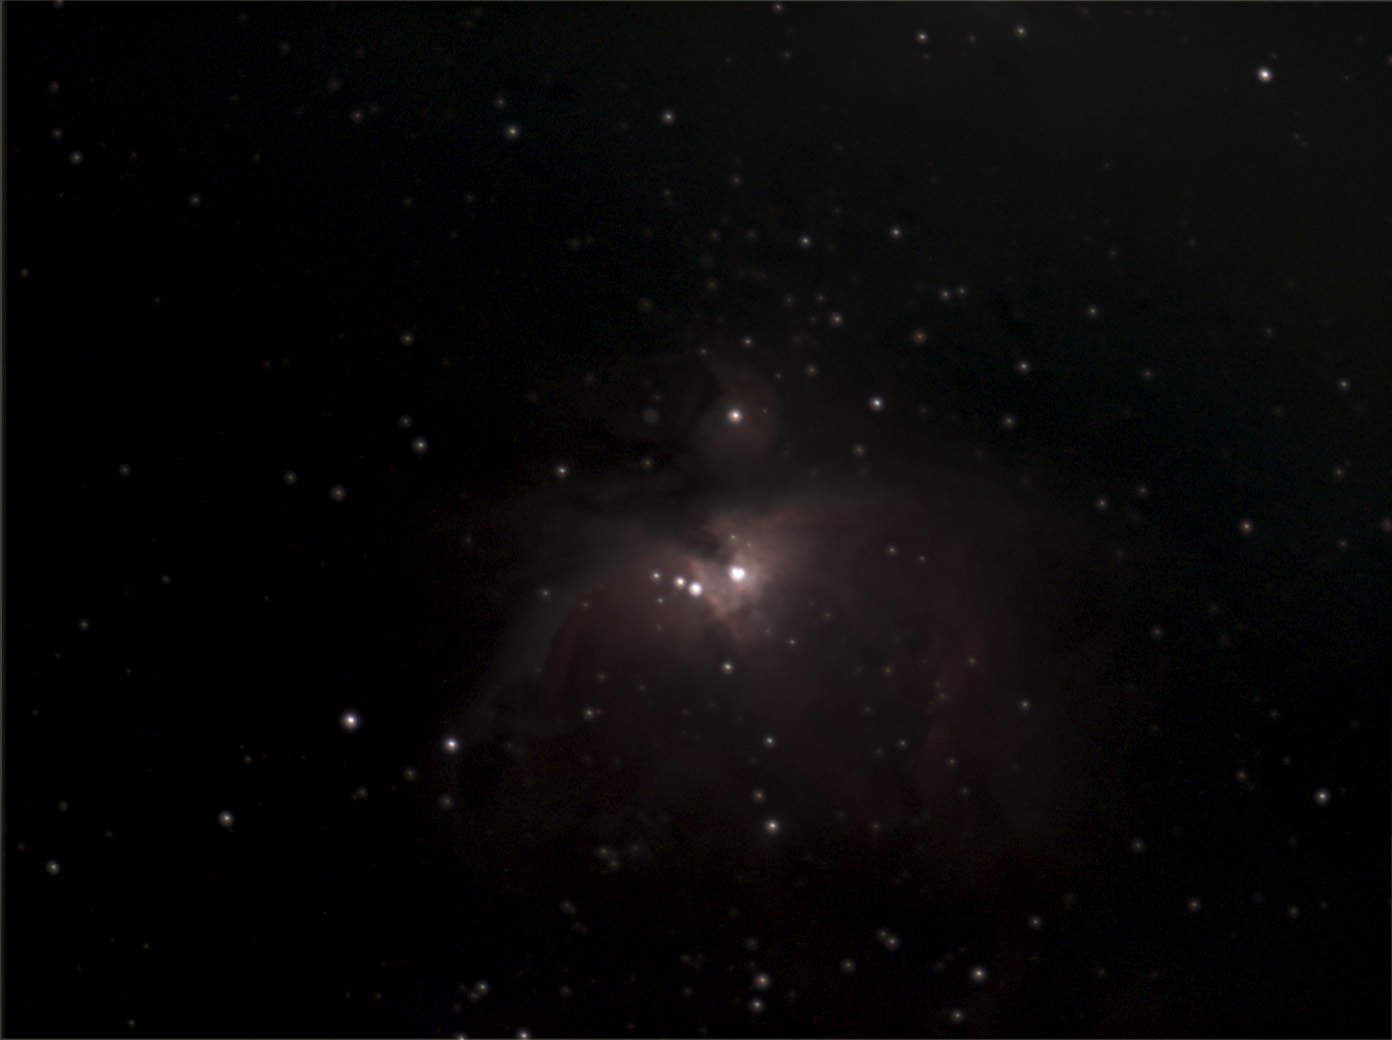
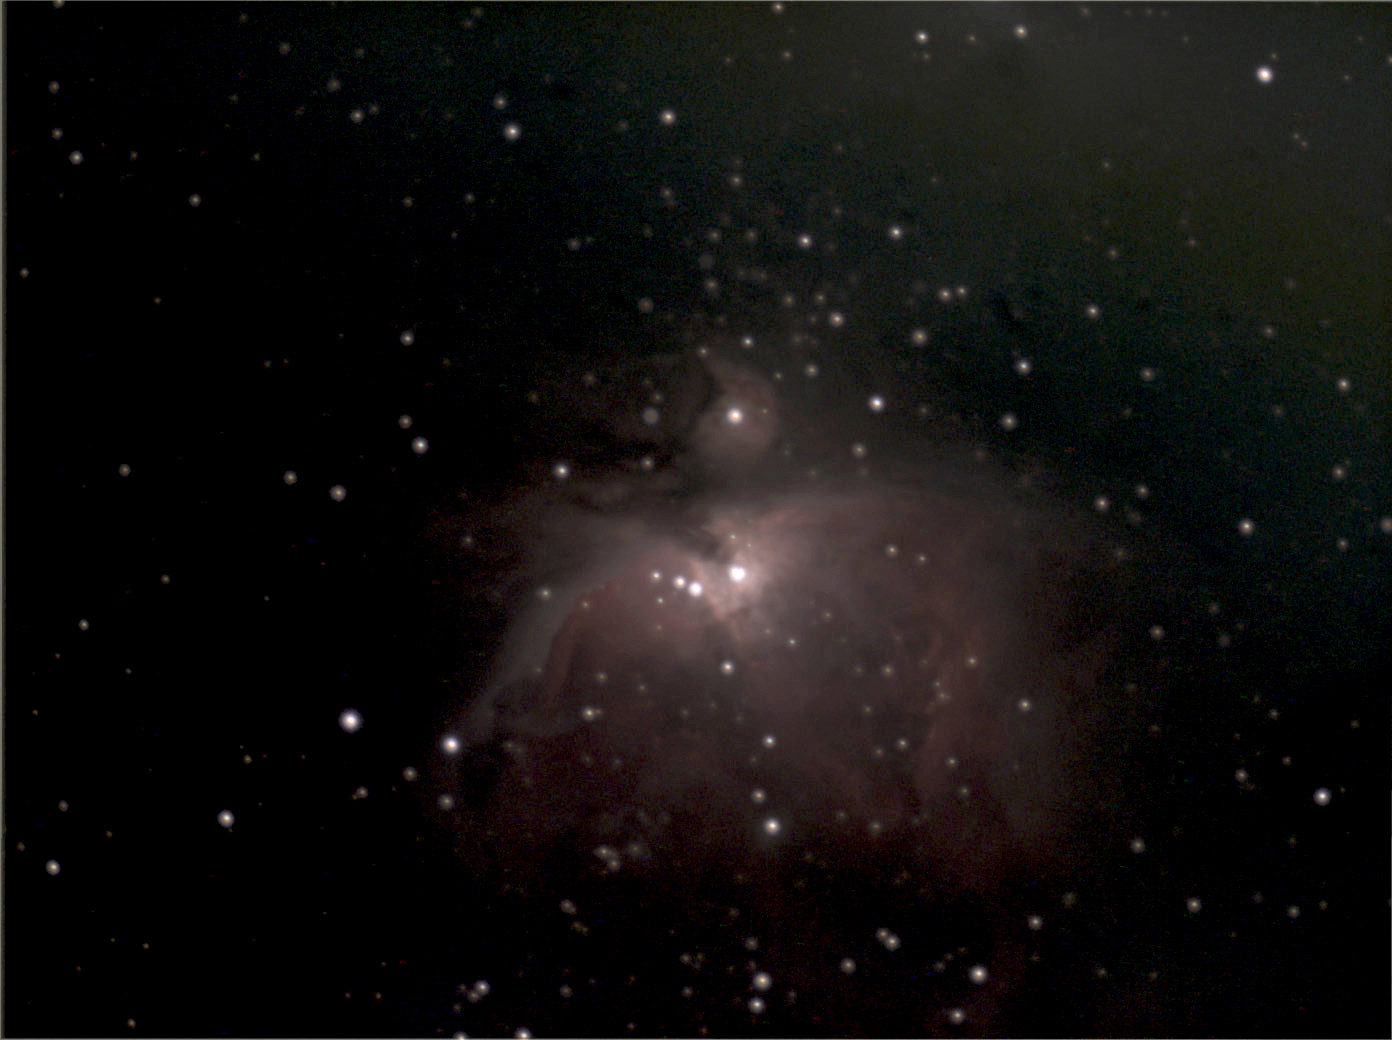
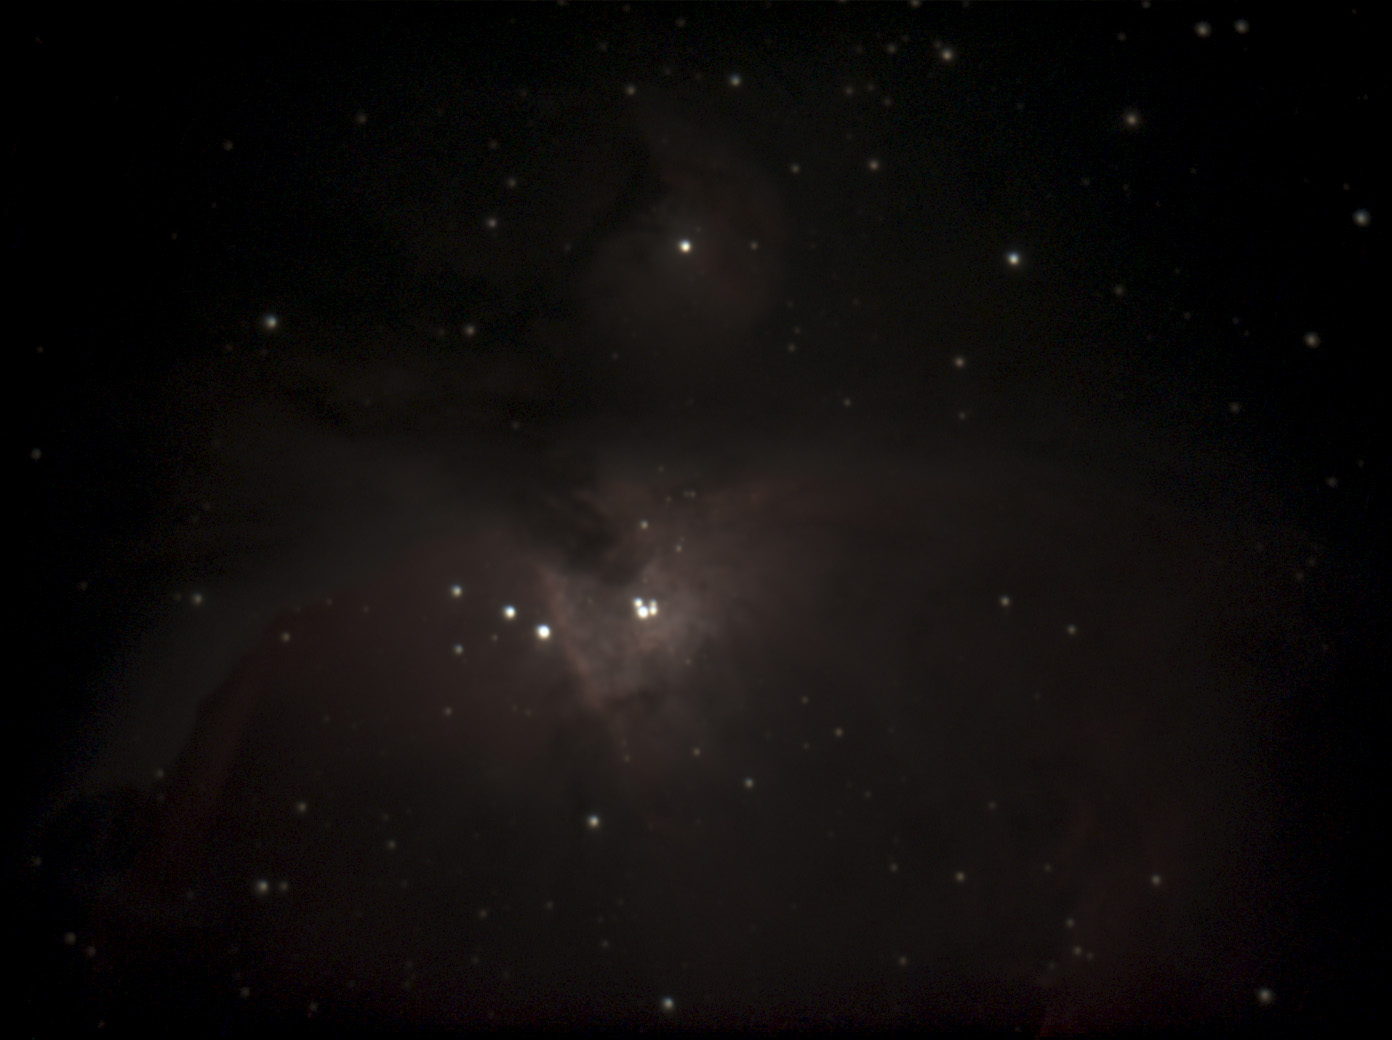
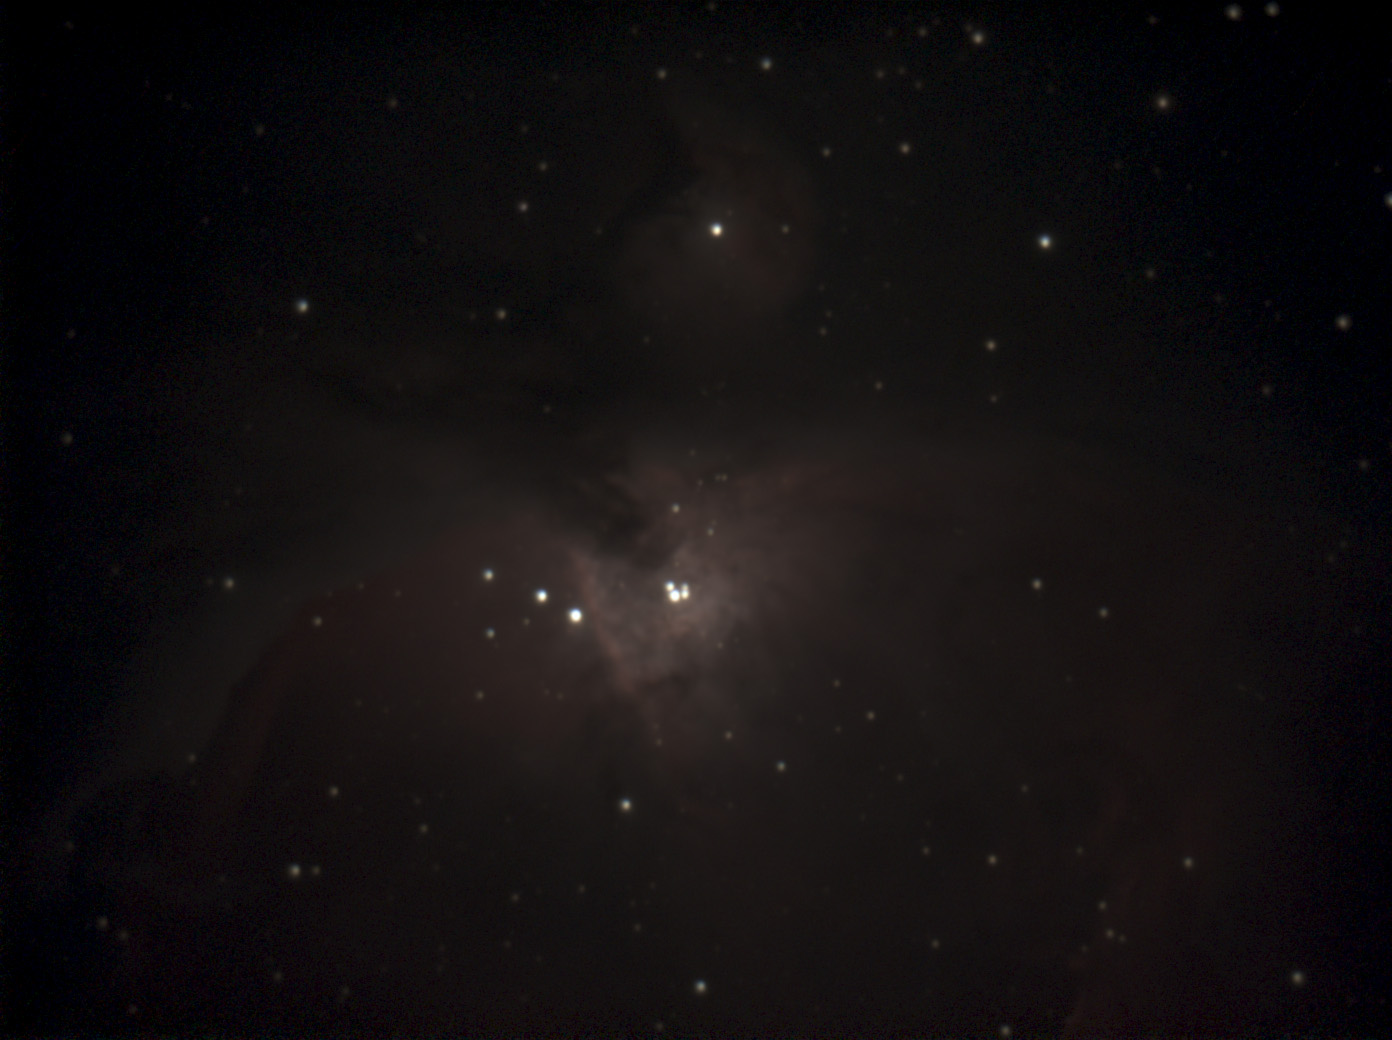
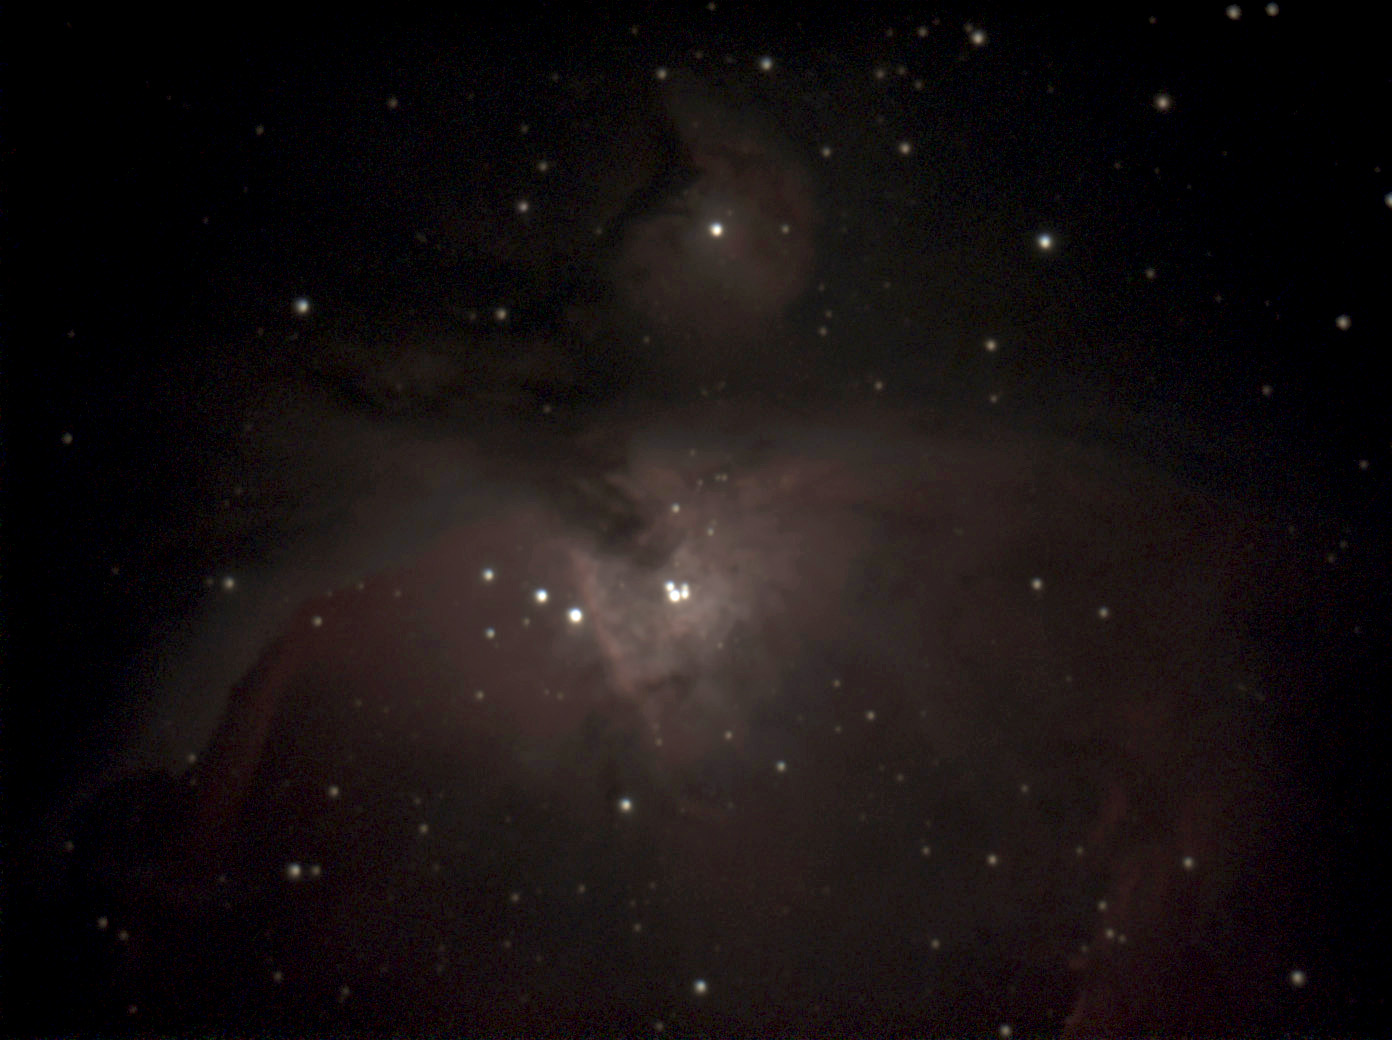
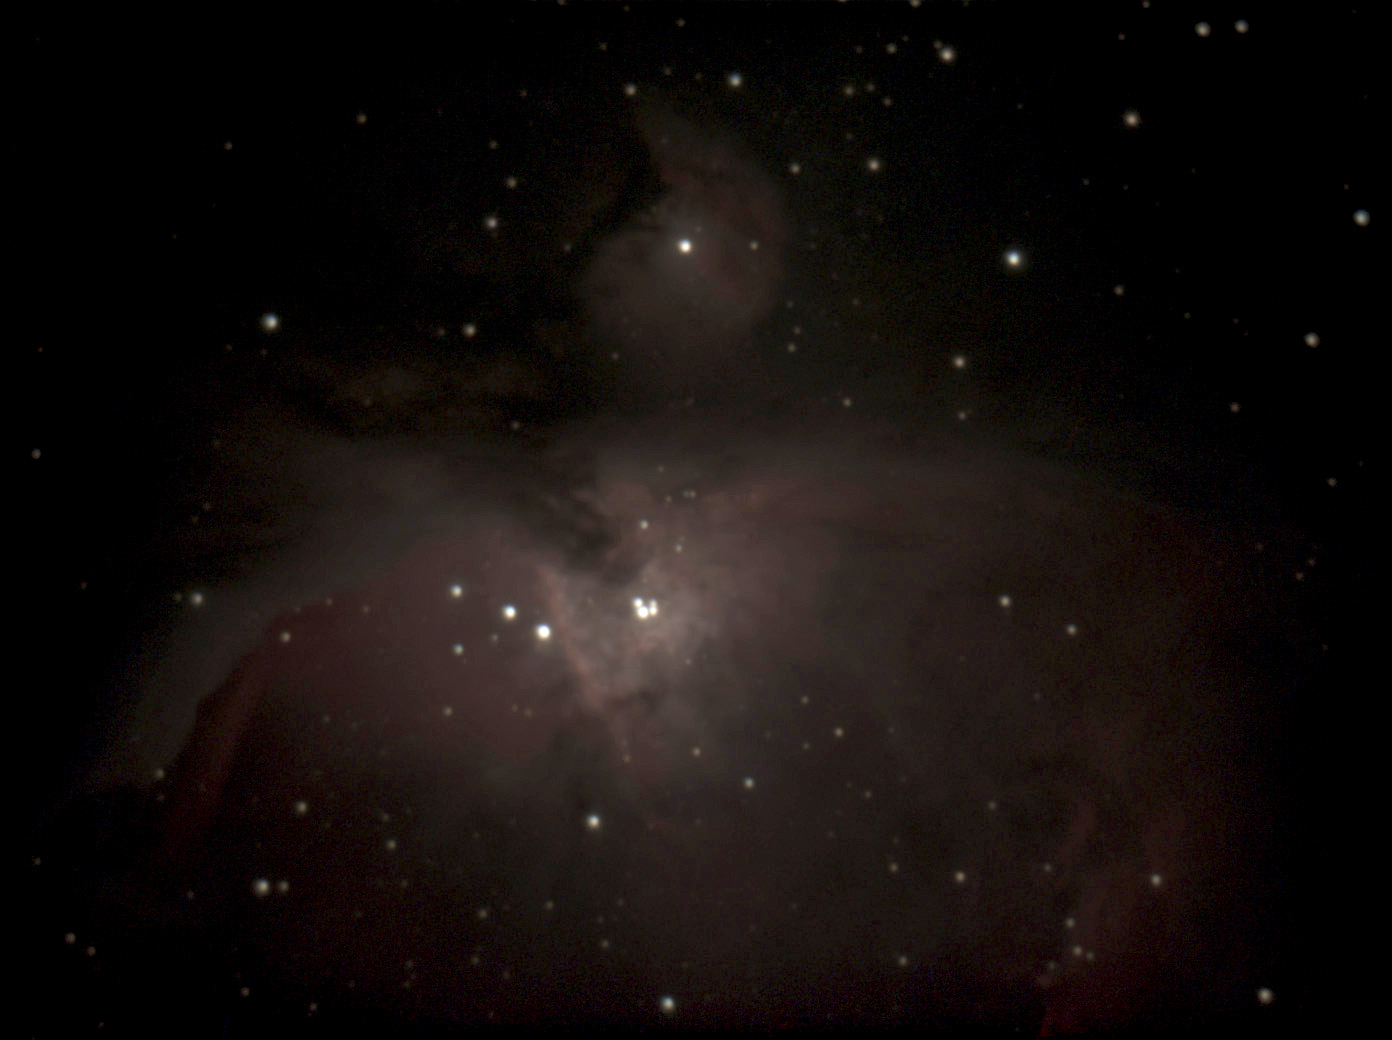
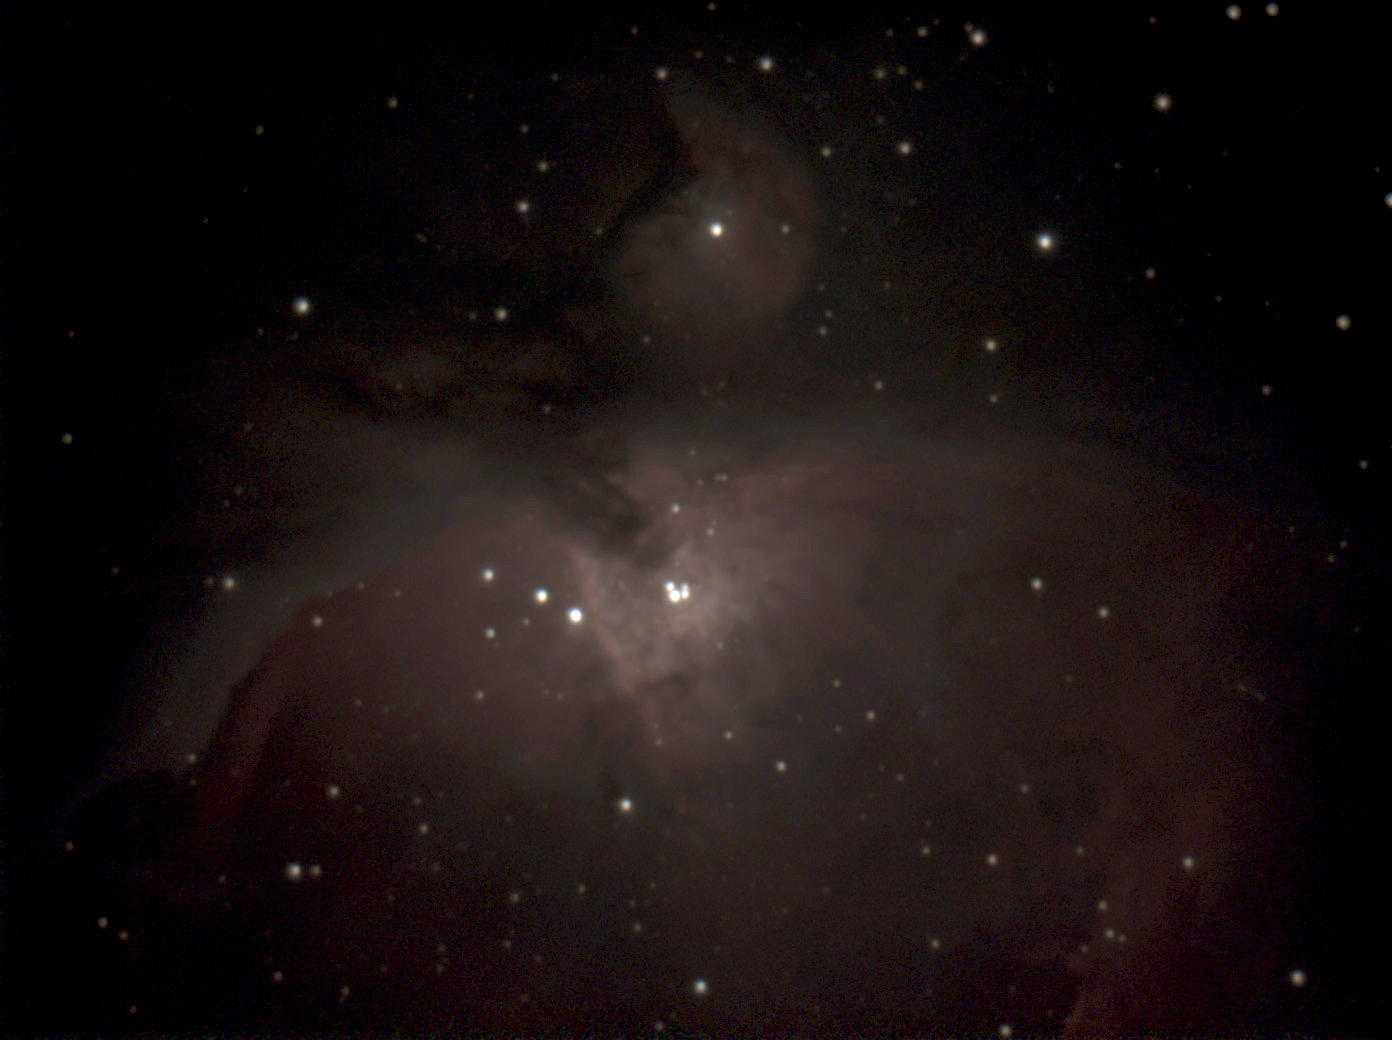
In the evening I tried the polar alignment and the "normal" alignment again. It all went a bit "murky", especially the star alignment was way too low. Afterwards, I let the mount track during dinner. After half an hour, M 42 was still standing quite neatly. And so I attached the Atik Infinity camera to the PS72/432 and photographed M 42 with exposure times of 10, 15, 30, and 60 seconds. The stars were quite bloated, especially at 60 seconds exposure*. At the end, I tried to take photos of the Flame Nebula and the Horsehead Nebula together. I had already had better results with this pair!
*) As I learned later, a UV/IR cut filter helps against the bloating of stars with refractors.
 |
 |
 |
||
M 42/43 - Apr 3, 2021 (30 s?) |
M 42/43 - Apr 3, 2021 (60 s) |
M 42/43 - Apr 3, 2021 (15 s) |
||
 |
 |
 |
||
M 42/43 - Apr 3, 2021, photo on top processed |
M 42/43 - Apr 3, 2021, photo on top processed |
M 42/43 - Apr 3, 2021, photo on top processed |
Photos: M 42/43 with PS 72/432 and Atik Infinity
April 4, 2021
In the evening of April 4, 2021, I tried to apply my newly learned knowledge once again, this time with the C5 tube.
 |
 |
 |
||
|
 |
 |
Photos: Equipment with C5 and Atik Infinity
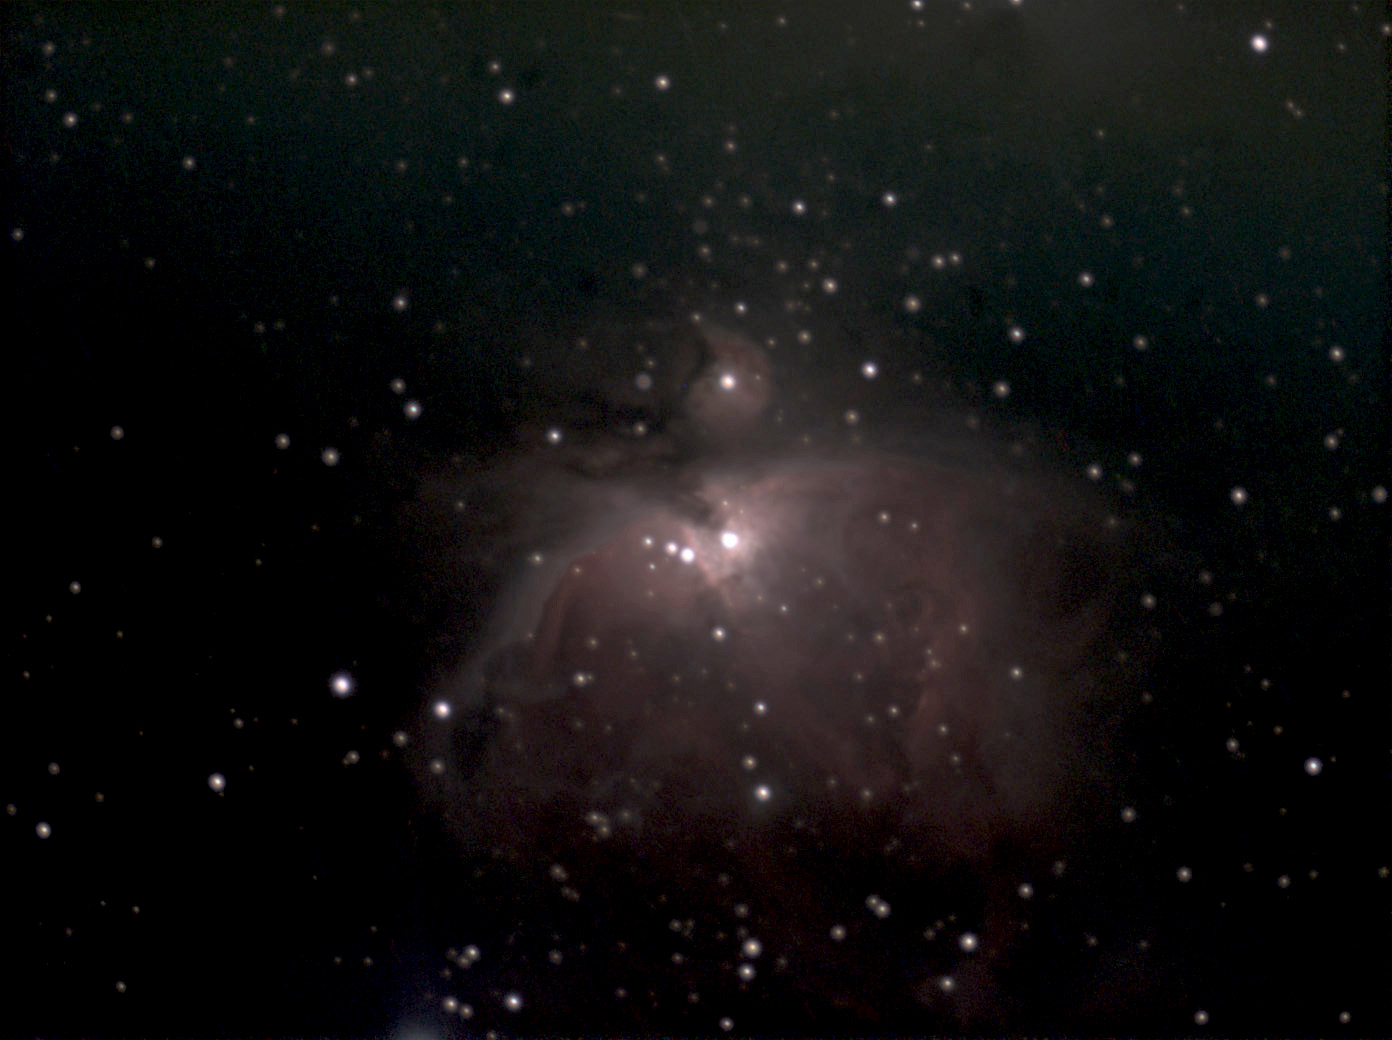
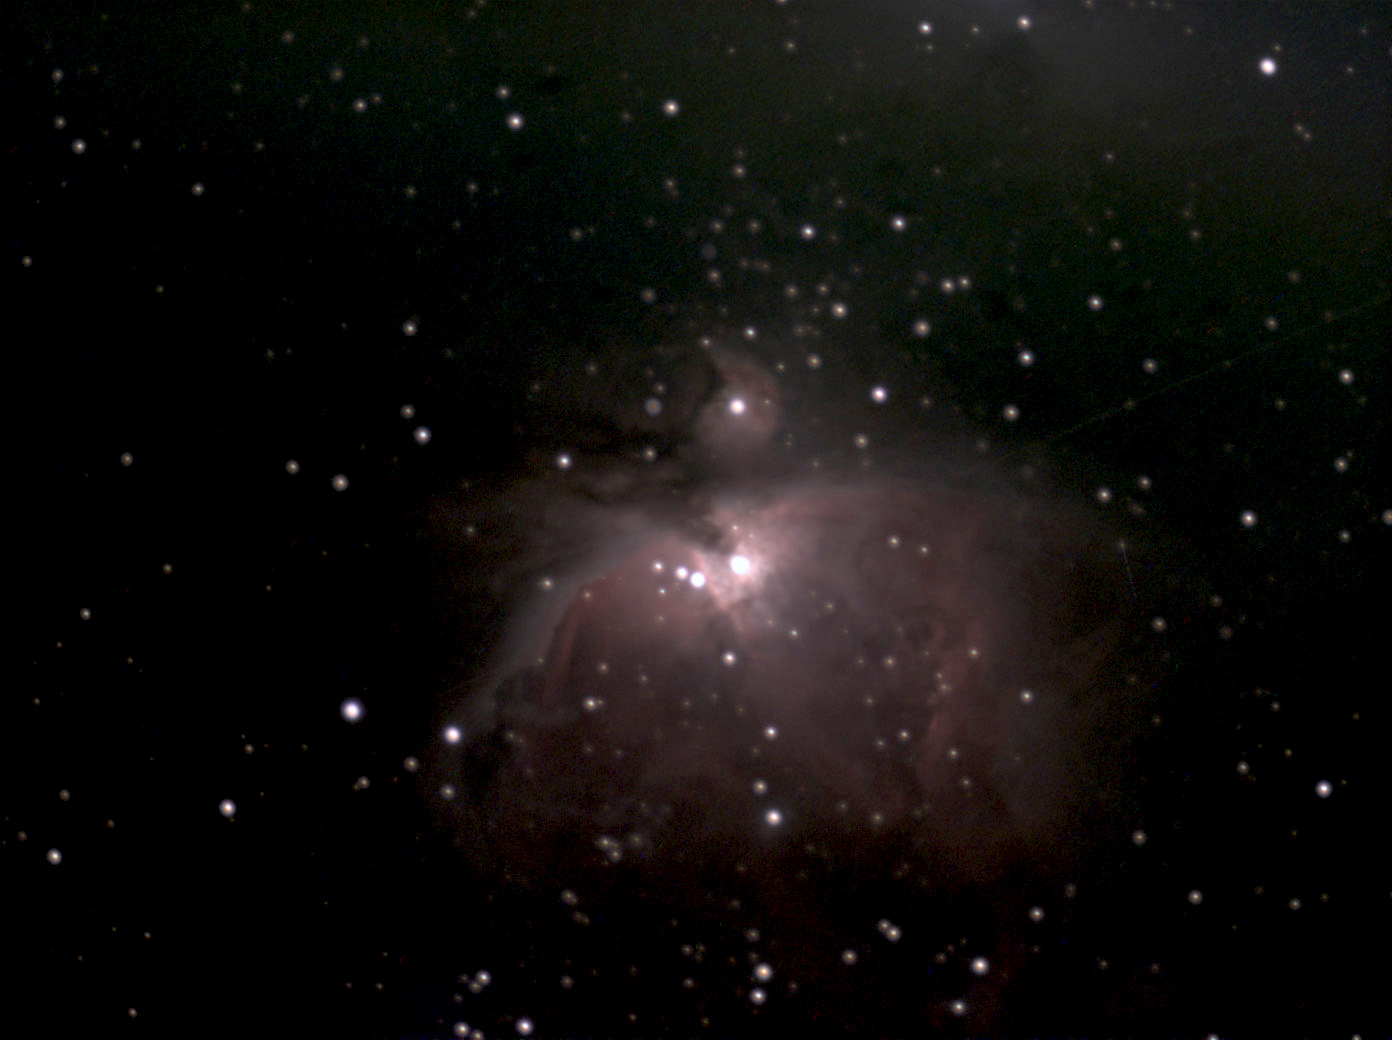
The polar alignment and the "normal" alignment (1-star with Rigel; later 2-stars with Rigel and Castor) were not very precise; for Castor I had to nearly lie on the ground... My targets were M 42/43 as well as M 105 with the galaxies NGC 3384 (elliptical) and the smaller NGC 3389 (spiral). The stars were not quite as bloated as the day before with PS72/432 (because the C5 is not a refractor, as I learned later)..
 |
 |
 |
||
M 42/43 - Apr 4, 2021 (15 s) |
M 42/43 - Apr 4, 2021 (15 s) |
M 42/43 - Apr 4, 2021 (15 s) |
||
 |
|
 |
||
M 42/43 - Apr 4, 2021, photo on top processed |
M 42/43 - Apr 4, 2021, photo on top processed |
M 42/43 - Apr 4, 2021, photo on top processed |
Photos: M 42/43 with C5 and Atik Infinity
Preliminary Conclusions
To be able to operate the AZ-GTi mount as an EQ mount, I had to buy a few things, learn some things, take some things from manuals or ignore them. My way there was by no means straight, especially since Sky-Watcher supports this configuration only "unofficially" and does not document it. This made everything even more difficult for me than if I had switched from an AZ mount to a normal EQ mount. All in all, I now believe to have clarified all questions and to be able to operate the AZ-GTi mount in EQ mode even for EAA.
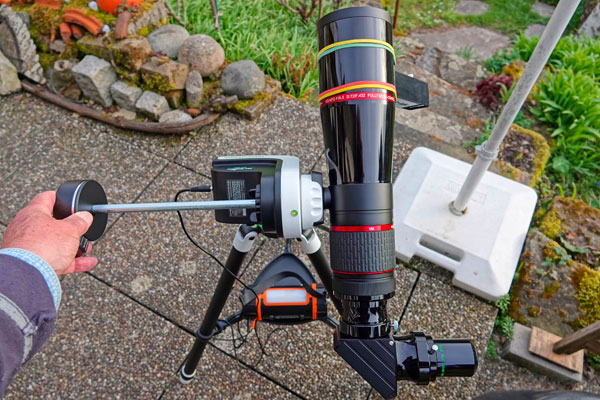
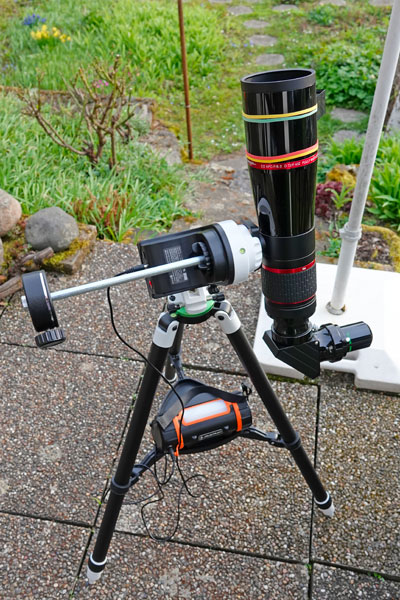
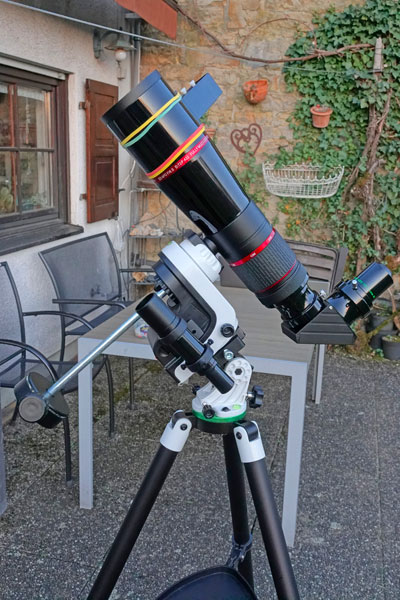
And this is how my setting looks like with the PS 72/432 refractor and with the C5 (the tube points North, the wedge South):
|
|
|
According to tests I did on June 8, 2021, it seems to be irrelevant whether the screw of the prism rail points to the left or to the right, that is, in which direction the tube is inserted into the prism rail (in contrast, with the azimuthal mode of operation where there is a "preferred direction" (tests of June 7, 2021), which I marked on the mount).
What is still missing, is a polar finder to be able to operate the mount with longer exposure times. The handling of the field rotation is also still an open question for me so far. But as far as I know, there should be none for EQ mounts...
Update
Since June 2021, I have no longer operated the AZ-GTi in EQ mode, but for various reasons only in AZ mode. I therefore cannot report anything more current here...
| Note: In the beginning of October 2024, I sold my Sky-Watcher AZ-GTi mount head, including the Sky-Watcher wedge. I therefore can no longer report any experiences with this mount here. |
Links
- Sky-Watcher Company Website, USA: www.skywatcher.com - AZ-GTi mount: skywatcher.com/product/az-gti-mount
- Pages from German distributors for the Sky-Watcher AZ-GTi mount head:
- Teleskop-Service (here I bought the mount head): www.teleskop-express.de/shop/product_info.php/language/en/info/p10011_Skywatcher-AZ-GTi---azimutaler-GoTo-Montierungskopf-ohne-Stativ.html
- Astroshop: www.astroshop.eu/alt-azimuth-with-goto/skywatcher-mount-az-gti-goto-wifi-without-tripod/p,55178
- Teleskop-Spezialisten: www.teleskop-spezialisten.de/shop/Telescope-Mounts/Skywatcher-Mount-AZ-GTI-with-Goto-and-Wi-Fi-Freedom-Find-patented-dual-encoder::3497.html?language=en
- Sky-Watcher AZGTi Mount with new dual mode AZ/EQ Firmware (Wolfie6020, video): www.youtube.com/watch?v=By6mBcMspGQ
- AGTi update AZ to EQ (Astronomy and Nature TV): www.youtube.com/watch?v=bLdkgLIGDfc
- Setting up the AZ-GTi Mount in Equatorial mode - for portable Astrophotography! (Cuiv, The Lazy Geek, video): www.youtube.com/watch?v=xJmntIr50lk
- New Skywatcher AZ GTi goto wifi mount (thread started by Gavster on CloudyNights): www.cloudynights.com/topic/586532-new-skywatcher-az-gti-goto-wifi-mount
- AZ-GTi mount in equatorial mode (Oliver Gutiérrez): starlighthunter.com/articles/az-gti-equatorial-mode/
- See also my page offering Astronomy Links.
|
made by |
| 28.11.2024 |