My Collimation Experiences
What Is Collimation, Why Do I Need a Collimator? | Collimator Basics and the Baader Laser Collimator Laser-Colli Mark III | Collimation Briefly Explained (Newton Telescopes) | Collimation of My Telescopes | References
Archive
On this page, I present my personal experiences with collimating my various Newtonian telescopes and also provide some background information on this topic. Please note that I no longer own any Newtonian telescopes.
Note: I sold the Meade LightBridge 10" Dobson telescope in March 2016 and gave away the Sky-Watcher Heritage 76 telescope at the same time. In spring 2017 I also gave away the Sky-Watcher Heritage P130 to a friend. I therefore can no longer report any experiences with these scopes here. Finally, in mid-May 2021, I also sold the the Baader Laser-Colli Mark III to a starfriend. |
What Is Collimation, Why Do I Need a Collimator?
In optic, the parallel orientation of light beams is called collimation; in the broadest sense the word collimation simply means "to align" or "to adjust." Newtonian reflector telescopes are considered as prone to maladjustment (also called decollimation), for example as a result of rough transport (during the delivery or when brought to an observation place).
To adjust misaligned telescopes correctly, a collimator is used. A collimator using a laser beam is also referred to as a laser collimator. In the case of a Newtonian reflecting telescope, the primary and the secondary mirror must be adjusted so that they are mutually centered as well as centered on their optical axes. Other types of telescopes like refractor telescopes can also be decollimated / maladjusted, but here I cover only Newton telescopes (and even only Dobsonians, but that's irrelevant...).
Since I was not satisfied with the performance of my telescopes, I decided to buy a laser collimator to improve the adjustment of my telescopes. In retrospect, however, the observation conditions (the "seeing") were probably more responsible for the unsatisfactory performance of my telescopes than their misalignment. Our sky is too light-polluted, and many objects that I observe are too close to the horizon, so that air turbulence also comes into play...
Collimator Basics and the Baader Laser Collimator Laser-Colli Mark III
Most laser collimators that are offered commercially have a very similar structure. They feature
- a 1.25" sleeve for using the laser collimator at the telescope instead of an eyepiece,
- a "laser pointer", which emits a focused red laser beam, and
- a 45 degrees inclined reflector or frosted glass with or without a "target mark" on which the quality of the calibration can be judged.
The 45-degree tilt makes it easier to assess the quality of the adjustment, when turning the adjustment screws for the primary mirror at the lower or rear end of the telescope. Some devices also allow you to adjust the intensity of the laser beam (usually lasers are, at least in the dark, too bright). For copyright reasons, I do not present any images of commercial laser collimators here, and instead, would like to refer you to the pages of the respective distributors (see References).
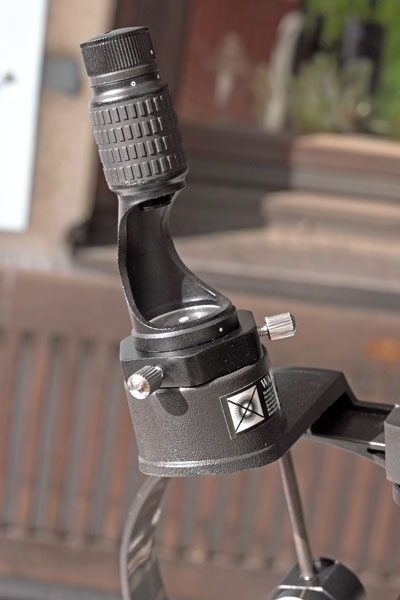
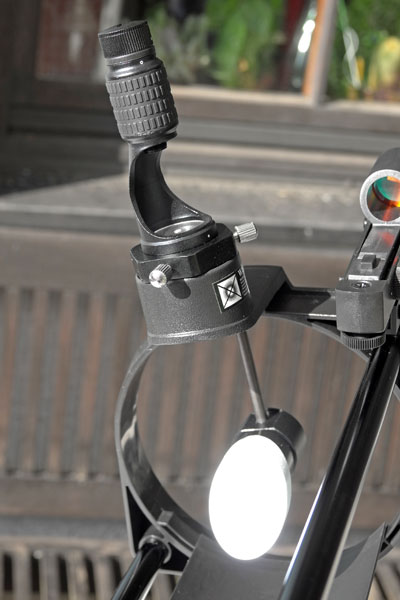
Baader Planetarium offers a laser collimator, called Laser-Colli Mark III (see photos below), which differs from other collimators by having a vertically mounted transparent disc with a central hole and a grid of crosses to show the position of the the laser dot. Thus, one can observe the adjustment process when adjusting the primary mirror. Moreover, the device has a particularly large cut-out, which also reduces its weight.
The Laser-Colli Mark III with package and instructions |
Laser-Colli Mark III in "off" state |
Laser-Colli Mark III in "on" state: Laser beam made visible |
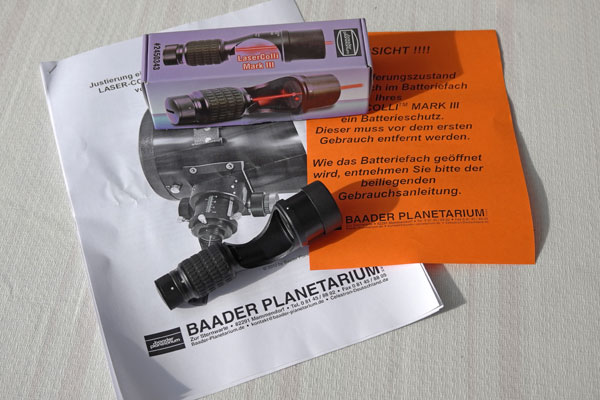
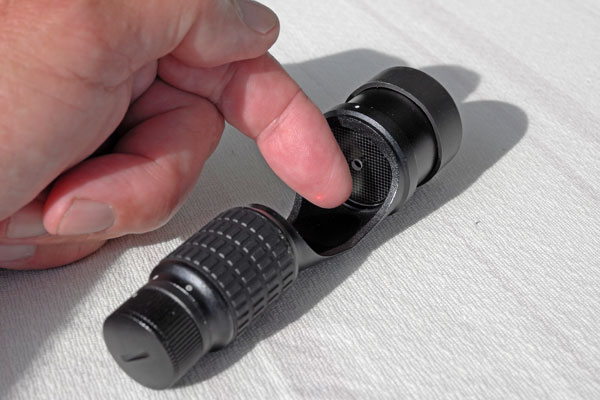
Photos: Laser collimator Laser-Colli Mark III from Baader Planetarium
Since this collimator was selected in a comparative test by the magazine Night at Sky in 2010 as the winner, I decided for it. It is a little more expensive (85 EUR) than other devices (but there are also much more expensive devices ...), but Baader is considered to be a renowned manufacturer of astronomical products, and therefore, I hope that the device was adjusted properly at the factory (you can re-adjust it).
Note: In the meantime I found out that regrettably the on-off switch of the collimator is unreliable. Therefore, it can take quite a lot of attempts until the collimator is working...
Update: In mid-May 2021, I sold the the Baader Laser-Colli Mark III to a starfriend. It also looks as if the "switch issue" was just a battery issue...
Collimation Briefly Explained (Newton Telescopes)
Most commercially offered collimators use a laser beam, thus, they are laser collimators (or adjusting lasers), and operate according to the following principle: The laser beam...
- originates in the collimator and thus, at the position of the eyepiece,
- is reflected by the secondary mirror and sent to the main mirror,
- is reflected by this and sent back to the secondary mirror, and
- is eventually reflected by this back into the collimator where it hits a reflector, frosted glass or glass plate ("reference plane" called by Baader Planetaium for the Laser-Colli III), which serves for adjustment.
Ideally, the beam should be reflected back into itself. When mirrors are, however, misaligned, it hits the plate next to the starting point (sometimes, it even hits a surface within the telescope, when the mirrors are misaligned). The aim of adjusting a Newtonian telescope is thus, to adjust the mirrors, that is, the catch (or secondary) and the main mirror so that the beam is reflected back into itself. The adjustment using an adjusting laser is carried out in two steps:
- First, the secondary mirror is adjusted (if possible).
- Then, the main mirror is adjusted (if possible).
Below I will outline only the principle of adjustment. For details please refer to the manual of your own adjustment laser. All in all, the adjustments take only a few minutes, provided that all the conditions are met for an adjustment (center marker present, adjustment screws on main levels available, see below).
Note: On YouTube there are numerous videos (in English) available that describe the collimation of a Newtonian telescope (see References).
Step 1: Adjustment of the Secondary Mirror
>> Set up the telescope horizontally so that any adjustment screws that might fall down cannot fall onto the precious primary mirror.
In this step, the laser spot is moved to the center of the main mirror. To do this, three adjustment screws (Allen or Phillips screws) that hold the secondary mirror are adjusted - gently in small steps while observing how the light spot moves. When doing this, look into the telescope from the front/top.
Problem: Better telescopes have an ring-shaped mark
at the center of the primary mirror (the label does not interfere with the
observation), into which the light spot can be moved. With cheaper telescopes
this label may be missing. Then it is very difficult to find the center of
the mirror.
Baader therefore recommends in the latter case to remove the main mirror before
any adjustments and, using a cardboard template and a felt pen, to apply a ring-shaped
marking on the main mirror. For two of my telescopes, however, it seems impossible
for me to remove the main mirror, and I also do not know whether I really would
dare to do this...
Step 2: Adjustment of the Main (Primary) Mirror
>> Set up the telescope horizontally (if not already done so) and go to the back side of the telescope.
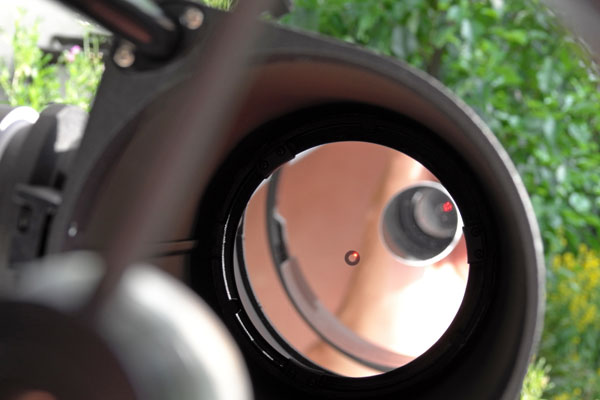
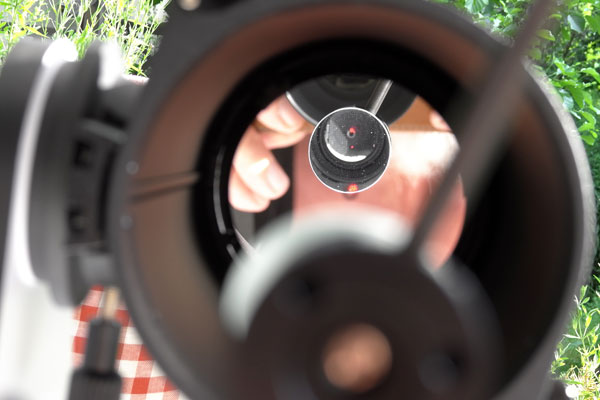
In this step, the laser dot is moved to the center of the reflector/glass plate of the laser collimator (for the Baader Laser-Colli into the hole of the glass pane, so that the light spot can not be seen!). For this purpose you turn three adjustment screws on the telescopes bottom and observe how the light spot moves. Thanks to the 45 degrees inclined reflector / frosted glass or the cutout in the device, you can do so from the back end of the telescope and track the movement of the light spot (or you ask someone to track the movement of the light spot).
Note: Some telescopes use only three screws with pressure springs for adjusting the primary mirror, others have three additional locking screws. Larger telescopes have pairs of tension and compression screws. In the case of the locking screws, the alignment process has to be performed "iteratively", because the locking screws can also change the alignment - so this can be somewhat tricky ... This is probably also true for the pairs of screws.
Problem: With cheap telescopes, it may be the case that the primary mirror is not adjustable. Here one can only hope that it adjusted reasonably accurate at the factory...
Collimation of My Telescopes
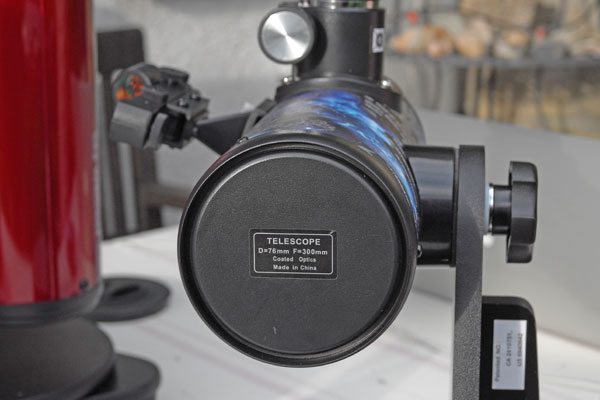
In the following, I illustrate briefly the collimation of my Newtonian telescopes (Dobson), where such an adjustment is possible at all. I can already give away that you cannot adjust the main mirror of the Heritage 76- and 100P telescopes. So you can only hope that it was already correctly adjusted at the factory...
Heritage 76
For the Sky-Watcher Heritage 76 telescope, none of the preconditions for a successful adjustment is satisfied: Neither has the main mirror a center mark, nor can you adjust it on your own - it is installed permanently. This is confirmed in discussion threads in astronomy forums (see References):
- Thomas:
The secondary has 3 small adjustment screws but the primary can't be moved
at all. There's also no center mark on the primary so it's not like you'd
know by adjusting the secondary if it is collimated or not.
Really there's nothing that can be done on these and they're meant to use as-is. - Luminova11: There are 3 collimation screws on the secondary, which when used together can also adjust the inward travel as there is no centre screw. There are no primary collimation adjusters although with care some adjustment is available by slackening the mounting screws and moving the rear cap by hand. No adjustment was needed however as it was perfectly collimated out of the box.
- Longjohn54:
Primary is fixed and looks to be aligned in the tube.
Secondary is attached by a threaded rod into a captive nut which is held in place with a locknut. The locknut is a standard 7mm nut however the captive part is round with two flats on it. The flats are 90 degrees from the tube entrance so will need a spanner with a right angled offset to hold it. ...
The secondary is pointing at about 30mm to the left of the main mirror's unspotted centreline. Once straightened it should be reasonably easy to collimate with the normal three screws (somewhat fiddly though).
Thus, since at least three Phillips screws for adjusting the secondary mirror are available, I turned these, until the laser beam was approximately reflected back into itself. I have no idea, whether this resulted in a usable adjustment... I'm not sure whether these screws are intended for an adjustment at all, or just to hold the secondary mirror...
Screws for adjusting the secondary mirror |
Ditto |
The primary mirror cannot be adjusted |
|
Left: The laser light dot meets the reference plane slightly next to the hole so that it is visible on the photo. |
|
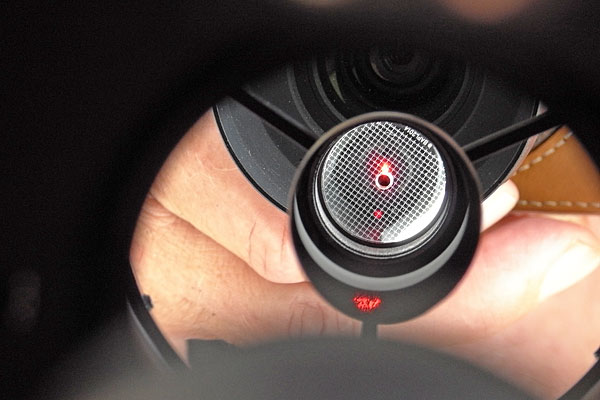
I repeated the adjustment, and it seems to be OK on the whole. Unfortunately, the performance of the Heritage 76 does not satisfy me at all. The Venus as a crescent and the Saturn ring were virtually unrecognizable (about 10 July, 2015), because the view showed strong interference effects at the center. This might have also been caused by air turbulence, but in my other telescopes, I could recognize both objects well (which, of course, was to be expected based on the telescope data as well).
Heritage 100P
The Sky-Watcher Heritage 100P telescope as well does not satisfy any of the preconditions for a successful adjustment: Neither has the main mirror has a center mark, nor can you adjust it on your own - it is installed permanently. This is also confirmed in several astronomy forums (see References) - and the telescope seems to be well collimated ex works:
- mkettler:
From what I read on the interwebs, the 100p has an adjustable secondary,
but not an adjustable primary. However, I have no experience with the scope
myself.
The general idea at that point would be to adjust the secondary to obtain collimation between the two mirrors. Assuming the primary was properly aligned when they made the scope, this should work. Not normal, or ideal, but it should work. - terrynak: One problem is that the primary mirror isn't collimatable. So I unscrewed the rear end of the scope, center-spotted the primary mirror, then screwed it back on. I then collimate the scope by adjusting the tilt of the secondary mirror by fiddling with the three allen-head screws on the secondary holder until the secondary is aligned with the primary (by looking through a collimation cap attached to the focuser).
- rodhull: I checked collimation of the 100P first, which was spot on out of the box which I was relieved to find (my ST80 is also well factory collimated and I've never had to mess with it)...
- Thanks: I have one and it didn't really need collimating. I used a laser and checked it. At that size mirror you can judge without having it spotted, I tweaked the secondary ever so slightly, the primary was perfect.
Since there are, at least, three Allen screws available for adjusting the secondary mirror (which I only found after a longer search using a flashlight), I turned these until the laser beam was approximately reflected back into itself. The telescope was not quite perfectly adjusted "ex works". I have no idea, whether my effort resulted in a usable adjustment...
Allen screws for adjusting the secondary mirror |
The main mirror cannot be adjusted |
Allen key for adjusting the screws for the secondary mirror in use... |
Reflection of the reference plane in the main mirror |
Ditto |
Ditto |
 |
Left: The laser light dot meets
the reference plane slightly next to the hole so that it is visible
on the photo. |

I repeated the adjustment, and it seems to be OK on the whole. The performance of the Heritage 100P is significantly better than that of the Heritage 76, and after adjusting it, I was able to recognize both the Venus as a crescent and the Saturn with ring (but without Cassini division and details) (about 10 July, 2015). Since both were positioned quite lowly above the horizon, visibility conditions were not really good, and the air was very restless.
Heritage P130
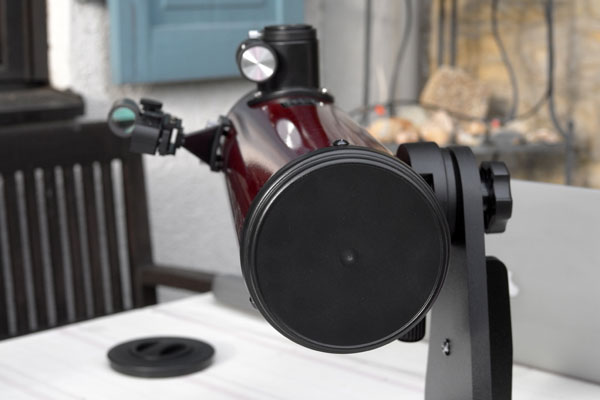
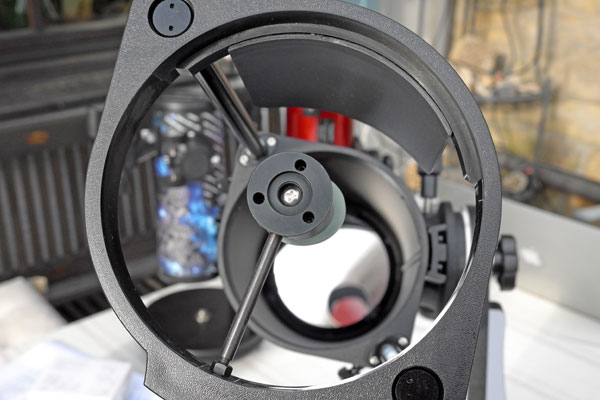
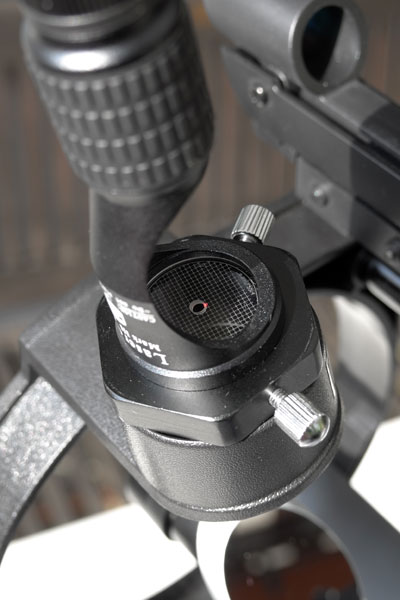
While the Sky-Watcher Dobson Heritage P130 is still a "cheap" telescope, it already fulfils the conditions for an adjustment: The main mirror has a center mark and is adjustable (three larger spring screws and three elongated screws). Therefore, I can show more details of the adjustment process on the photos below.
By the way: You can use the same Allen key as for the Heritage 100P (an IKEA-key) for adjusting the secondary mirror.
Allen screws for adjusting the secondary mirror |
Ditto |
Ditto, detail |
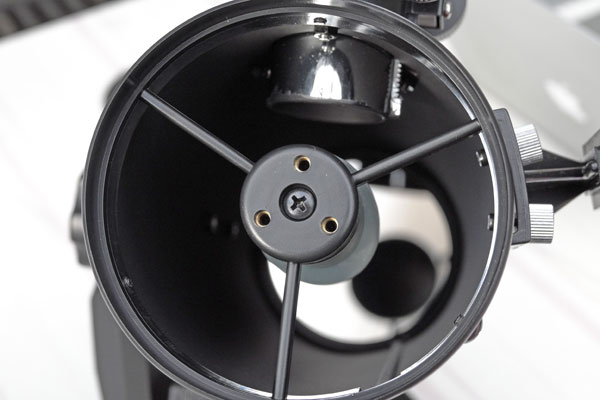
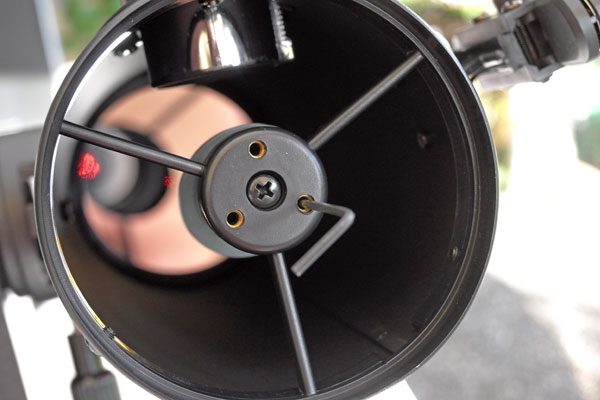
Adjustment and fixing screws for the main mirror |
Ditto |
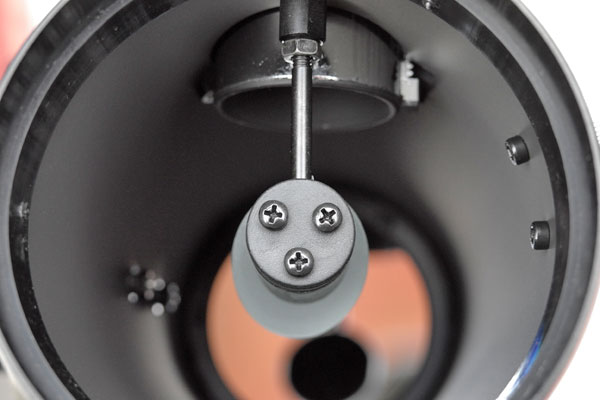
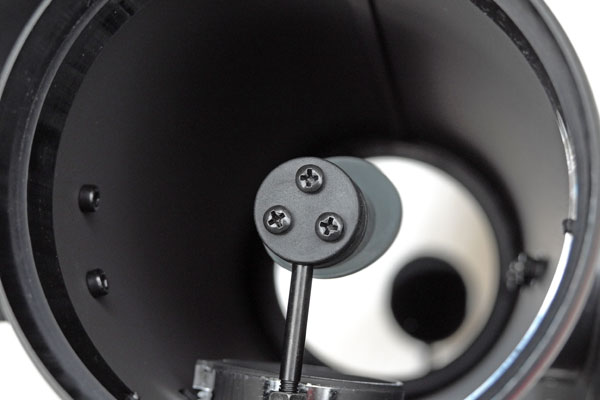
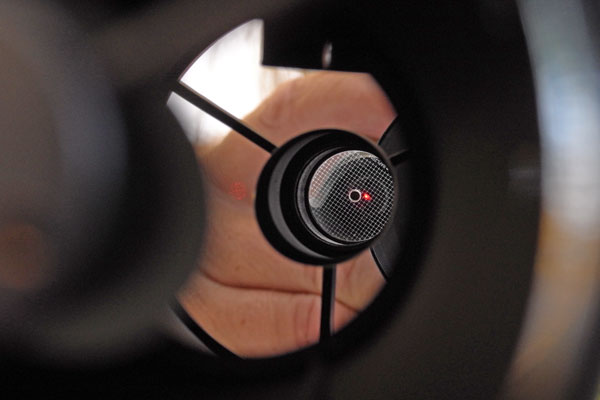
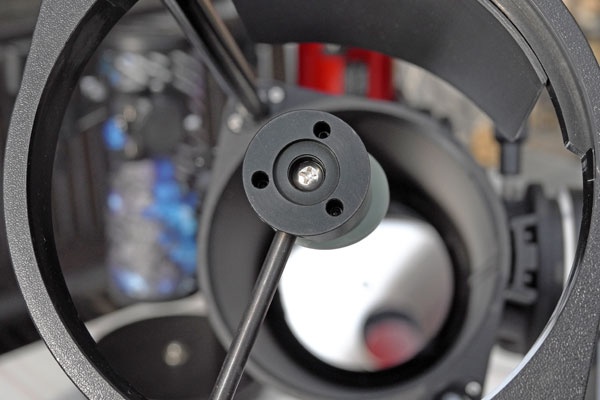
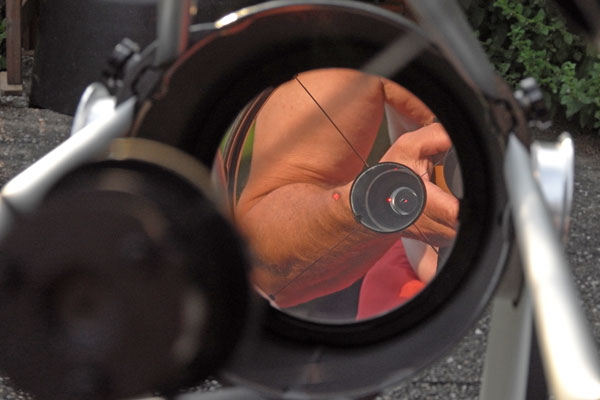
Collimator in the opening for the eyepiece |
Ditto with secondary mirror |
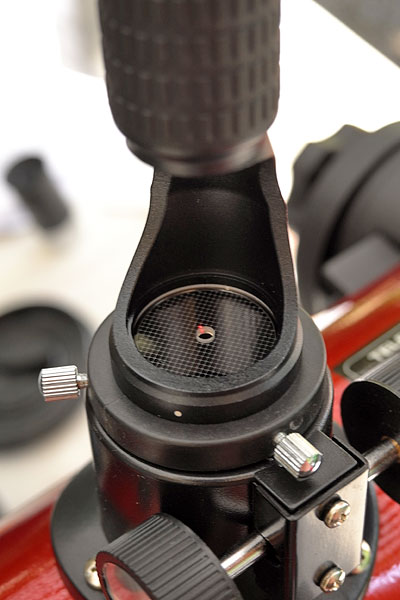
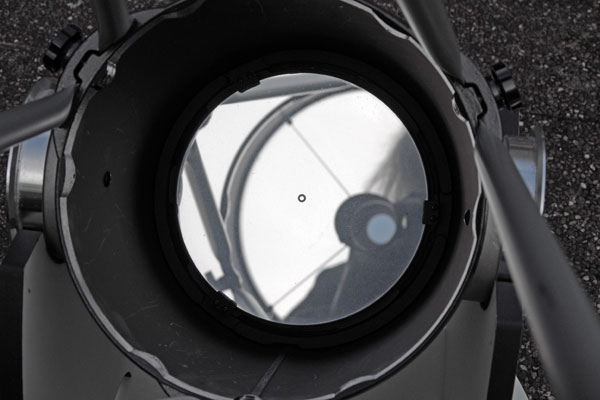
Adjusting the secondary mirror: The red laser light dot meets nearly the center of the mark |
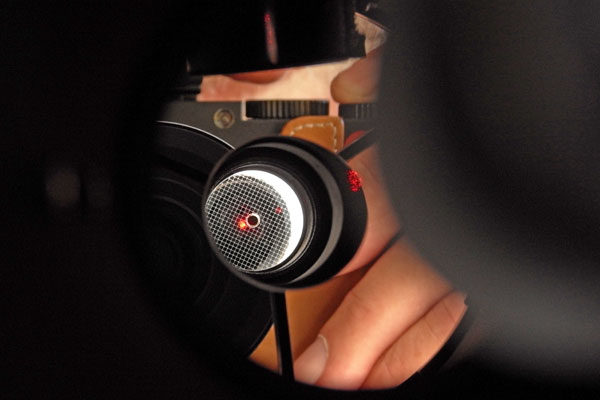
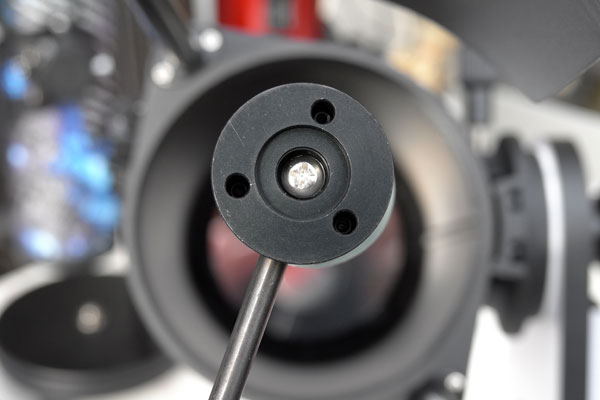
Adjusting the primary mirror: The red laser light dot is at the edge of the reference plane so that it can be seen on the photo |
Adjusting the primary mirror: The red laser light dot is at the edge of the reference plane so that it can be seen on the photo |
||

I repeated the adjustment, and it seems to be OK on the whole. The performance of the Heritage P130 is significantly better than that of the Heritage 76 and also better than that of the Heritage 100P. After adjusting the P130, I was able to recognize both the Venus as a crescent and the Saturn with ring (but without Cassini division and details) (about 10 July, 2015), and both were a little bit larger than with the Heritage 100P. Since both were positioned quite lowly above the horizon, visibility conditions were not really good, and the air was very restless.
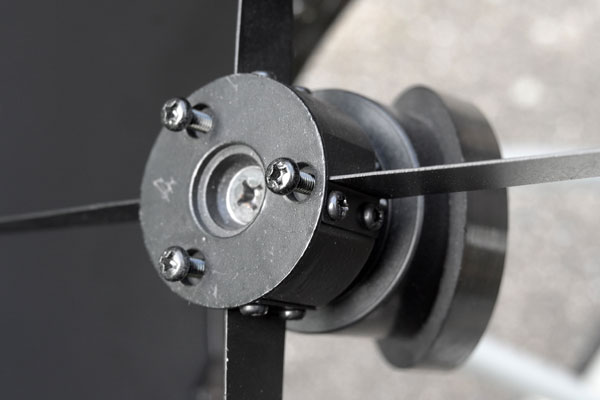
Meade Dobson Lightbridge 10"
The Meade LightBridge 10" Dobson telescope, of course, meets the conditions for an adjustment: The main mirror has a center mark and is adjustable (three larger spring screws and three fixing screws).
Screws for adjusting the secondary mirror |
Ditto |
Ditto, detail |
Adjustment (spring) screws and fixing screws for the main mirror |
Center mark on the main mirror for adjusting the secondary mirror |
Adjusting the primary mirror: The red laser light dot is at the edge of the reference plane so that it can be seen on the photo |
After an initial adjustment, Saturn and Venus exhibited a definite coma at larger magnifications. I also found that I had fixed the main mirror incorrectly. So I had to repeat the adjustment. Here, the secondary mirror got loose, so I had to re-orient it again toward the eyepiece opening. I do not know, whether I managed this perfectly. Anyway, everything is much better, although probably not perfect, after my second adjustment. Venus crescent and Saturn with ring were clearly visible afterwards (about 10 July, 2015), albeit without Cassini division and details. Since both were positioned quite lowly above the horizon, visibility conditions were not really good, and the air was very restless.
References
- Collimators
- Laser-Colli Mark III (Baader Planetarium): www.baader-planetarium.de/sektion/s19/s19.htm
(in
German)
- Test report in Night at Sky (2010): www.baader-planetarium.de/sektion/s30/download/att-may2014_baader-mpcc-mark3_testreview_no-ads-1.pdf
- Test report on the BAADER Laser Colli and the BAADER MPCC III Newton Correktor in Astronomy Technology Today (ATT) (Summer 2014): www.baader-planetarium.de/sektion/s30/download/att-may2014_baader-mpcc-mark3_testreview_no-ads-1.pdf
- Collimation Heritage 76
- Collimating Heritage 76 (astronomyforum.net): www.astronomyforum.net/skywatcher-telescopes-forum/117013-collimating-heritage-76-a.html
Thomas: www.astronomyforum.net/skywatcher-telescopes-forum/117013-collimating-heritage-76-a.html#post1057338591 - Skywatcher Heritage 76 Mini Dob first light review (Luminova11, stargazerslounge): stargazerslounge.com/topic/183695-skywatcher-heritage-76-mini-dob-first-light-review/
- Collimation on a small scale - expert needed (Longjohn54, Central Scotland Observers Group Forum): scottishastronomers.com/forum/index.php?topic=1665.0 and scottishastronomers.com/forum/index.php?topic=1665.msg14554#msg14554
- Collimating Heritage 76 (astronomyforum.net): www.astronomyforum.net/skywatcher-telescopes-forum/117013-collimating-heritage-76-a.html
- Collimation Heritage 100P
- Collimation of heritage 100p: www.astronomyforum.net/astronomy-beginners-forum/180251-collimation-heritage-100p.html#post1057924783
mkettler: www.astronomyforum.net/astronomy-beginners-forum/180251-collimation-heritage-100p.html#post1057924783 - Skywatcher Heritage-100P: www.astronomyforum.net/reflector-telescope-forum/176416-skywatcher-heritage-100p.html
terrynak: www.astronomyforum.net/reflector-telescope-forum/176416-skywatcher-heritage-100p.html#post1057889262
rodhull: www.astronomyforum.net/reflector-telescope-forum/176416-skywatcher-heritage-100p-2.html#post1057917372
Thanks: www.astronomyforum.net/reflector-telescope-forum/176416-skywatcher-heritage-100p-3.html#post105792600
- Collimation of heritage 100p: www.astronomyforum.net/astronomy-beginners-forum/180251-collimation-heritage-100p.html#post1057924783
- Collimation in general
- Astrofotografie-Workshop - Justage von Teleskopen (Rayko Menzel, große Version): www.hatschie.de/EBV/Astro_gross/041.html (in German)
|
made by |
| 12.05.2021 |