Unistellar eVscope - Moon Photos
Introduction | Automatic versus Manual Exposure | Details | Air Turbulence | Comparison with Sony RX10 M3/4 | Conclusions | Links
Archive
On this page I provide some information about observing the moon with my electronic 4,5" Newton telescope Unistellar eVscope 112 mm/450 mm (f/4) (I took part in a Kickstarter campaign in mid-November 2017; my eVscope arrived on January 27, 2020).
Update: Scroll to the bottom of the page for tips for moon photos given by Unistellar!
Note:
- Basically, this page is "outdated" by the article Observing the moon and planets in the Unistellar Help Center. But it shows how I came to similar conclusions by trial and error...
- See page Overview of the Unistellar Pages for just that!
Introduction
The eVscope is primarily designed for the observation of deep sky objects. Planets appear small and are very bright in the eVscope. Because they are so bright, they can only be observed in "Live View" mode. The same is true for the moon, but it just about fits into the eVscope's field of view (its height does not quite fit). Initially, it was not possible to photograph objects observed in "Live View" mode. This was only possible via a screenshot (see photos below). Since version 1.1.0 (October 2020) it is now also possible to save photos in "Live View" mode. This is a great improvement, because it makes taking photos of the moon and the planets easier and because now the complete sensor format can be used.
 |
 |
 |
||
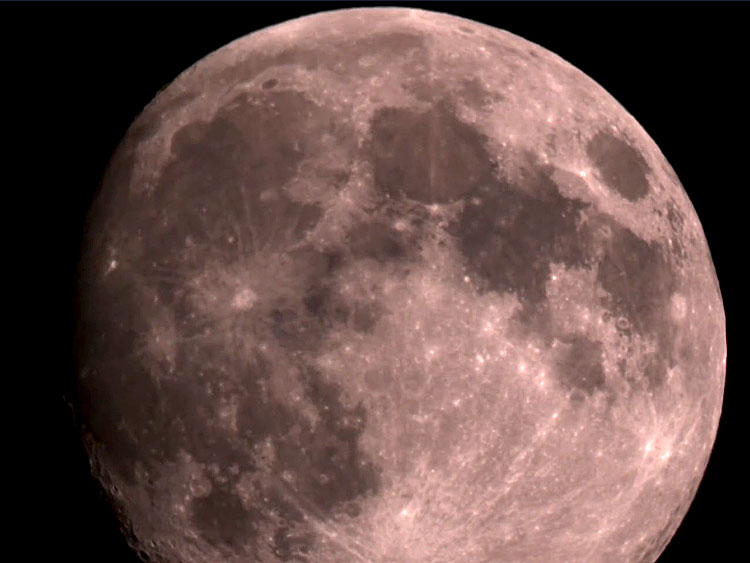
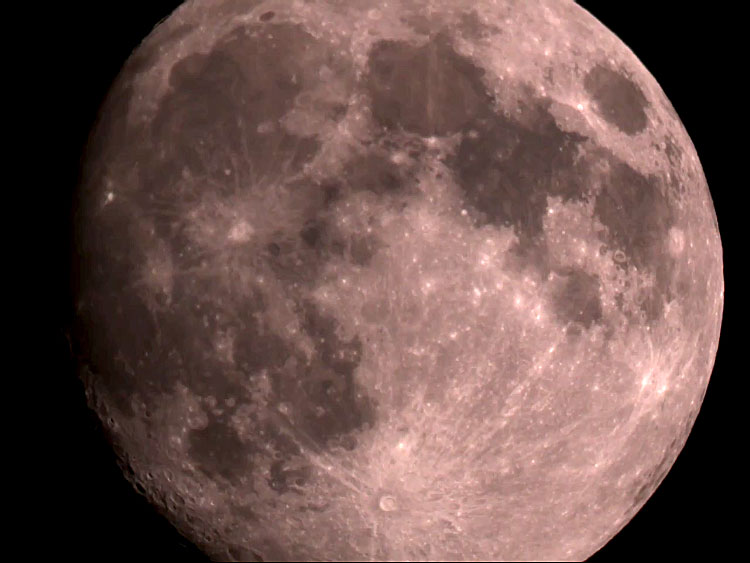
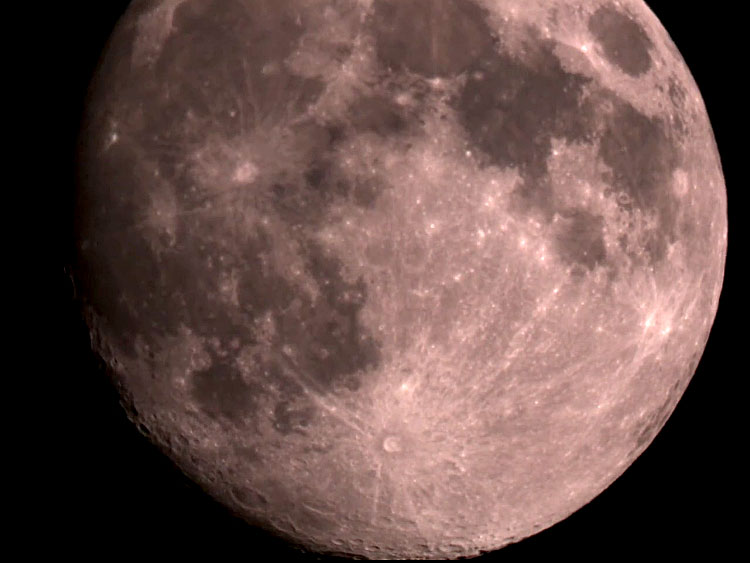
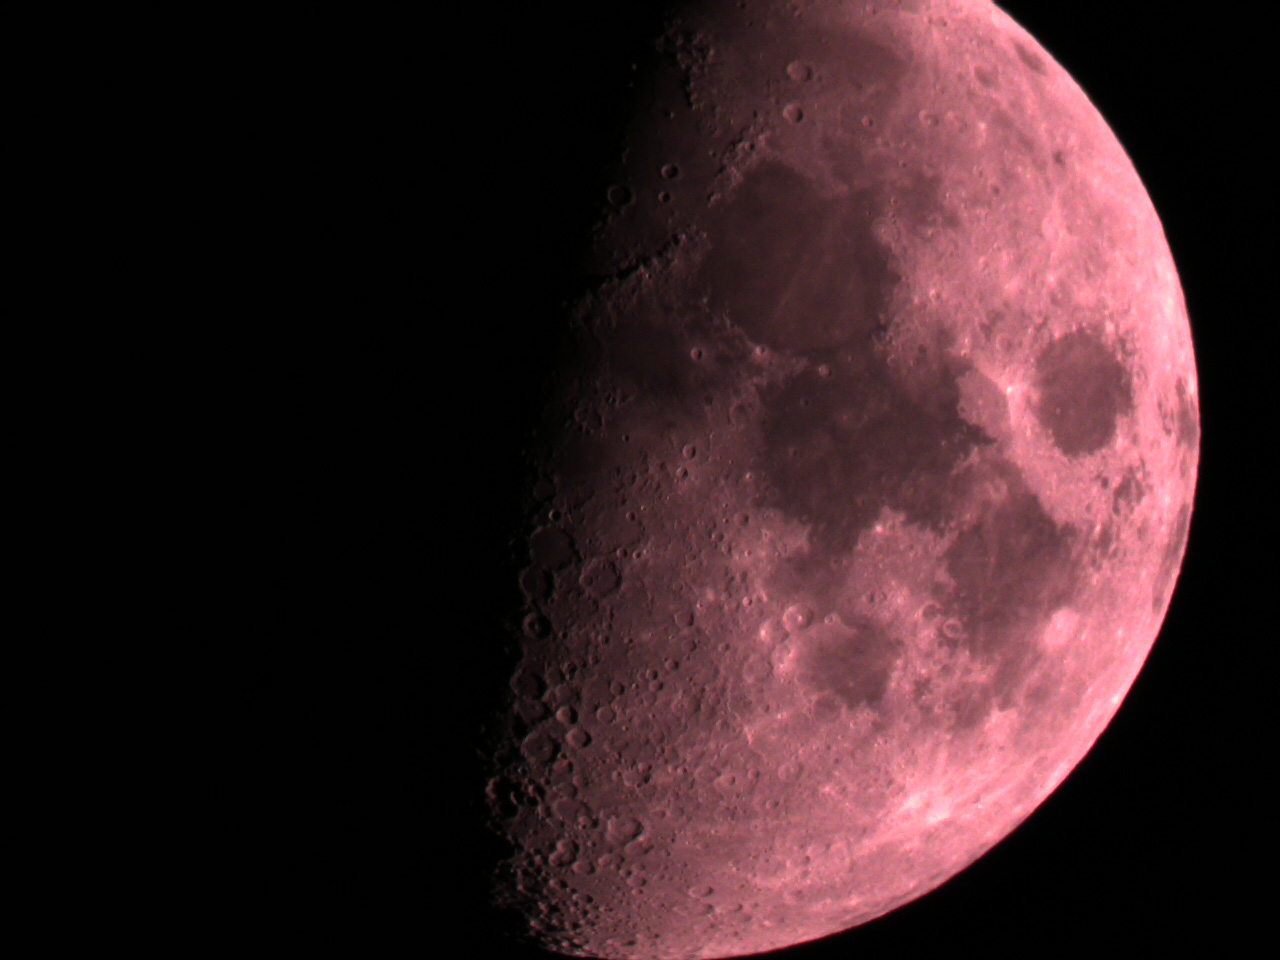
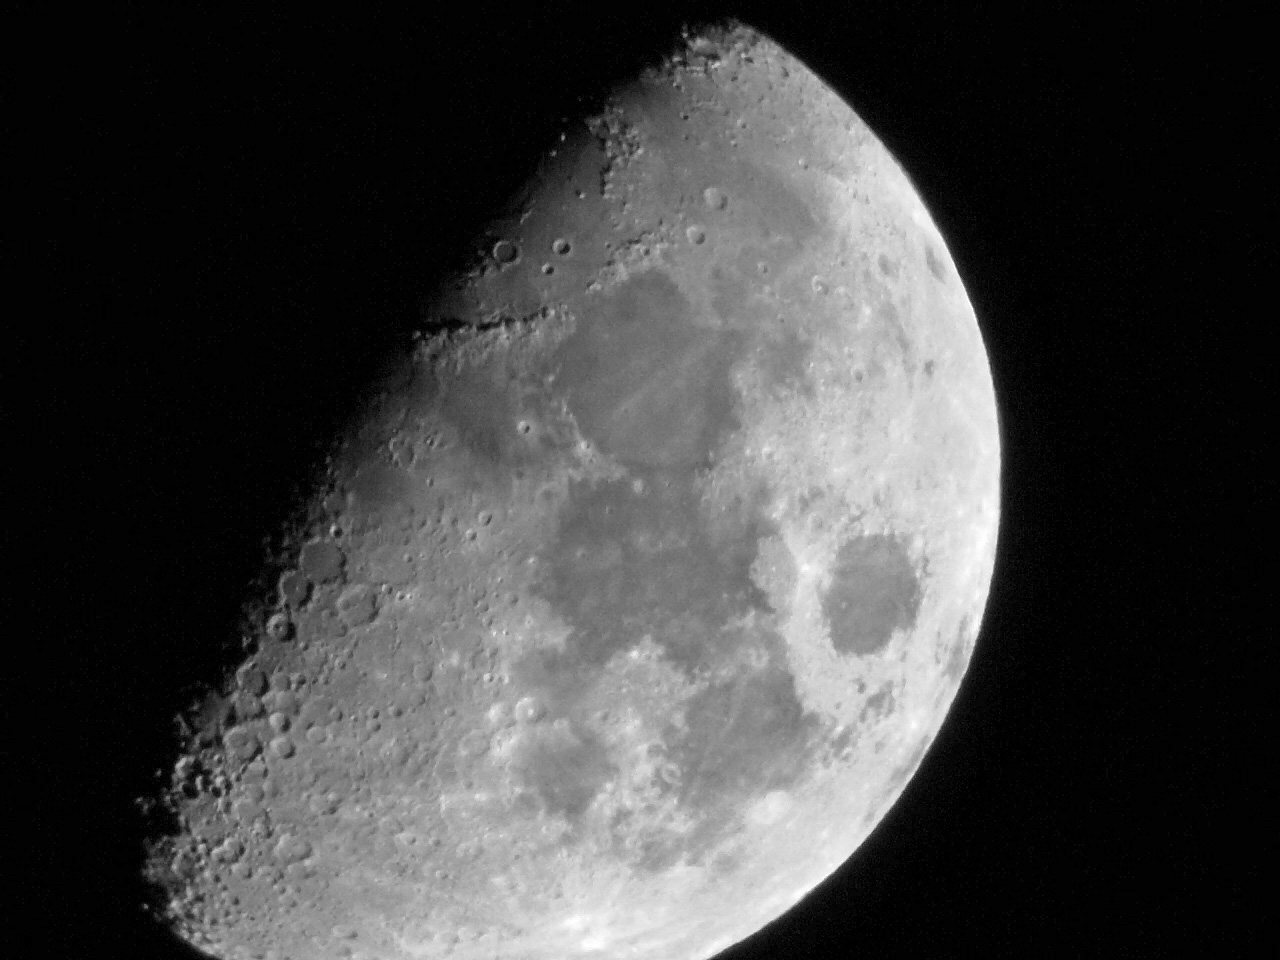
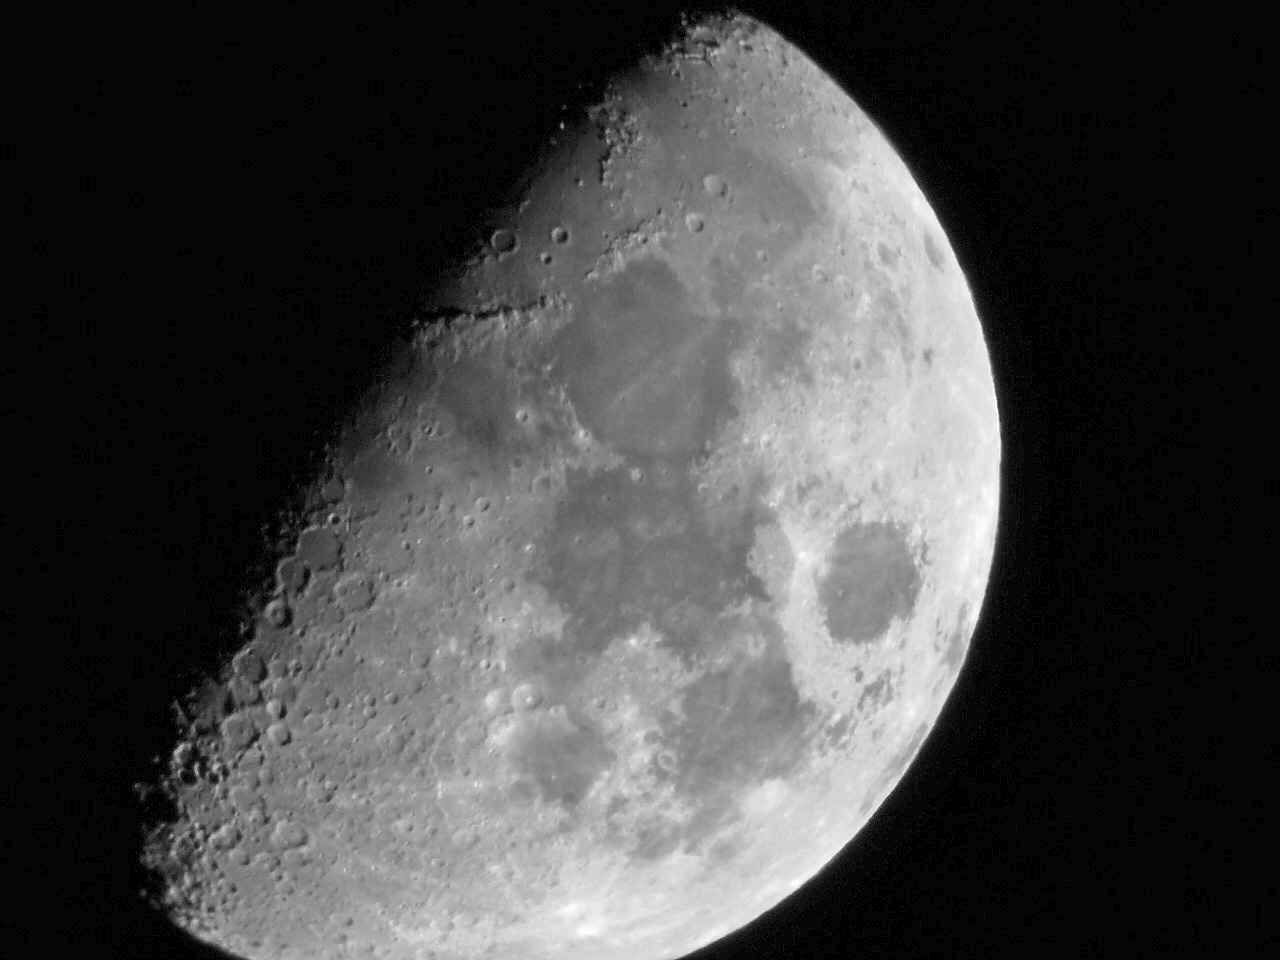
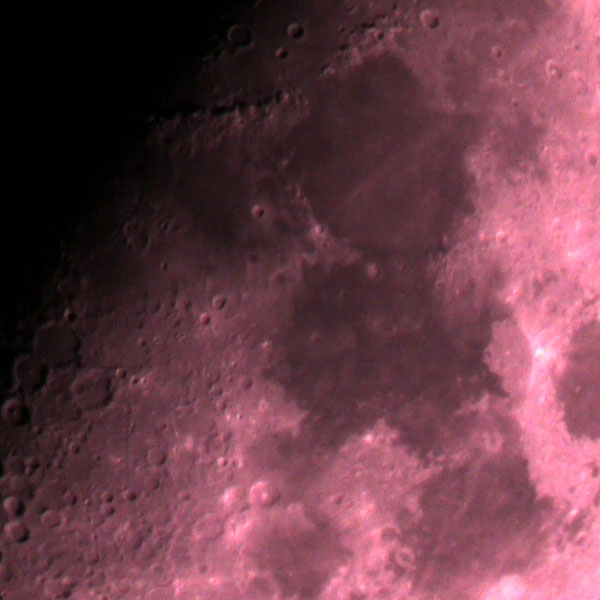
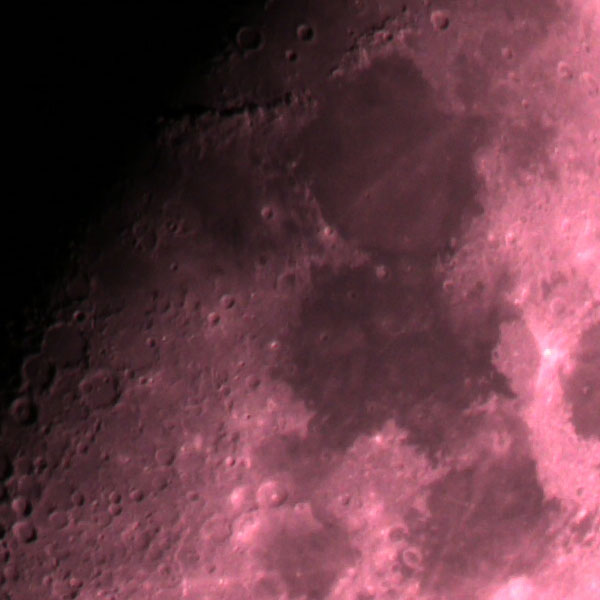
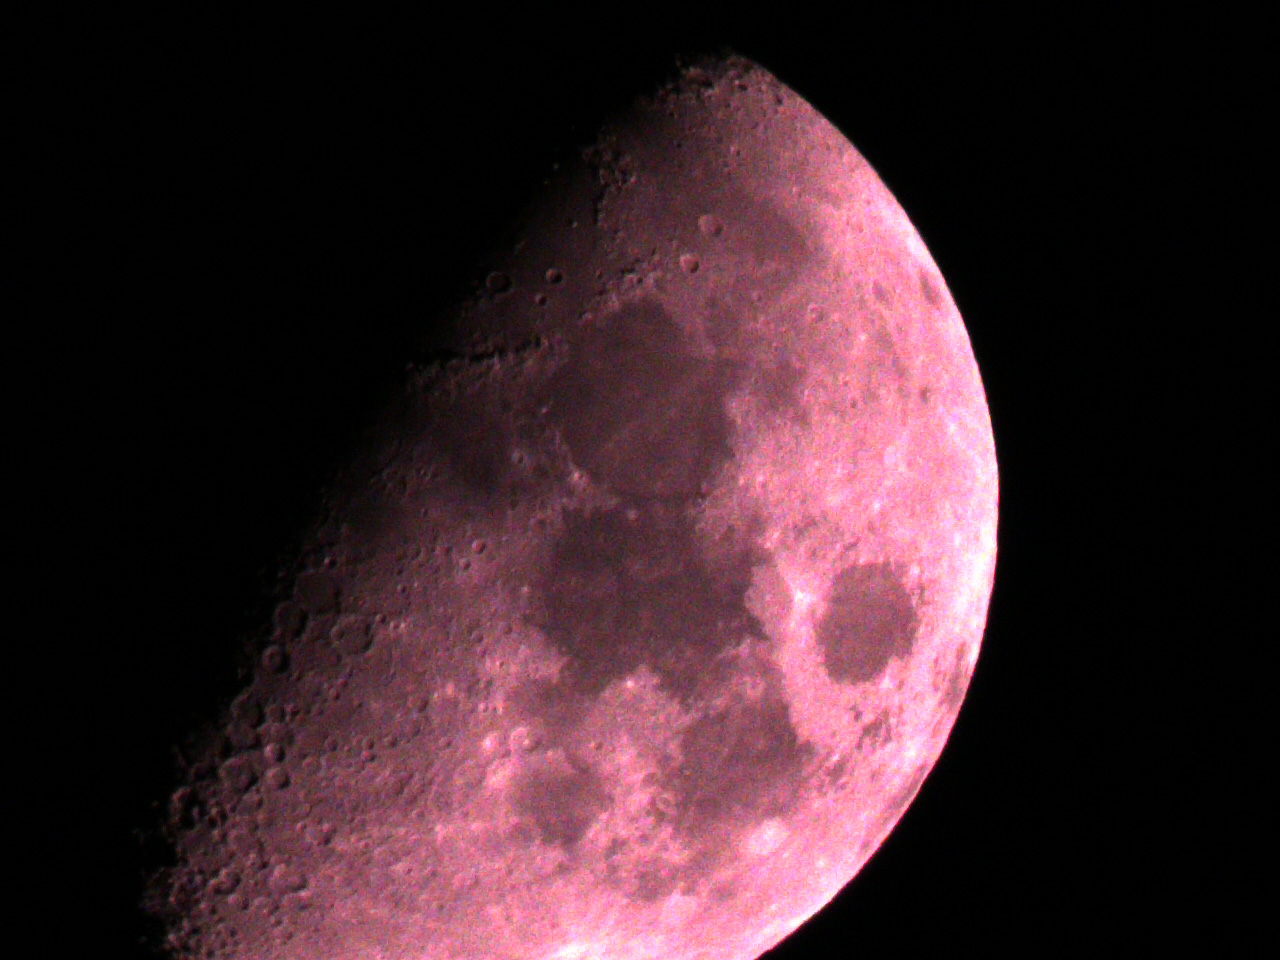
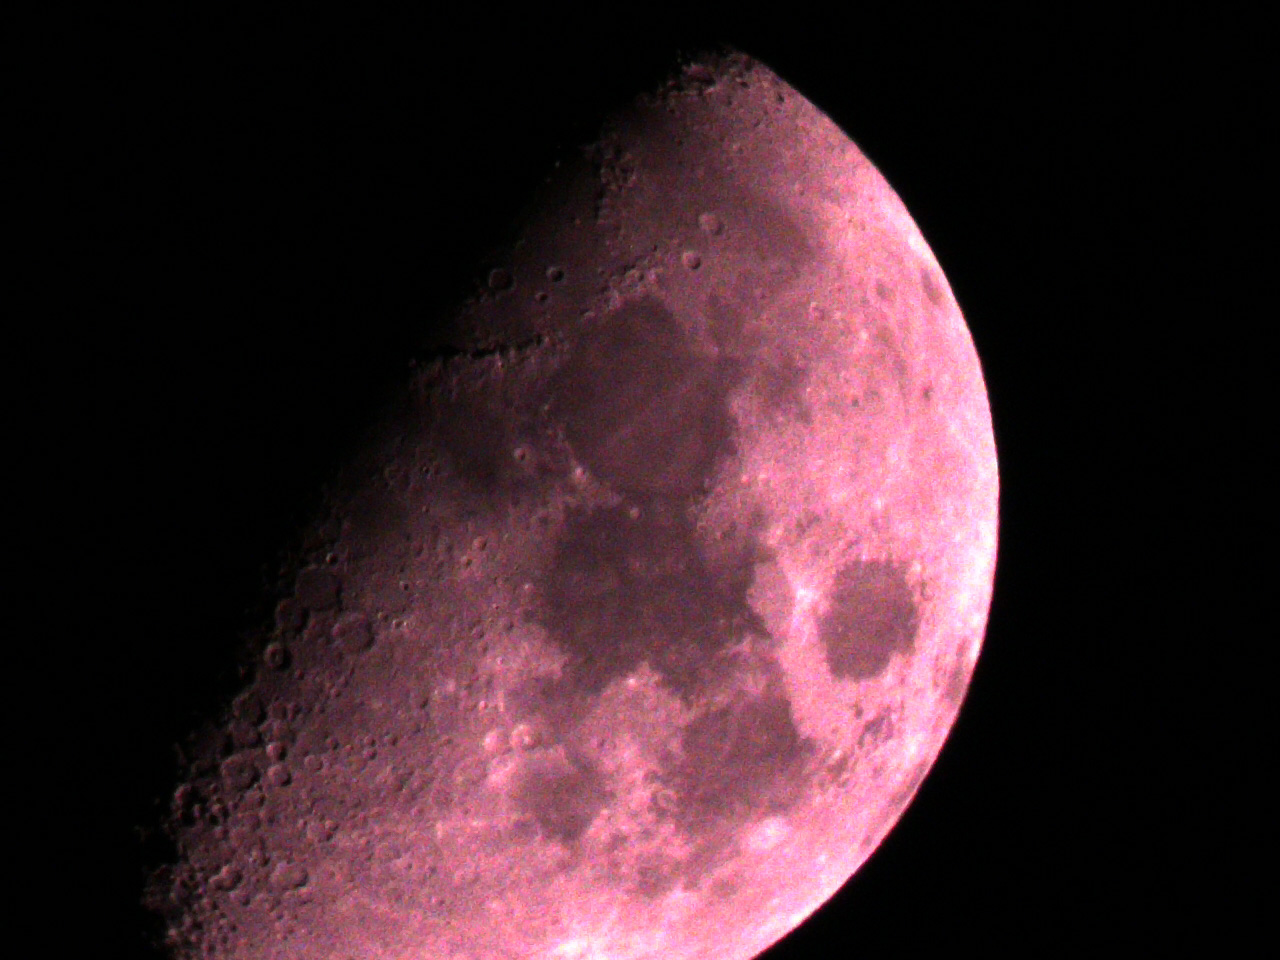
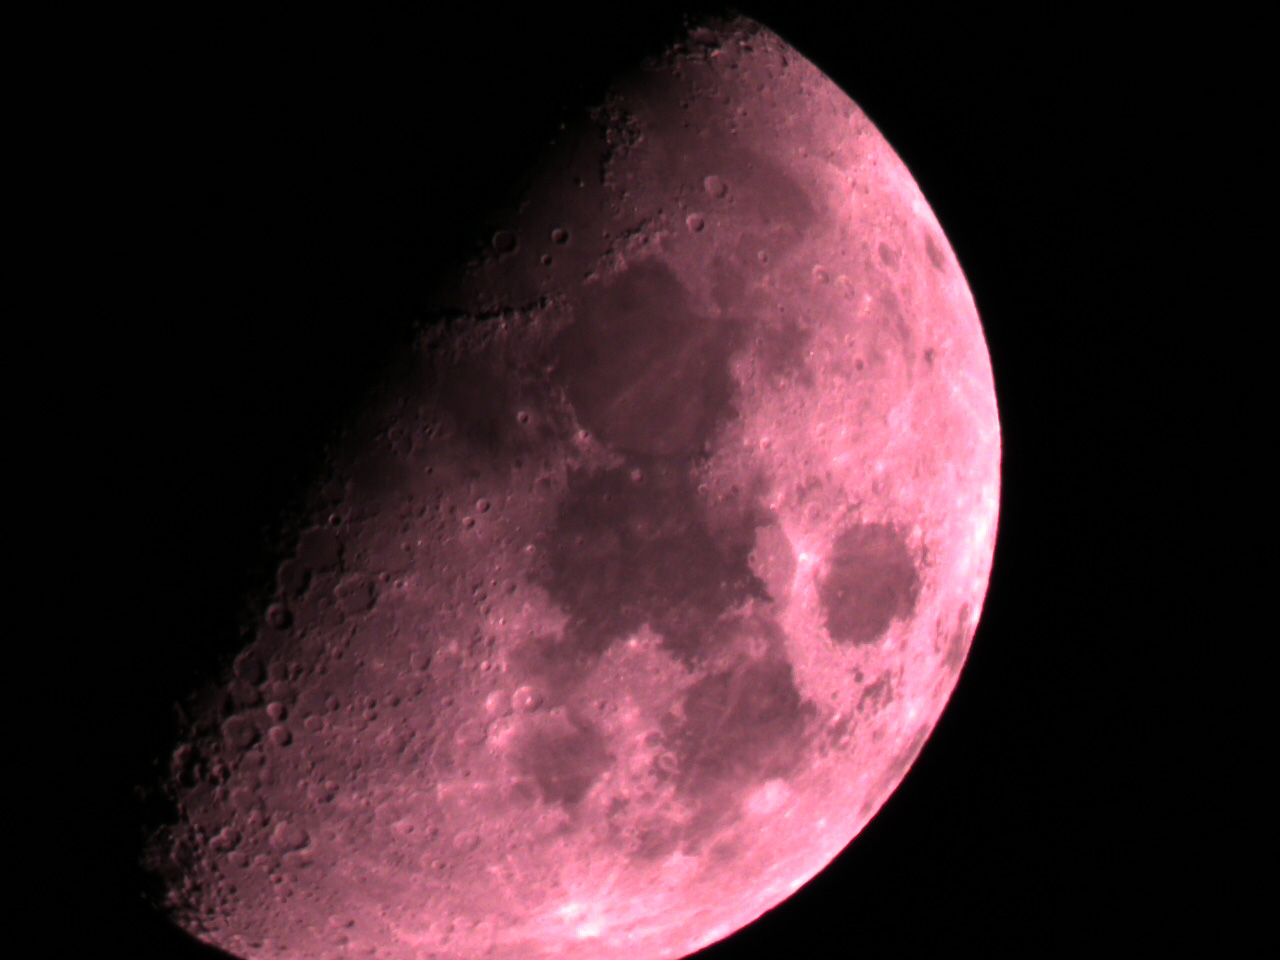
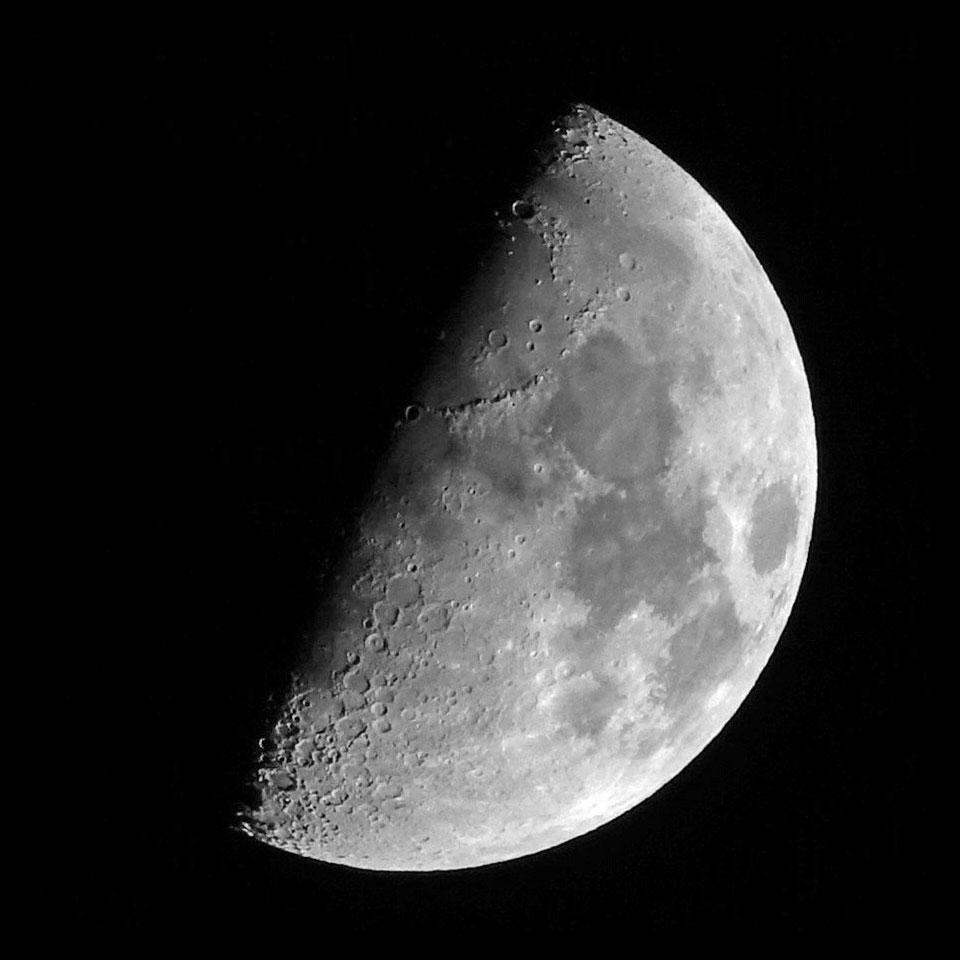
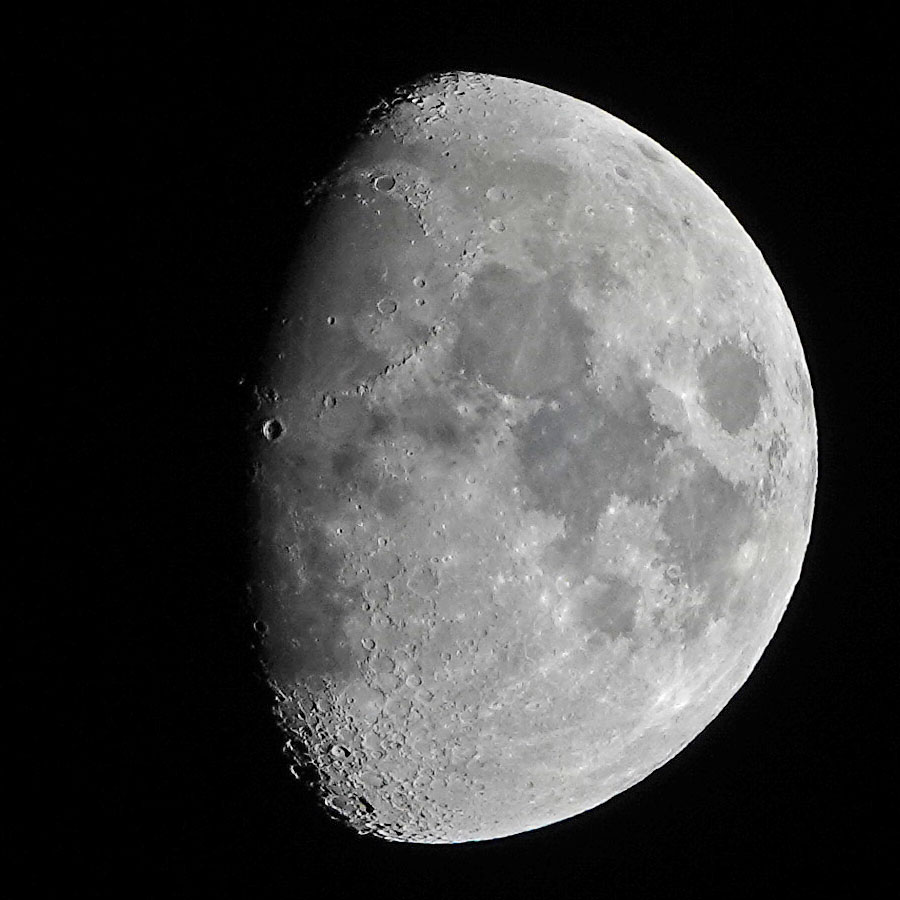
Nearly Full Moon - May 5, 2020; original |
Nearly Full Moon - May 5, 2020; original |
Nearly Full Moon - May 5, 2020; original |
Photos: Nearly full moon photographed with the eVscope in "Live View" mode - sharpened screenshots
From the beginning, the eVscope unfortunately had problems with finding the moon via GoTo. This was still the case when I wanted to observe the moon in late October 2020. With the help of the joystick I was then able to "capture" the moon, but even with a short tap on the joystick keys I was not able to position it optimally, because each tap always resulted in a movement with a minimum size. Planets are easier to find, and because they are so small, positioning in the field of view is no problem either.
Another problem is that the moon, and especially the planets, are not optimally exposed in "Live View" mode when automatic exposure is set, which is the default*. While I can manually adjust the exposure for Saturn so that the ring is visible, I cannot see both Jupiter's moons and its surface with its stripes at the same time. This is typically not a problem in visual telescopes. Also with the moon, the automatic exposure does not give the best results. But I found this out more or less by chance and this shall be the main subject of this page.
*) Update: In mid-July 2021, Unistellar started a weekly challenge called "To the Moon". There, they provide tips for taking optimal photos of the moon, which I will cite at the end of this page. They also link to an article in their Help Center (Observing the moon and planets), which is older and includes tips for taking photos of the planets as well. The article makes suggestions for gain and exposure time for both the moon and the planets (including the planets with their moons):
Planet |
Moons |
|||
| Gain (dB) | Exposure (ms) | Gain (dB) | Exposure (ms) | |
| Moon | 0 | 5-20 | ||
| Venus | 0 | 0.3-10 | ||
| Mars | 5 | 5-30 | ||
| Saturn | 5 | 10-30 | 25 | 100 |
| Jupiter | 5 | 5-20 | 25 | 100 |
Automatic versus Manual Exposure
By default, the eVscope exposes automatically, and thus also in "Live View" mode, when observing the moon. When the moon is in the field of view, the automatic exposure will settle down to settings that make the moon look "properly exposed". It is, but the setting is still not optimal, which I only realized when I looked at the photos that I took more closely: The automatically exposed photos were much too noisy! When I checked the automatic exposure, I noticed that the exposure time was extremely low at about 0.3 milliseconds (about 1/2700 sec) - and the gain (the amplification) was correspondingly high to ensure a correct exposure. The strong noise I found on the photos, was a consequence of this high gain!
 |
 |
|
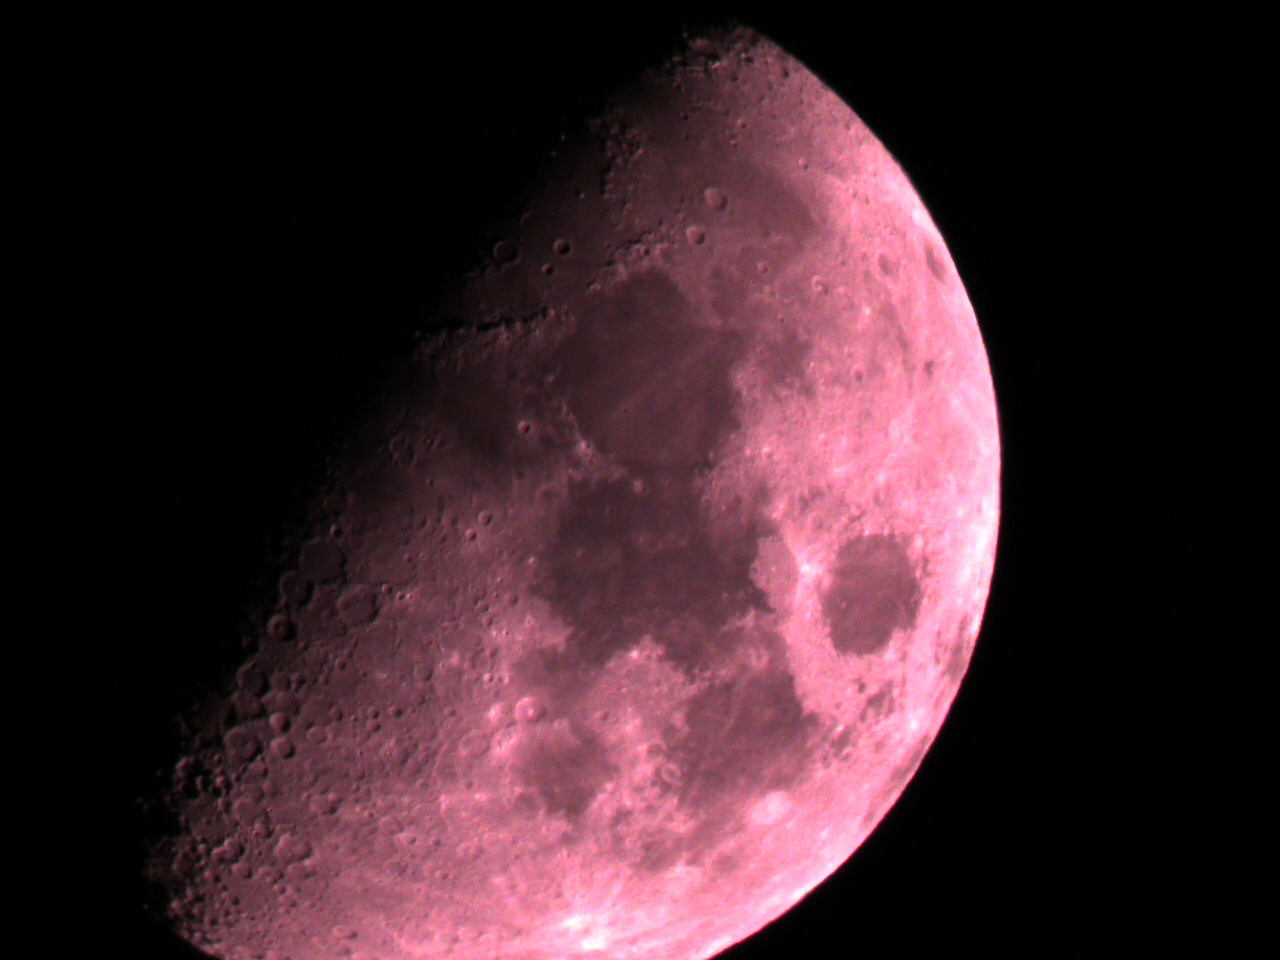
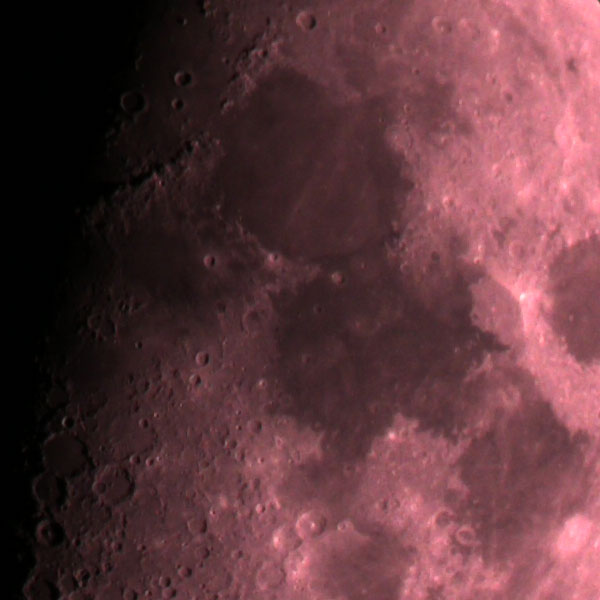
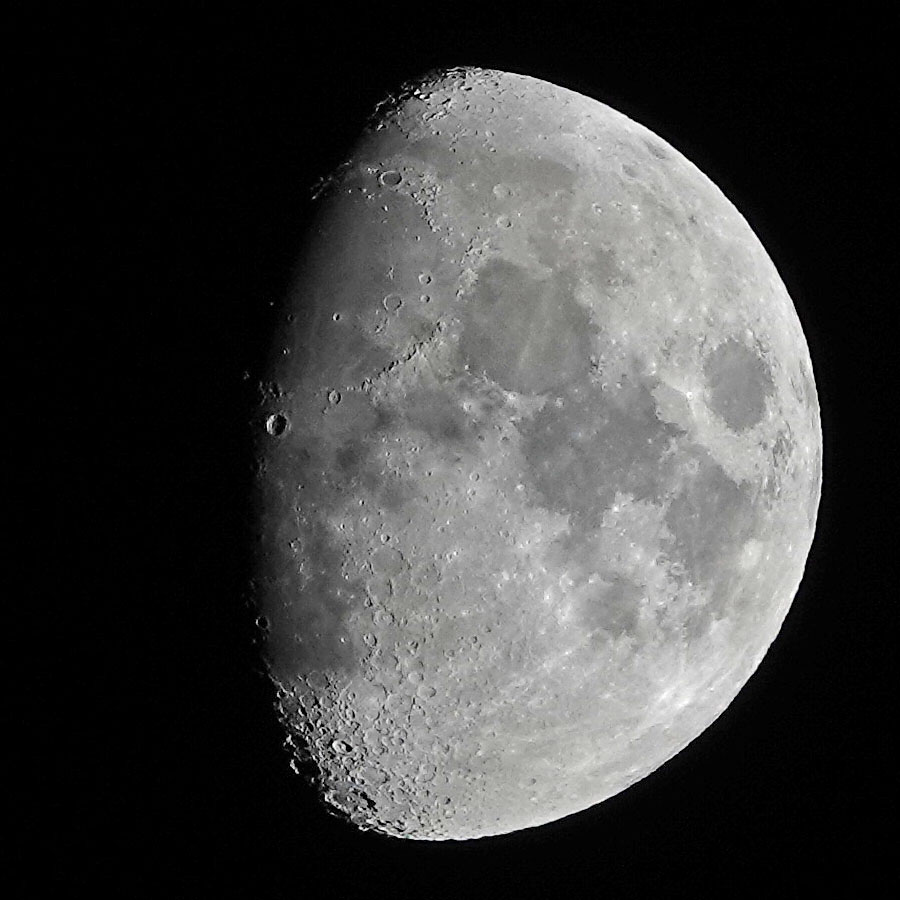
About Half Moon - Oct 24, 2020; automatic exposure (1/2700 sec) |
About Half Moon - Oct 24, 2020; 1/1000 sec |
Photos: The first photos where I noticed a difference in noise
So I started a new test series in which I exposed automatically and for comparison purposes with 1 millisecond (1/1000 sec) (with adapted gain). When I take pictures of the moon with a visual telescope, I select exposure times in the range of 1/100 to 1/1000 sec. At first sight, these photos looked much less noisy, so that I even thought in between that I had taken them in "Enhanced Vision" mode. But I quickly realized that this could not have been the case, because I was not able to observe the moon in this mode at all. So the lower noise was due to the longer exposure time (or the lower gain...)!
After I was sure that a longer exposure time can lead to less noise, I varied exposure the time in another test series between 1/1000 and 1/100 sec. At 1/100 sec the moon was, however, already so bright that I was not able to not reduce the gain so much that the moon's highlights were not partly blown out. So the "usable" exposure times in the test were: 1/1000, 1/500 and 1/250 sec. Possibly, also 1/200 sec might still work. At first sight, there were no big differences between the three exposure times, but at a second, closer look there were: From 1/1000 to 1/500 and further to 1/250 sec the noise decreased somewhat (see photos below)!
 |
 |
 |
||
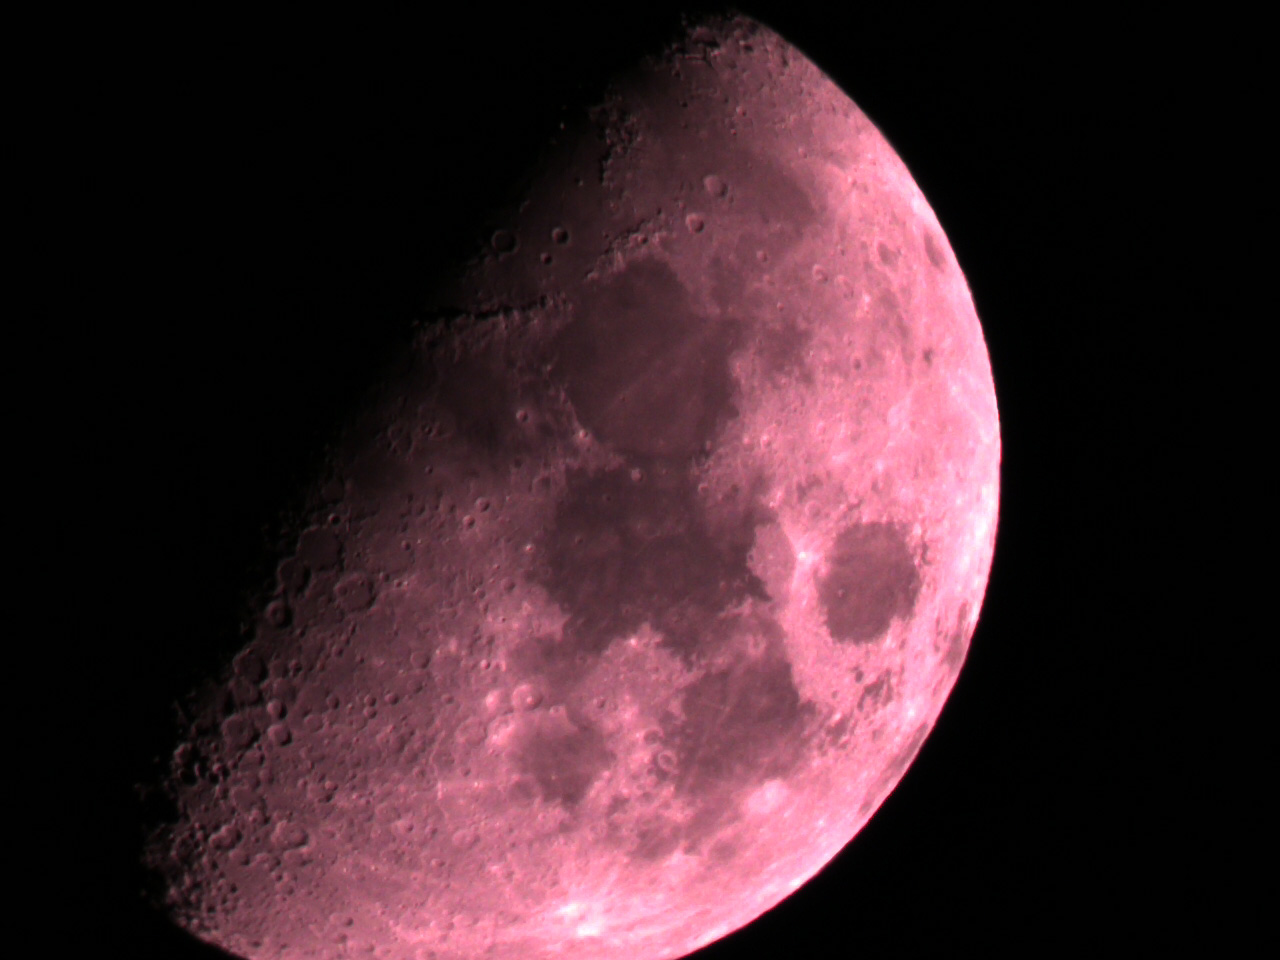
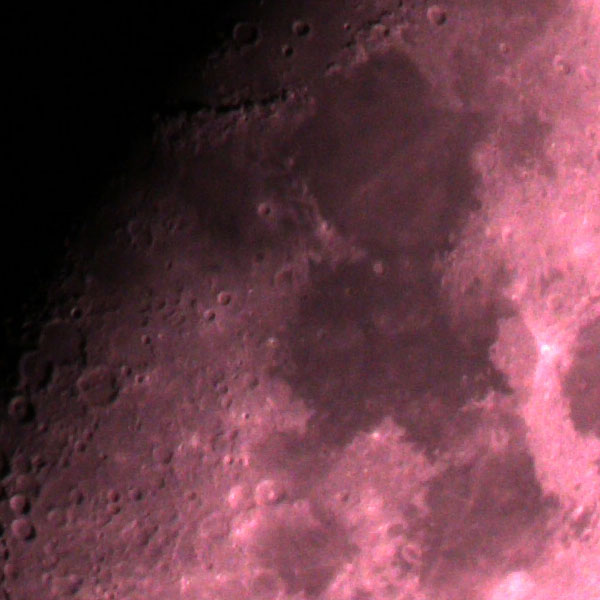
About Half Moon - Oct 24, 2020; 1/1000 sec |
About Half Moon - Oct 24, 2020; 1/500 sec |
About Half Moon - Oct 24, 2020; 1/250 sec |
||
 |
 |
 |
||
About Half Moon - Oct 24, 2020; 1/1000 sec, processed and sharpened |
About Half Moon - Oct 24, 2020; 1/500 sec, processed and sharpened |
About Half Moon - Oct 24, 2020; 1/250 sec, processed and sharpened |
Photos: About half moon photographed with the eVscope in "Live View" mode, manual exposure; differences can only be found if you click the preview images to get the full-size versions.
When I photographed the moon, the air was very restless. You could see this in the differences between the individual images. I will go into this further below! So the question for me was, which exposure time is still sufficient to "freeze" the air turbulence and not to let it come to blurred or widened contours. At first sight, I have the impression that this is still possible down to 1/100, but in any case down to 1/250 sec. So 1/250 sec or 1/200 sec might be the optimal exposure time for the moon. Note that the gain has to be adapted accordingly so the the highlights are not blown out.
Influence of the Gain
Later, I noticed that the first manually exposed photo, exposed at 1/1000 s, showed the least noise of all my moon photos, even less than the 1/250 s. Obviously, this first photo was taken with less gain than the following ones; unfortunately, it is not possible to determine afterwards which gain was used. But the photos, the first one is the darkest, all others are much brighter and a little bit washed out in the highlights, suggest this assumption. See also the first manually taken photo compared with another photo, also taken with 1/1000 s:
|
|
|
About Half Moon - Oct 24, 2020; 1/1000 sec, lower gain (first manually exposed photo) |
About Half Moon - Oct 24, 2020; 1/1000 sec, higher Gain |
When the opportunity arises, I will take further photos where I will change the gain to check whether my assumption is correct.
Update: This no longer seems necessary to me after seeing what Unistellar suggests! To put it simply, set the gain to 0 dB and adjust the exposure time so that the highlights do not wash out. For this, you can take photos with several exposure times to find out the optimum.
Note: Since the brightness of the moon varies strongly, you can only give hints for the exposure time - as Unistellar does.
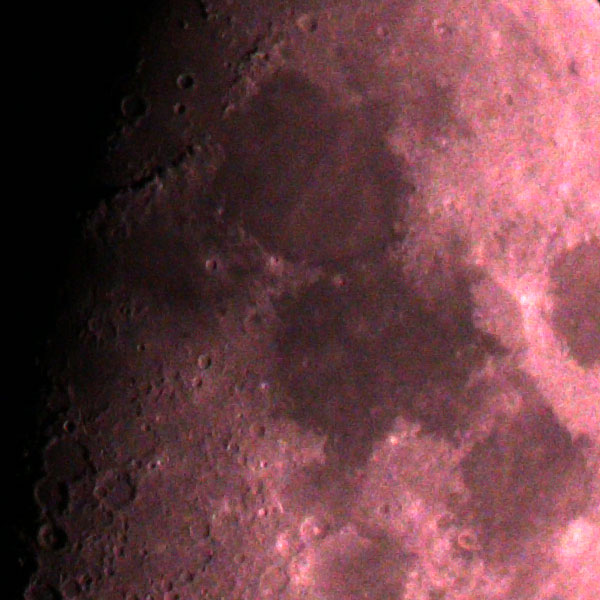
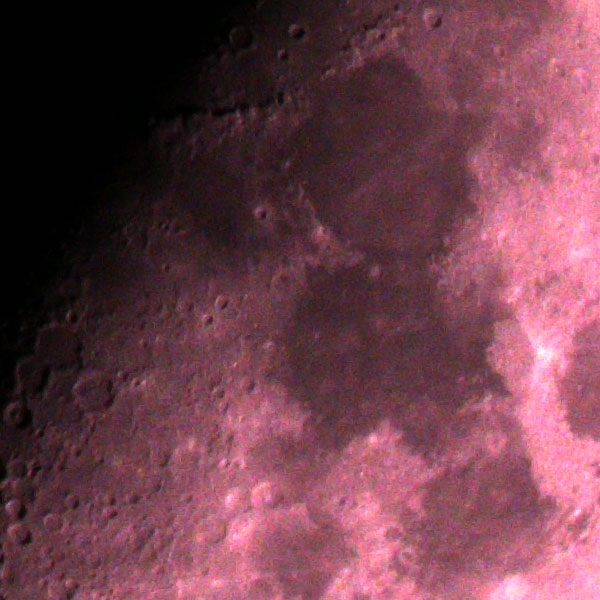
Details
In the following, I present details from the first and third test series. Note that the differences will only become visible in the larger versions that you get when you click the previews!
 |
 |
 |
||
About Half Moon - Oct 24, 2020; autom. expos. |
About Half Moon - Oct 24, 2020; autom. expos. |
About Half Moon - Oct 24, 2020; 1/500 sec |
||
 |
 |
 |
||
About Half Moon - Oct 24, 2020; 1/1000 sec? |
About Half Moon - Oct 24, 2020; 1/1000 sec |
About Half Moon - Oct 24, 2020; 1/250 sec |
Detail photos: About half moon photographed with the eVscope in "Live View" mode, manual exposure; differences can only be found if you click the preview images to get the full-size versions.
Air Turbulence
Short exposure times "freeze" the air turbulence. Therefore, you can only recognize the air turbulence when you compare several photos that were taken in succession. With longer exposure times, the air turbulence blows up the fine structures. When exactly this effect occurs is not quite clear to me, because I cannot check it with my eVscope. The reason for this is that at 1/100 sec and longer the gain cannot be reduced enough to prevent the highlights from being blown out. I can therefore only demonstrate here, how air turbulence changes the "frozen structures". For this purpose, I select automatically exposed photos on the one hand, and photos that were exposed manually on the other hand. Both demonstrate more or less the same effects.
 |
 |
 |
||
About Half Moon - Oct 24, 2020; autom. expos. |
About Half Moon - Oct 24, 2020; autom. expos. |
About Half Moon - Oct 24, 2020; autom. expos. |
||
 |
|
 |
||
About Half Moon - Oct 24, 2020; 1/250 sec |
About Half Moon - Oct 24, 2020; 1/250 sec |
About Half Moon - Oct 24, 2020; 1/250 sec |
Photos: About half moon photographed with the eVscope in "Live View" mode; differences can only be found if you click the preview images to get the full-size versions.
A Second Test
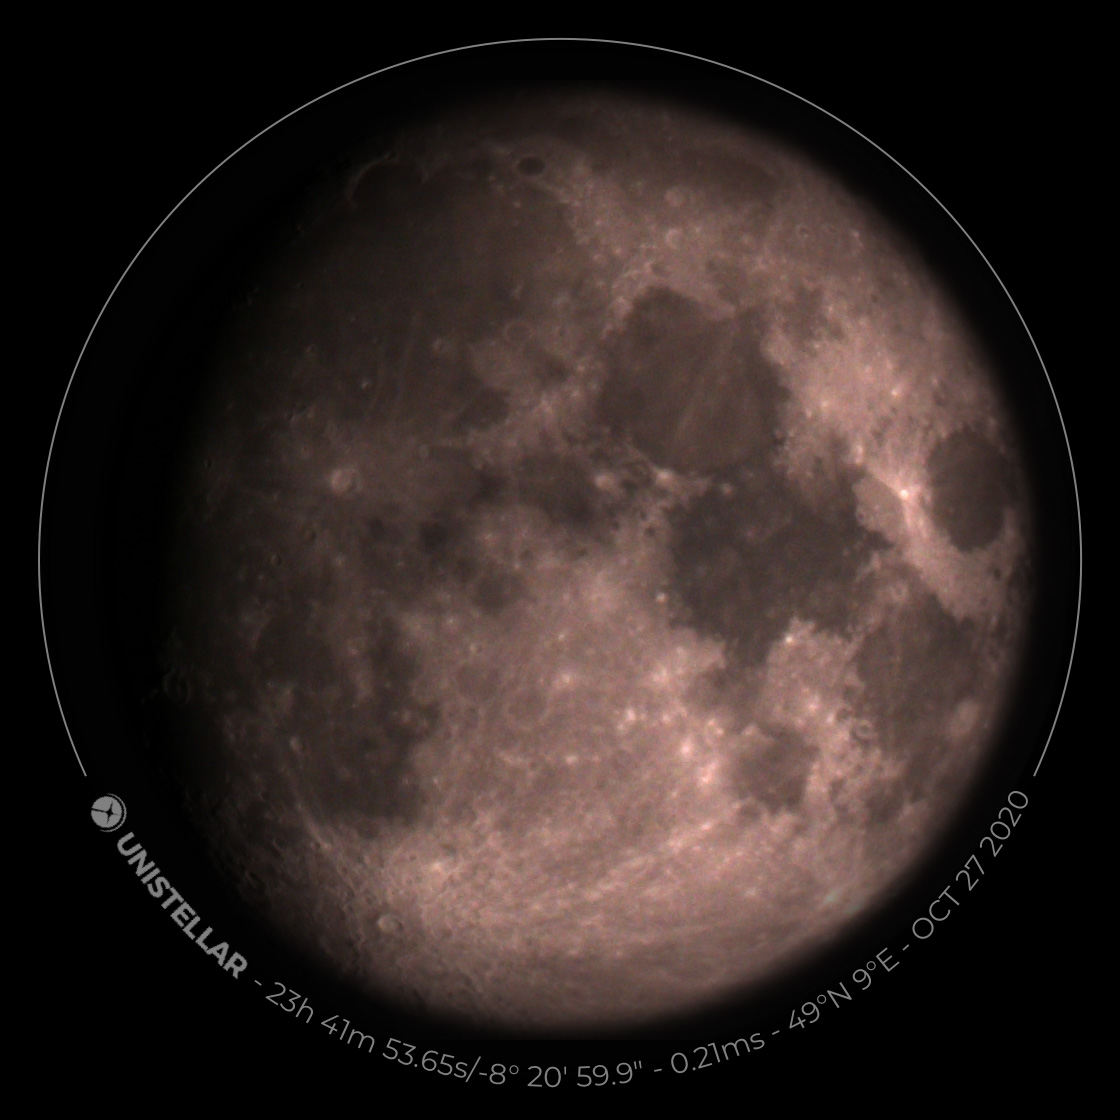
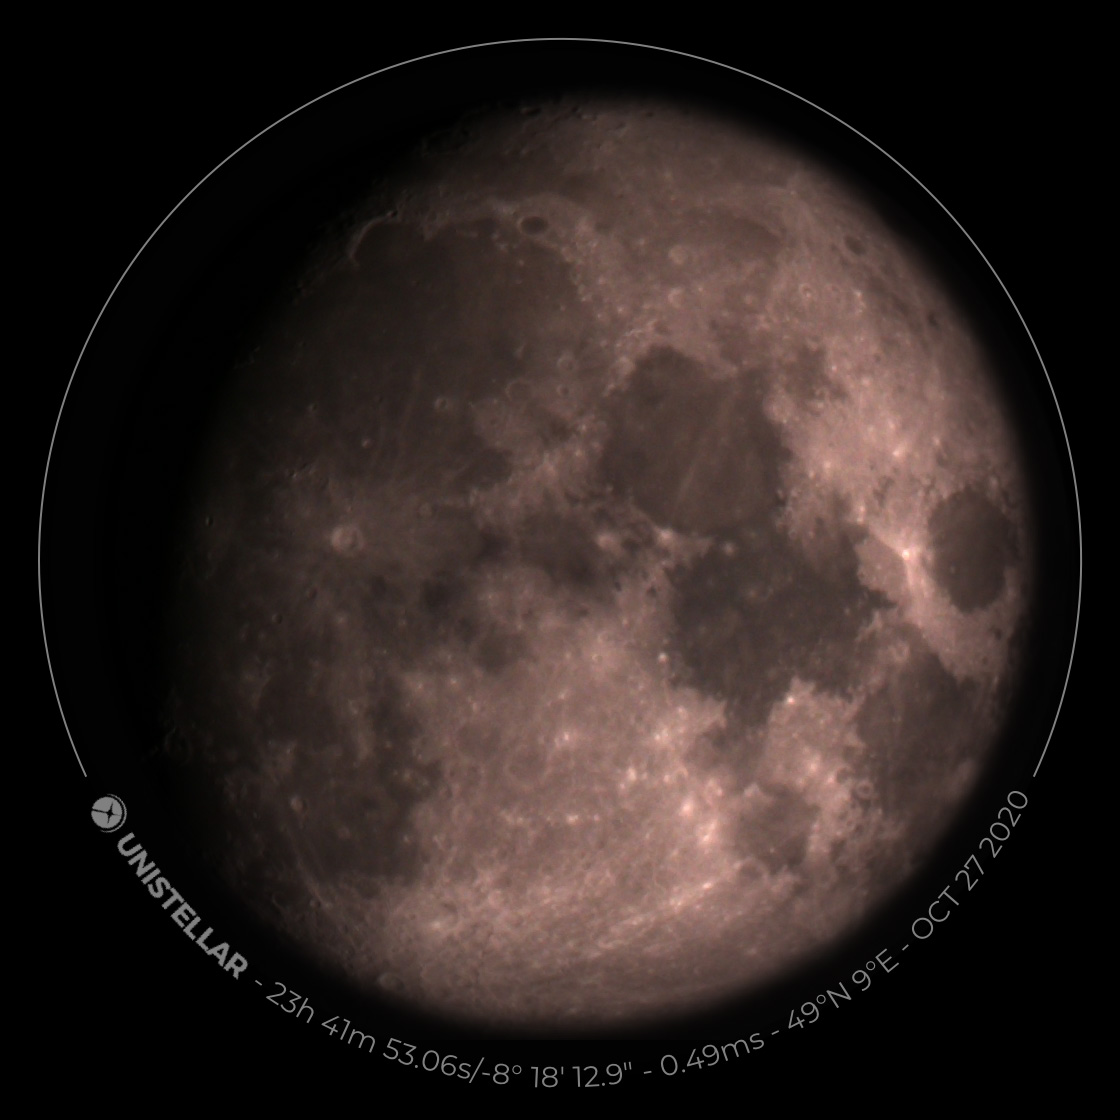
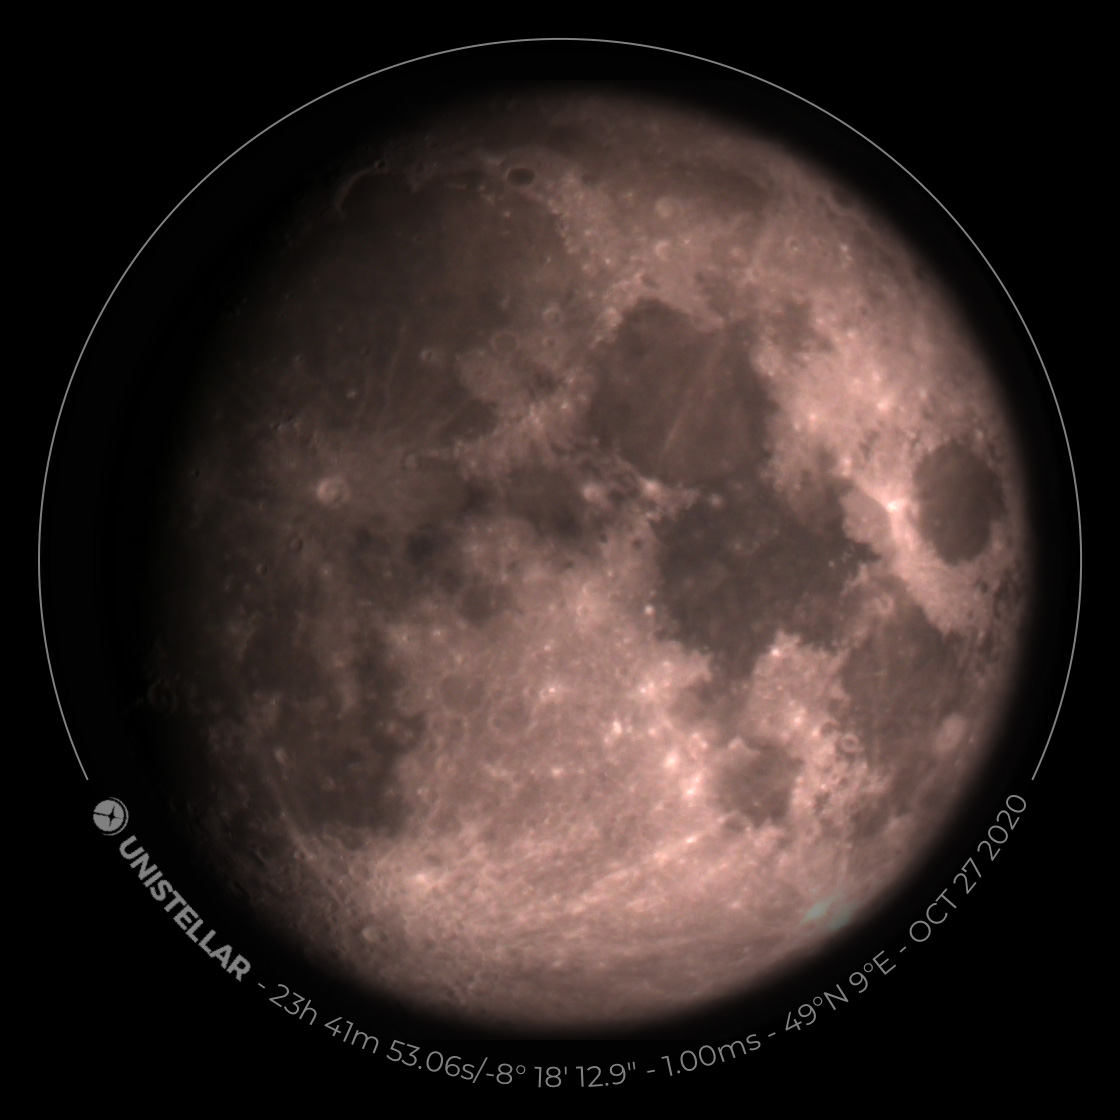
Moon photographed with the eVscope in Live View mode, automatic and manual exposure:
 |
 |
|
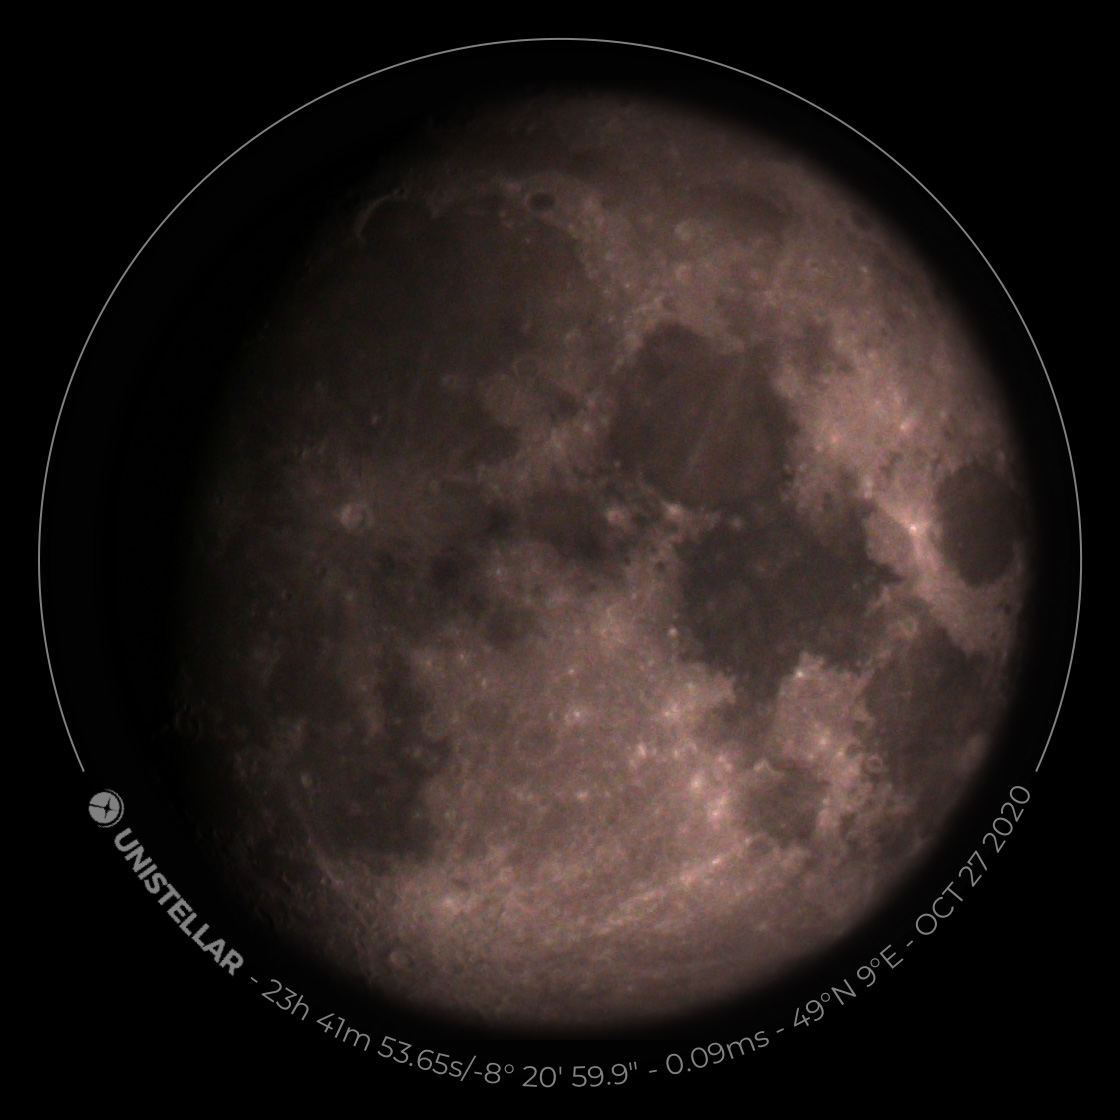
Moon - Oct 27, 2020; about 1/10000 sec, automatic exposure |
Moon - Oct 27, 2020; about 1/5000 sec, manual exposure |
|
 |
 |
|
Moon - Oct 27, 2020; about 1/2000 sec, manual exposure |
Moon - Oct 27, 2020; about 1/1000 sec, manual exposure |
Comparison with Sony RX10 M3/4
The moon is slightly larger than the image height of the eVscope (30' vs. 27.6'), its diameter extends over about 1050 pixels. The moon appears almost as large on the sensor of my Sony RX10 M3/4 at 600 mm focal length; it measures 870 pixels for the supermoon. So it was obvious for me to make an image comparison, because with the camera can can take photos of the moon of course much more comfortable, even if I put the camera on a tripod.
Comparison with Sony RX10 M3
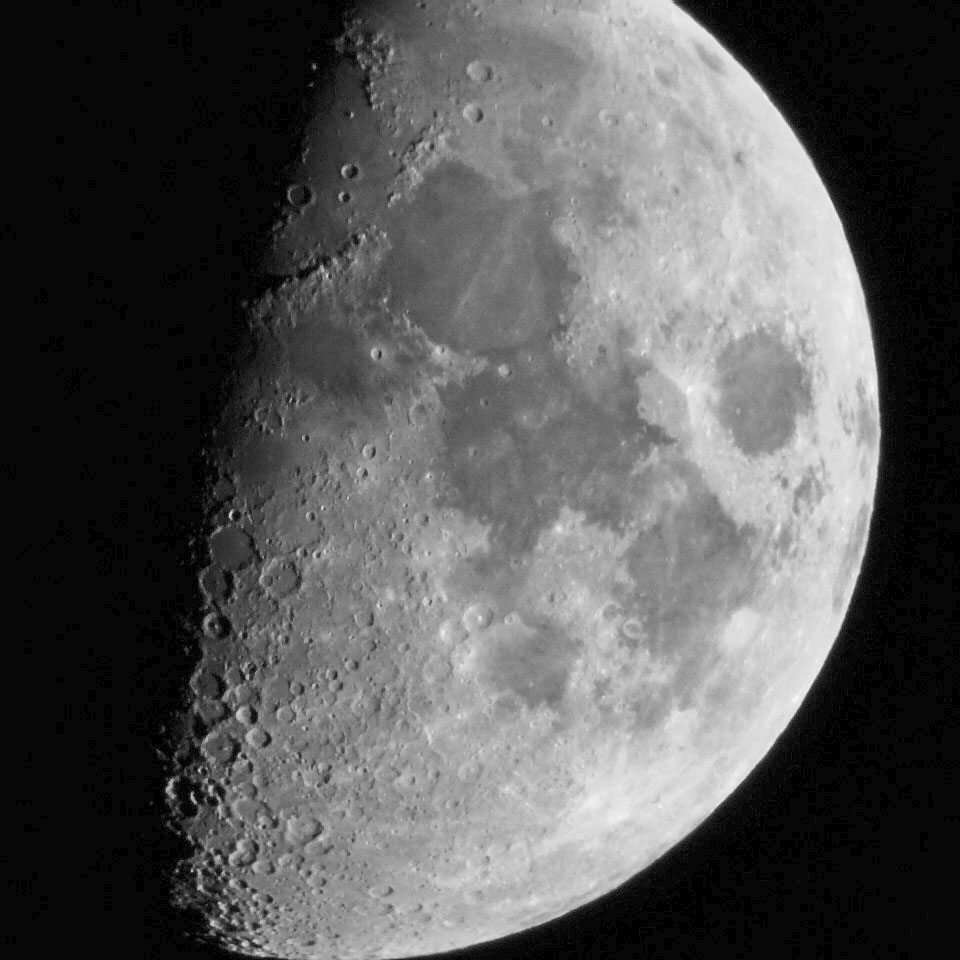
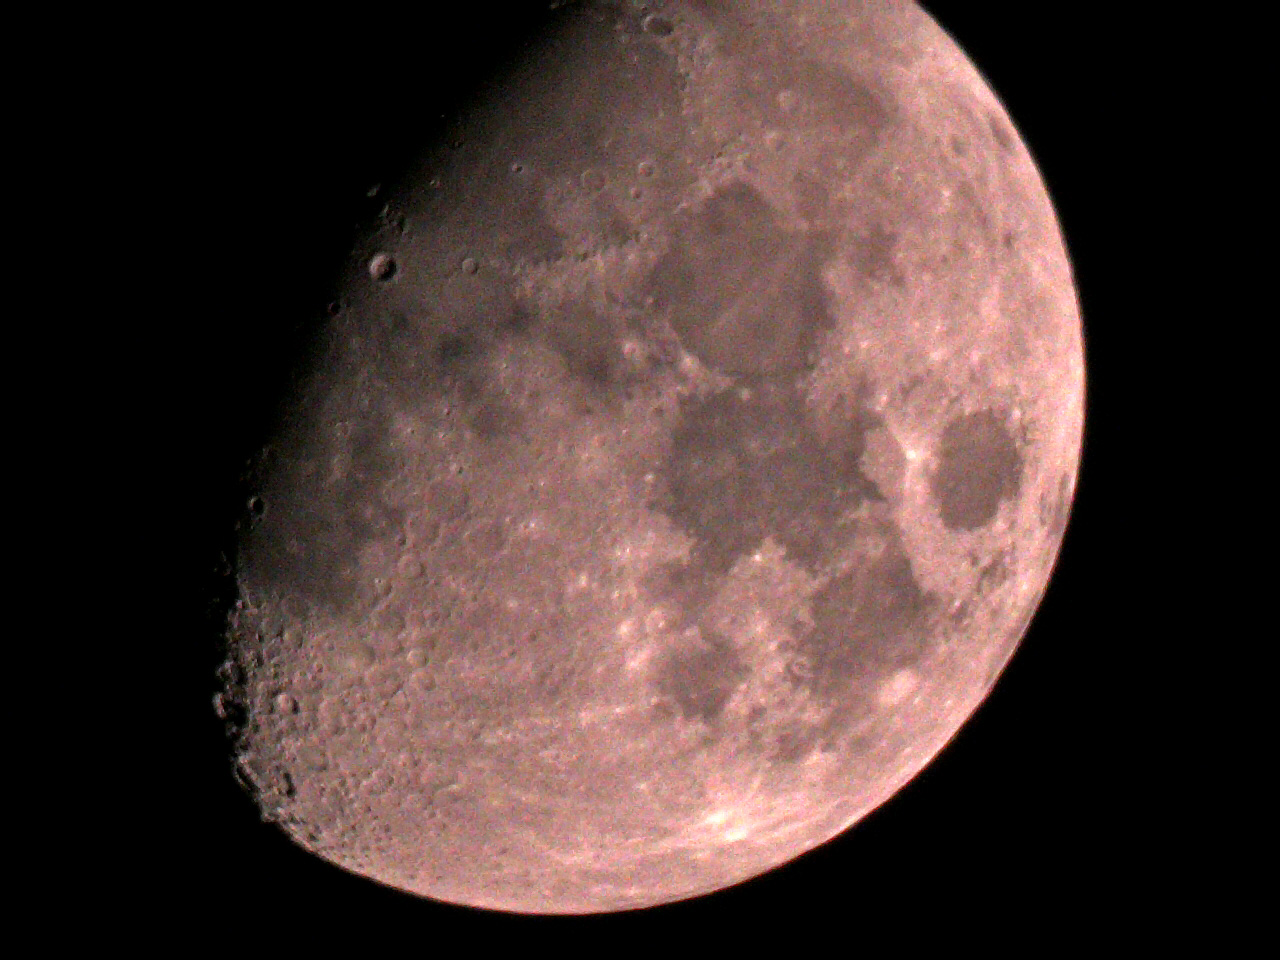
Since I did not have a comparable photo taken with the RX10 M4 available, I chose initially a photo taken with the RX10 M3 for the comparison; there should be no differences to the M 4. For the eVscope, I chose the first manually taken photo of the moon, because it seemed to have the best sharpness. While I show an unedited version of the photo above, I show an edited and sharpened version of the photo below.
 |
 |
|
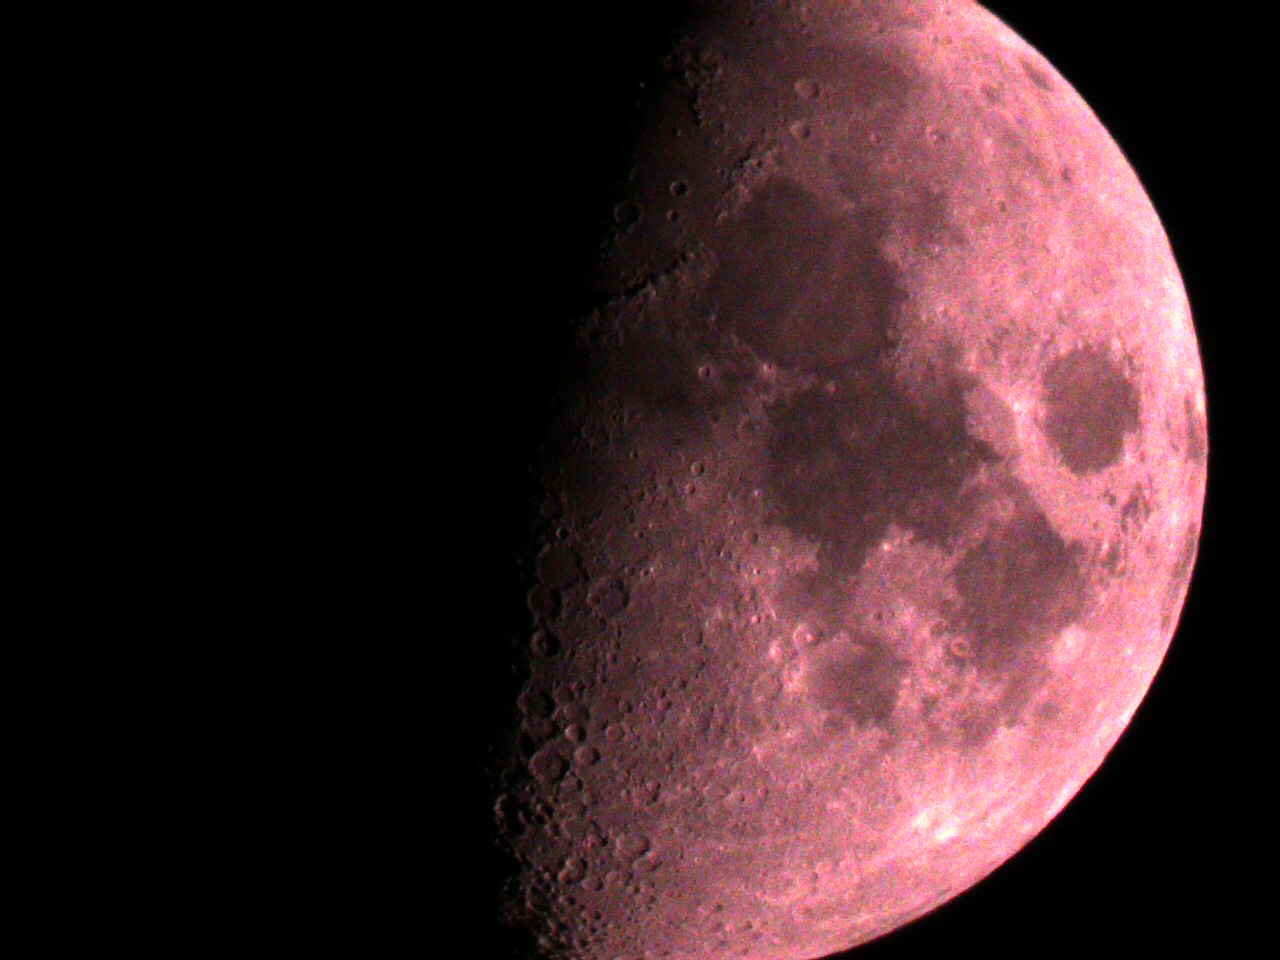
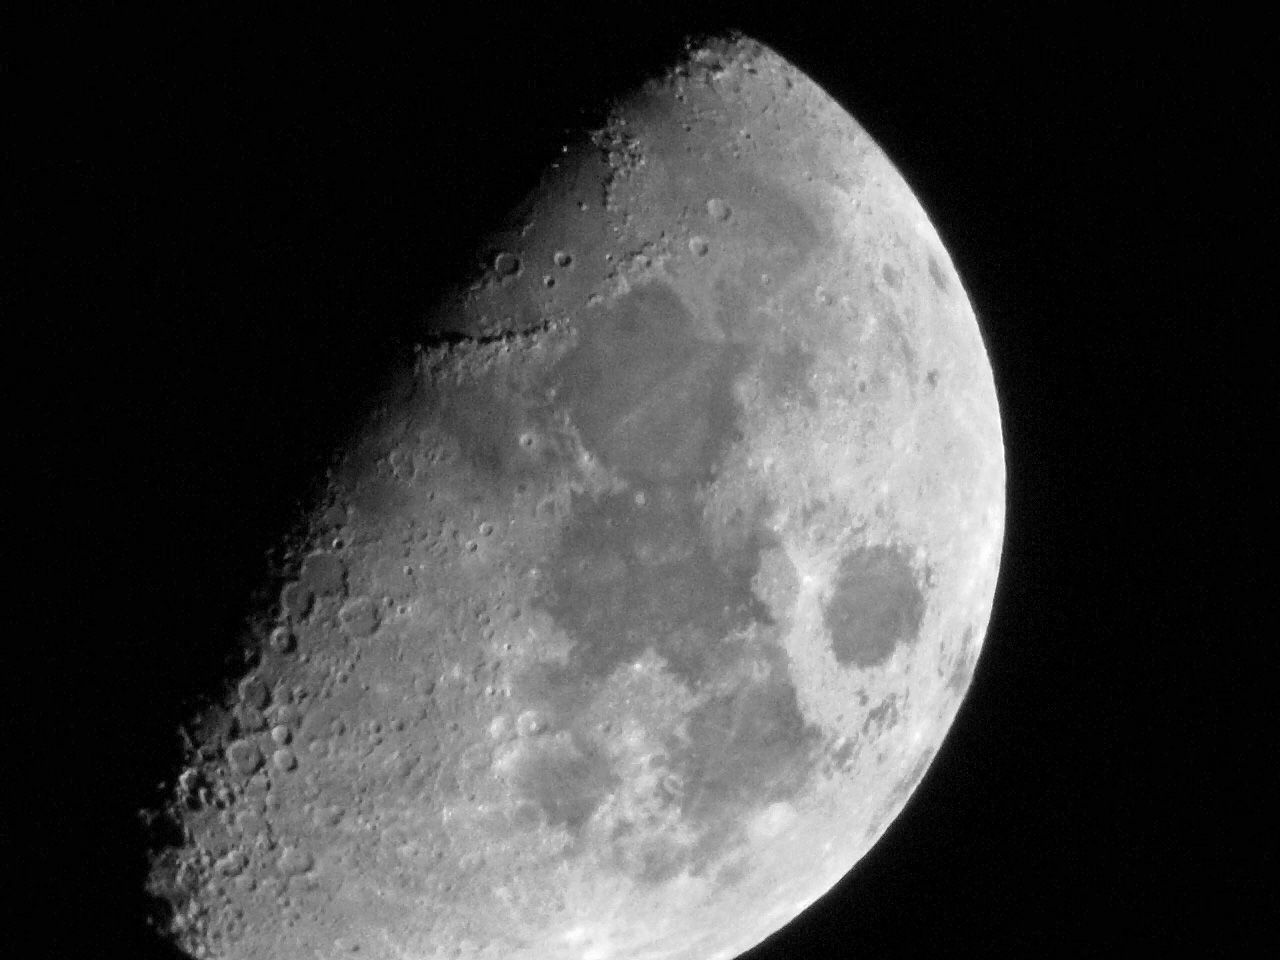
About half moon - Oct 24, 2020; eVscope, manually exposed, post-processed and sharpened (B&W) |
About half moon - Jan 14, 2019; Sony RX10 M3, post-processed and sharpened (B&W) |
At first glance, the Sony photo looks more contrasty and sharper; at a second glance, I like the eVscope photo better because it shows more details. You can see this more clearly if you click on the thumbnails and look at the 1:1 pixel versions. The eVscope photo also exhibits much fewer artifacts than the Sony photo and shows even smaller craters (11-12 km against 16-17 km).
Comparison with Sony RX10 M4
Here, I show only post-processed photos.
eVscope
 |
 |
 |
||
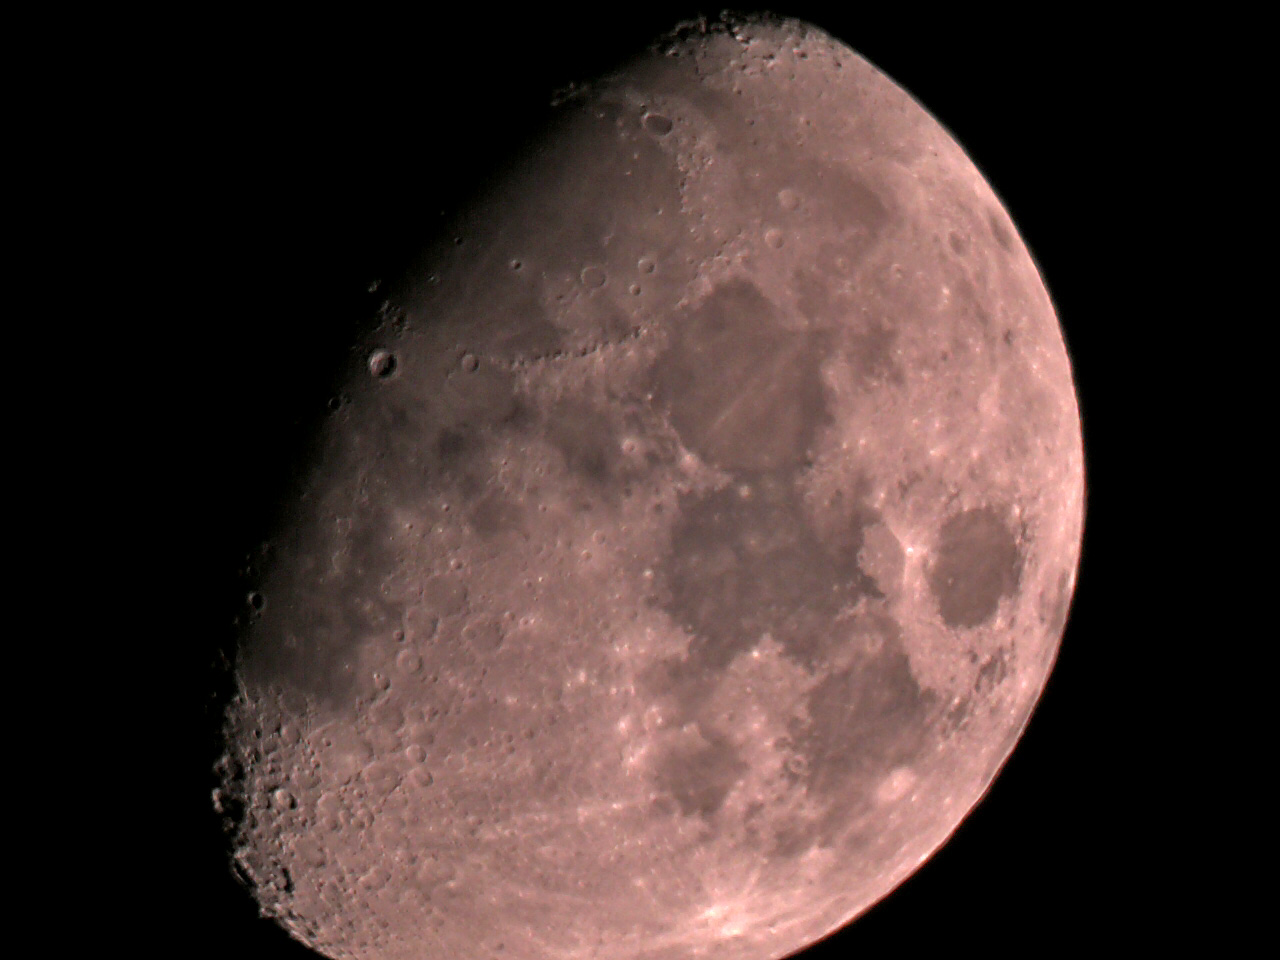
Moon - Nov 24, 2020, processed and sharpened |
Moon - Nov 24, 2020, processed and sharpened |
Moon - Nov 24, 2020, processed and sharpened |
If you look at the large versions, you will see that the automatically exposed photo shows more noise than the two other ones.
Sony RX10 M4
 |
|
 |
||
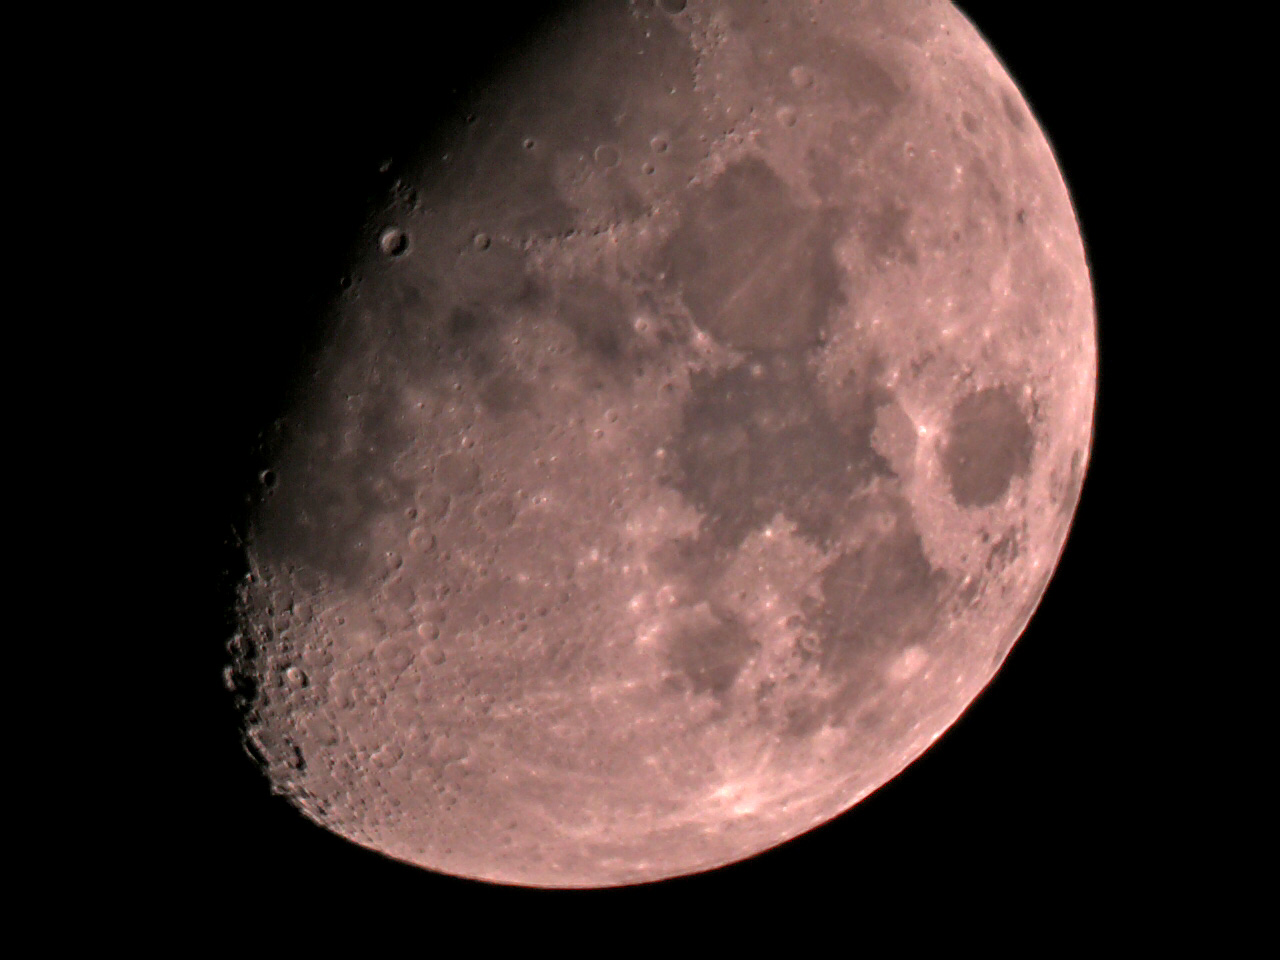
Moon - Nov 24, 2020, processed and sharpened |
Moon - Nov 24, 2020, processed and sharpened |
Moon - Nov 24, 2020, processed and sharpened |
Conclusions
The automatic exposure does not result in optimal photos of the moon in "Live View" mode; instead they show a lot of noise. I found out that an exposure time between 1/500 and 1/250 sec leads to lower noise without the air turbulence already inflating the delicate structures. Possibly, it may help to use a low gain. Further details are definitely still to be clarified... So I thought! But in the meantime, Unistellar itself offers tips for optimum photos of the moon. Read the following!
Unistellar Tips for Optimum Photos of the Moon
Unistellar offers the following tips for optimum photos of the moon:
- Search for the "Moon" in the Explore tab of the Unistellar app and hit Go to.
- If the Moon is not quite centered, slowly reduce the Gain until you can tell which direction the nearest light source - the Moon - is coming from. Then tap the arrows to shift the view towards the light*. Repeat this process until the Moon is in full view.
- If you have not done so already, make sure to manually set the Gain to all the way down to 0 dB and the Exposure to 5–20 ms (1/200...1/50 s), and make sure Auto mode is turned off for both. You will be viewing the Moon in the Live View mode — it is too bright for the eVscope's Enhanced View mode.
*) According to my experience, this navigation is done in small steps, preventing me from being able to center the moon exactly in the field of view.
See the links below for further details.
Links
- Unistellar Website: unistellaroptics.com
- Observing the moon and planets (Unistellar Help Center): help.unistellar.com/hc/en-us/articles/360002268974-Observing-the-moon-and-planets
- TO THE MOON: JOIN THIS WEEK’S LUNAR MARATHON!: unistellaroptics.com/to-the-moon-challenge?utm_source=Delivered+June+23+2021&utm_campaign=c8762160e1-EMAIL_CAMPAIGN_2021_06_29_06_58_COPY_02&utm_medium=email&utm_term=0_3e6ad7162f-c8762160e1-85130814
- See also my page offering Astronomy Links.
|
made by |
| 13.12.2023 |