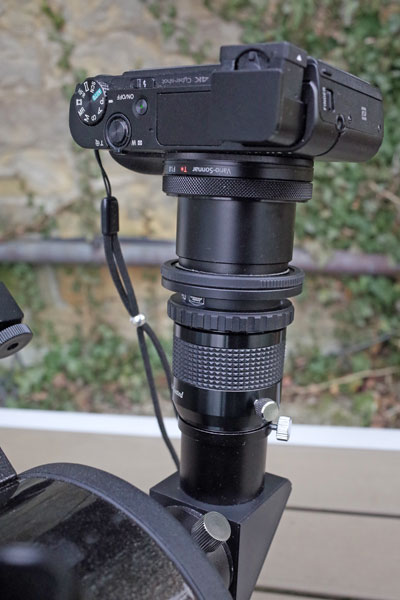
Sony RX100 M4 Attached to Telescope
Prolog... | Eyepiece and Adapters | Camera Attached to Eyepiece | Camera Attached to Skymax-102 Telescope | Camera Attached to Skymax-102 Telescope as a Spotting Scope | Camera Attached to Skymax-127 Telescope | Camera Attached to a Telescope - Tips | References
On this page, I demonstrate how I attach the Sony RX100 M4 to a telescope eyepiece with a T-mount filter thread for taking astro photos using the projection technique. Projection technique means that the camera is mounted to the eyepiece, not directly to the telescope. The latter technique can only be used with SLR cameras where the body can be directly attached to the telescope - typically using a T mount adapter.
BTW: I mention the 1:50 method on this site several times. This is a simple variant of the projection technique - you hold the camera by hand to the eyepiece instead of attaching it firmly...
Note: I bought a Sony RM-SPR1remote commander for releasing the shutter in order to prevent camera shake from pressing the shutter.
Prolog...
At the beginning a few warnings:
- Special care must be taken that the front lens of the camera and the front lens of the eyepiece do not touch and damage each other!
- If you need to use several adapters rings and attach these to the camera
lens, you are in danger of tightening the rings too strongly so that you
cannot separate them from each other when disassembling everything. Particularly,
the DT or step-down ring may stick either to the camera lens or to the adapter
to which it is attached - I experienced already both cases... As I do not
like to grasp the adapters with tongs, I used a rubber blanket from our kitchen
gear (used for opening glass containers or bottles) for separating adapters
- with success. However, special tools for unscrewing the adapters would
be much more helpful...

Eyepiece and Adapters
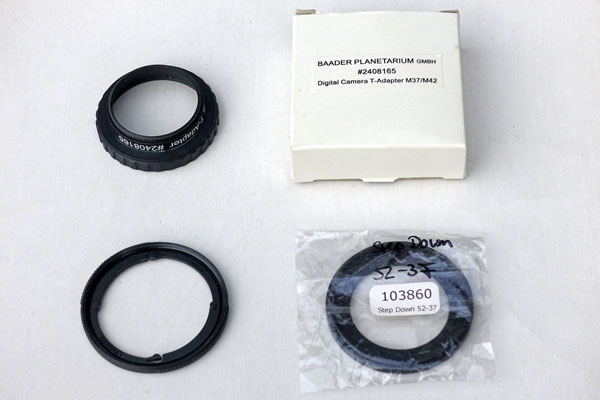
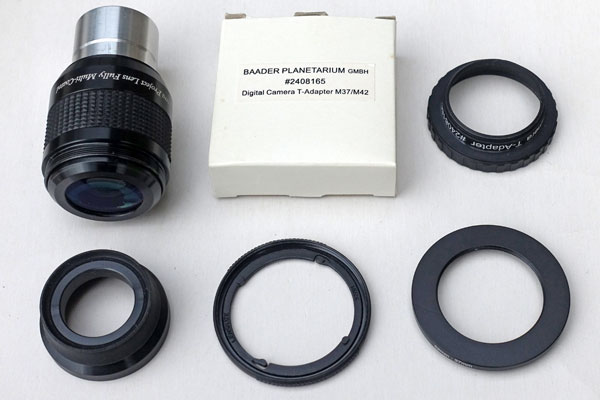
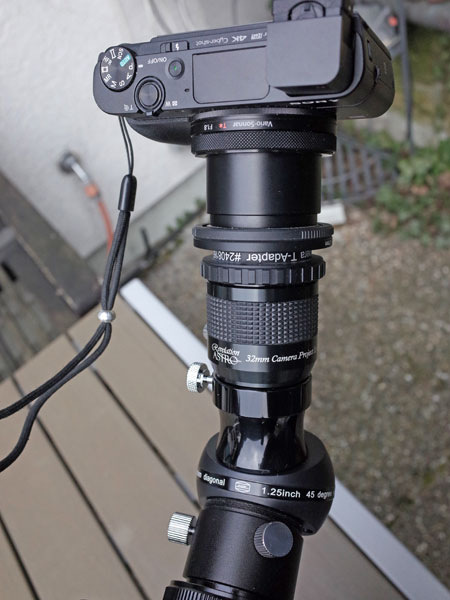
Here, you can see the Revelation 32 mm DigiScope eyepiece and the two adapters needed to mount the Sony RX100 M4 with Lensmate filter adapter to the eyepiece. A second adapter, a step-down ring 52-37*, is required, because there is no T-mount adapter available, which directly fits the filter thread of the Lensmate filter adapter (52 mm). You can remove the upper part of the eyepiece including the eyecup to reveal the T-mount filter thread.
*) The respective Baader DT ring adapter is no longer available. I found the step-down ring on the Internet, and it looks nearly like a DT ring (and works like one)...
 |
 |
 |
||
Top: Baader Digital Camera T-mount adapter M37/M42 (#2408165); bottom left: Lensmate filter adapter for Sony (52 mm); bottom right: Step-down ring M37/M52 |
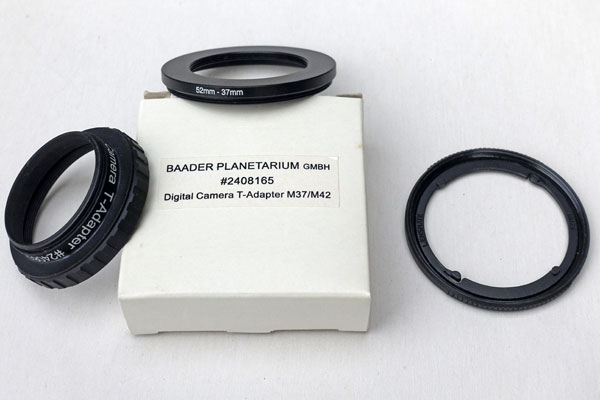
Top: Step-down ring M37/M52, left: Baader Digital Camera T-mount adapter M37/M42 (#2408165); right: Lensmate filter adapter for Sony (52 mm) |
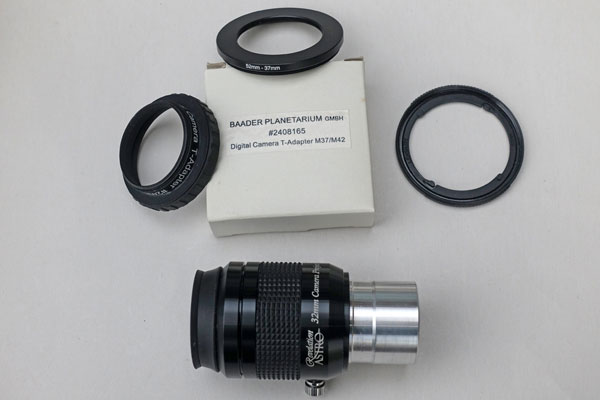
Ditto; bottom: Revelation 32 mm DigiScope eyepiece with eyecup |
||
 |
 |
 |
||
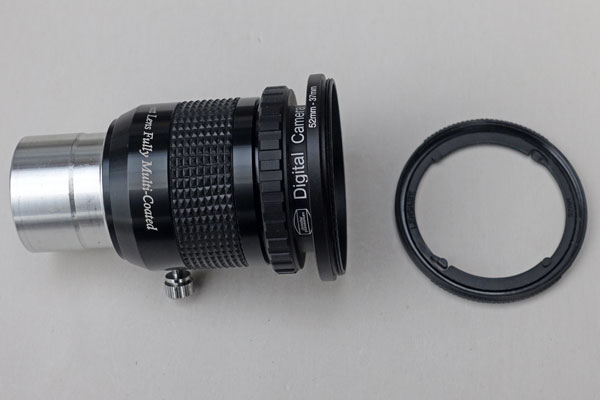
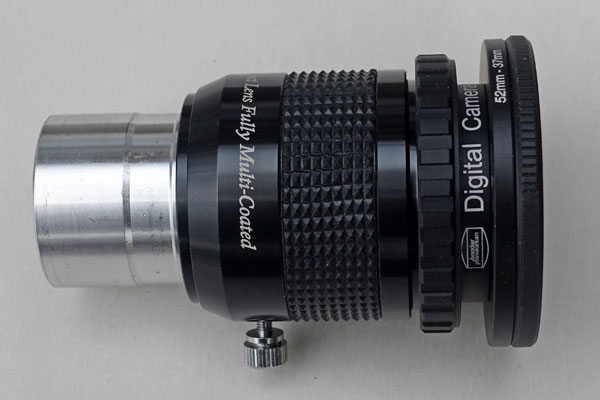
Left: Revelation 32 mm DigiScope eyepiece, T-mount thread visible (the eyecup lies below it) |
Revelation 32 mm DigiScope eyepiece with nearly all adapters for mounting the eyepiece to the RX100 M4, Lensmate adapter still not screwed on |
Dito, Lensmate adapter attached; now you just need to attach the camera to the Lensmate bayonet |
Camera Attached to Eyepiece
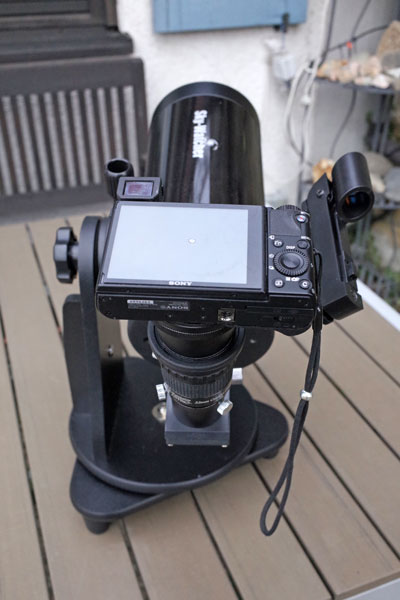
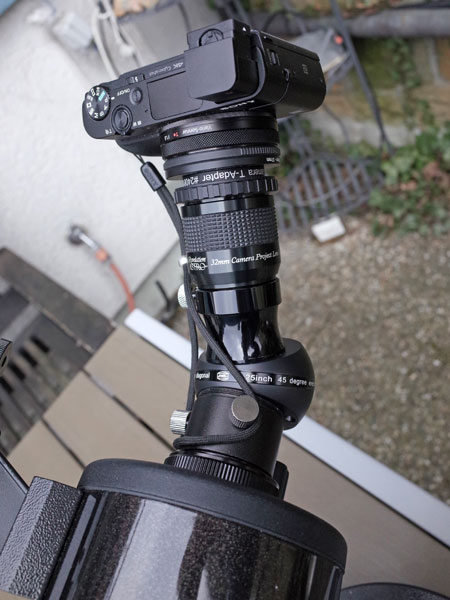
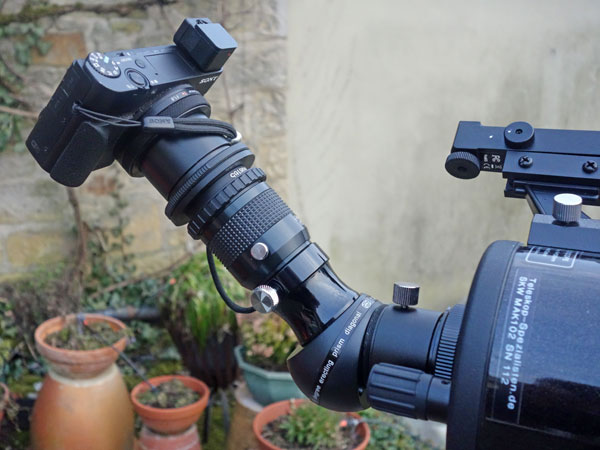
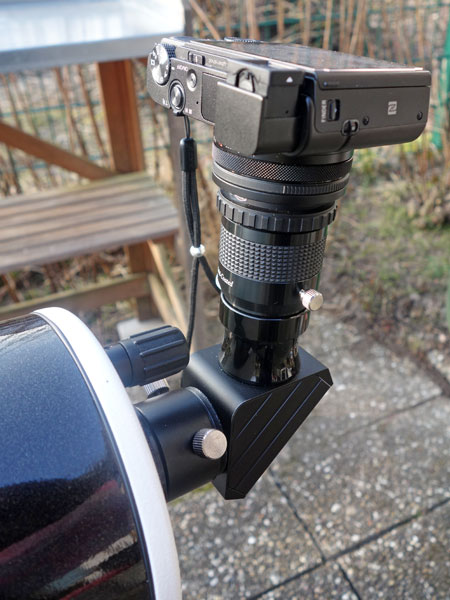
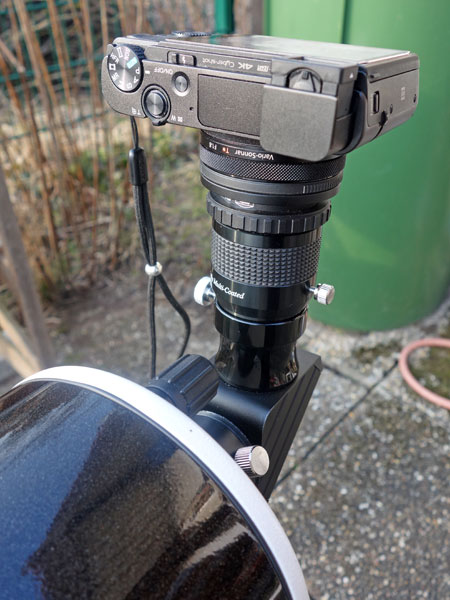
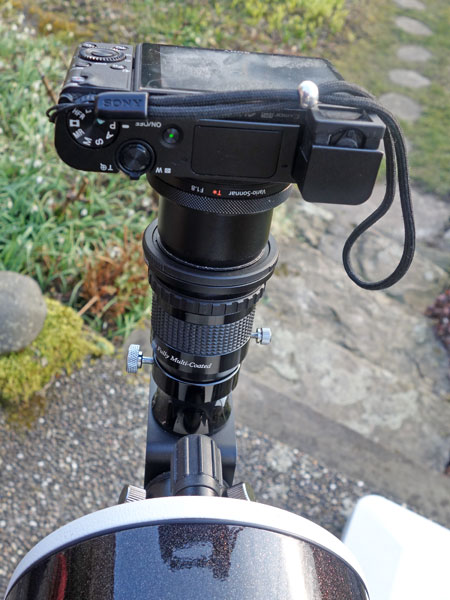
Here, you can see the Sony RX100 M4 attached to the Revelation 32 mm DigiScope eyepiece:
|
|
|
Camera Attached to Skymax-102 Telescope
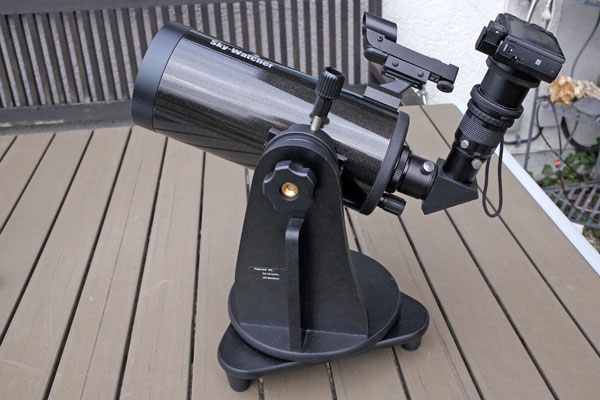
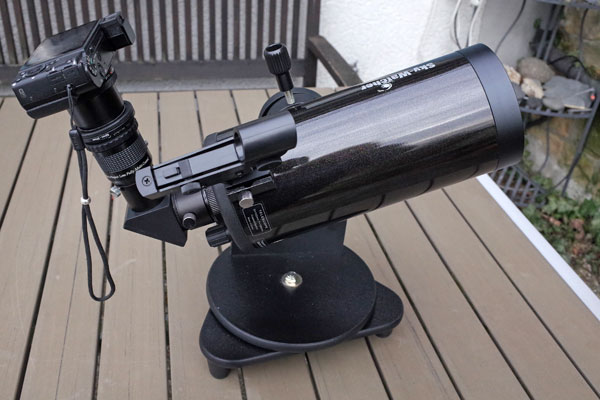
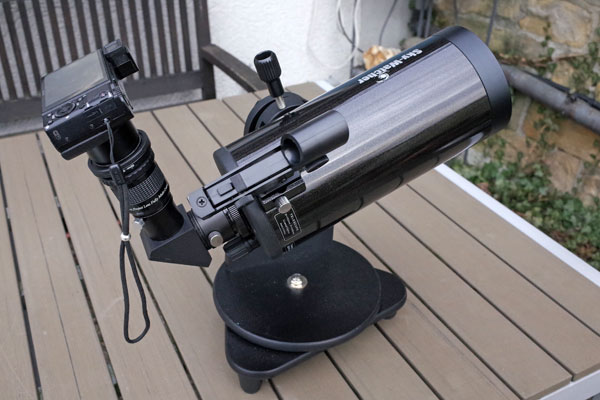
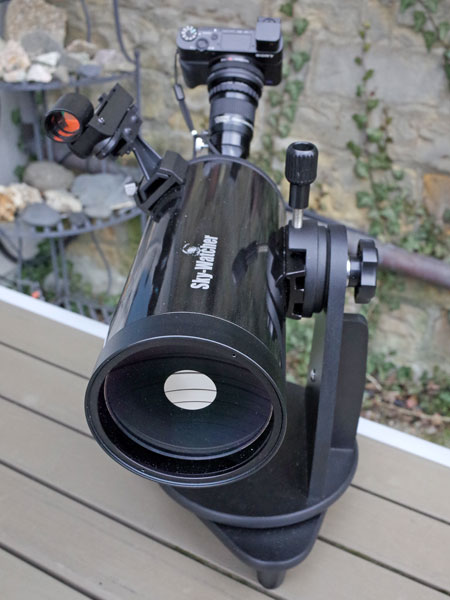
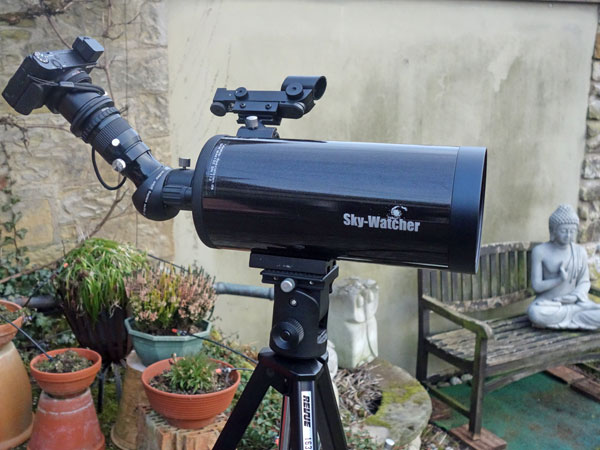
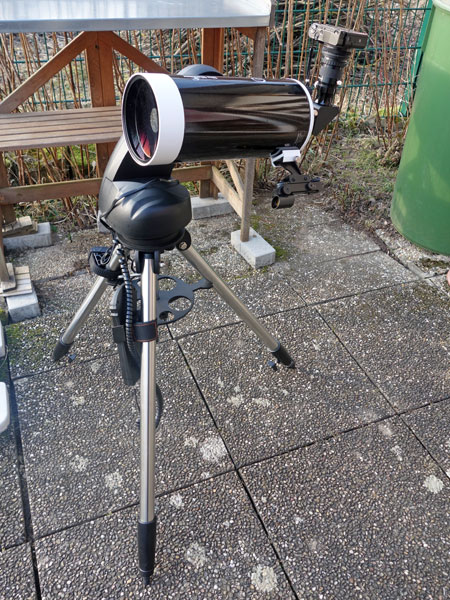
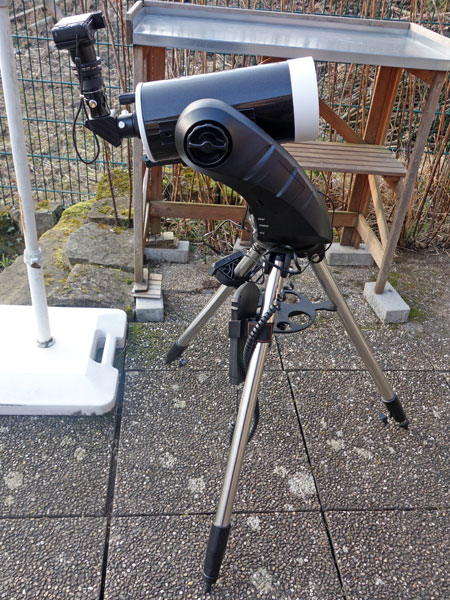
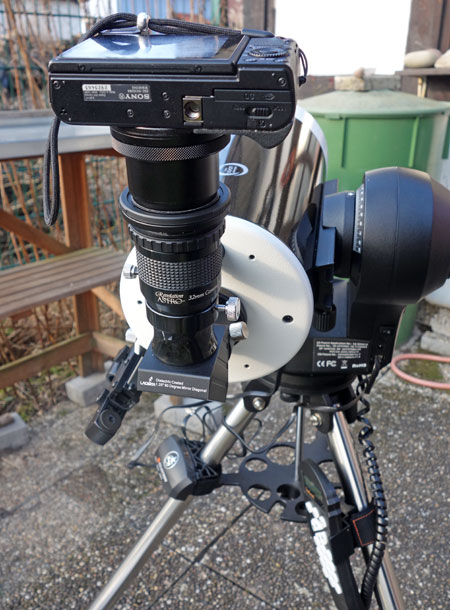
Here, you can see the Sony RX100 M4 attached to the Sky-Watcher Skymax-102 telescope (Maksutov-Cassegrain) and the Revelation 32 mm DigiScope eyepiece.
Attention: The small Dobsonian base (taken from the Heritage 100P) is extremely wobbly and shaky and therefore not a "recommendation," but only shown here for demonstration purposes. If I actually use this base, I hang the camera's shoulder strap around my neck to avoid the worst! Alternatively, I use a photo tripod for this configuration.
|
|
|
||
Skymax-102 on small Dobsonian base from Heritage 100P |
||||
 |
 |
 |
||
Ditto, detail views |
||||
 |
 |
|||
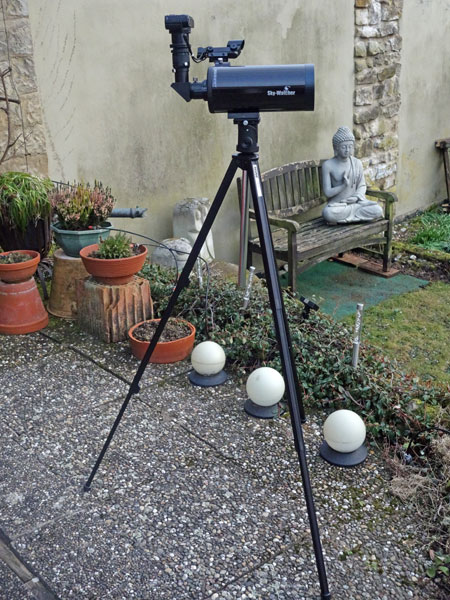
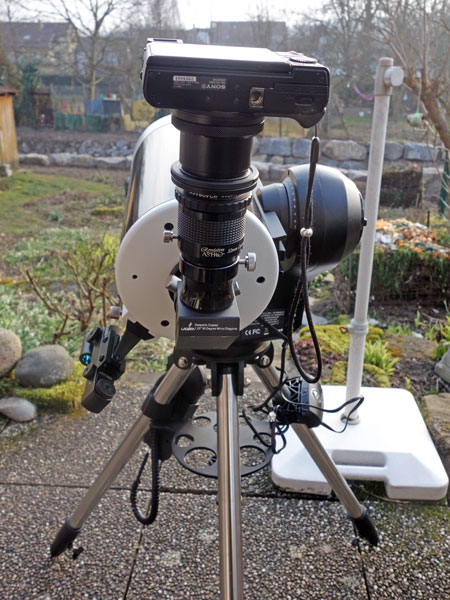
Skymax-102 with zenith mirror on a photo tripd |
||||
Results
 |
 |
|
Zoomed in (54 mm equiv.) |
Ditto |
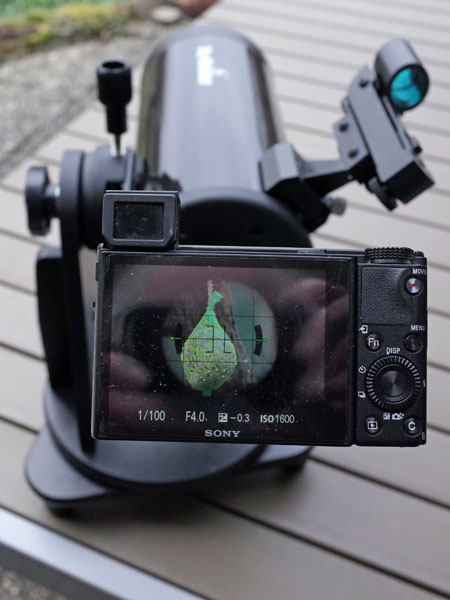
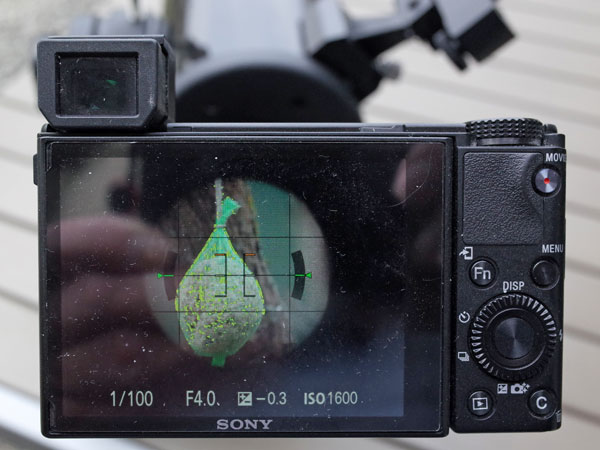
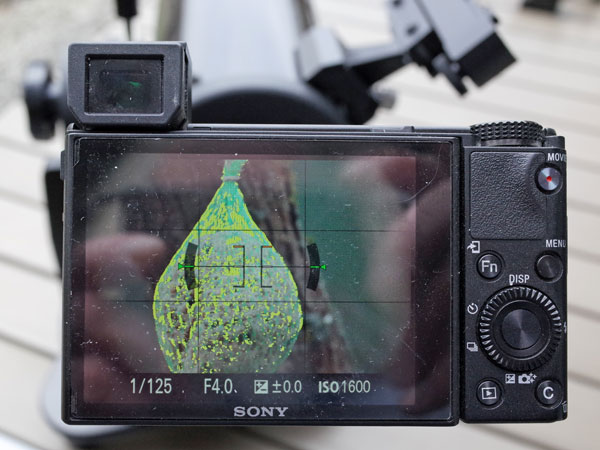
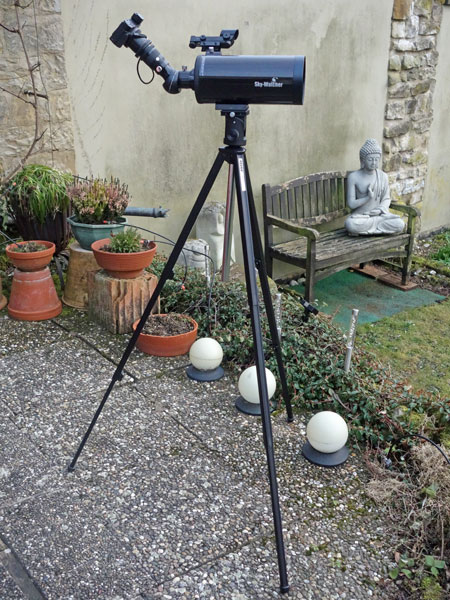
Camera Attached to Skymax-102 Telescope as a Spotting Scope
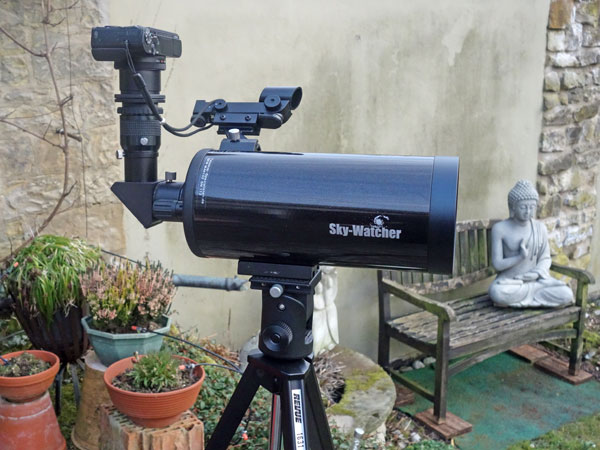
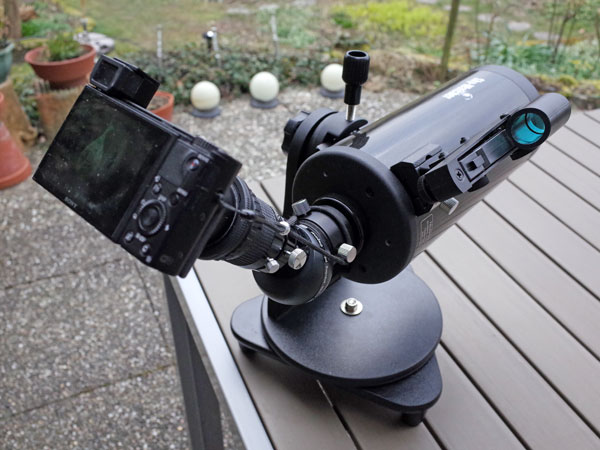
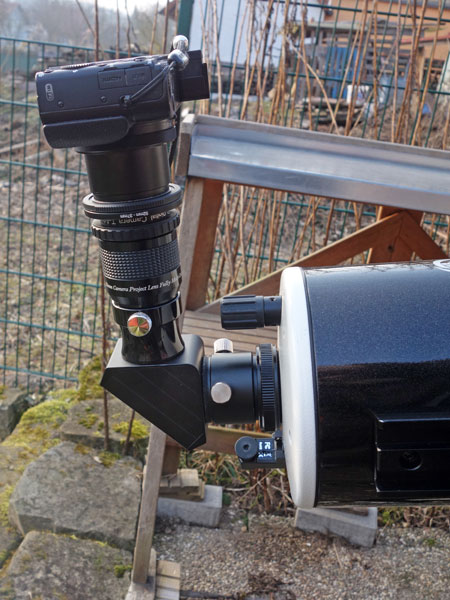
Here, you can see the Sony RX100 M4 attached to the Sky-Watcher Skymax-102 telescope (Maksutov-Cassegrain) and the Revelation 32 mm DigiScope eyepiece. In addition, I use an Amici prism for getting a correct view for daylight.
Attention: The small Dobson base (taken from the Heritage 100P) is extremely wobbly and shaky and therefore not a "recommendation," but only shown here for demonstration purposes. If I actually use this base, I hang the camera's shoulder strap around my neck to avoid the worst! Alternatively, I use a photo tripod for this configuration.
 |
 |
 |
||
Skymax-102 on small Dobsonian base from Heritage 100P |
||||
 |
 |
 |
||
Ditto, detail views |
||||
 |
 |
|||
Different zoom steps: wide angle (left), tele (right) |
||||
 |
 |
 |
||
Skymax-102 with Amici prism on a photo tripd |
||||
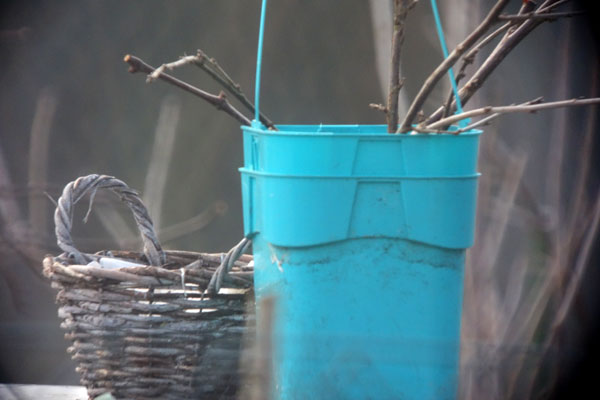
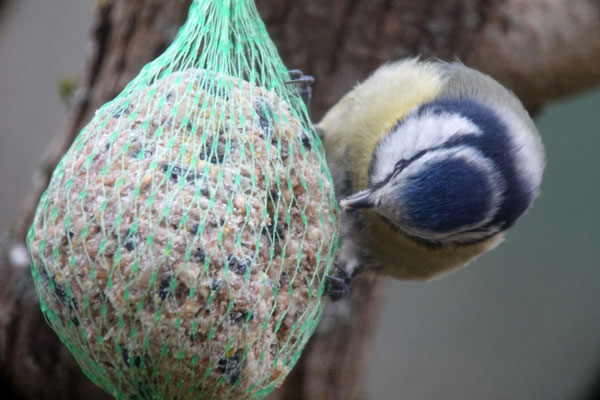
Results
At Home...
 |
 |
 |
||
 |
 |
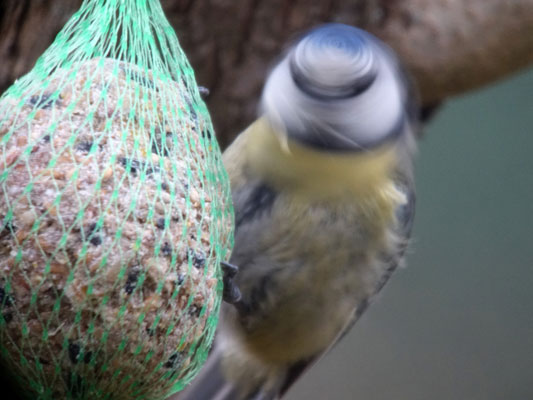 |
Photo data: March 2, 2018, ISO 1600, focal length 50 mm (equiv.)
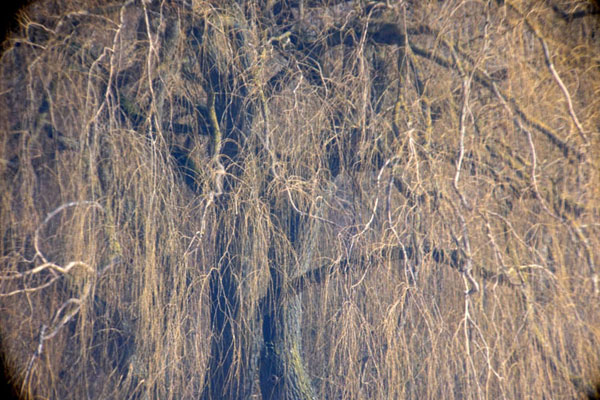
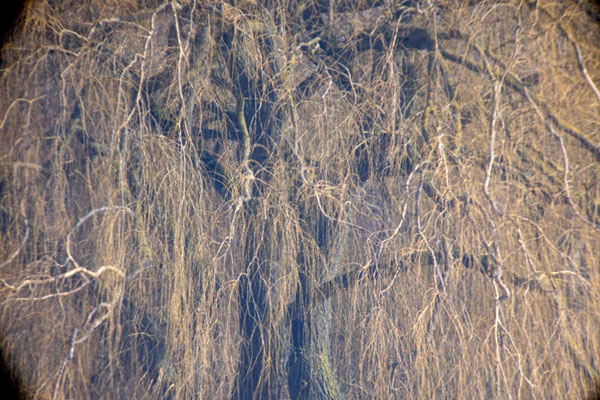
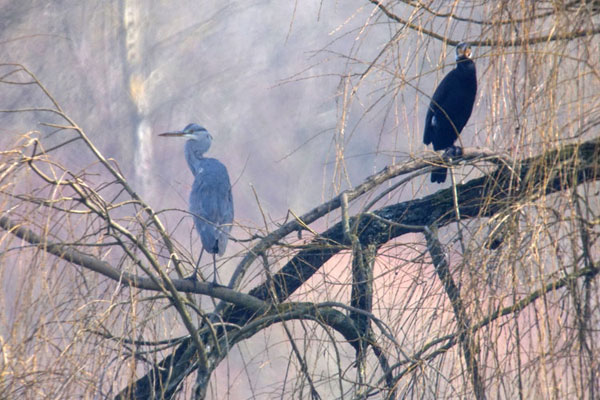
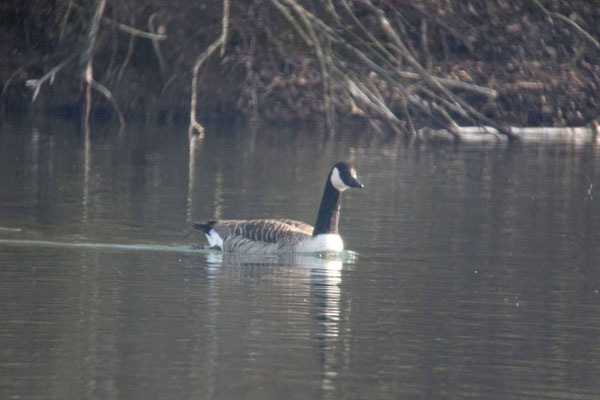
At the Binshof Lakes Near Speyer
 |
 |
 |
||
 |
 |
 |
||
 |
 |
 |
||
 |
 |
 |
Photo data: March 4, 2018, ISO 800, focal length 52 mm (equiv.)
Camera Attached to Skymax-127 Telescope
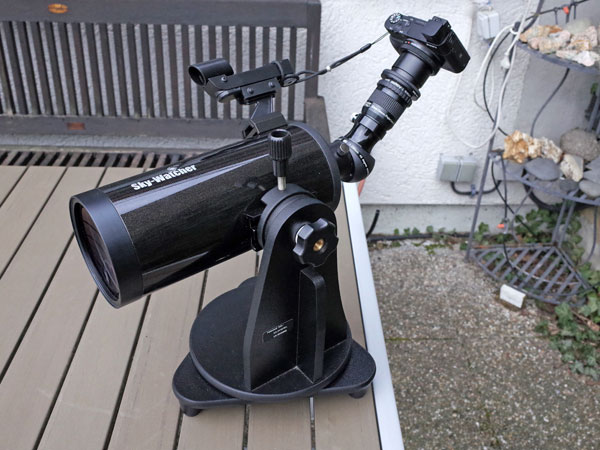
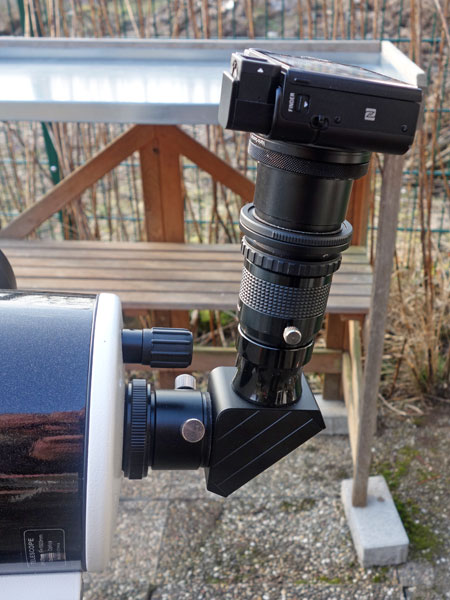
Here, you can see the Sony RX100 M4 attached to the Sky-Watcher Skymax-127 telescope (Maksutov-Cassegrain) and the Revelation 32 mm DigiScope eyepiece. It is mounted on my Sky-Watcher Star Discovery mount.
 |
 |
 |
||
 |
 |
 |
||
 |
 |
 |
Results
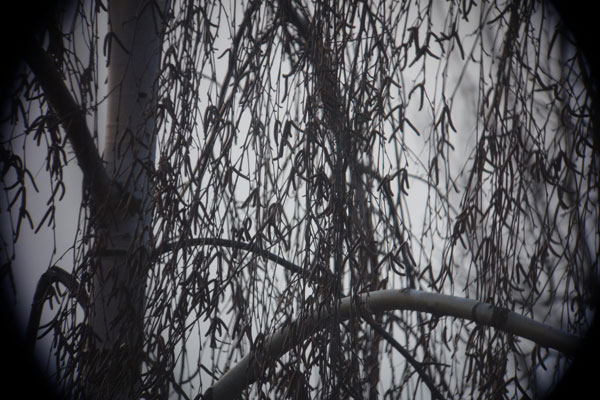
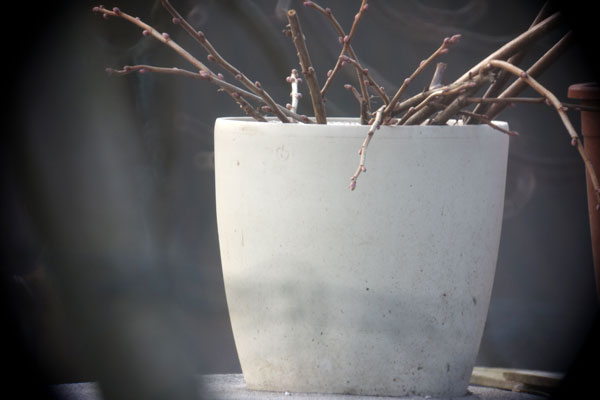
Daylight
 |
 |
|
||
Zoomed in (50 mm equiv.) |
Ditto |
Dito |
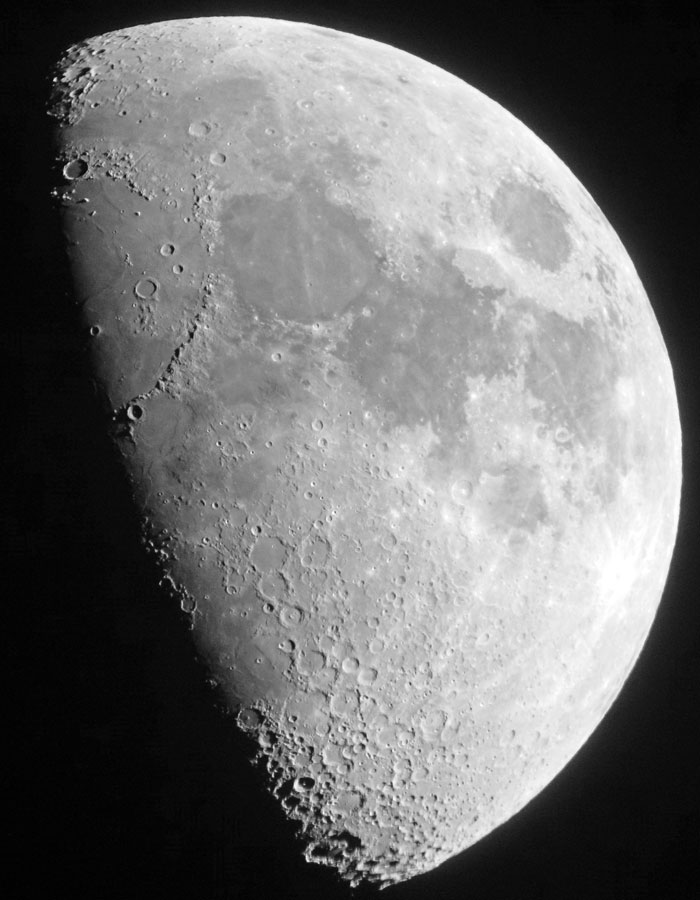
Moon
The following photos of the moon were taken on March 25, 2018 using the projections method, that is, with the Sony RX100 M4 attached to the eyepiece. I used ISO 800 and mostly underexposed EV -1 to avoid blowing the highlights. I used the Sky-Watcher Skymax-127 OTA with a 32 mm Digiscope eyepiece with T-mount.
 |
 |
|
|
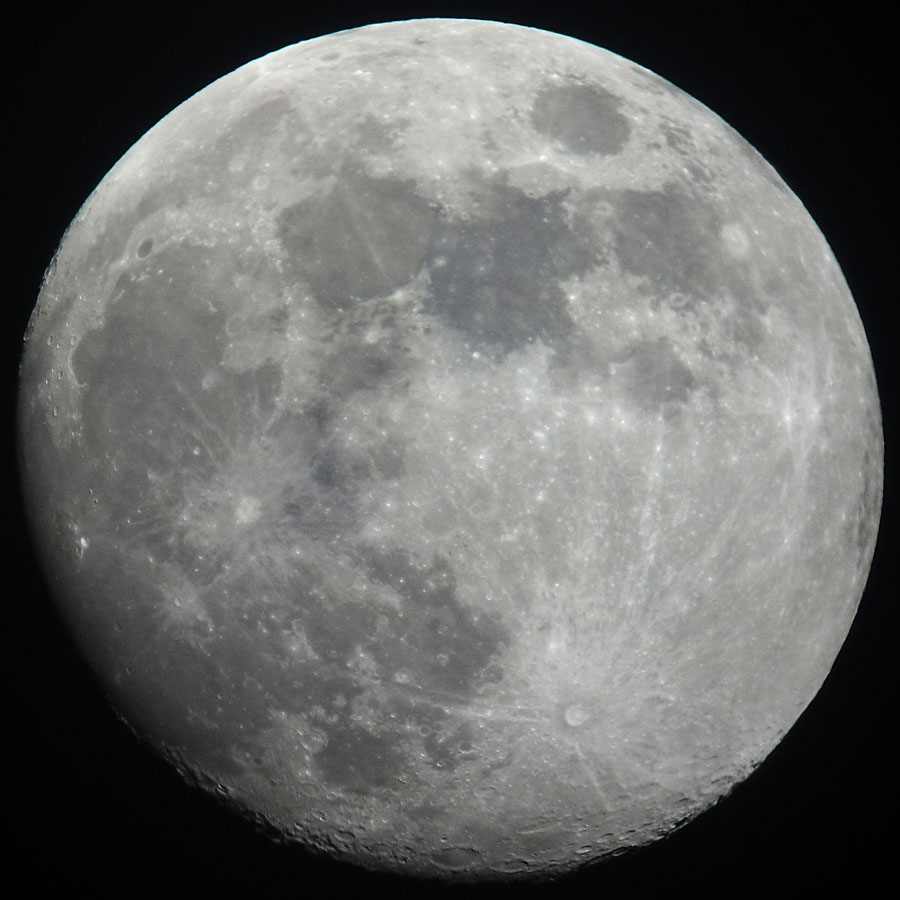
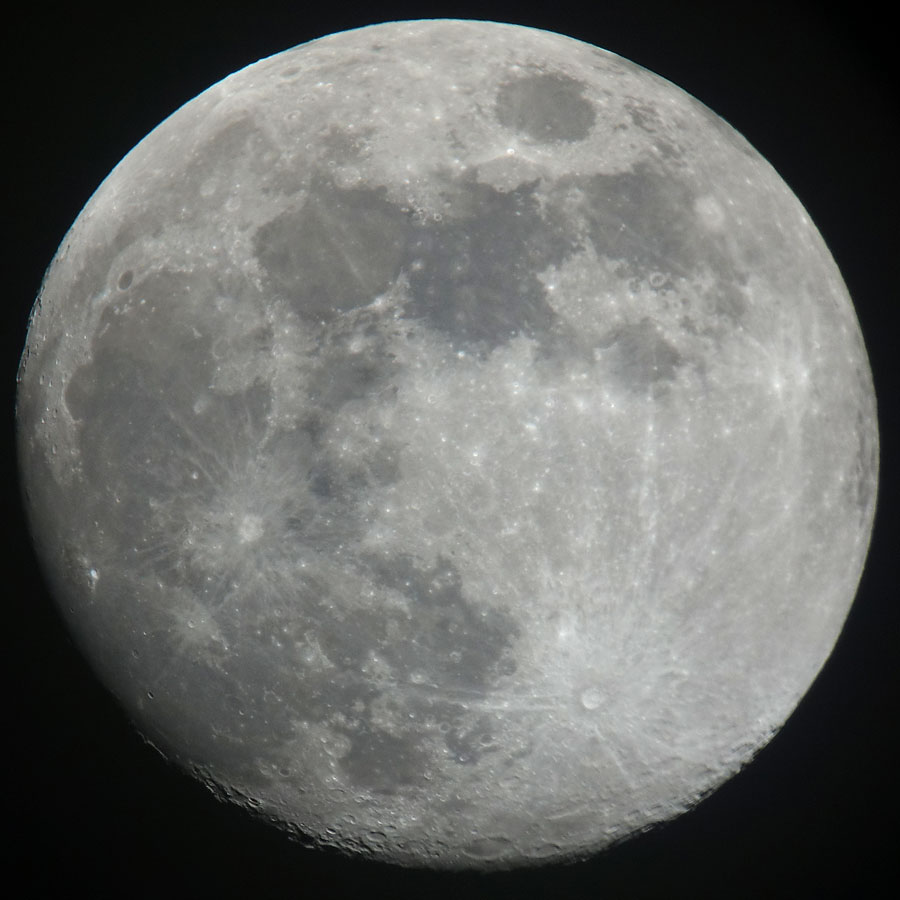
The following photos of the moon were taken on March 29, 2018, two days before Full Moon, using the projections method, that is, with the Sony RX100 M4 attached to the eyepiece. I used ISO 400 and 200 and underexposed EV -2 to avoid blowing the highlights. I used the Sky-Watcher Skymax-127 OTA with a 32 mm Digiscope eyepiece with T-mount.
 |
 |
|
2200 pixels (ISO 400, 28 mm equiv.) |
2700 pixels (ISO 200, 35 mm equiv.) |
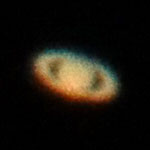
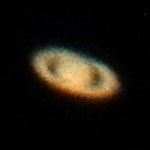
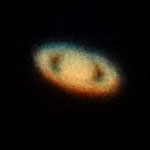
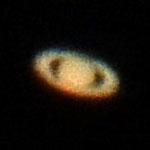
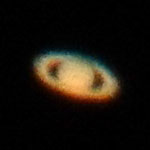
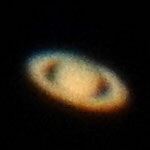
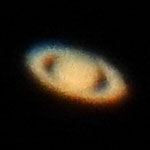
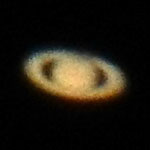
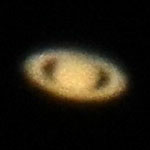
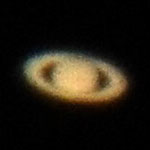
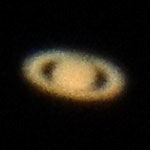
Saturn
The following photos of Saturn were taken on August 3, 2018 using the projections method, that is, with the Sony RX100 M4 attached to the eyepiece. I used ISO 800 and 1600 and underexposed to avoid blowing the highlights. I used the Sky-Watcher Skymax-102 and Skymax-127 OTA with a 32 mm Digiscope eyepiece with T-mount.
 |
 |
 |
 |
 |
 |
|||||
Skymax-102 (brighter versions) |
||||||||||
 |
 |
 |
 |
 |
 |
|||||
Skymax-127 (brighter versions) |
||||||||||
Camera Attached to a Telescope - Tips
There are three things that can make life difficult with astronomy photos:
- Focusing: When shooting with a telephoto lens, it is enough to manually
set the distance to infinity..
If you take photos with a camera with a built-in lens, it is more complicated
(see below). I also took successfully photos
of the moon using the autofocus.
If the camera is attached to a telescope, however, this is not sufficient, because the telescope must also be focused correctly. It looks, however, that you need not focus exactly with one element and can use the other to focus exactly (whichever is more convenient). - Exposure: A small bright dot in front of a black background is not correctly exposed by any camera, but overexposed.
- Protection against camera shake: With the moon, you easily get exposure times down to 1/1000 sec, with the planets this is however different. With a suitable choice of sensitivity (ISO) and aperture, I reach ed exposure times around 1/20 - 1/30 sec. But if the telescope is mounted on a shaky mount, this will not help much...
Focusing
Focusing requires two steps:
- Distance has to be set at the camera to "infinity."
- The telescope has to be focused using the viewfinder or LCD screen of the camera.
Setting the Distance to "Infinity"
Basically I set the distance to manual (MF) and then to "infinity" (unless there is an explicit "infinity" setting as Ricoh cameras have) for all my cameras that I use on the telescope and that have fixed lenses. Not with every camera (example: Sony RX100 M1) you can easily and quickly check whether the distance is actually set to "infinity." Since the Sony RX100 M4 displays a rough distance scale as soon as you set the distance, this can be quickly done and corrected if necessary with this camera (even if I never know in which direction I have to turn the Control Ring).
Note: At medium to long focal lengths, however, I found that the image was not sharp at all when I set the distance to infinity. Here you have to set the focus on infinity "by eye" on bright stars. Strong focus peaking and the automatic viewfinder magnification help me here (it may also make more sense to activate the viewfinder magnification manually). Unfortunately, our Sony cameras show a strong hysteresis when focusing and react with strong delays in the dark, so that focusing can become a patience game.
Focusing the Telescope
Since the camera is set to infinity, the telescope takes over the focusing task. This is done using the camera's viewfinder or LCD display, often under poor lighting conditions. This is why focusing is less successful on surface structures, as I tried during the lunar eclipse in 2018, because the viewfinder image is often too dark for this. Stars or planets are better suited to to task.
"Combined Focusing"
It looks as if you need not focus exactly with one element and can use the other to focus exactly - whichever is more convenient (according to a personal communication with a starfriend).
Exposure
A bright object or even a small bright dot in front of a black background generally leads to overexposure when using the normal exposure controls (spot metering may work for larger objects). One option that I use more often is to use exposure compensation and underexpose 1 to 3 exposure (EV) steps. Of course, this requires some trying, but most of the time you have the time for it.
However, it is best to adjust the exposure manually according to the "eye impression" provided by your digital camera (according to the viewfinder image, especially during playback). I select an aperture that is not too small and then adjust the exposure time until the exposure "fits" (which is not always easy to see...). Bracketing is certainly one way to find the right exposure.
However, some cameras, such as the Sony RX100 M4 and M1, do not make it easy to set aperture and exposure simultaneously in manual mode (MF and M mode), especially when manual focus is set and a setting ring is occupied by this or another function. Unfortunately, only a look into the camera manual will help here! See next!
Setting Aperture in M Mode
Usually, you can use the Control Ring in M mode to set the aperture value and the control wheel to set the shutter speed. However, when you assign another function, such as exposure compensation or zoom, to the Control Ring or use the manual focusing, which is also controlled by the Control Ring, the latter is no longer available for setting the aperture. Since exposure compensation is not needed in M mode, the "bottom" button on the control wheel is in thos case used to toggle between setting shutter speed and setting aperture. That is really a brilliant idea - once you have grasped it!
Protection against Camera Shake
First of all, a photo tripod or a telescope mount is recommended if you want to take photos with a telescope. However, my tripods and mounts are not very stable and let the telescope and camera shake as soon as you touch them. In such a case, you should avoid touching the shutter as much as possible or separate the time of shooting from the time of shutter release (if this is possible and the equipment does not tremble for too long). You have the following options:
- Self-timer (2-10 sec); it is usually too cumbersome for me to use the self-timer in the dark...
- Wireless: Control the camera via camera app on a smartphone or tablet computer (or use a laptop computer)
- Wired: USB cable release or wire cable release*; for the Sony RX100 M1/M4 I bought the simple remote commander Sony RM-SPR1.
*) The cable release on my Leica M (type 240) caused camera shake due to the movement of the cable!
References
- SONY RX100 V Quick Change Adapter Kit 52mm by Lensmate: lensmateonline.com/products/lensmate-rx100-iii-rx100-ii-rx100-quick-change-adapter-kit-52mm?variant=998641683
- Sony Remote Commander RM-SPR1: www.sony.com/electronics/interchangeable-lens-cameras-tripods-remotes/rm-spr1
|
made by |
| 15.01.2022 |