Leica M (Typ 240) Attached to Telescope (3)
Prolog... | T-Mount Adapter | Camera with Adapter | Skymax-127 with Adapter | Skymax-102 with Adapter | Adapters | Camera Attached to Skymax-127 | Camera Attached to Skymax-102 | Results | Conclusions | Appendix: Comparison Leica M and Ricoh GR
Archive
On this page, I demonstrate how to mount a Leica M (Typ 240) directly to a telescope with a T-mount adapter in order to take astrophotos. This connection option is available for my two Maksutov-Cassegrain OTAs, the Skywatcher Skymax-102 and the Skymax-127.
Only a camera with interchangeable lenses, such as the Leica M, can be mounted directly to a telescope. That is, the camera body is directly attached to the telescope tube, typically using a T-mount adapter, and the telescope serves as "camera lens." In the case of my Sky-Watcher Skymax-127 (Maksutov-Cassegrain) with a focal length of 1500 mm, the telescope tube is therefore a lens with a focal length of exactly 1500 mm and an aperture of f/11.8. In the case of the Skymax-102, a focal length of 1300 mm and an aperture of f/12.7 results.
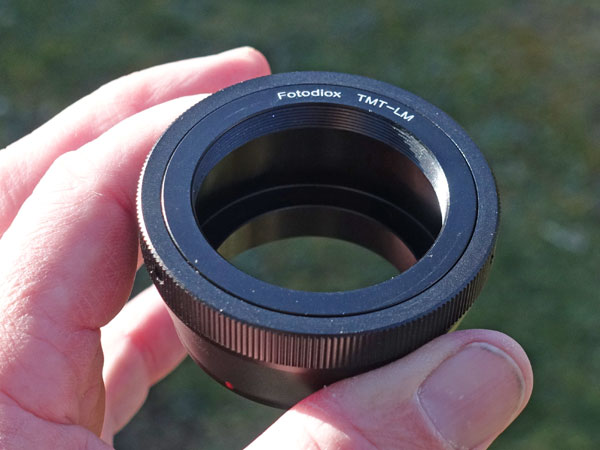
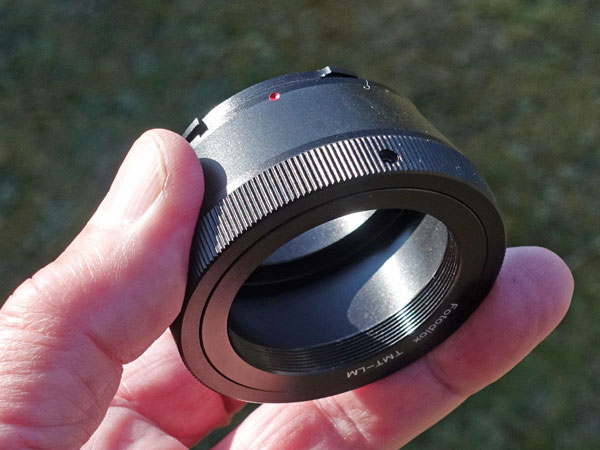
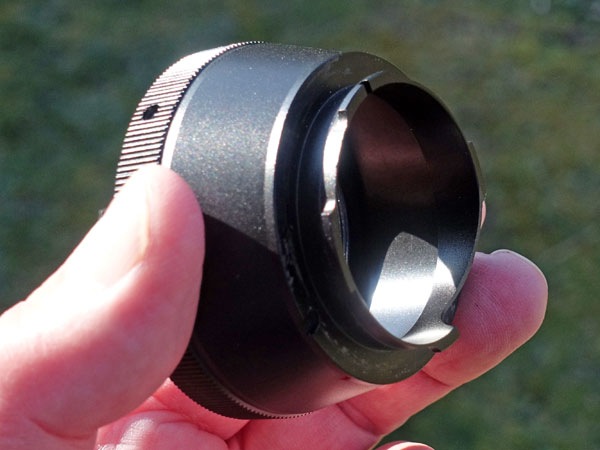
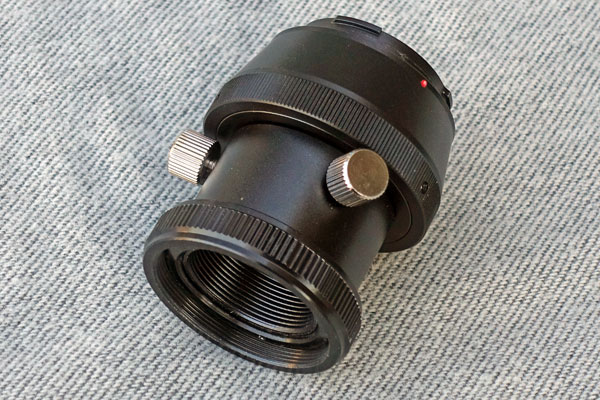
I use the Fotodiox Lens Mount Adapter "T Mount to Leica M" (in short: T-Mount-Adapter) for the connection of the camera to the telescope. It already disassembled after its first use, because the grubs could not hold the T-Mount ring and it spun...
Note: I sold the Skymax-102 at the end of August 2018. I therefore can no longer report any experiences with the Skymax-102 at the Leica M (Typ 240) here. |
Prolog...
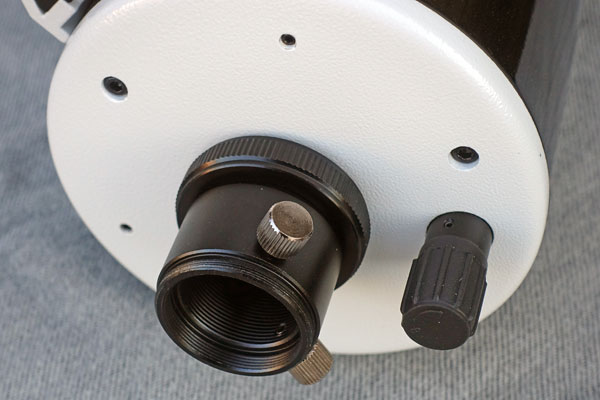
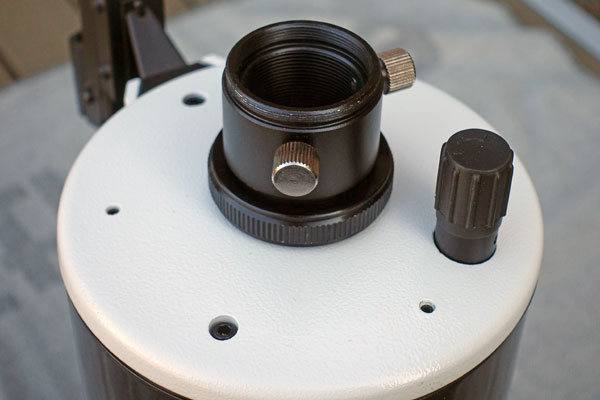
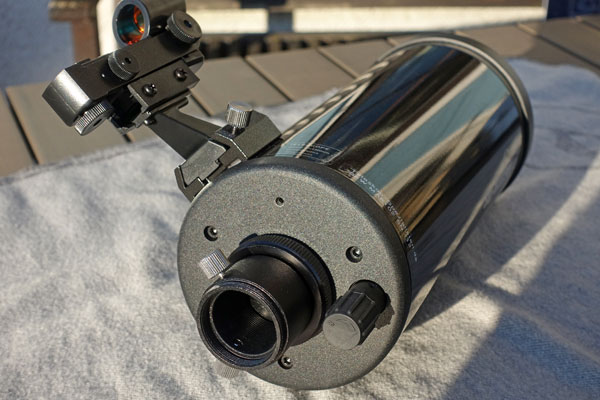
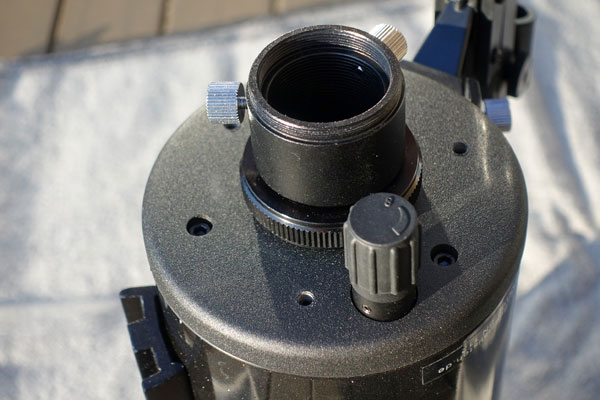
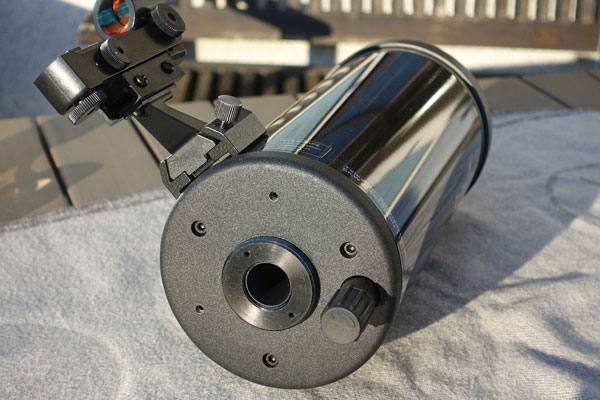
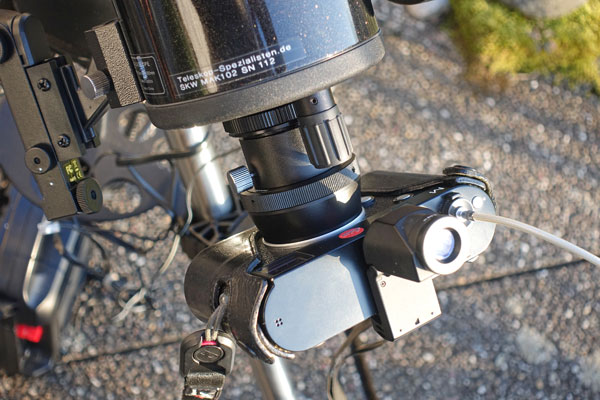
The Skymax-127 and the smaller Skymax-102 have an eyepiece adapter with T-mount thread at the eyepiece end. At the other end, there is a union nut that connects the eyepiece adapter to the telescope and also allows the eyepiece adapter to be rotated so that the fastening screws for the eyepiece (or the zenith mirror/amici prism) can be optimally aligned. See the photos below for details.
Warning: I connected the T-mount adapter too tightly to the telescope's eyepiece adapter. Therefore, when trying to unscrew the T-mount adapter again, the inner ring (that has the T-thread), which is held by several grub screws, spun. I was only able to help myself by loosening the grub screws (I did not have an exact fitting Allen key either...) to remove the adapter, while the ring remained on the eyepiece adapter. I unscrewed the ring by force (but not by using any metal objects...). Perhaps a rubber blanket would have helped...
I reattached the inner ring to the adapter using the grub screws, but I was not able to tighten the set screws properly, because the Allen key did not fit exactly and spun.
What I am going to do next time, I do not know yet. There was no next time, because the results with the Leica M (Typ 240) were completely disappointing. In addition, I sold the two Skymax OTAs in the meantime, the last one (Skymax-127) at the end of January 2021.
T-Mount Adapter
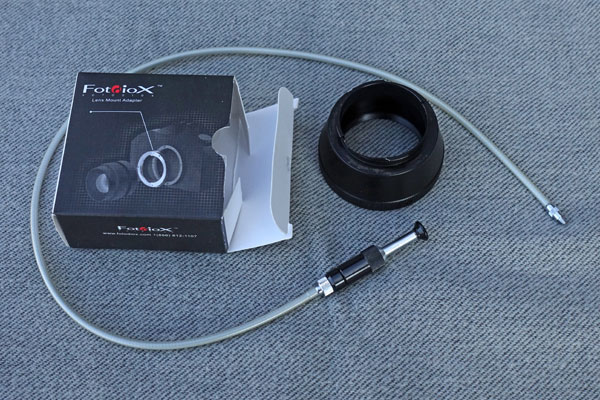
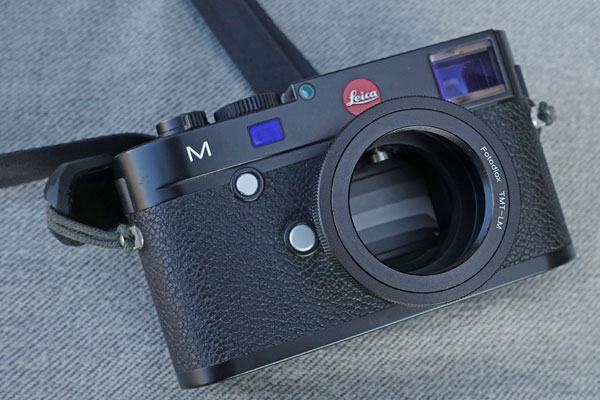
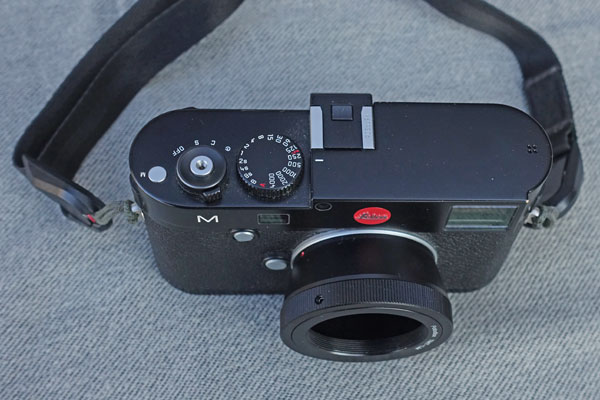
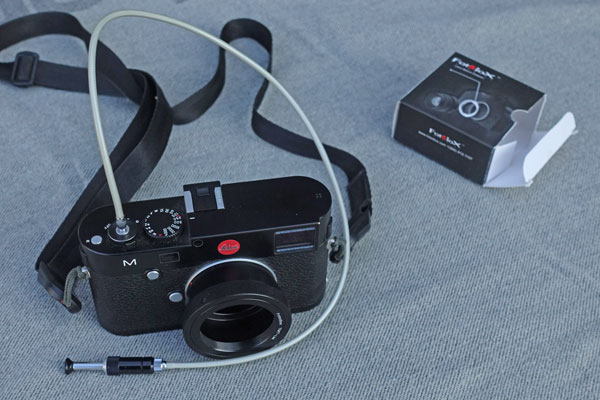
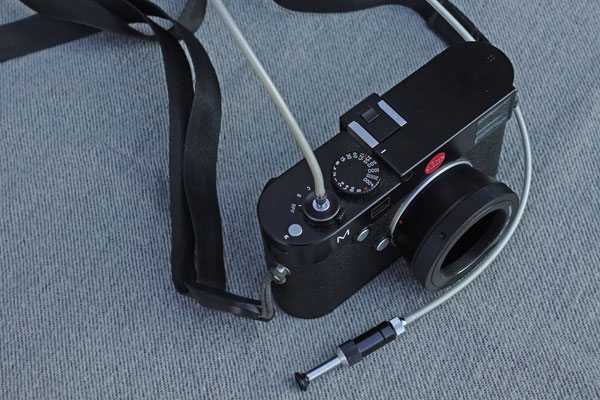
Here I present the Fotodiox T-Mount adapter for connecting the Leica M (Typ 240) to the telescope, and also the cable release for the Leica:
 |
 |
 |
||
 |
 |
 |
Camera with Adapter
Here I present the Leica M (Typ 240) with attached T-Mount adapter and partly with cable release:
 |
|
 |
 |
|
|
 |
Skymax-127 with Adapter
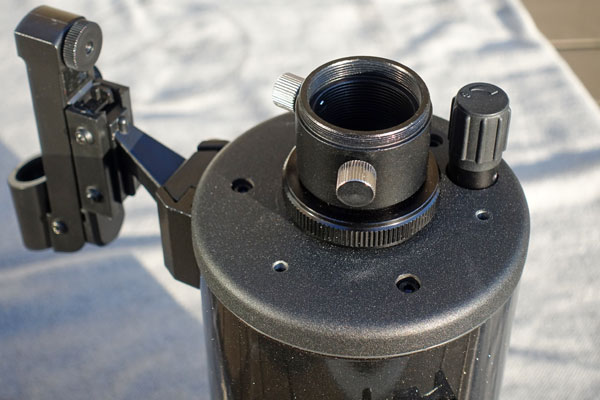
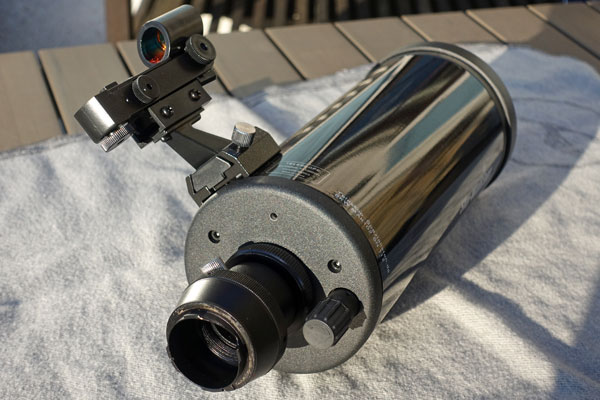
Here I demonstrate how to connect the camera to the Skymax-127 using the eyepiece adapter and a T-mount adapter for Leica M (the camera is not shown, you can see this below).
 |
 |
 |
||
Eypiece adapter at Skymax-127 (also used for zenith mirror or Amici prism) |
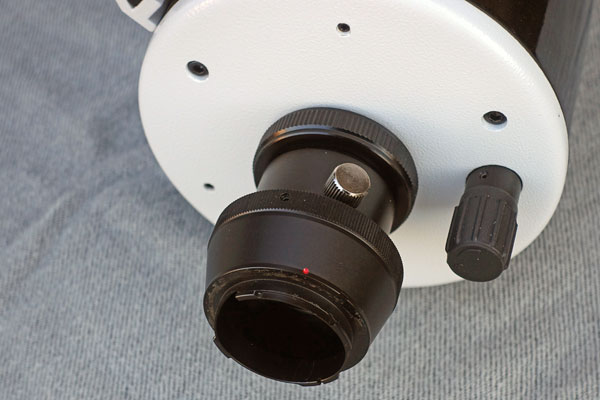
Ditto, with attached T-Mount adapter for Leica M - now the camera has to be connected to the bayonet, which you can see at the end |
|||
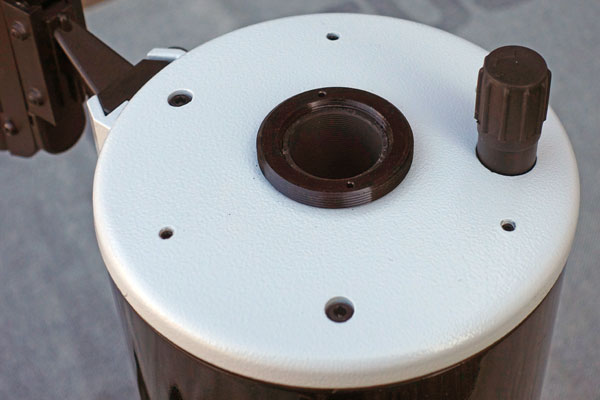 |
Eyepiece Adapter removed (unusual M45 thread; there are adapters available to a SC thread for connecting 2" accessories ) |
|||
Skymax-102 with Adapter
Here I demonstrate how to connect the camera to the Skymax-102 using the eyepiece adapter and a T-mount adapter for Leica M (the camera is not shown, you can see this below).
 |
 |
 |
||
Eypiece adapter at Skymax-127 (also used for zenith mirror or Amici prism) |
||||
 |
 |
 |
||
T-Mount adapter attached |
Eypiece adapter removed (unusual M45 thread; there are adapters available to a SC thread for connecting 2" accessories ) |
Ditto |
||
Adapters
Here, I present the two adapters - individually and screwed together.
 |
T-Mount adapter (left) and eyepiece adapter (right); the union nut is used for attaching the eyepiece adapter to the telescope; the T-thread is located at the end of the adapter where the two screws are |
 |
||
 |
T-Mount adapter screwed to the eyepiece adapter |
 |
||
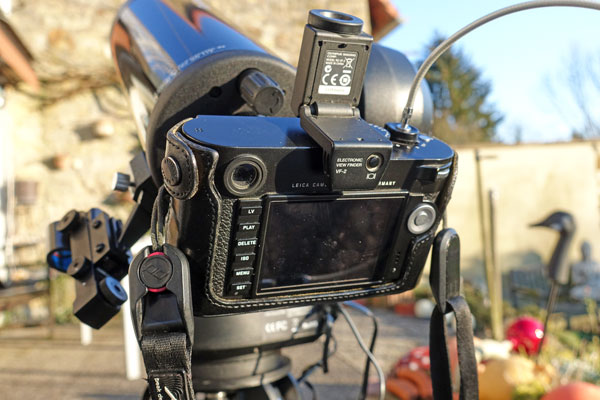
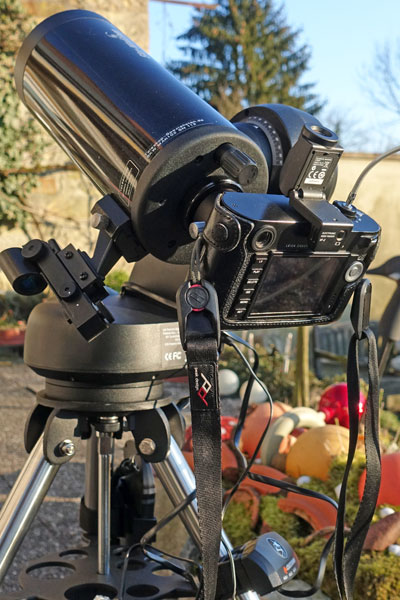
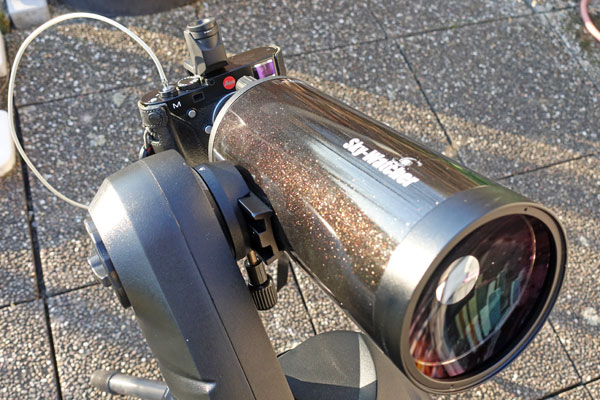
Camera Attached to the Skymax-127
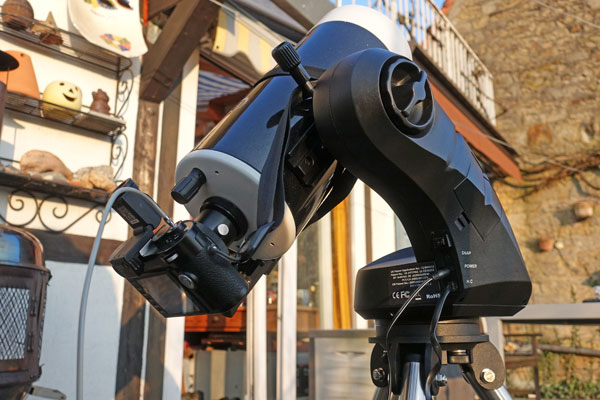
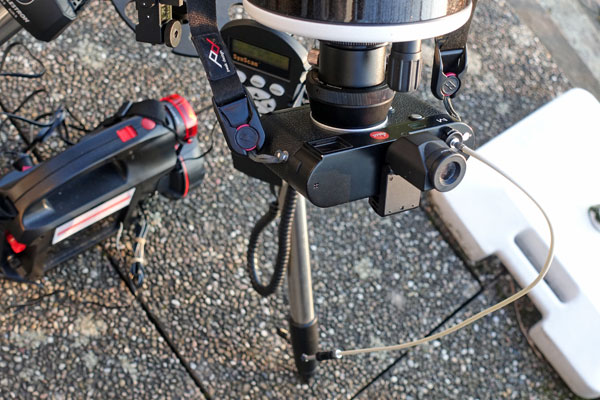
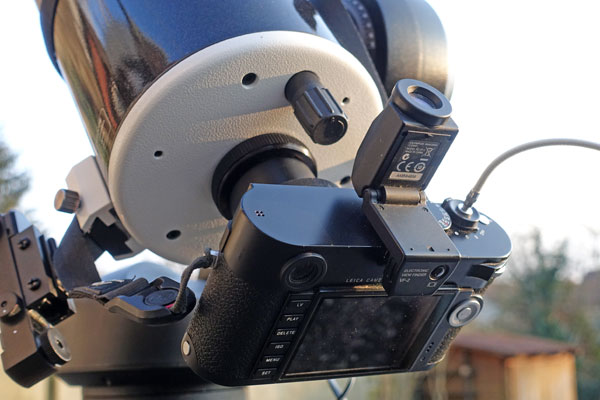
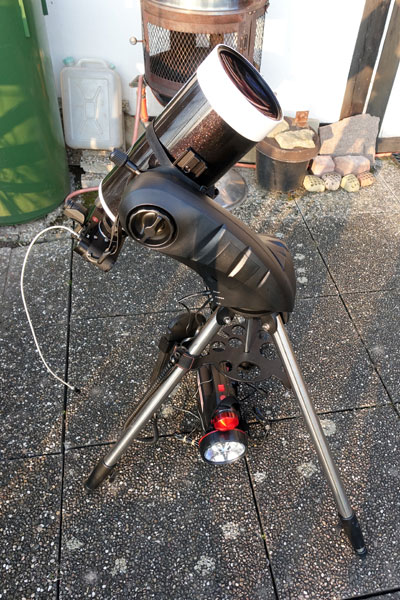
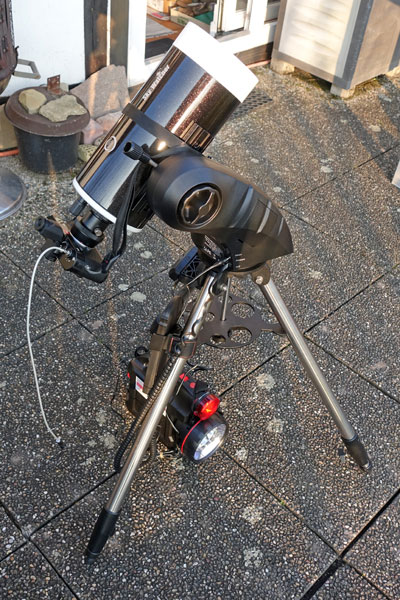
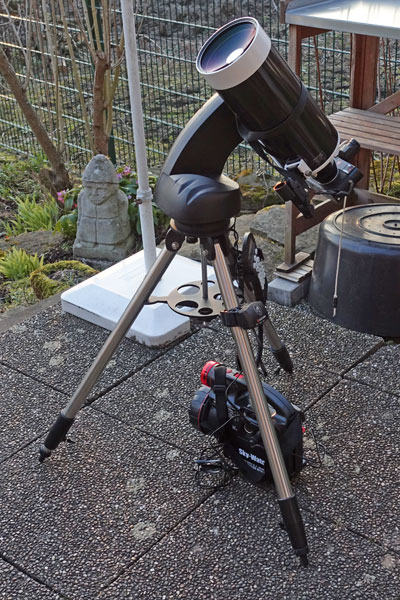
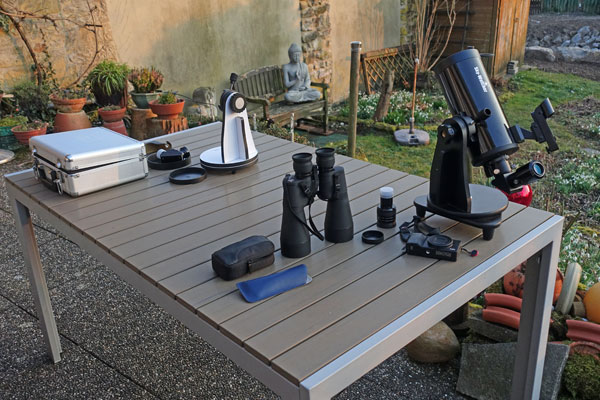
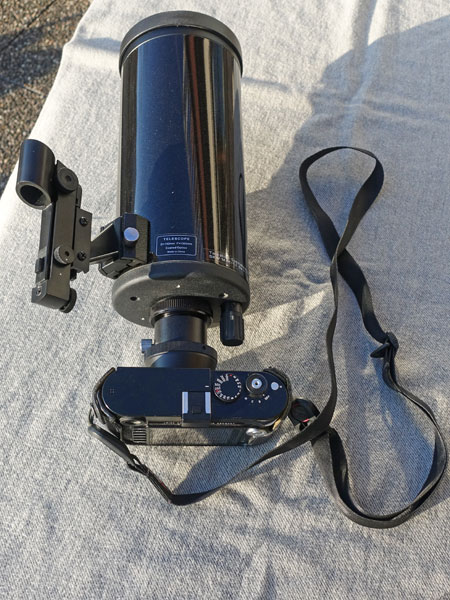
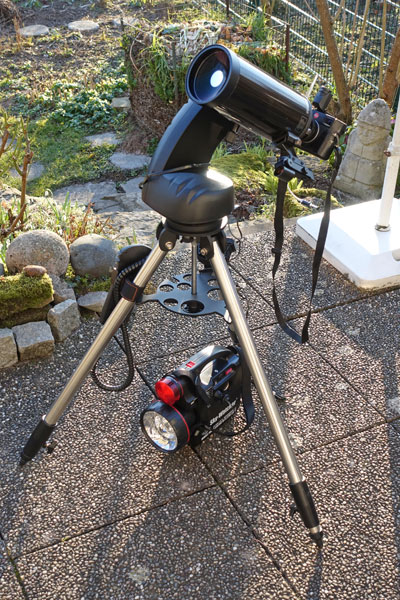
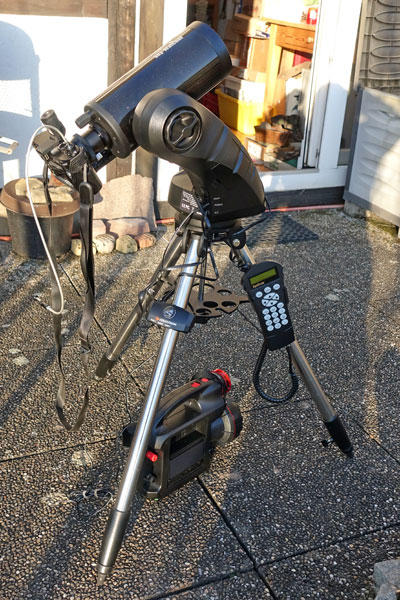
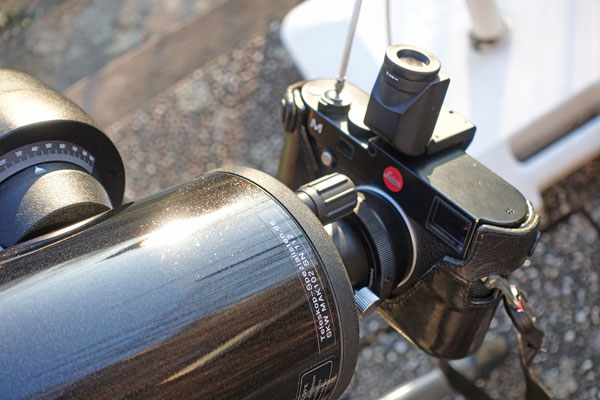
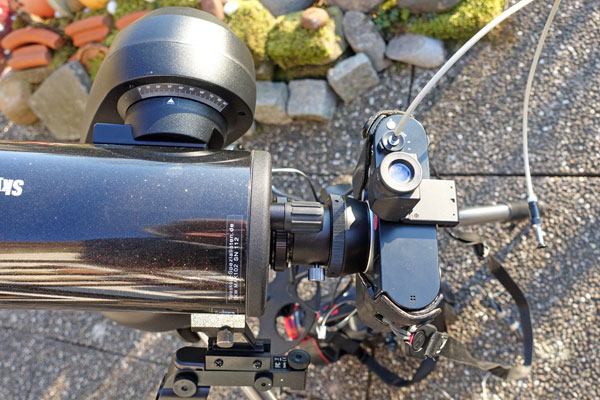
And now I present the Leica M (type 240) mounted to the Maksutov-Cassegrain telescope Sky-Watcher Skymax-127 (and also the overall equipment that I used that day...):
 |
 |
 |
||
 |
 |
 |
||
 |
 |
 |
Camera Attached to Skymax-102
Finally, I present the Leica M (type 240) mounted to the Maksutov-Cassegrain telescope Sky-Watcher Skymax-102:
 |
 |
 |
||
 |
 |
 |
||
 |
 |
 |
||
 |
Results
Daylight Tests
|
 |
 |
||
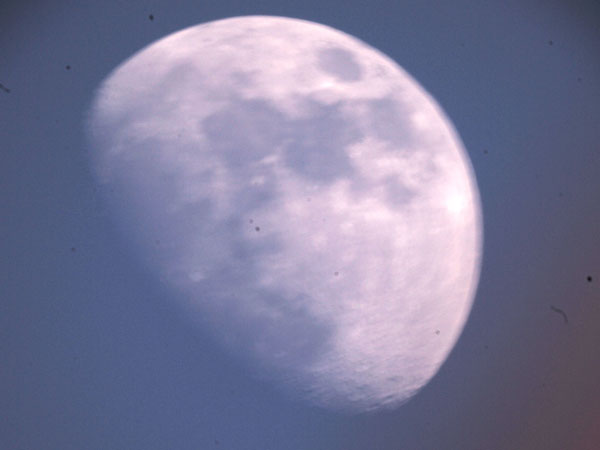
Original view, Skymax-102 |
Original view, Skymax-127 |
Original view, Skymax-127 | ||
|
|
|
||
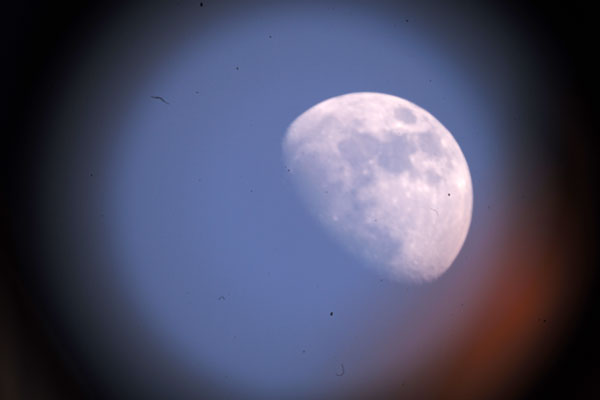
Original view, Skymax-102 |
Original view, Skymax-127 |
Original view, Skymax-127, post-processed |
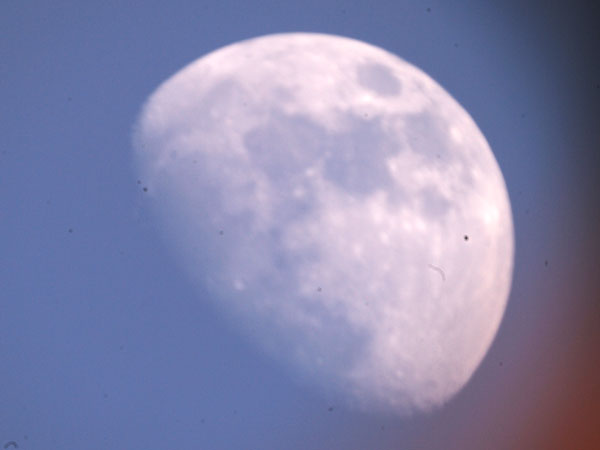
First, I did some daylight tests after "setting up the technology." I was not able to focus daylight shots well - with the exception of a nearby subject (Hazelnut kittens, right column). However, I had not used viewfinder magnification here. Motives against the light, unfortunately I did not have other motifs at my disposal, turned out having low contrast. Since I had used ISO 1600, there was also a lot of noise in the photos. All in all, these attempts did not make much hope for my upcoming photos of the moon... It also showed that the Skymax-102 produced much more vignetting than the Skymax-127, but it, too, cannot compete with typical lenses for photography. Nevertheless, the Skymax-127 seemed the better choice for my upcoming photos of the Aldebaran covering by the moon.
Skymax-127
I wanted to use the Skymax-127 with the Leica M (type 240) to photograph the covering of Aldebaran by the moon. This should also serve as a test for the direct use of the Leica M on the Skymax-127. Furthermore, I had built up my Skymax-102 tube for my wife for observing the covering of Aldebaran. Luckily, I took occasionally photos with this telescope and the Ricoh GR using the 1:50 method. Without this second camera I would not have achieved sharp photos of the Aldebaran covering!
Before the covering of Aldebaran (at about 17:50) the sky was still quite bright, and Aldebaran could only be seen in binoculars or with a telescope. When it returned one hour later (18:50 o' clock) on the other side of the moon, the sky was already quite dark. I also took some photos during the covering, when the sky was already a little darker, and the photos therefore showed more contrast.
At the latest, after the end of the covering of Aldebaran, but presumably already before that, I used the viewfinder magnification function of the Leica M for focusing. Typically, the focus shifted somewhat more than expected when I did so...
Especially the photos before Aldebaran's disappearance are dull and lack contrast. They also clearly show that the sensor was very dirty. In these tests, this did not really matter, but if you want to take serious astro photos, you should clean the sensor thoroughly first. On the later, darker images, the sensor dust is no longer that noticeable.
Phase 1 - Afternoon to shortly before Aldebaran's Disappearance
In this phase, I took about 40 photos. I took the first and early photos to try out the equipment, and then (from the 15th photo on) to document the coverage of Aldebaran. None of these photos were really sharp, although the exposure time was usually 1/500 sec at the beginning, in exceptional cases even up to 1/1000 sec. Towards the end, shortly before 6 p. m., the exposure times went up to 1/250 and 1/125 - with the result that the photos became increasingly blurred (usually having double contours).
Since the sky was still very bright, the contrast was low, so that the quality of the photos is not sufficient for this reason. When I increased the contrast, I got a lot of noise (ISO 1600). In addition and as already mentioned above, dust on the sensor disturbed the photos.
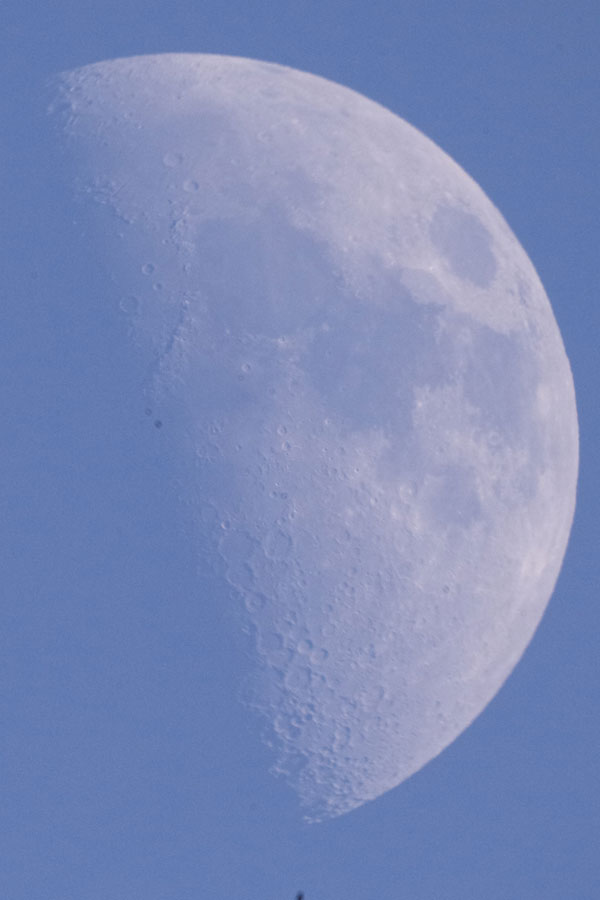
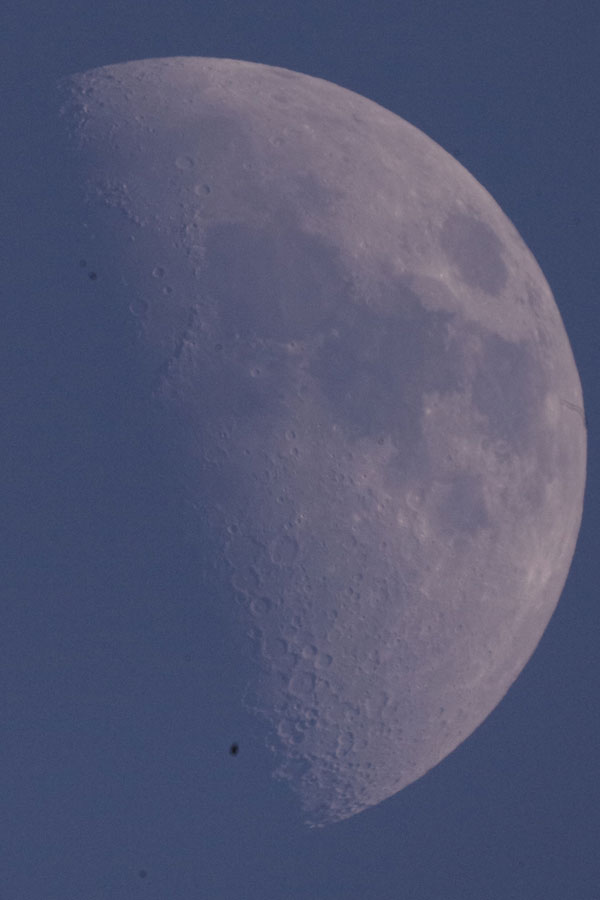
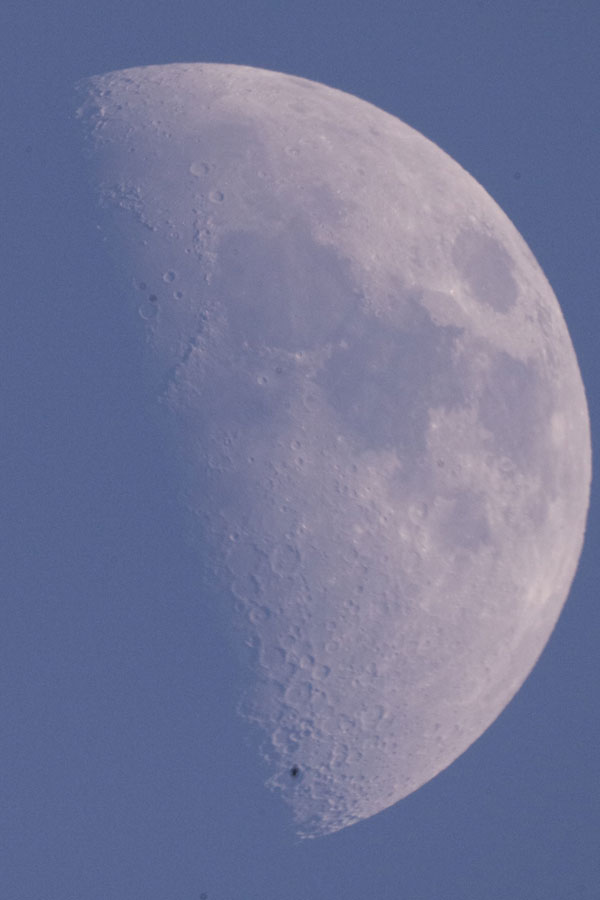
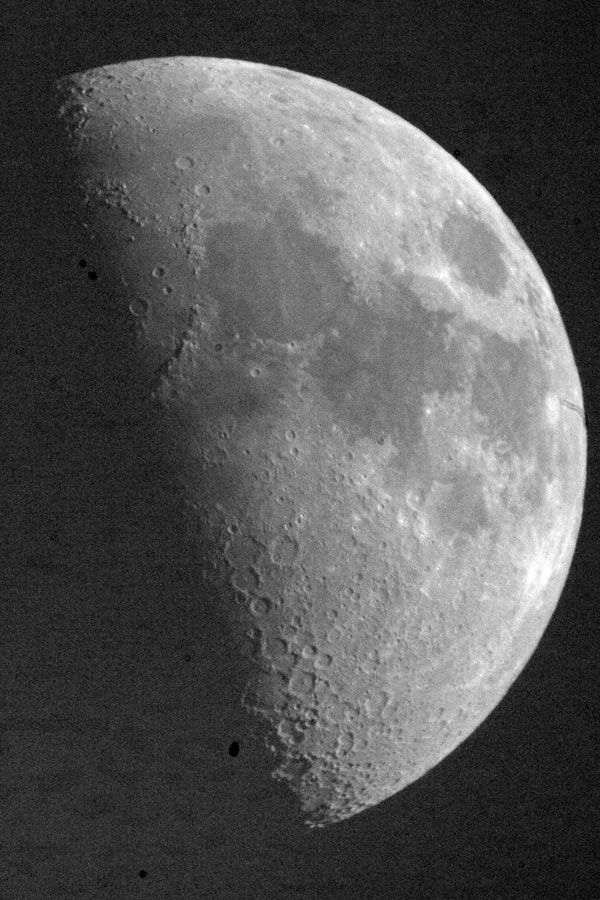
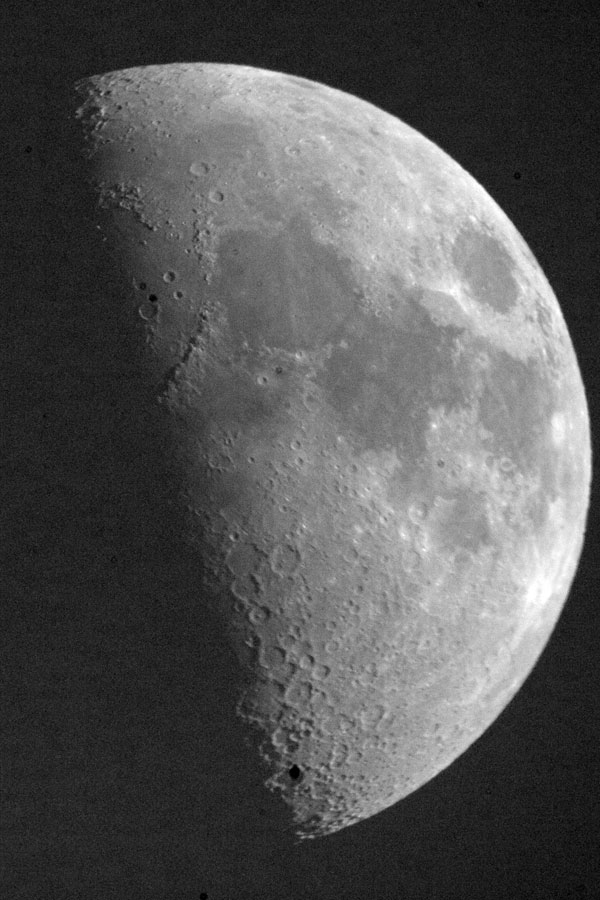
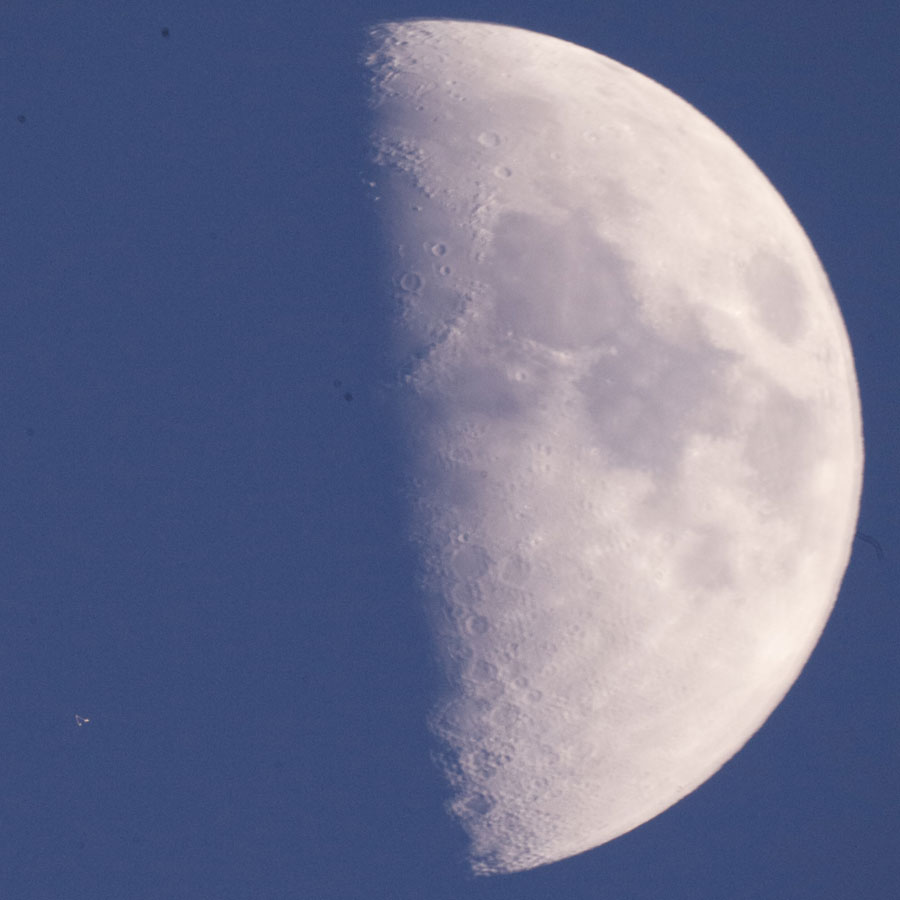
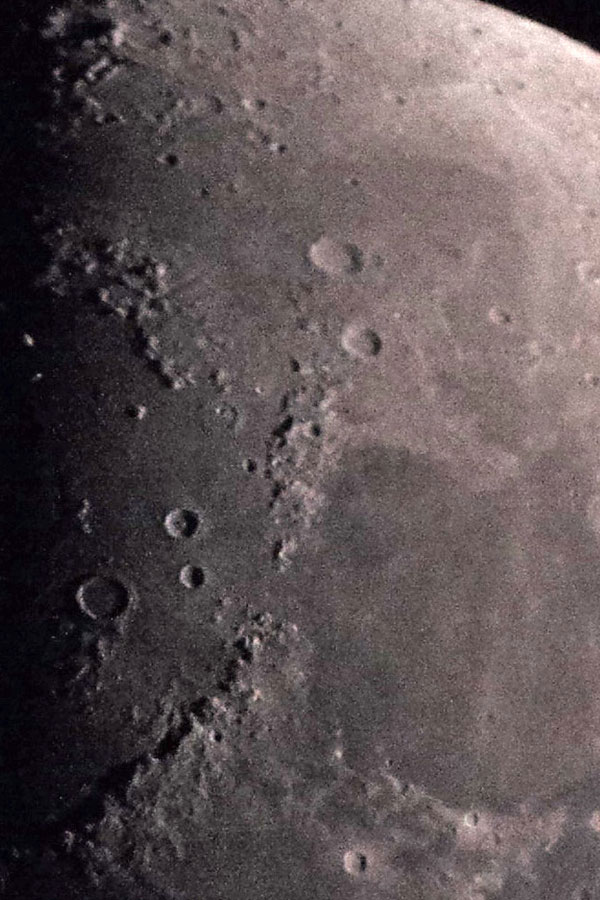
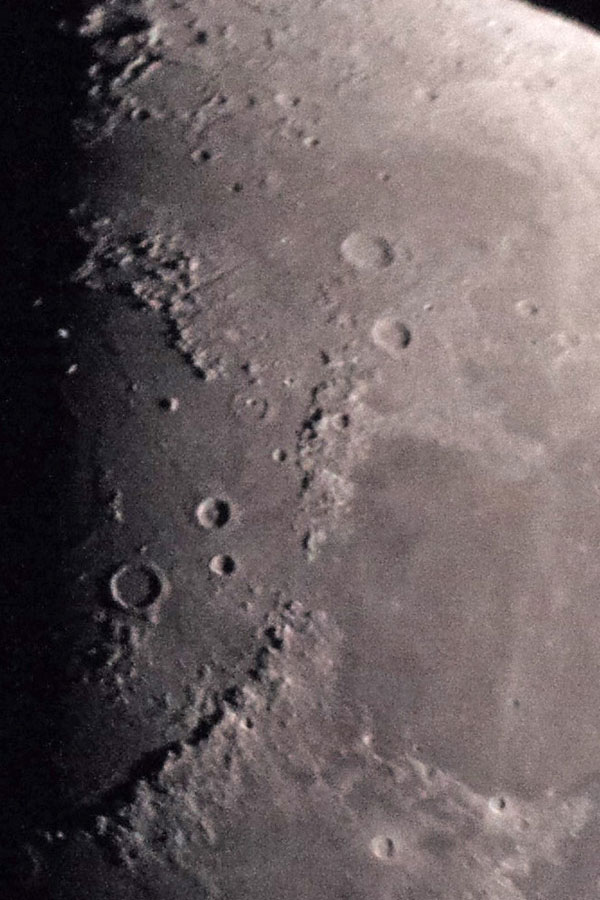
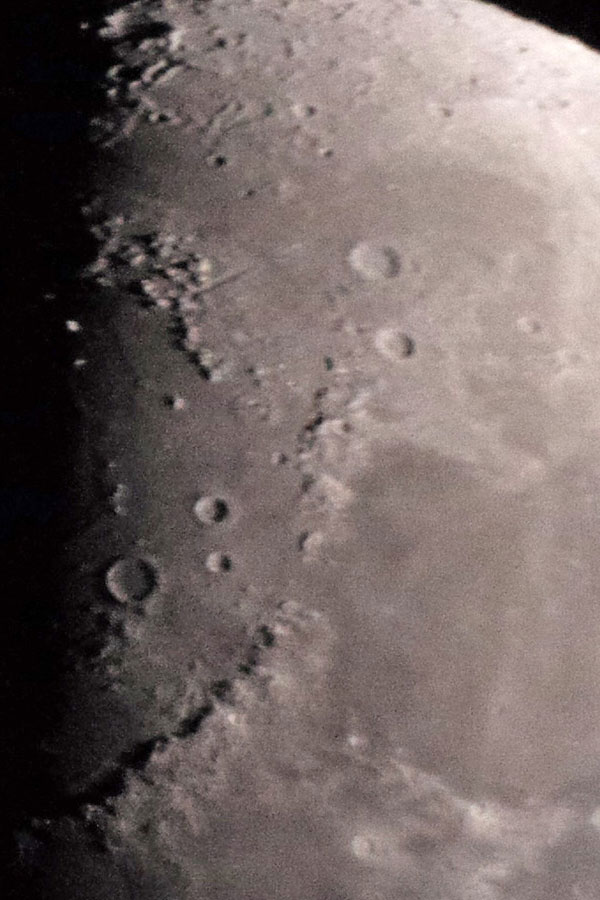
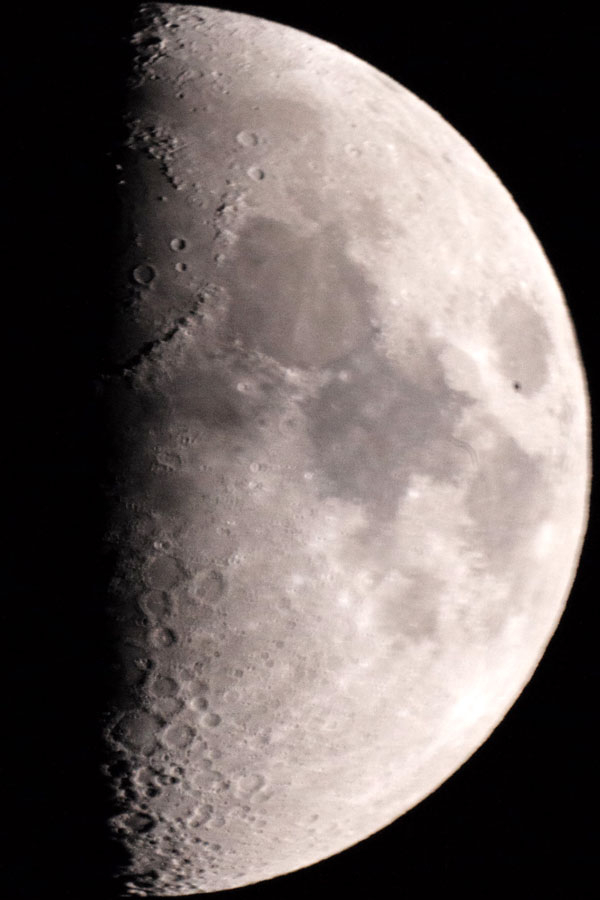
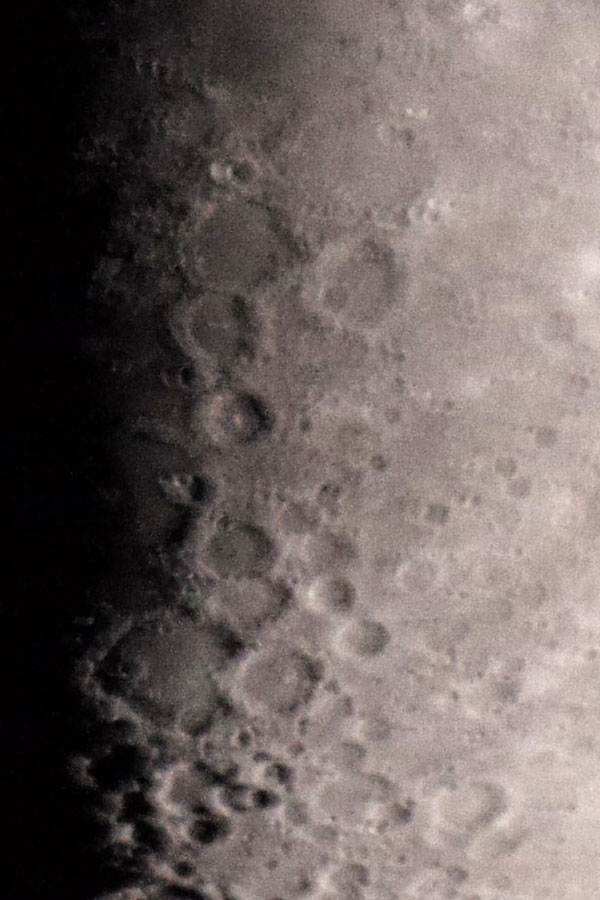
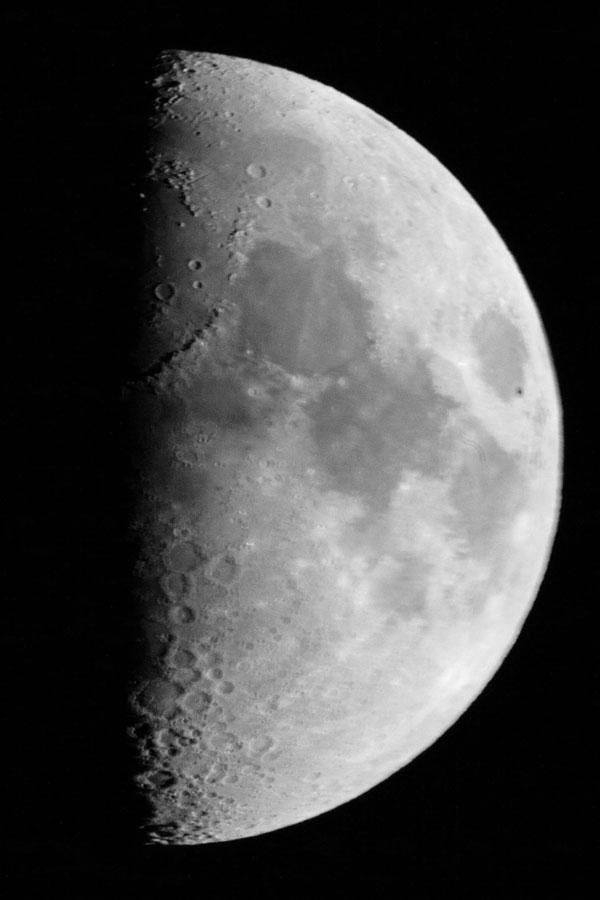
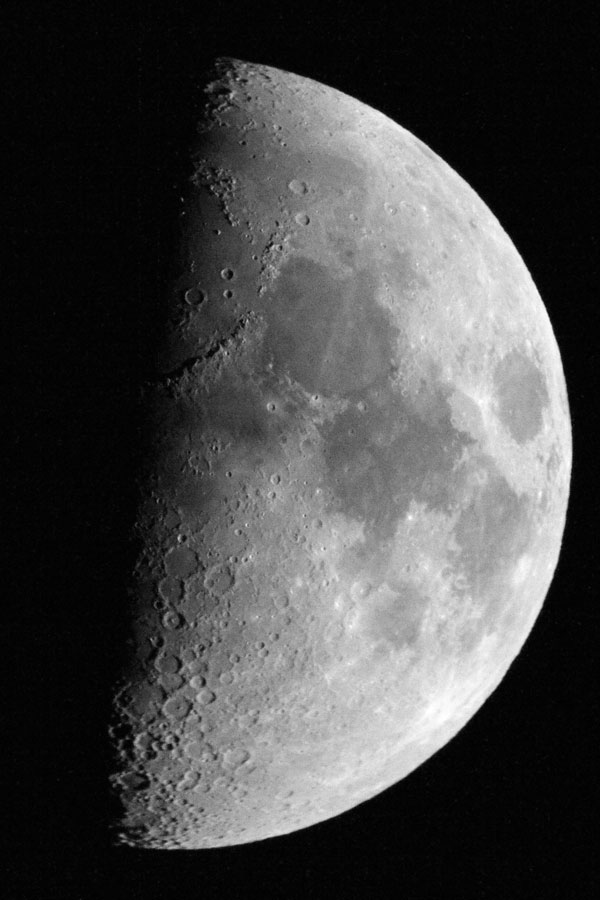
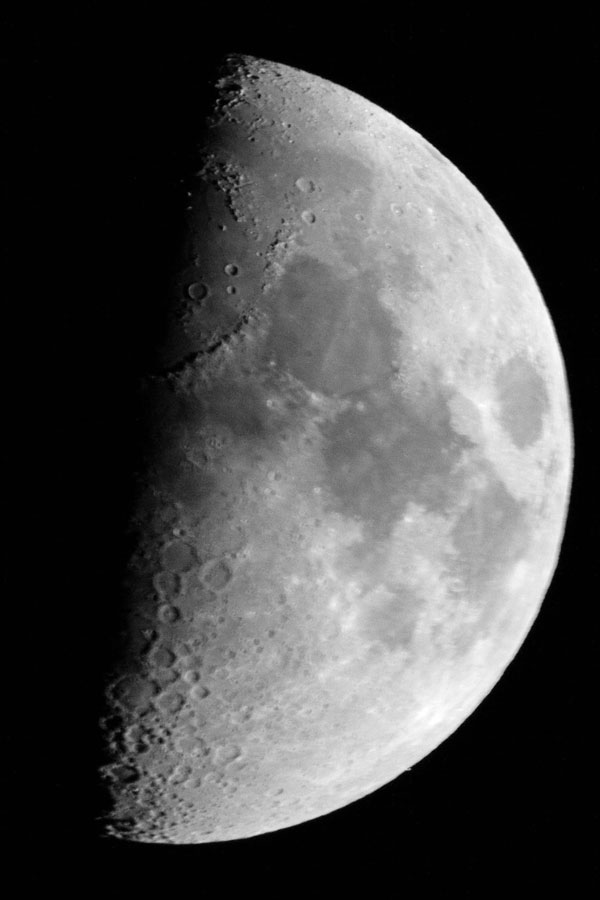
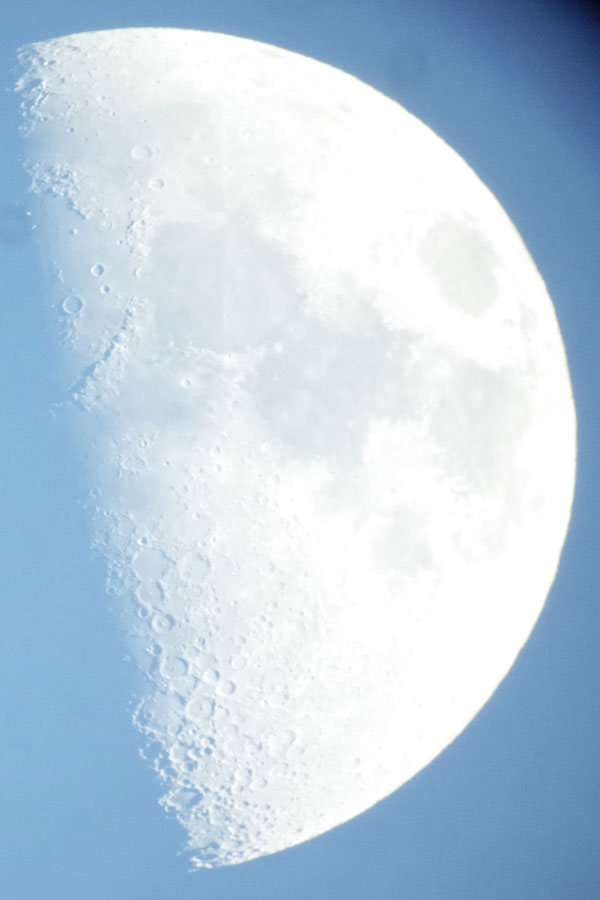
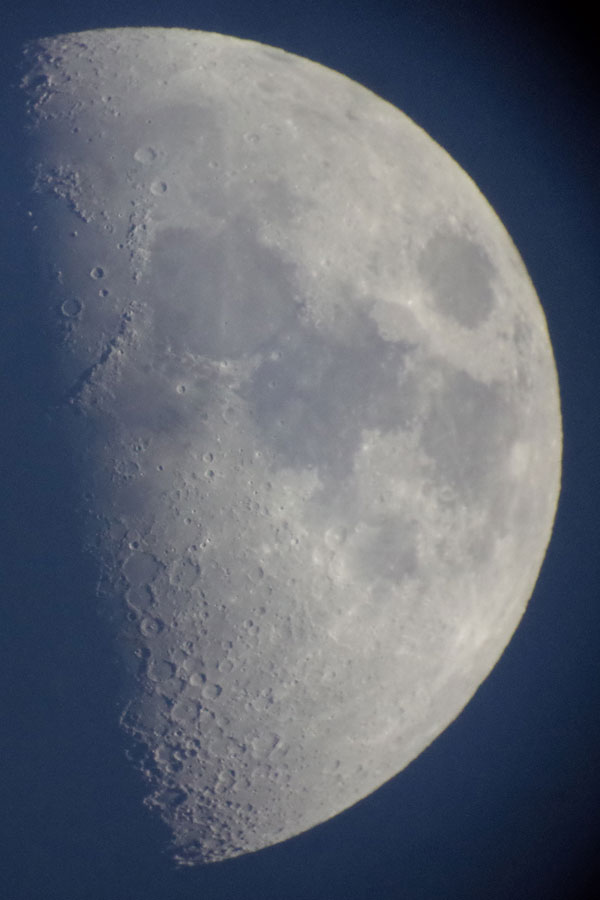
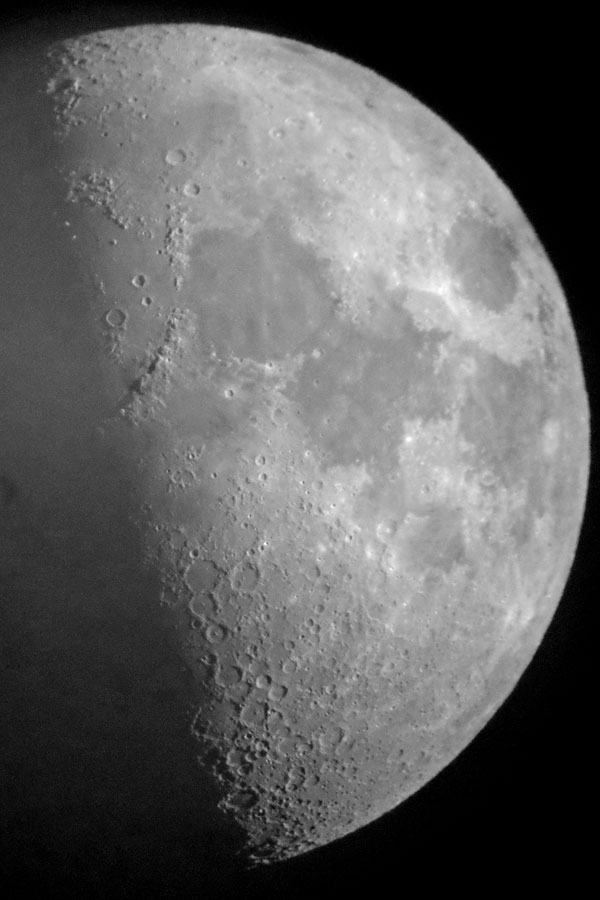
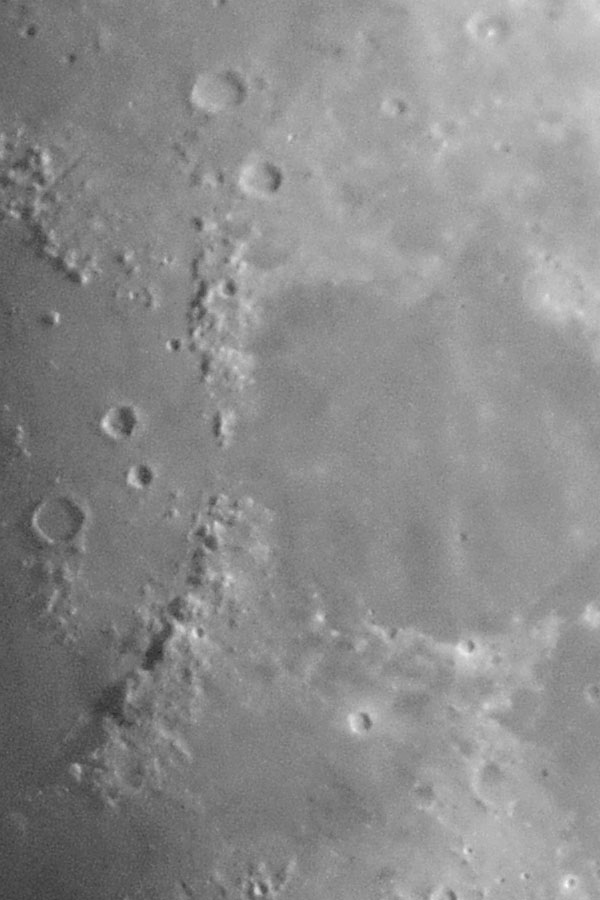
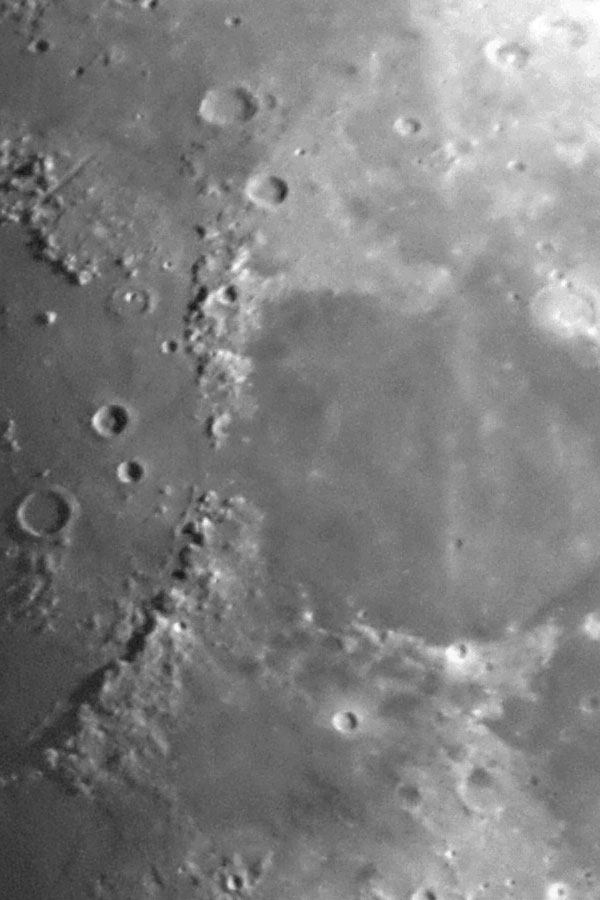
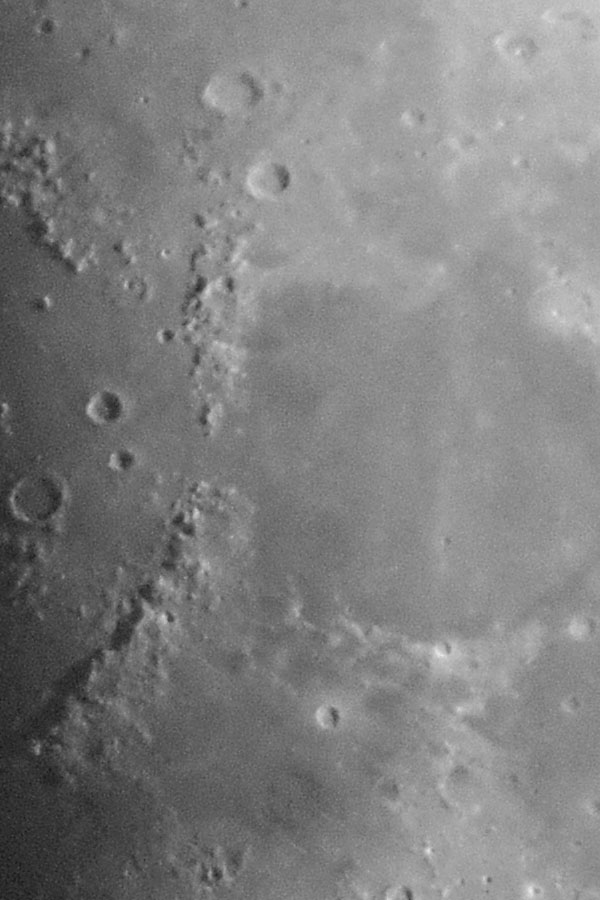
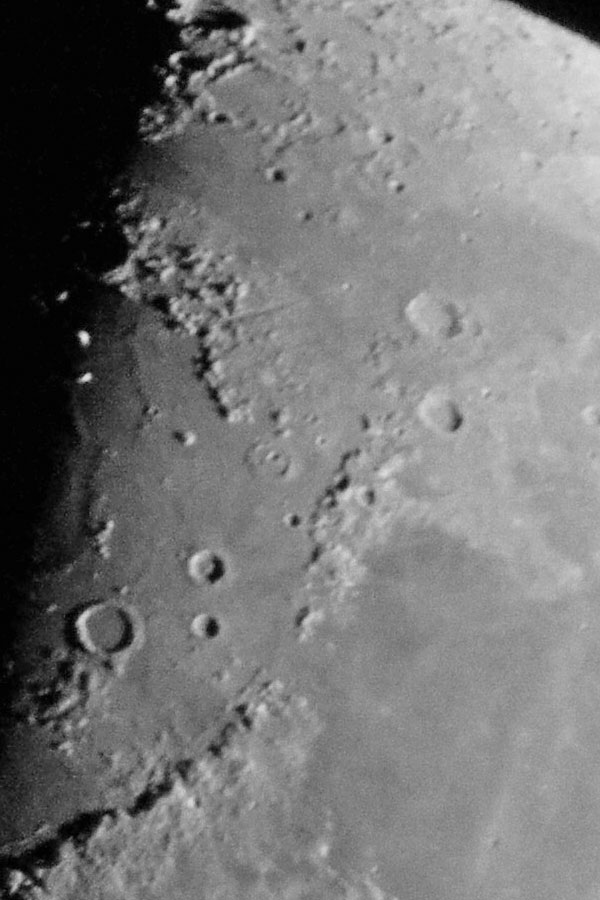
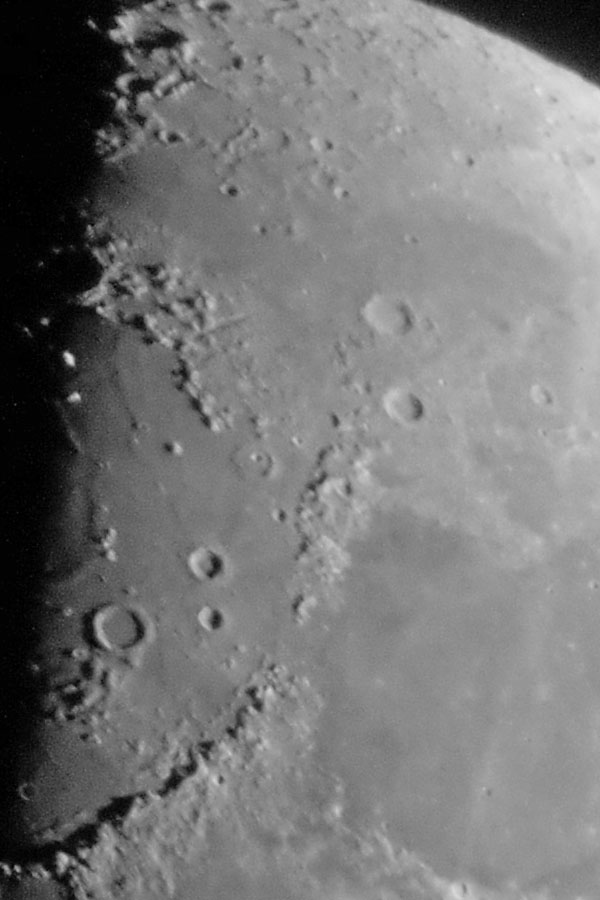
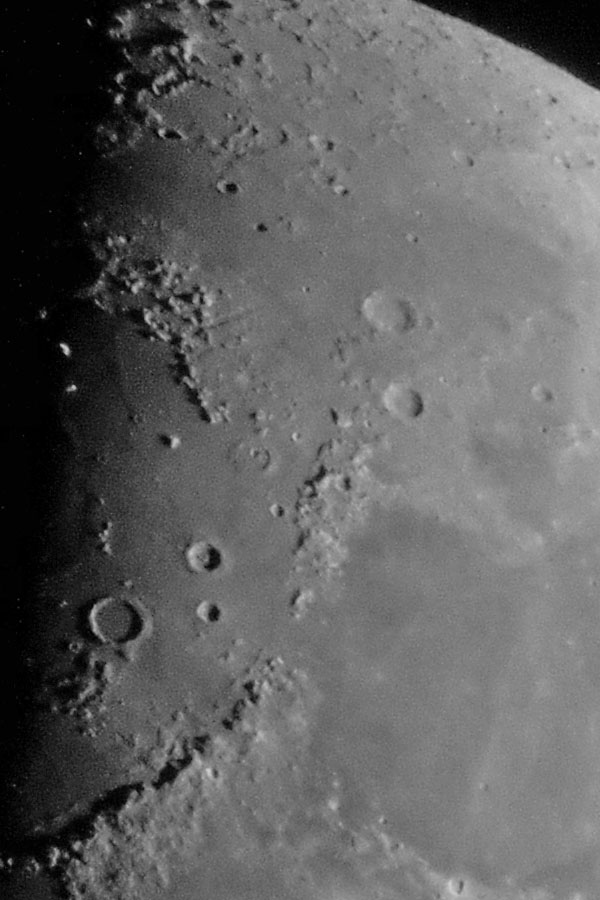
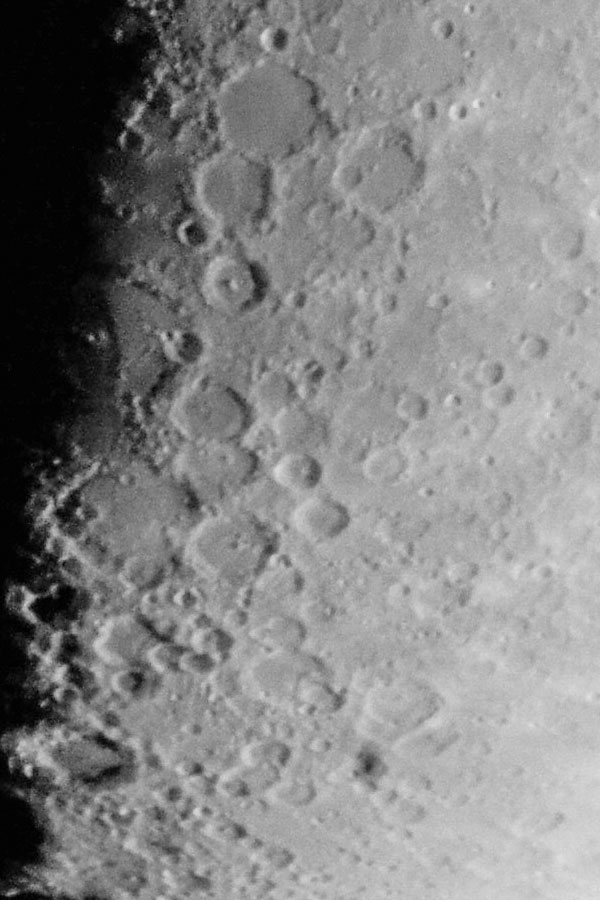
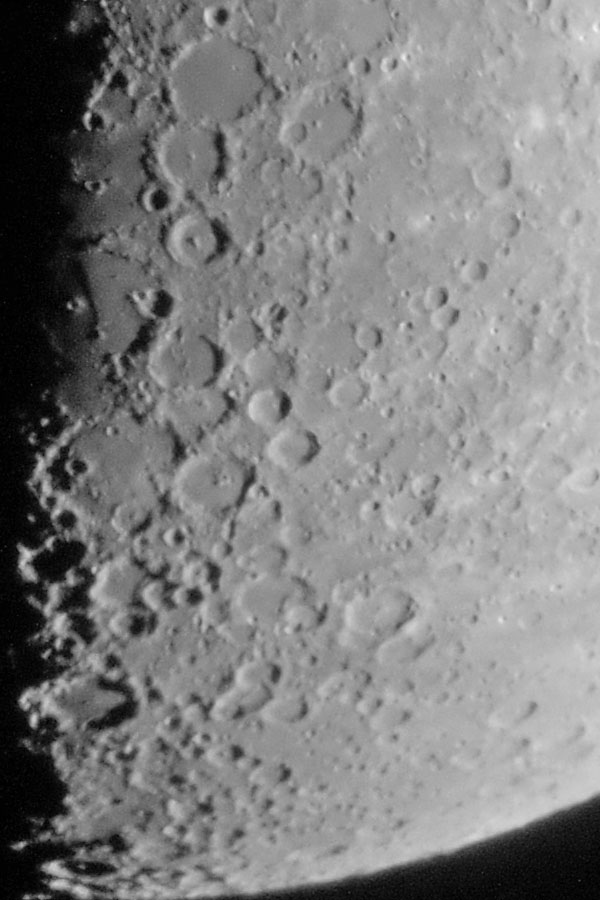
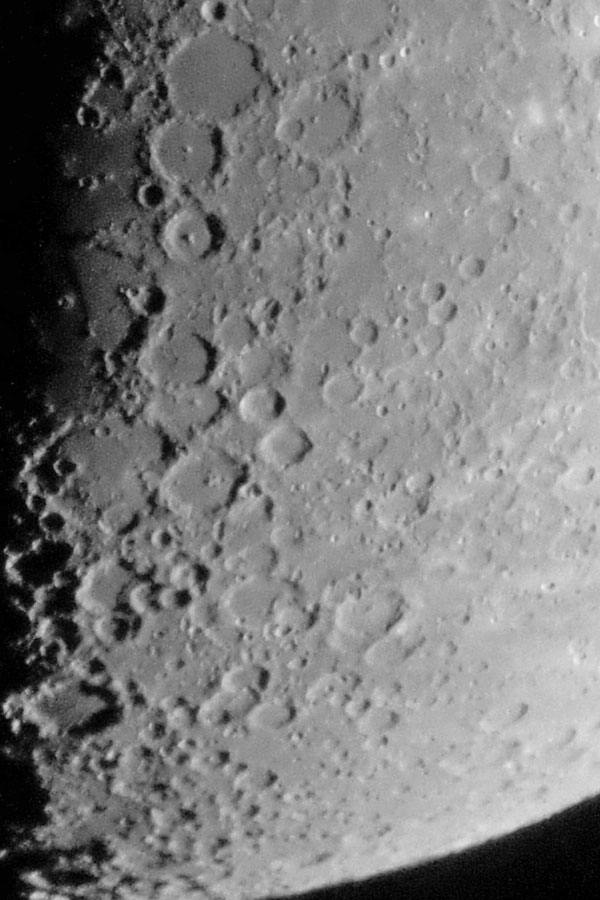
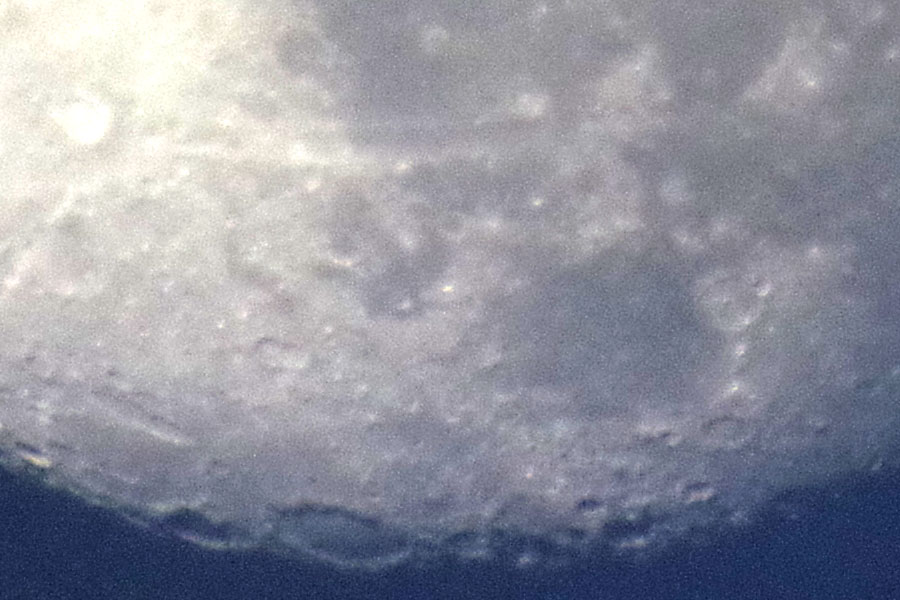
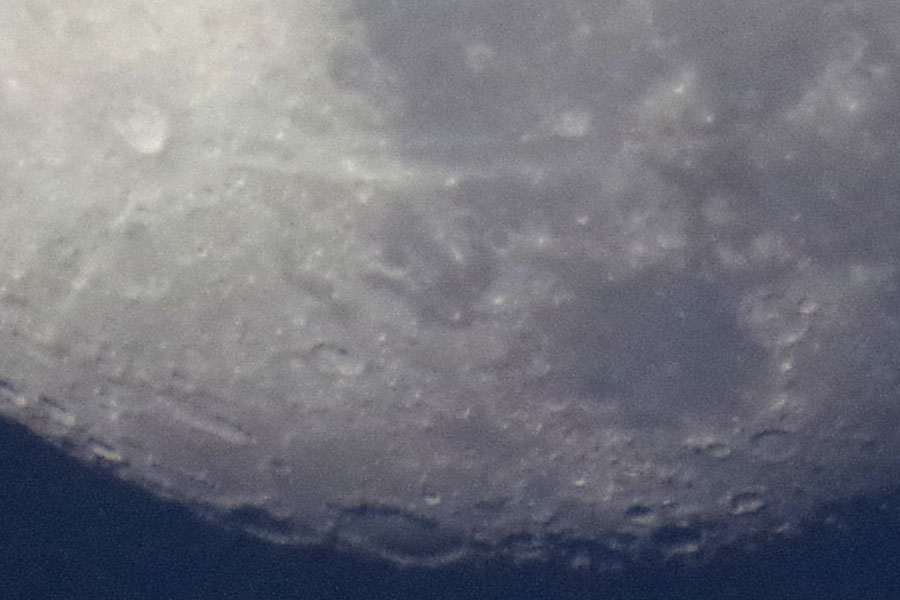
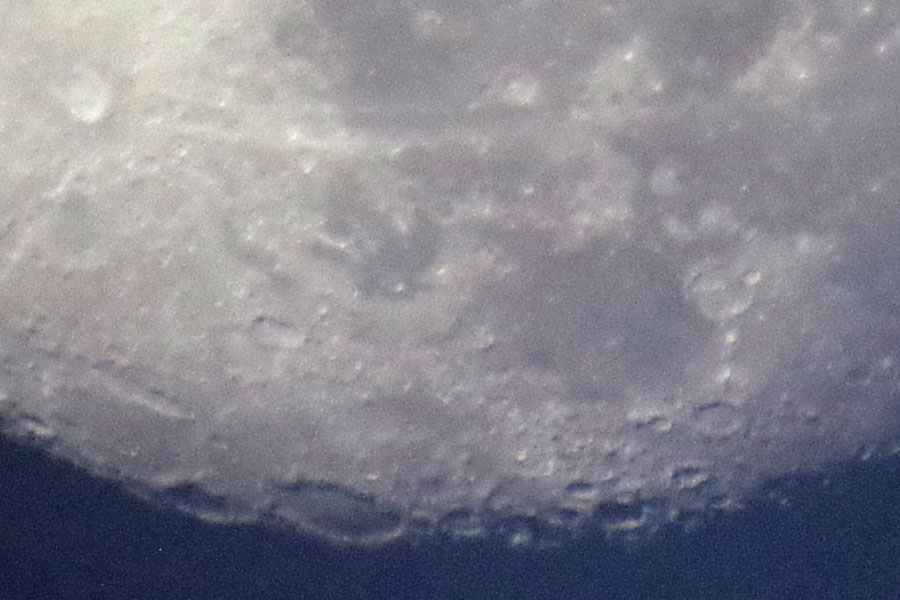
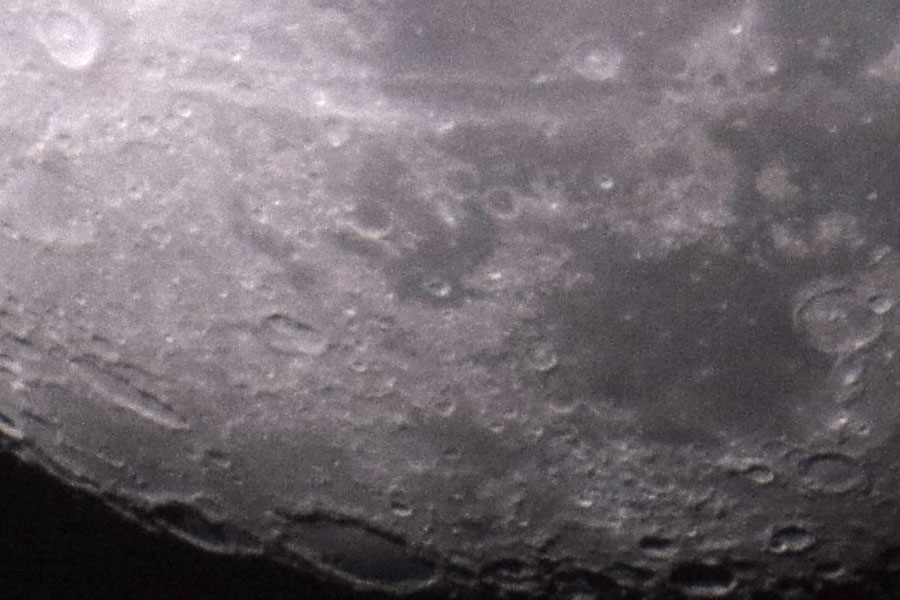
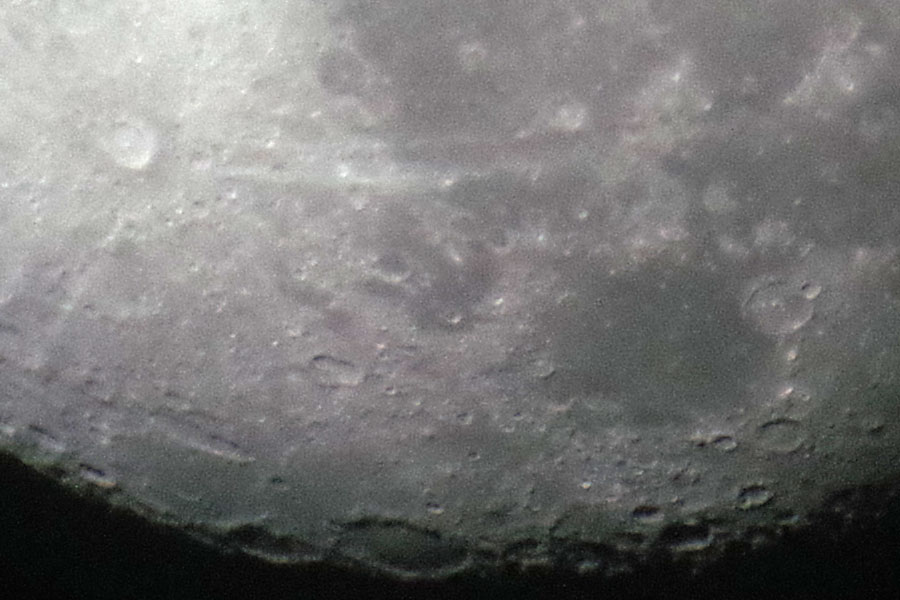
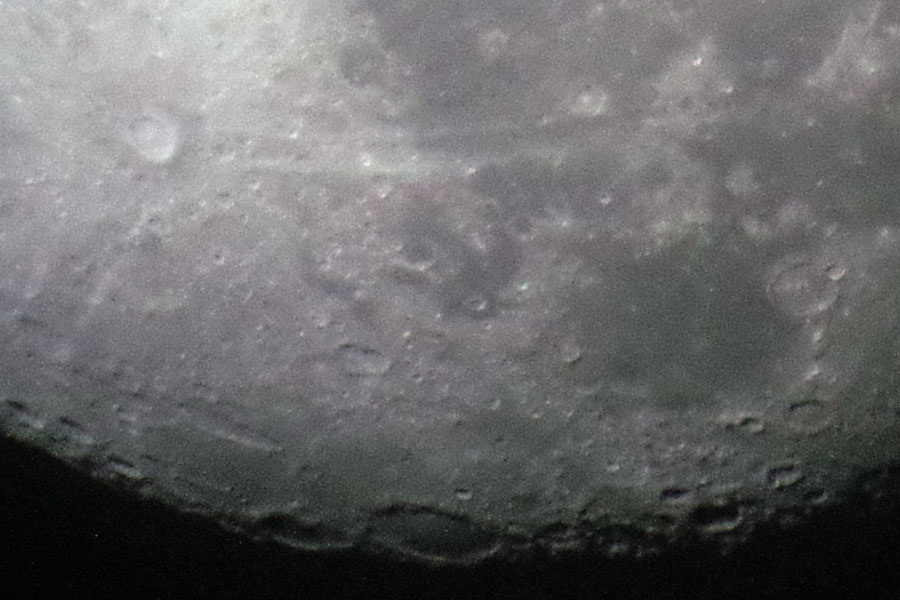
Here are three relatively sharp variations from the initial phase (16:49 to 17:10 o'clock). The noise becomes more obvious when you look at the larger versions.
 |
 |
 |
||
Faint, one of the sharper photos (1/500 sec) - 2700 pixels |
Somewhat underexposed (1/1000 sec), one of the sharper photos - 2700 pixels |
Brighter again (1/500 sec), one of the sharper photos ... - 2700 pixels |
||
 |
 |
 |
||
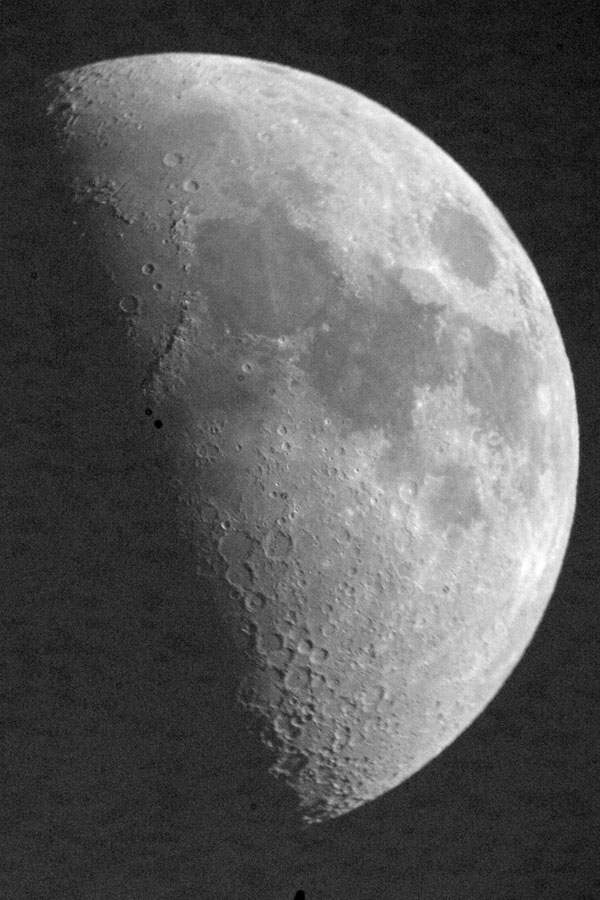
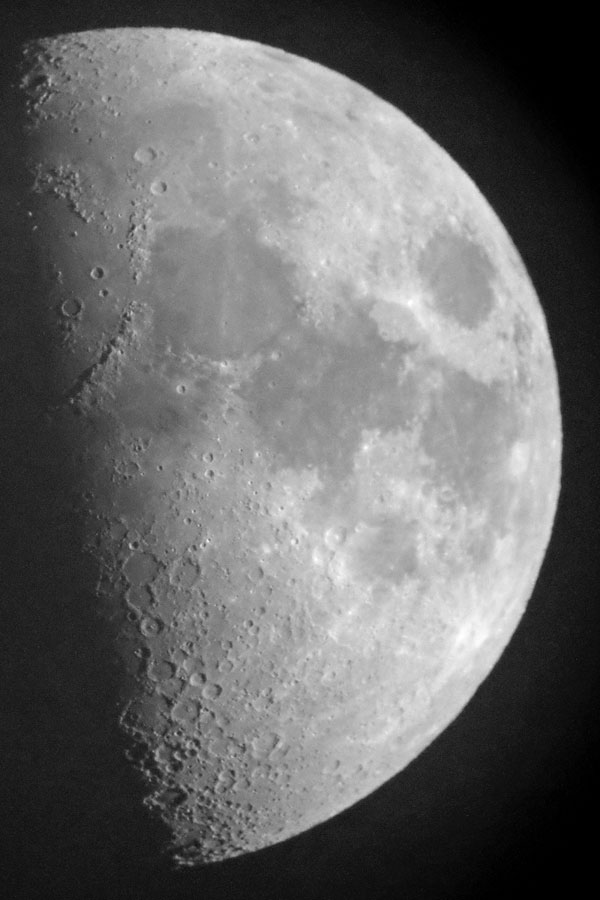
Photo above post-processed - 2700 pixels |
Photo above post-processed - 2700 pixels |
Photo above post-processed - 2700 pixels |
||
 |
 |
 |
||
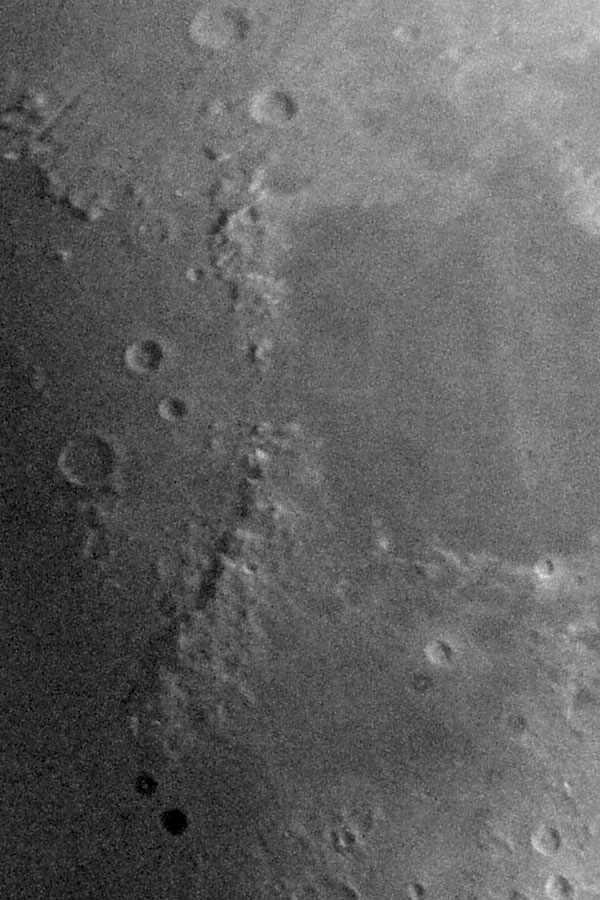
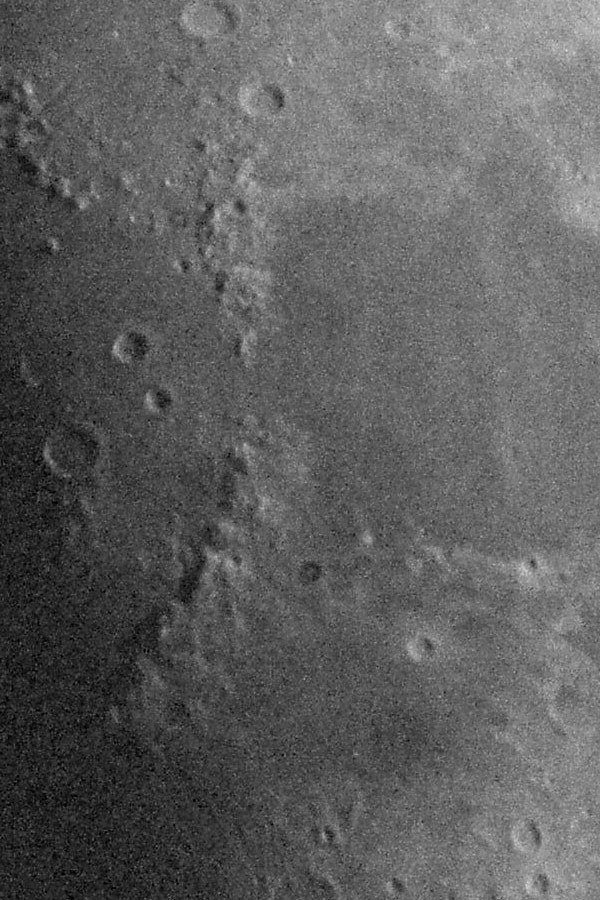
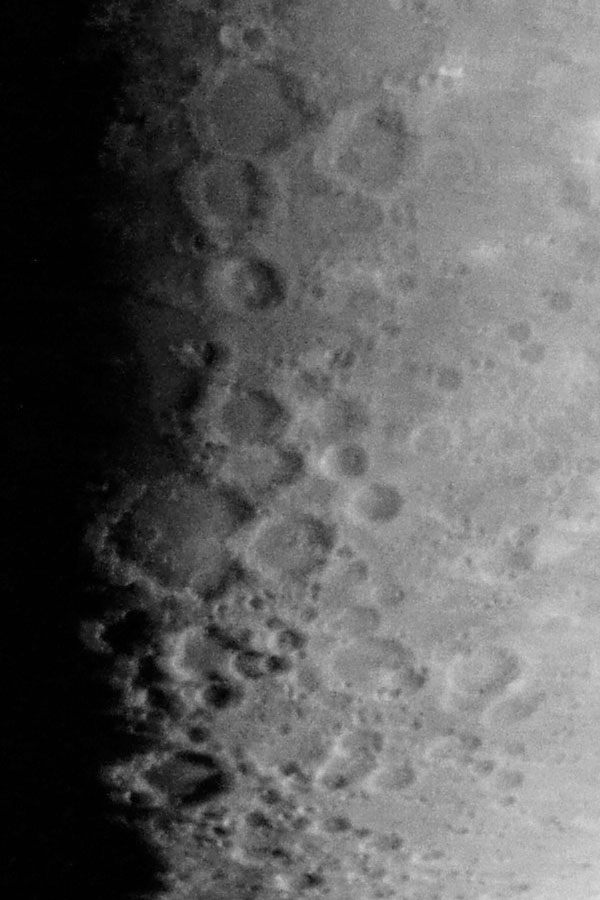
Section from photo above |
Section from photo above |
Section from photo above |
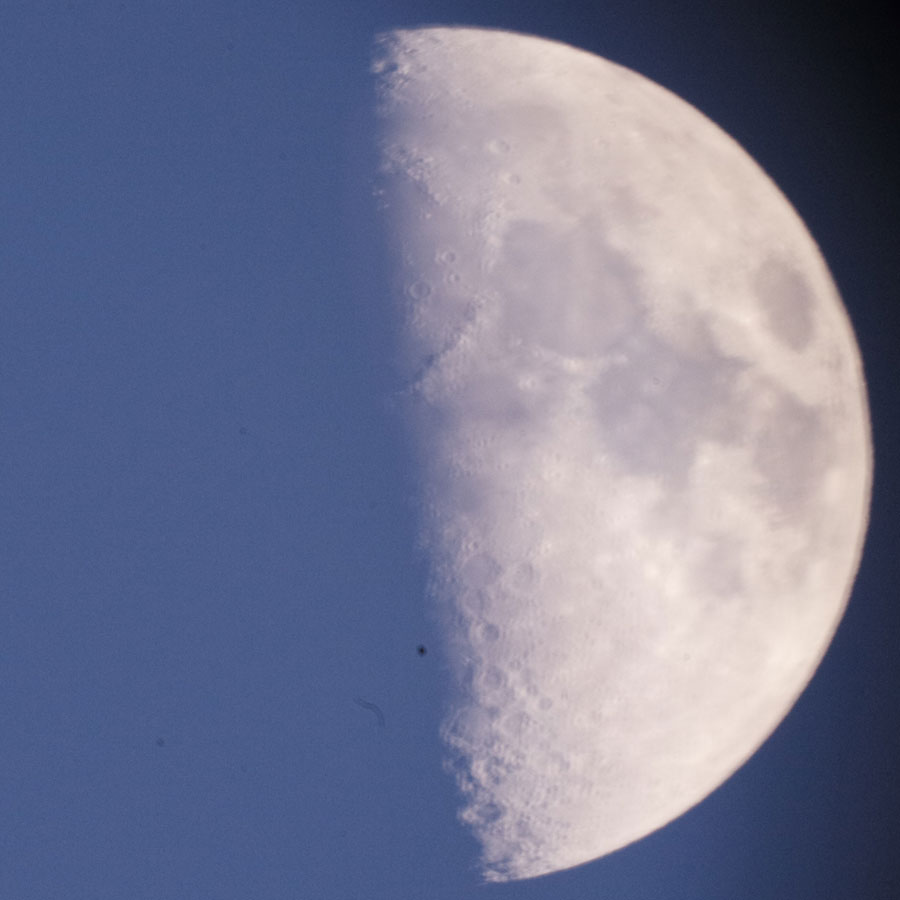
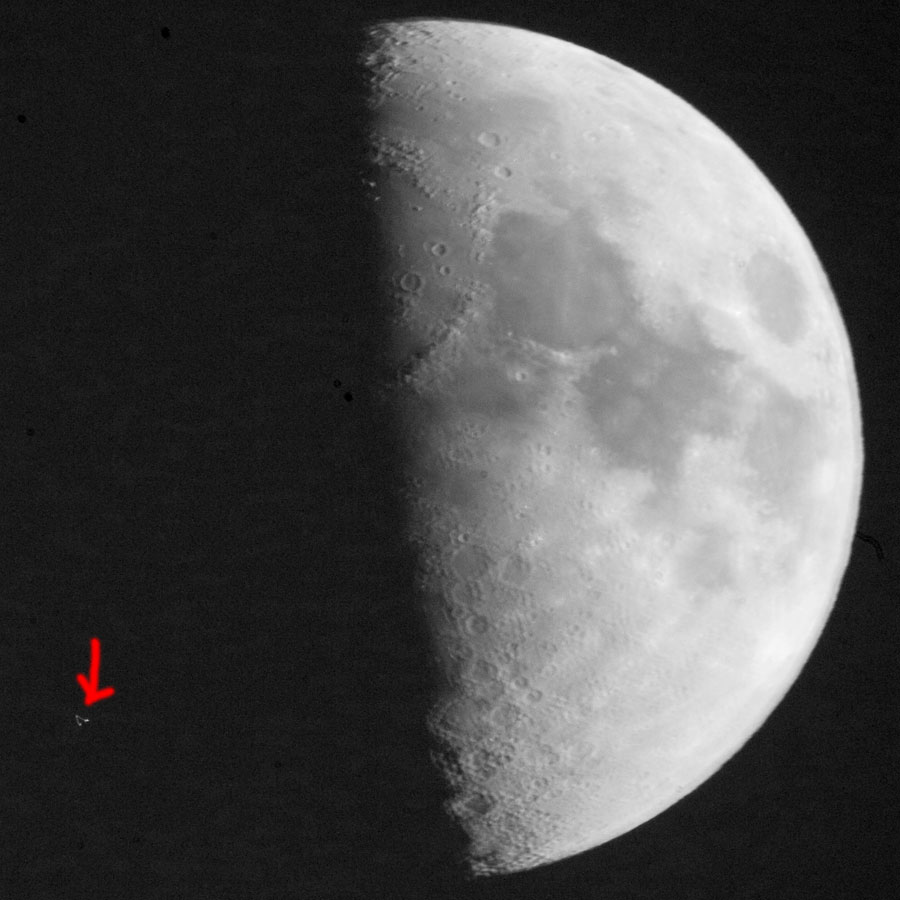
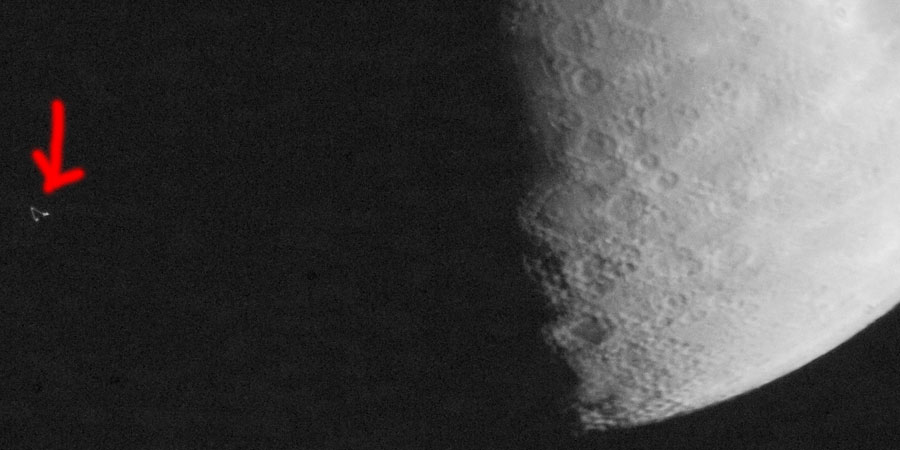
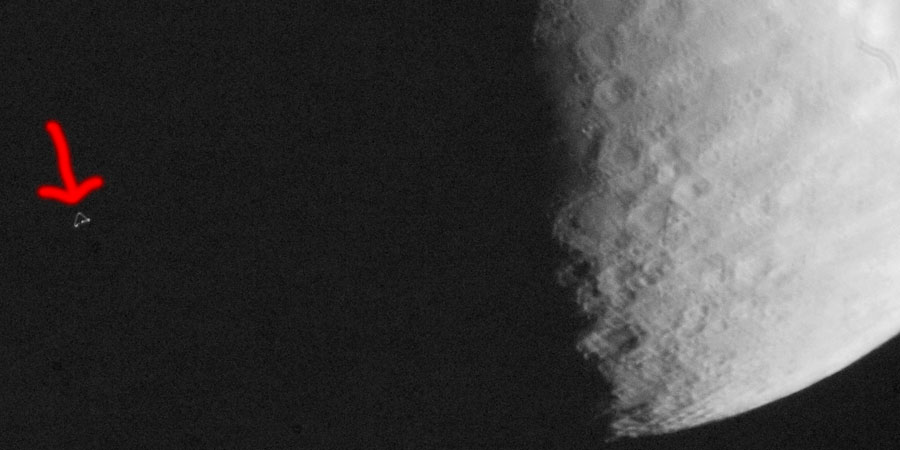
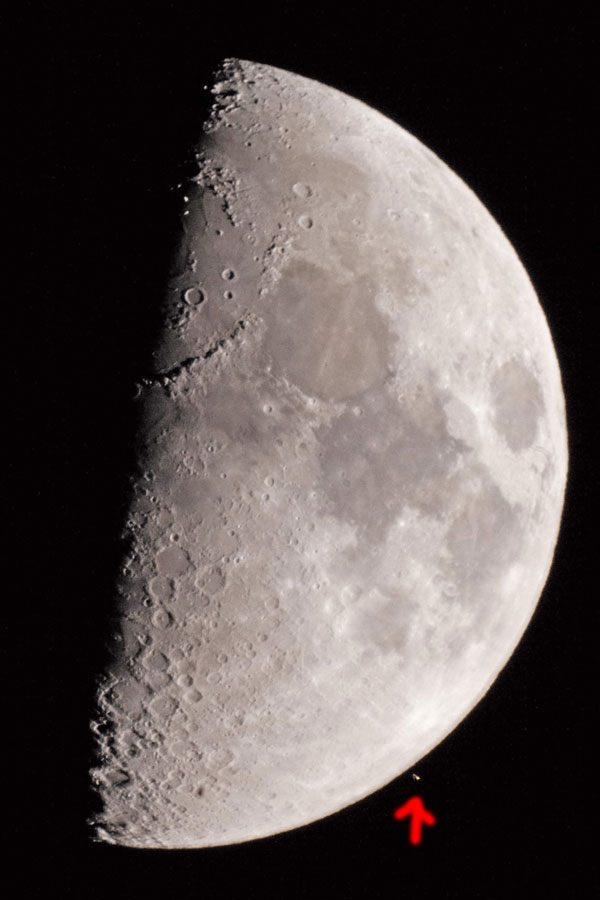
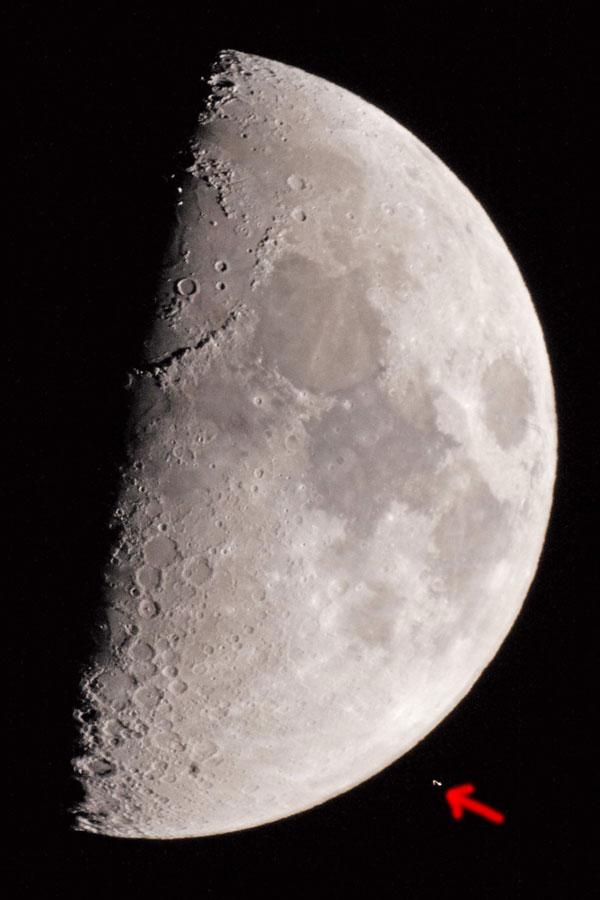
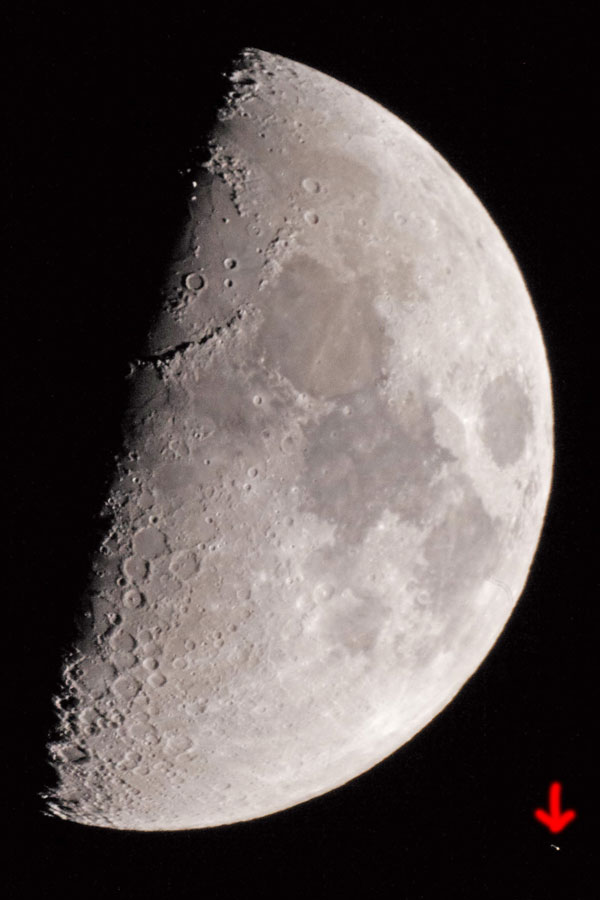
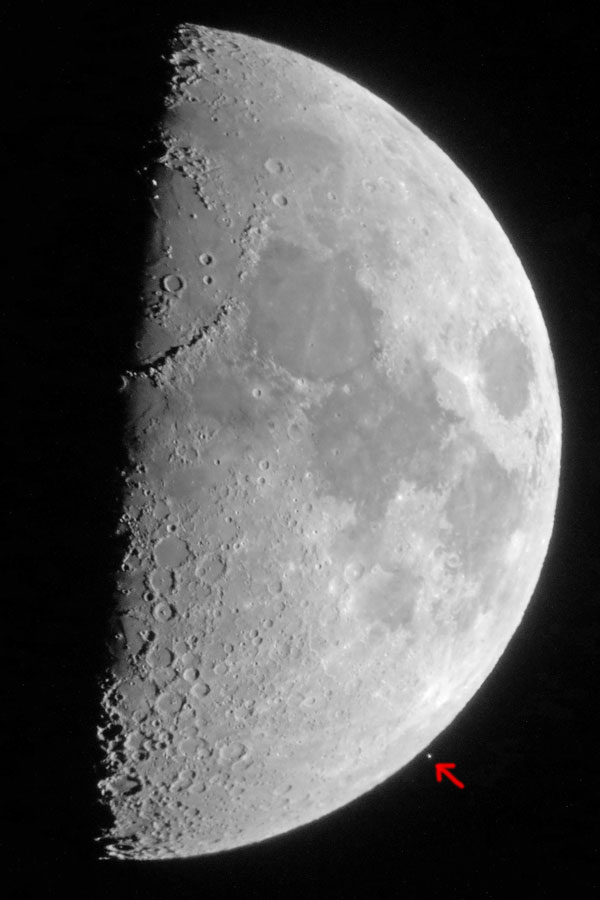
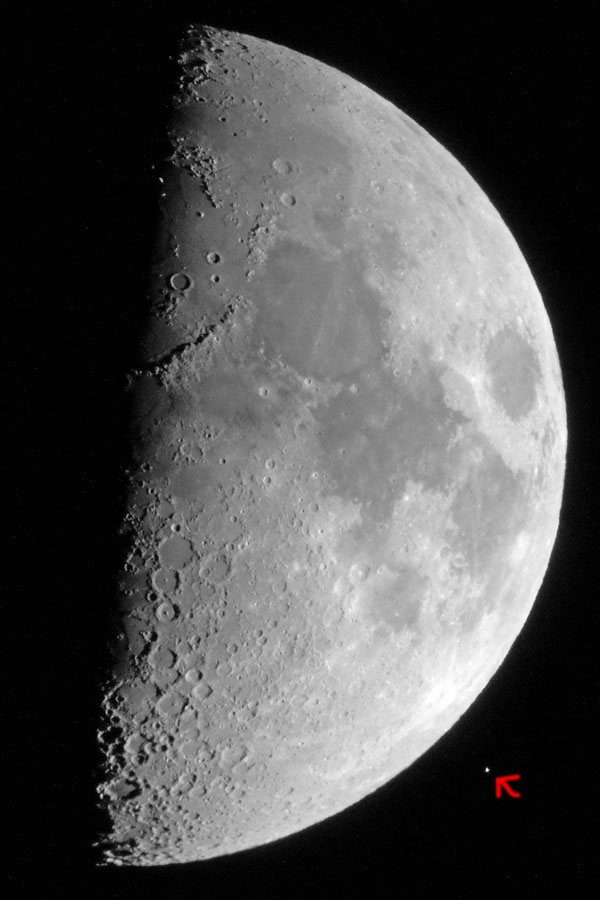
After this series I only managed to get about three more sharp photos in this phase, all the others are blurred... Here are the last two pictures before Aldebaran disappeared and the first one without it (to recognize Aldebaran, please open the large versions; note also the red arrows):
 |
 |
 |
||
Fuzzy (1/180 sec), penultimate photo showing Aldebaran - 2500 pixels |
Fuzzy (1/125 sec), last photo showing Aldebaran - 2500 pixels |
Fuzzy (1/125 sec), Aldebaran is hidden - 2500 pixels |
||
 |
 |
 |
||
Photo above post-processed - 2500 pixels |
Photo above post-processed - 2500 pixels |
Photo above post-processed - 2500 pixels |
||
  |
||||
Enlarged sections from the last two photos with Aldebaran to better demonstrate camera shake |
||||
Phase 2 - Shortly before Aldebaran Reappeared
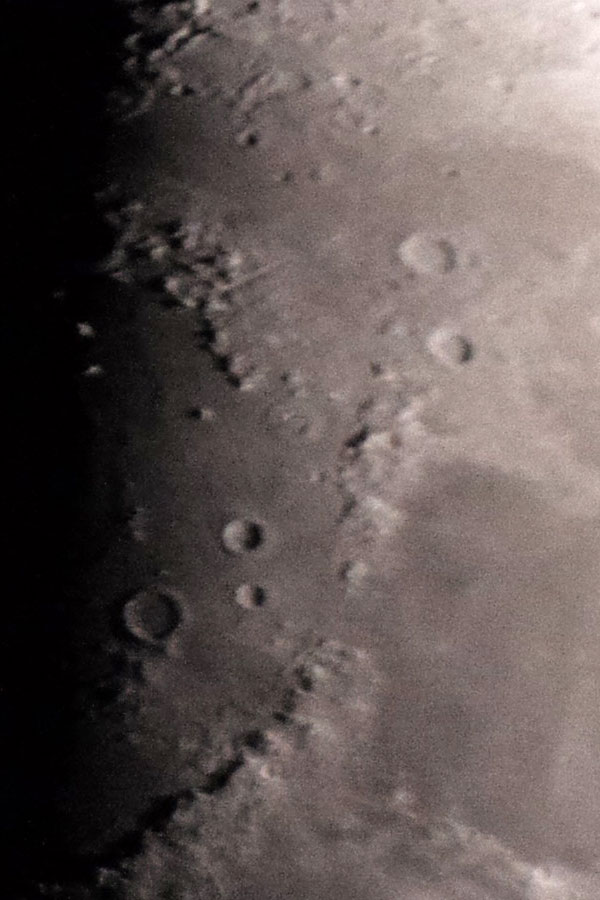
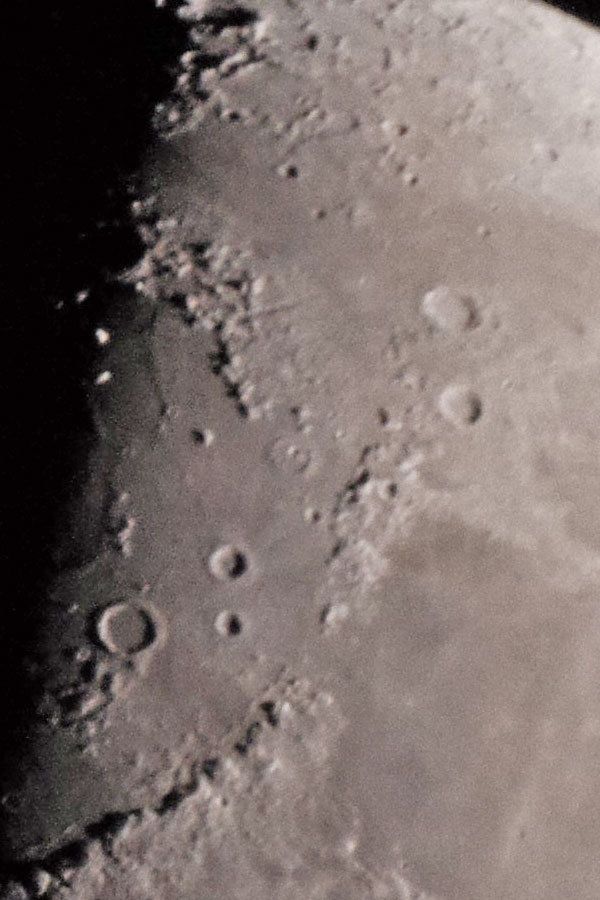
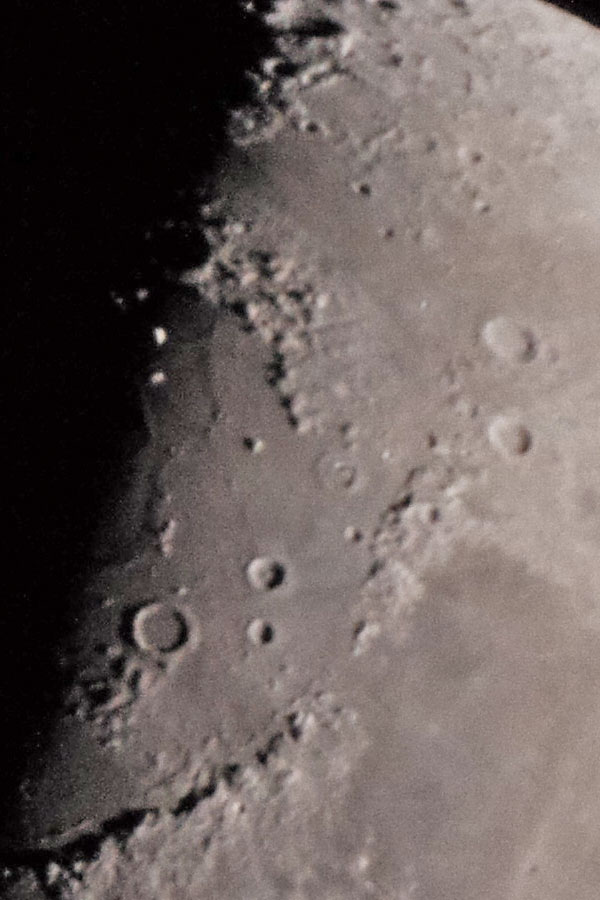
Here I present four typical samples of the 6 photos that I took in this phase. The sharp sample might be the only really sharp photo of the whole evening, probably because it was more underexposed and therefore had a shorter exposure time (1/1500 sec). Most of the photos resemble the two fuzzy samples, some of them have double contours at the bottom, but not at the top (see the photos of the bottom row). This may be a hint of camera vibrations that, despite exposure times between 1/250 and 1/500 seconds, led to blurring. From this phase on, I increased ISO from 1600 to 3200 to get shorter exposure times.
 |
 |
 |
||
Sharp, but noisy because underexposed; such a sharp image was rare - 2400 pixels |
Fuzzy - 2400 pixels |
Even fuzzier, my most common result... - 2400 pixels |
||
 |
 |
 |
||
Section from photo above, northern hemisphere |
Section from photo above, northern hemisphere |
Section from photo above, northern hemisphere |
||
 |
 |
 |
||
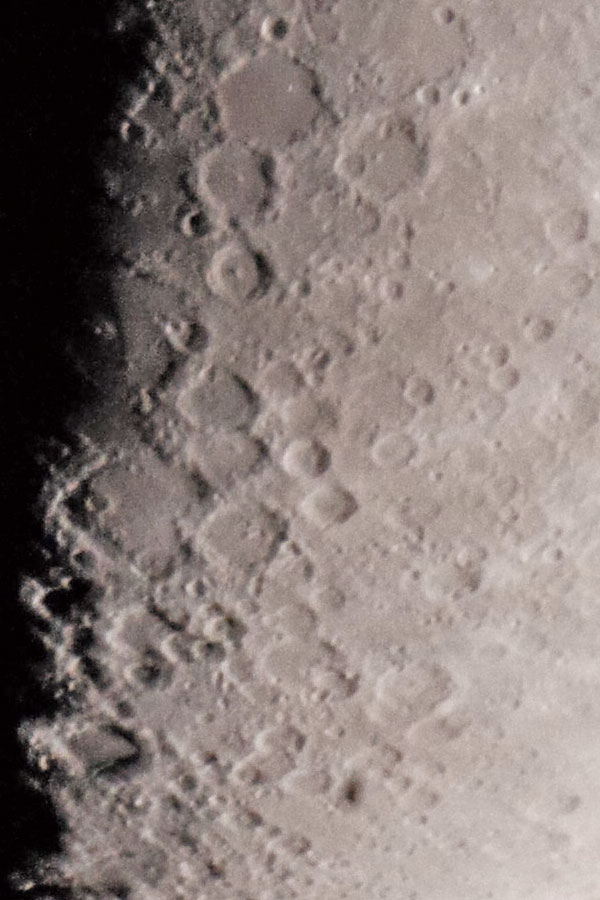
Typical case: sharper in the North (but not really sharp), double contours in the South - 2400 pixels |
Sections of the southern area with double contours |
Section of the northern area, no double contours |
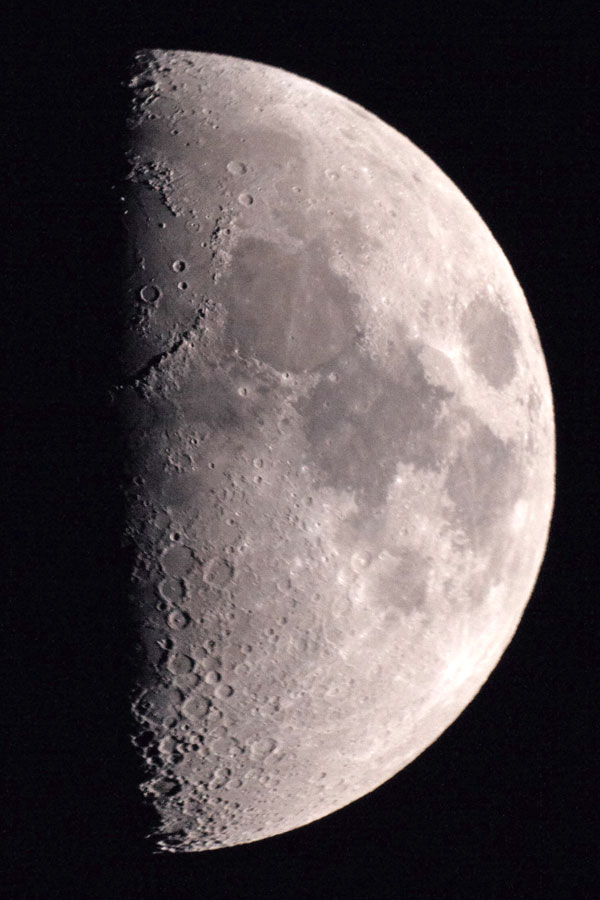
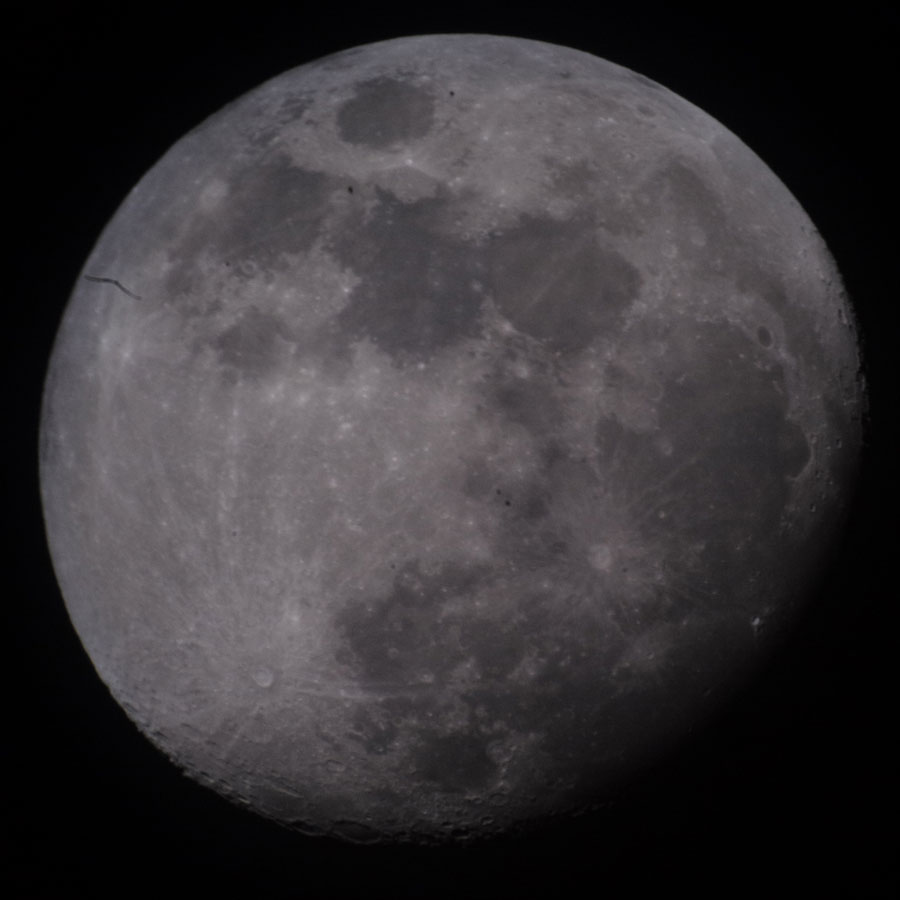
Phase 3 - Aldebaran Visible again
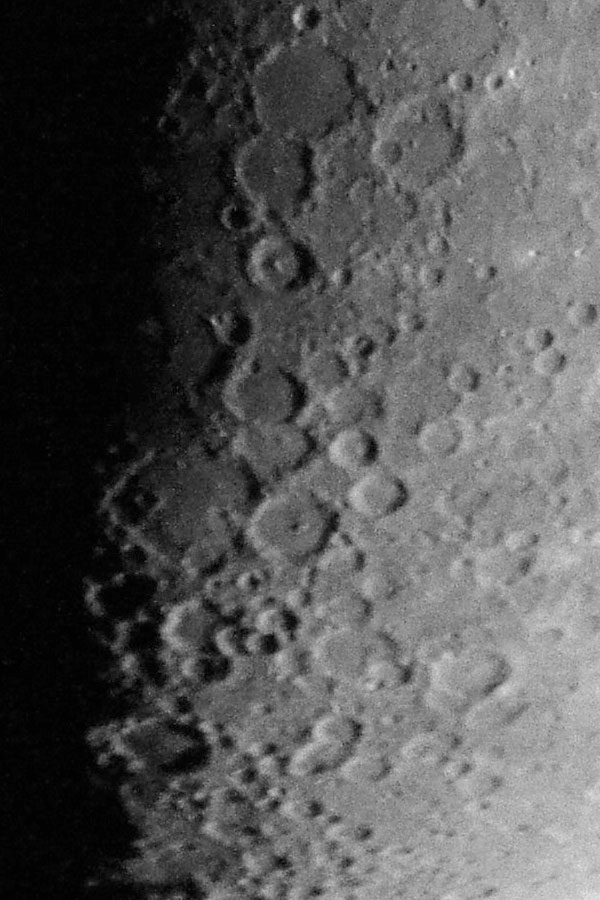
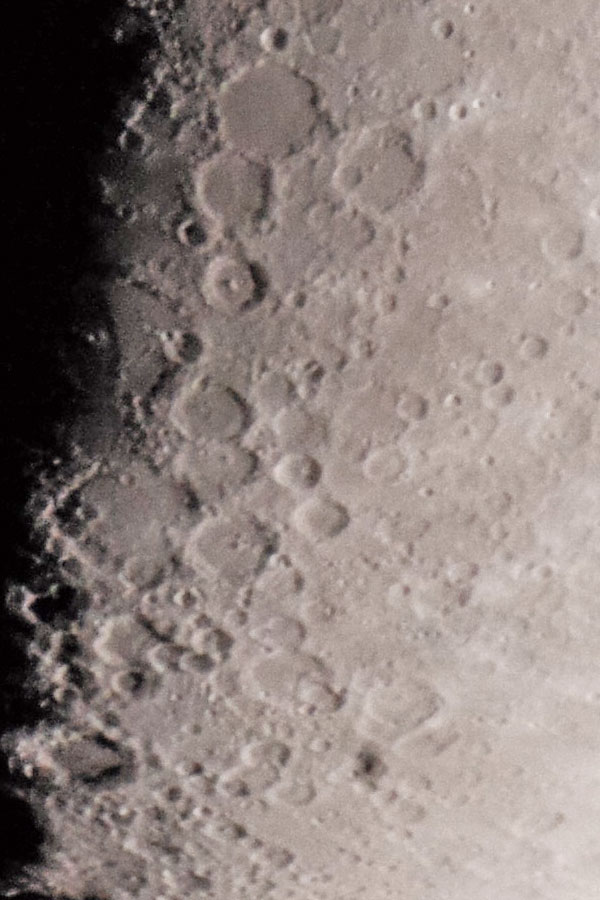
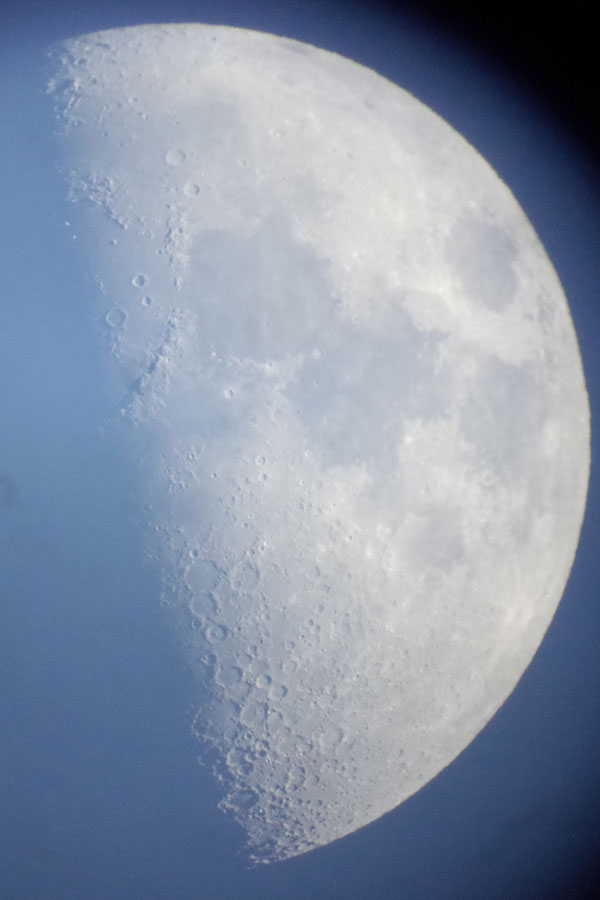
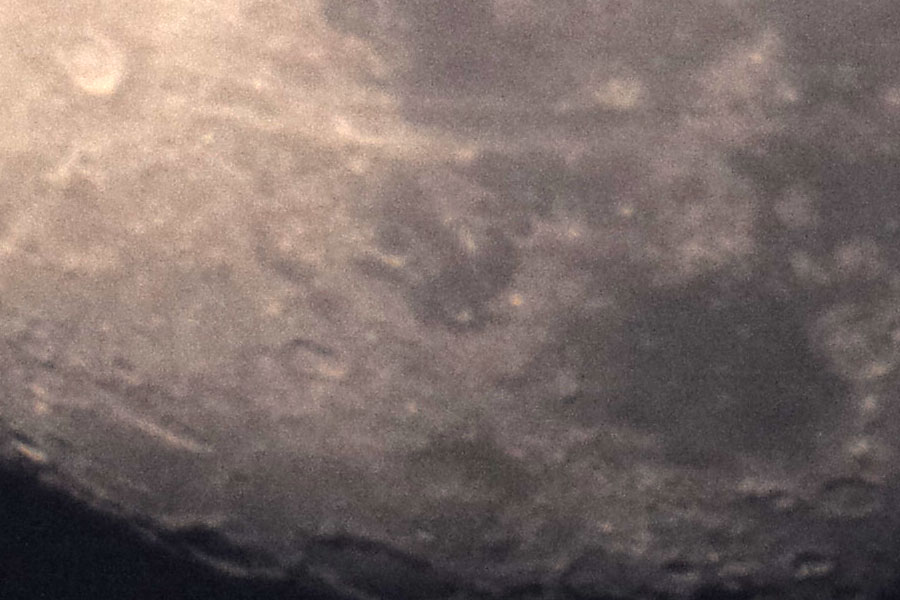
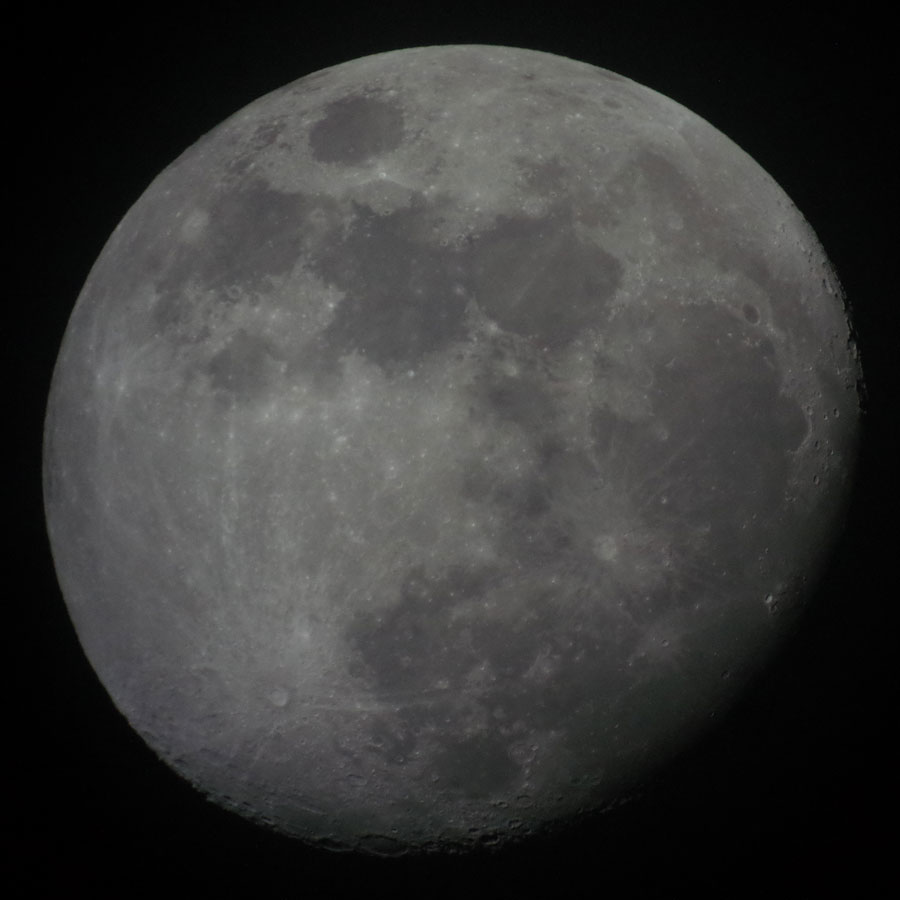
In phase 3, I took almost 90 photos, 9 of them before Aldebaran was visible again. Here some of the photos were still somewhat sharp, but with Aldebaran on it not a single photo has become really sharp, as you can see from the traces that Aldebaran draws into the sky... Maybe about 10 photos would still "pass" as "pure moon photos." All in all, however, the result was very disappointing for me, and the image quality as such (sharpness, noise) does not convince me either, as a comparison with 1:50 photographs taken with my Ricoh GR shows. Unfortunately, such photos are not as evenly sharp as those taken with a T-mount adapter...
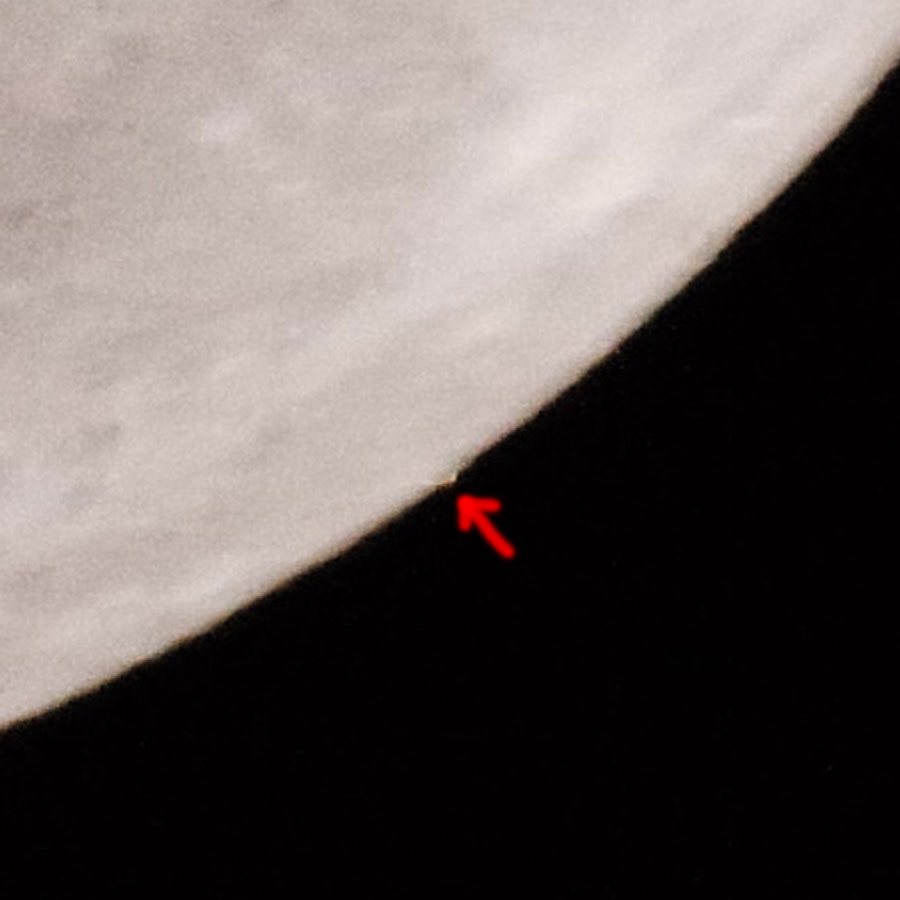
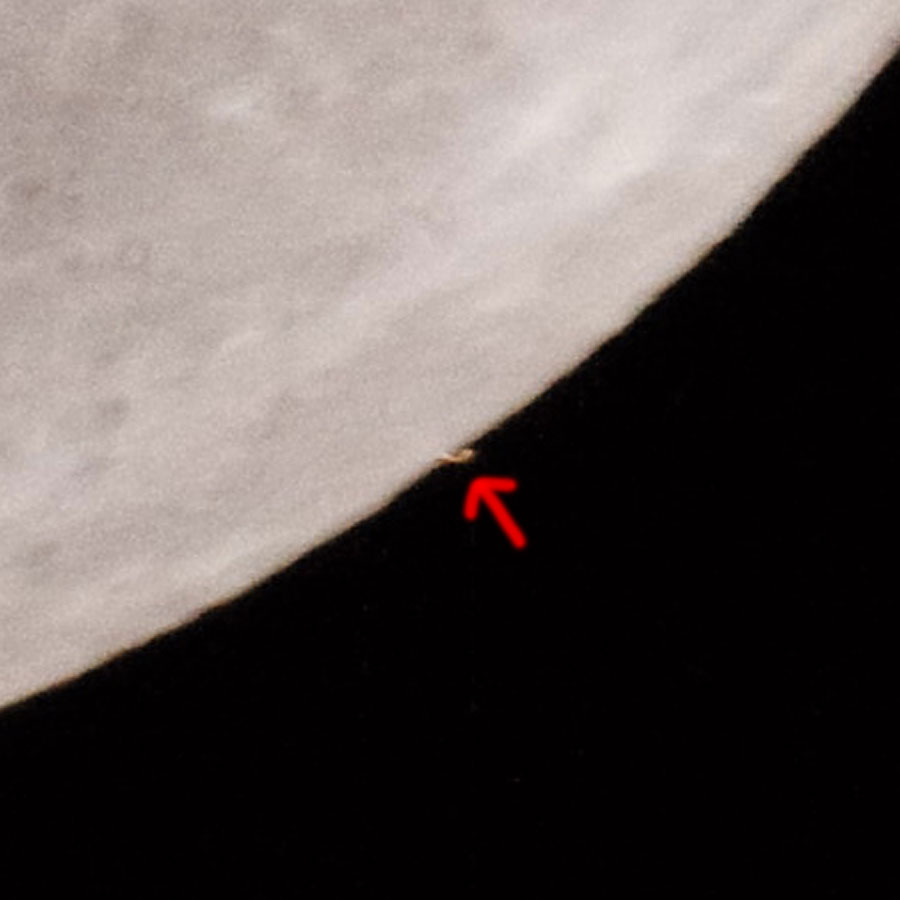
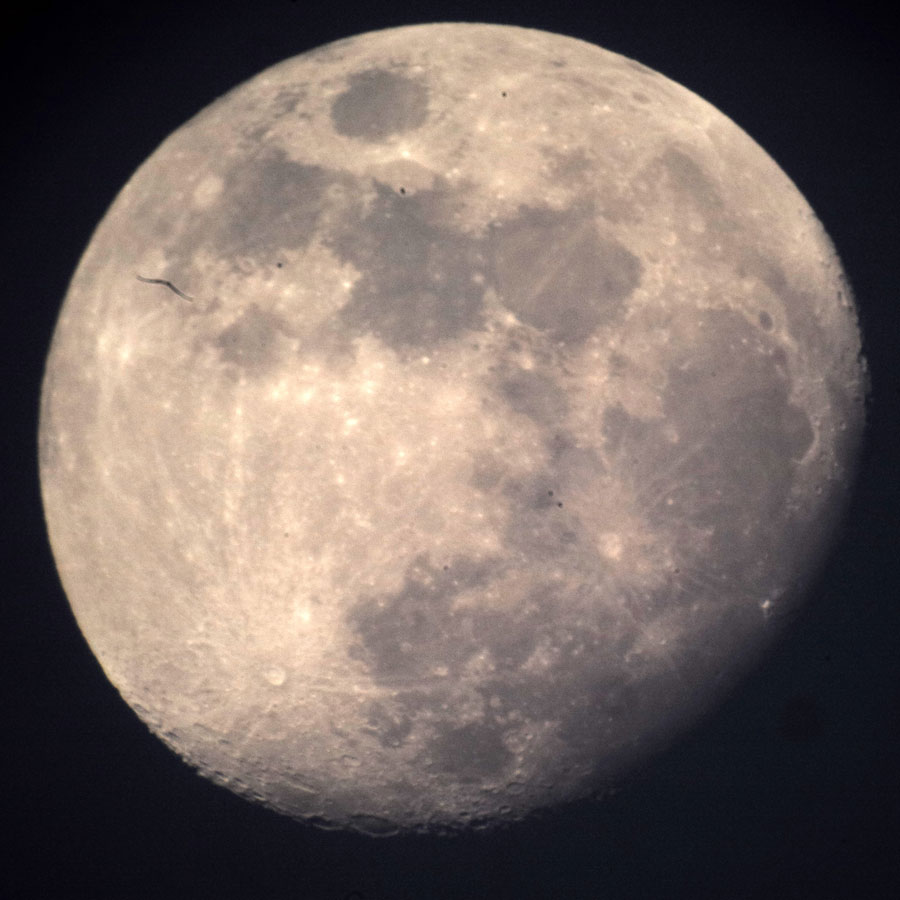
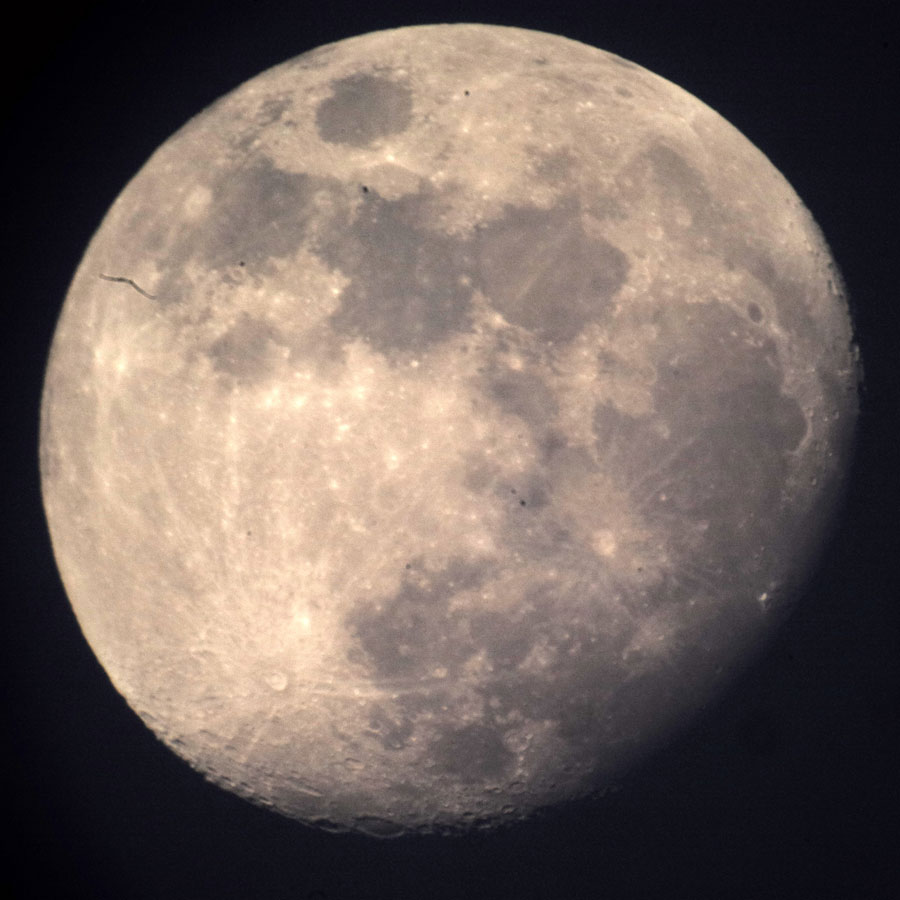
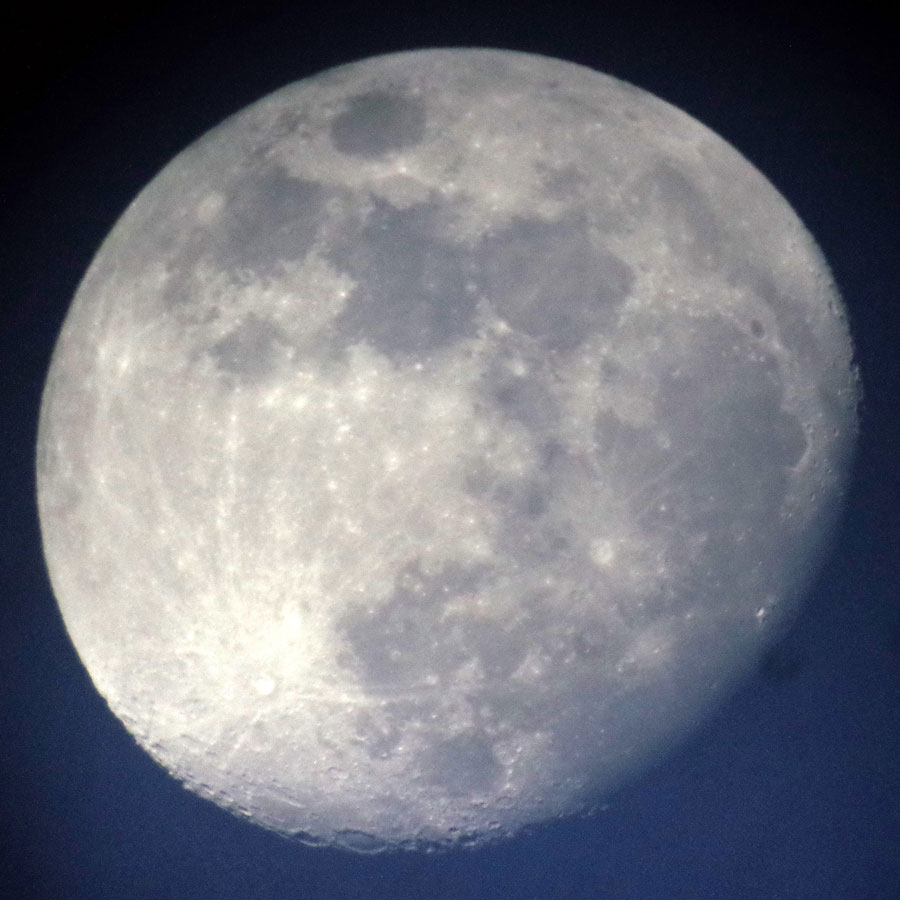
Although Aldebaran is not really the subject here, here are the first "photo-sightings" on the bright side of the moon (approx. 18:50 o' clock) in 200% magnification (the caprioles of Aldebaran are to be owed to the camera and the photographer):
 |
 |
|
First clearer view of Aldebaran |
Three photos later, Aldebaran was even better to see... |
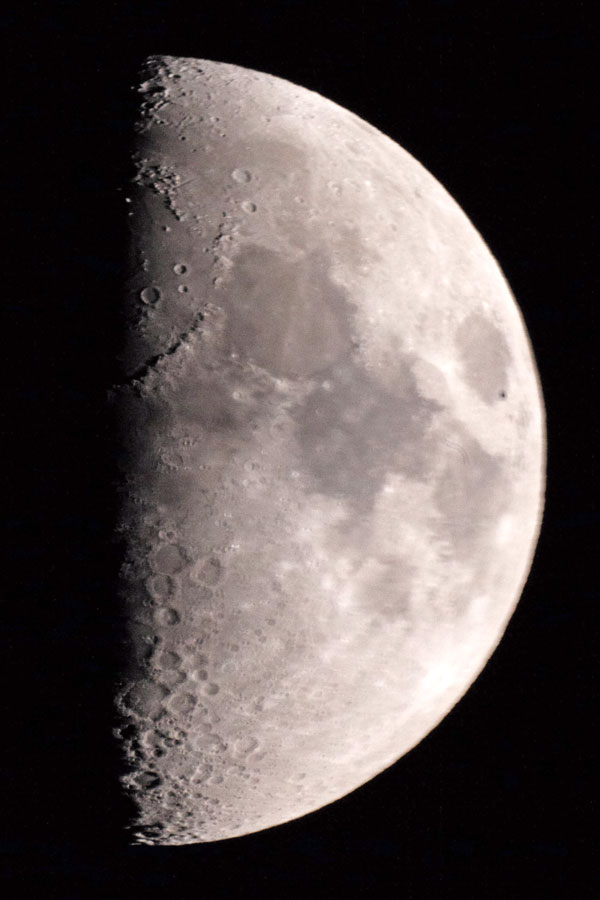
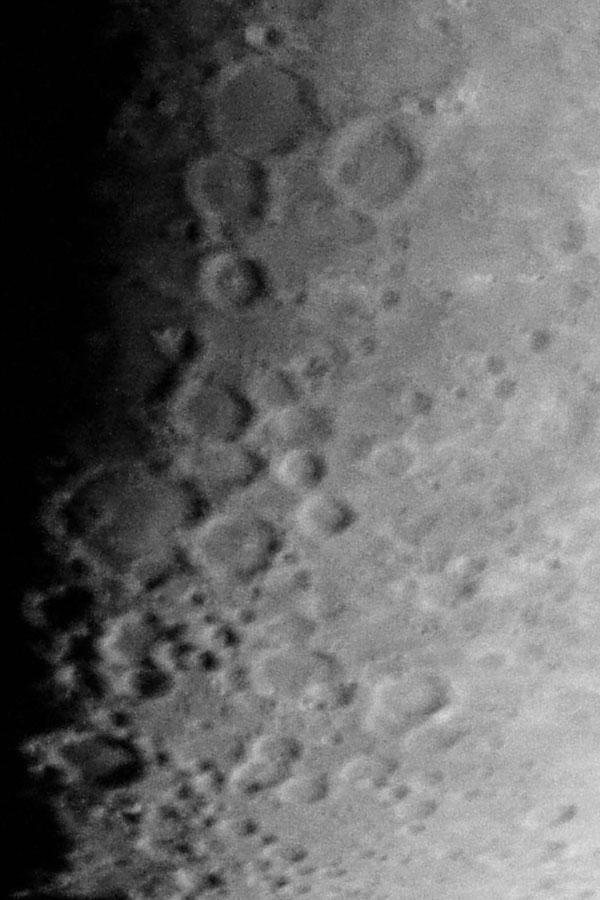
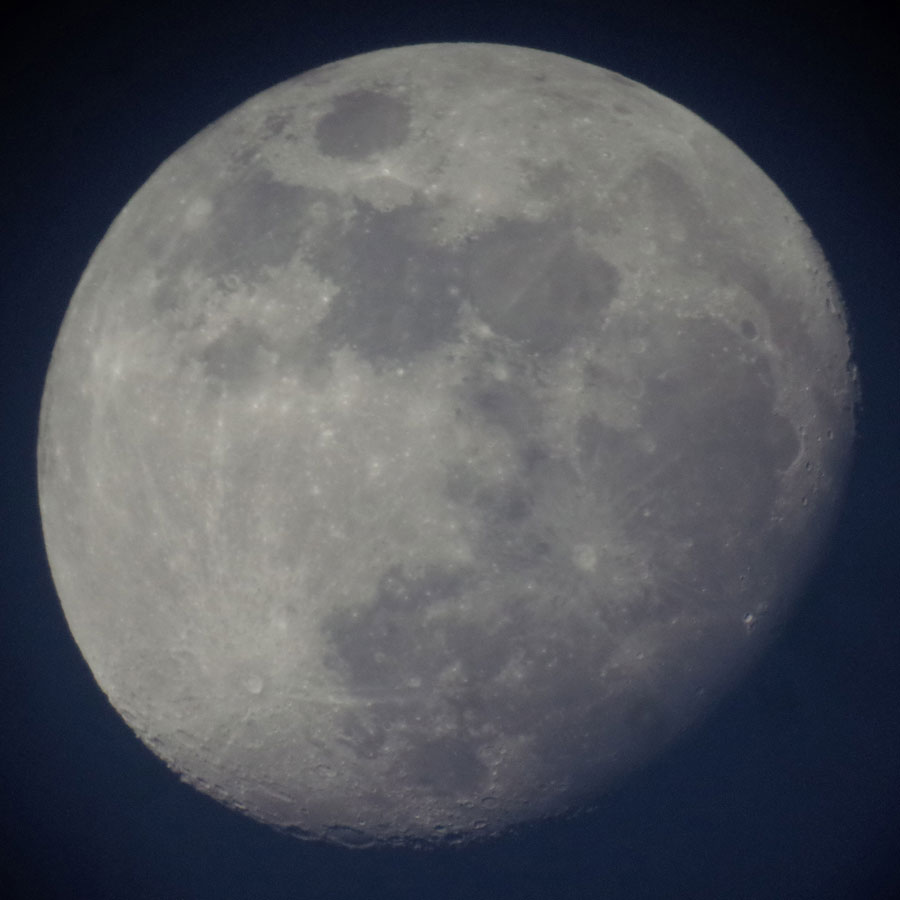
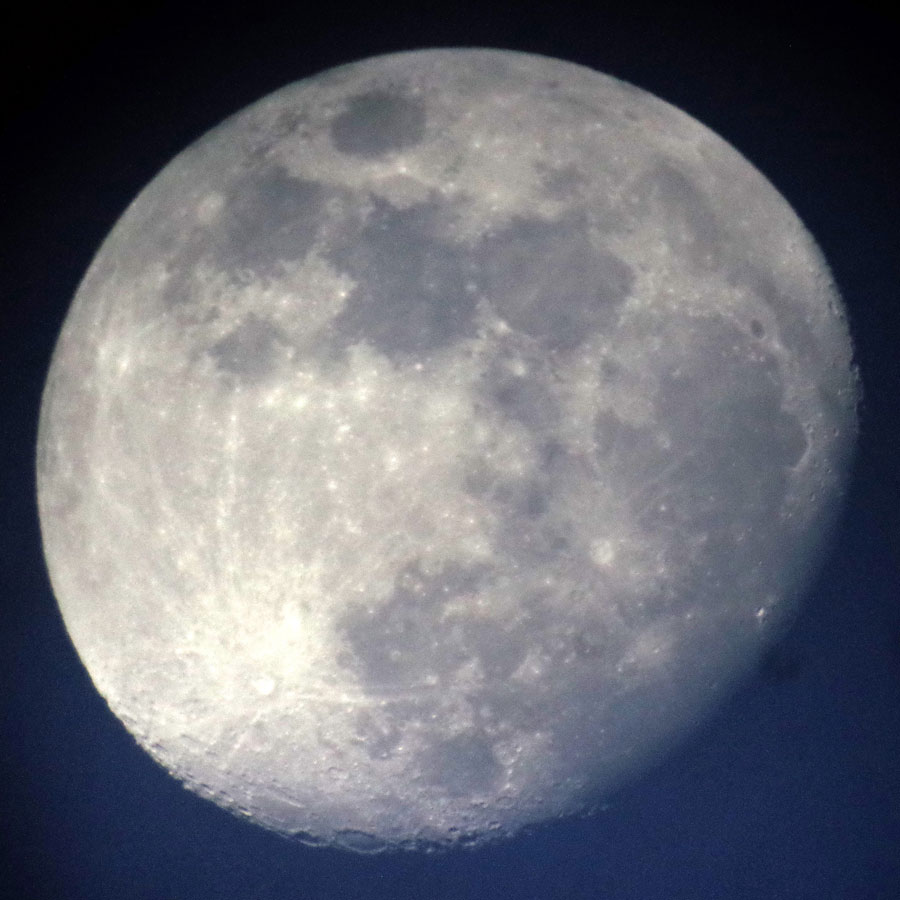
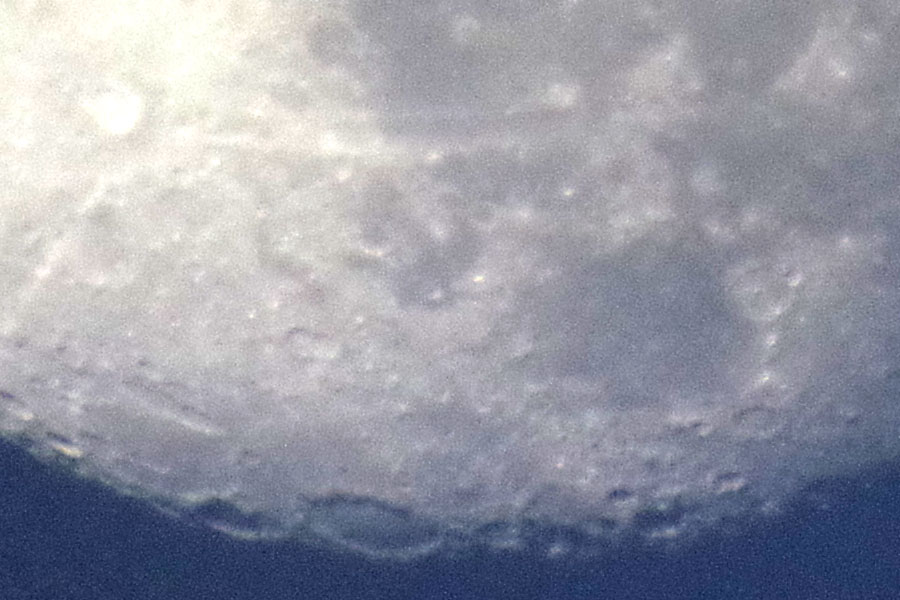
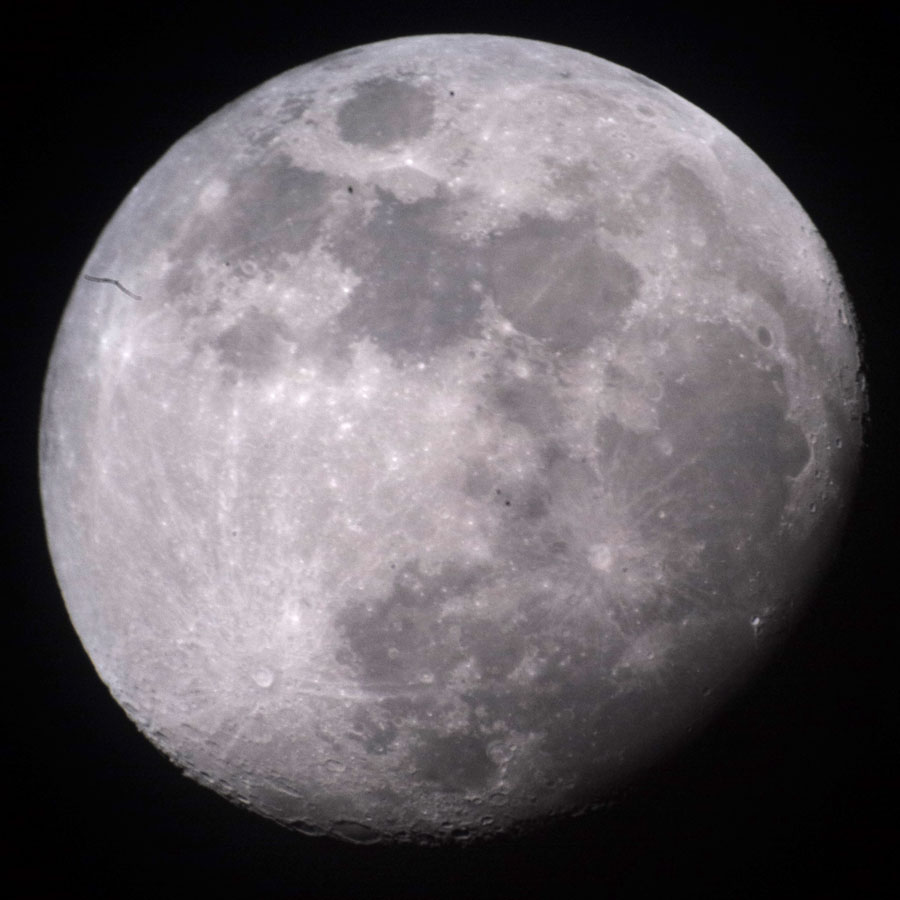
And here are three photos for comparison from the phase until the first sighting of Aldebaran (right photo above). Only the photo in the middle has become somewhat sharp:
 |
 |
 |
||
Fuzzy - 2700 Pixel |
Sharp - 2700 Pixel |
Fuzzy - 2700 Pixel |
||
 |
 |
 |
||
Section from photo above, some double contours |
Section from photo above |
Section from photo above, weaker double contours |
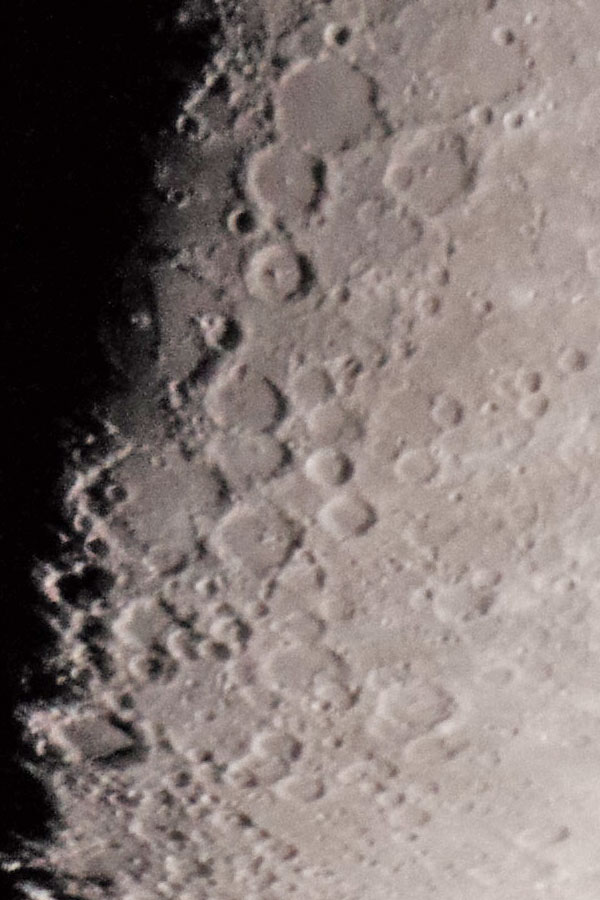
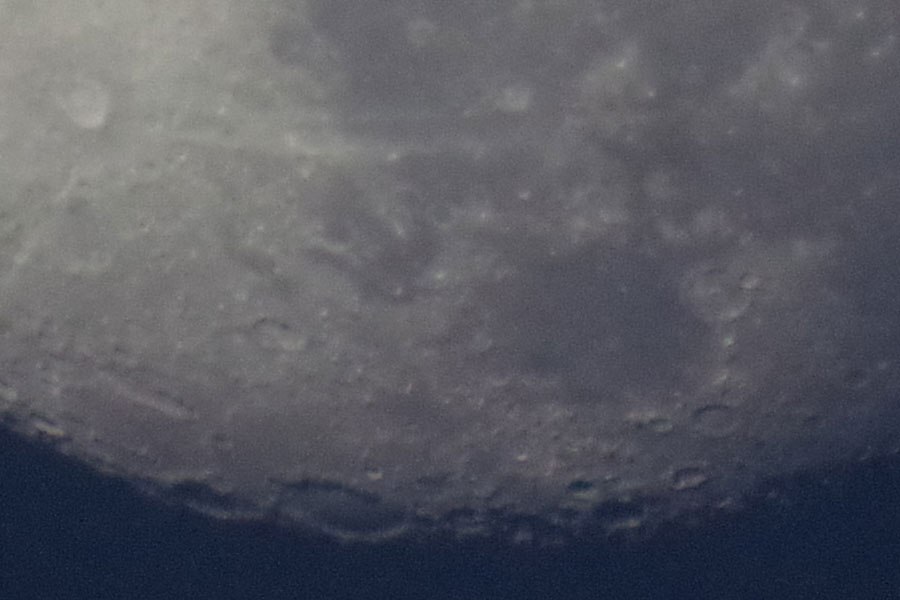
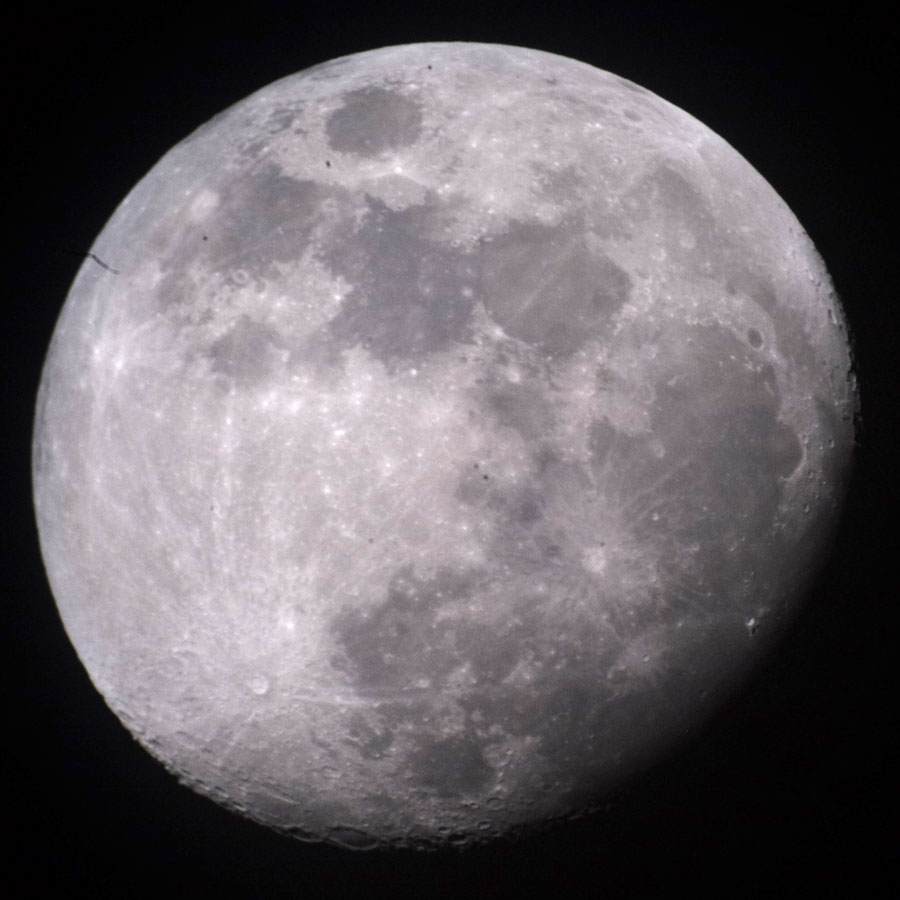
Apart from Aldebaran-caprioles "thanks to camera shake there is no further gain of knowledge from further photos. Nevertheless, here are three sharper samples including "Aldebaran tracks" from a little later, when the light was even brighter (which you cannot see "thanks" to the post-processing...):
 |
 |
 |
||
Nearly sharp - 2700 pixels |
The sharpest photo in this group - 2700 pixels |
Nearly sharp - 2700 pixels |
||
 |
 |
 |
||
Northern section from the photo above |
Northern section from the photo above |
Northern section from the photo above |
||
 |
 |
 |
||
Southern section from the photo above, weak double contours |
Southern section from the photo above |
Southern section from the photo above |
Here I have put together three similar sections from different phases to show that the noise decreased in the course of the observations because the moon became brighter:
|
|
|
||
ISO 1600 |
ISO 3200 |
ISO 3200 |
The few sharper photos might be a bit deceptive about the fact that most of the photos were blurred. With stronger moonlight and therefore higher contrast, however, the noise remains within tolerable limits. So the question remains, how to prevent camera shake effectively?
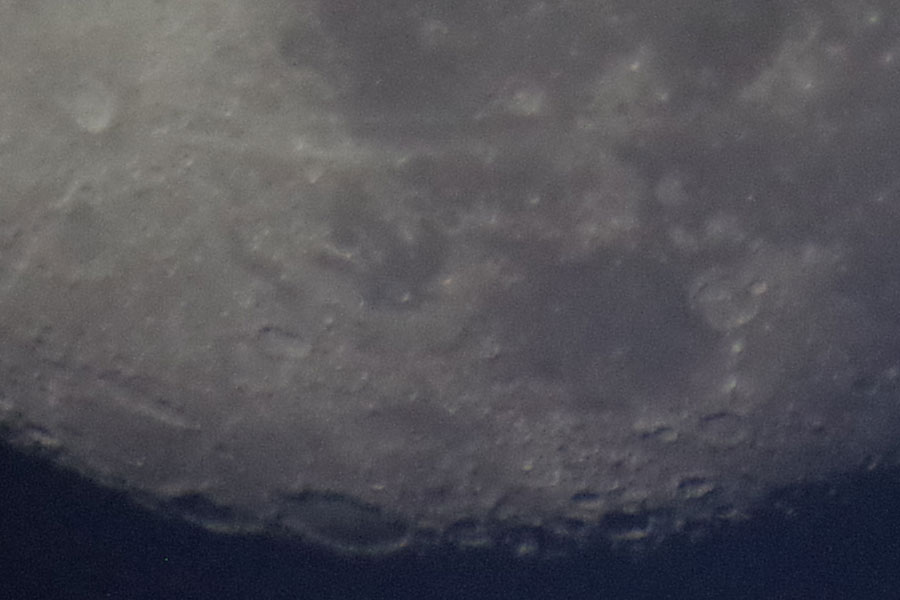
Skymax-102
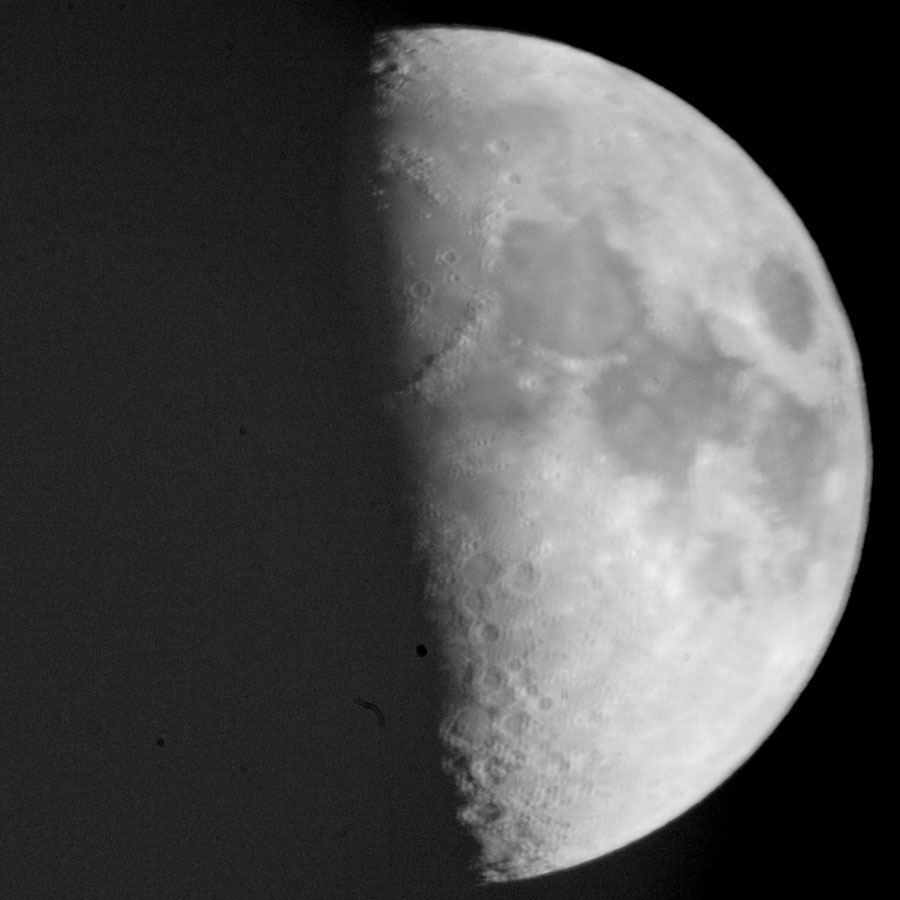
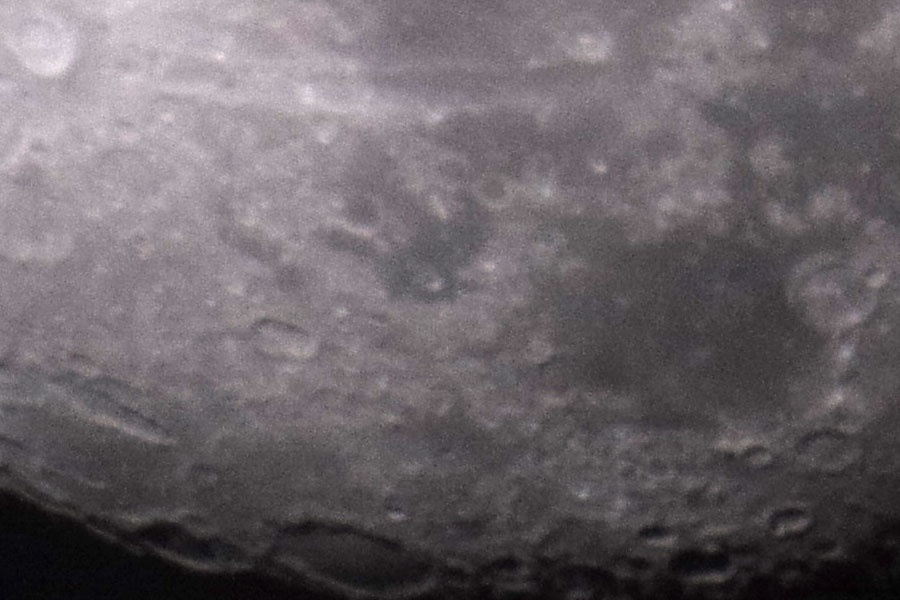
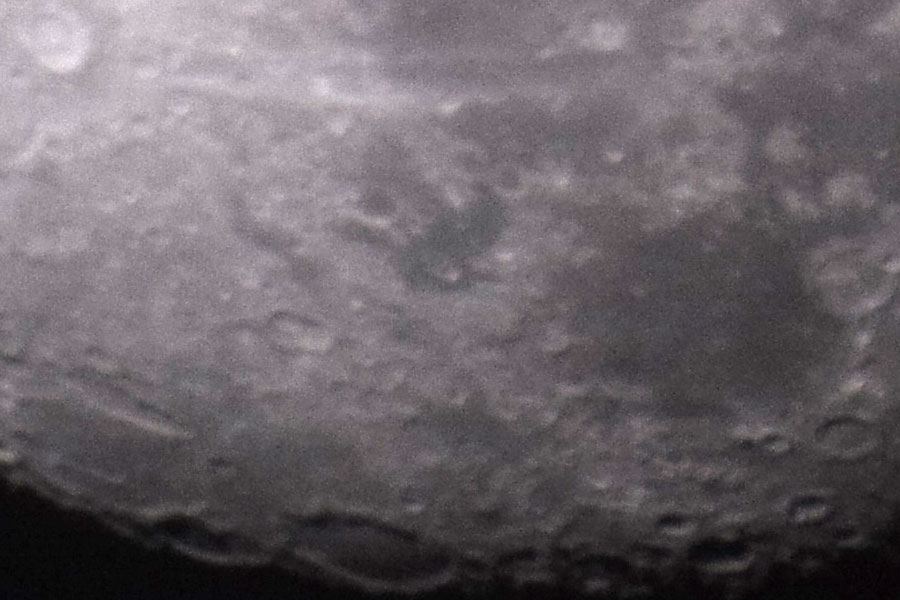
I took only a few photos of the moon with the Skymax-102, because it quickly became clear that these were not satisfying, even though it looked like this in the viewfinder at first, i. e. as if the photos were sharp. But despite or because of using a cable release, the photos are not sharp. However, unlike with the Skymax-127, it seems to be a problem of focusing rather than shake (although double contours appear on a few photos). Why the photos are so blurred, although they looked sharp in the viewfinder during quick review, is beyond my knowledge....
|
|
|
Original view |
Original view |
|
|
 |
|
Section of the photo above |
Section of the photo above |
Conclusions
The main purpose of this page is to show how to connect a camera with interchangeable lenses to a telescope with a T-mount option. This is shown for the Sky-Watcher Skymax-127 and for the Skymax-102.
However, the results that I achieved with the Leica M (type 240) at both telescopes do not meet my expectations. On the one hand, the noise behaviour of the camera seems to be partly poor, which I had not noticed before. The noise in the first few photos is not acceptable, whereas on the later photos taken in bright moonlight, the results seem to be acceptable, but the Ricoh GR is also in this situation still better (see Appendix).
On the other hand, most of the shots were blurred because of camera shake, although - or maybe because - I used a cable release. Unfortunately, I do not know yet why the photos are blurred so often. This needs further investigations...
Appendix: Comparison Leica M (Typ 240) and Ricoh GR
In parallel to the Skymax-127 with Leica M, I had built up the Skymax-102, through which my wife observed the Aldebaran covering. At this telescope, I took some photos with the Ricoh GR using the 1:50 method. In the following, I would like to present some comparison photos of the Leica M and the Ricoh GR.
Since the conditions for both cameras were not really comparable, I add a test in which both cameras are held to the eyepiece of the Skymax-102.
Test 1: Not comparable???
This test contains photos from the real observation situation. This means that the Leica M was mounted on the Skymax-127 using a T-mount adapter (resulting aperture for the camera was f/11.8), the Ricoh GR was held to the eyepiece of the Skymax-102 (maximum aperture of the camera f/2.8 at the f/12.7 telescope).
Light Sky
I start with photos from the time when the sky was still relatively bright. The noise differences between the two cameras seem to be most obvious here.
|
|
|
||
Leica M: Dull, one of the sharper photos (1/500 sec) - 2700 pixels |
Leica M: somewhat underexposed (1/1000 sec), one of the sharper photos - 2700 pixels |
Leica M: A little brighter again (1/500 sec), one of the sharper photos - 2700 pixels |
||
 |
 |
 |
||
Ricoh GR: Dull - 2400 pixels |
Ricoh GR: Overexposed - 2400 pixels |
Ricoh GR: Darker - 2400 pixels |
||
|
|
|
||
Leica M: Photo from above post-processed - 2700 pixels |
Leica M: Photo from above post-processed - 2700 pixels |
Leica M: Photo from above post-processed - 2700 pixels |
||
 |
 |
 |
||
Ricoh GR: "Dull" post-processed - 2400 pixels |
Ricoh GR: "Overexposed" post-processed - 2400 pixels |
Ricoh GR: "Darker" post-processed - 2400 pixels |
||
|
|
|
||
Leica M: Section from the photo above |
Leica M: Section from the photo above |
Leica M: Section from the photo above |
||
 |
 |
 |
||
Ricoh GR: Section from the photo above |
Ricoh GR: Section from the photo above |
Ricoh GR: Section from the photo above |
To make it short: On small samples, the Leica M photos look almost better than those of the Ricoh GR, but if you look closer and magnify them, there is a huge difference in the noise behavior of both cameras: the Ricoh GR is much, much better in this situation than the Leica M.
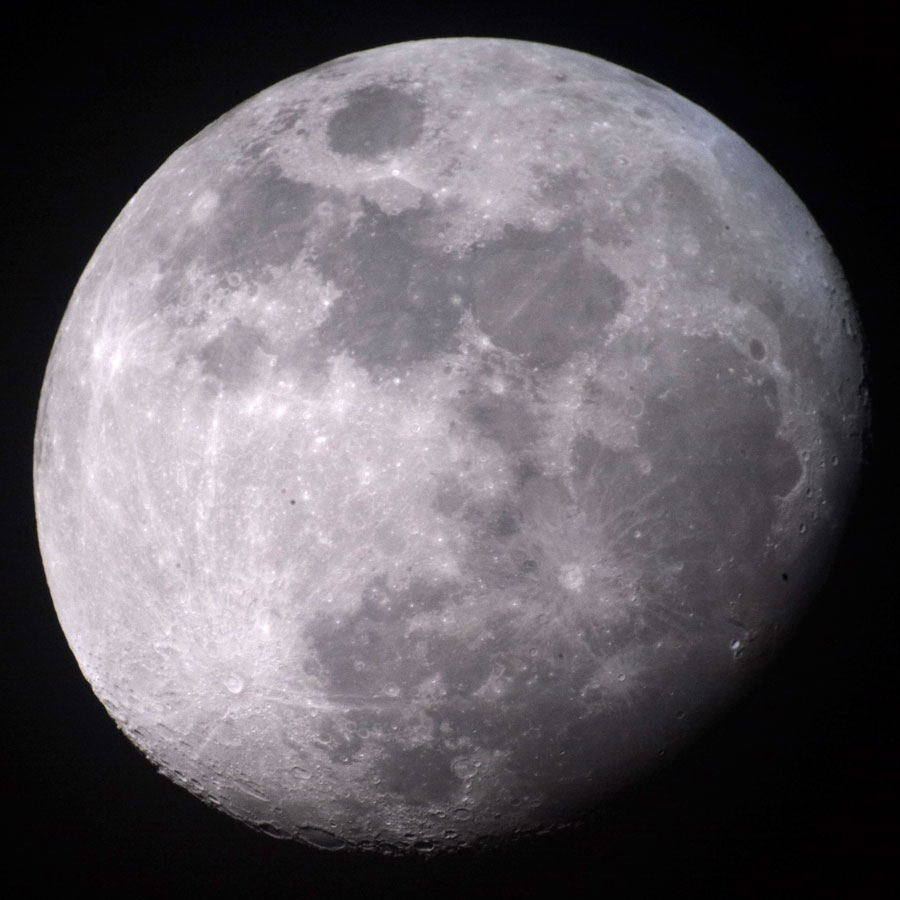
Darker Sky
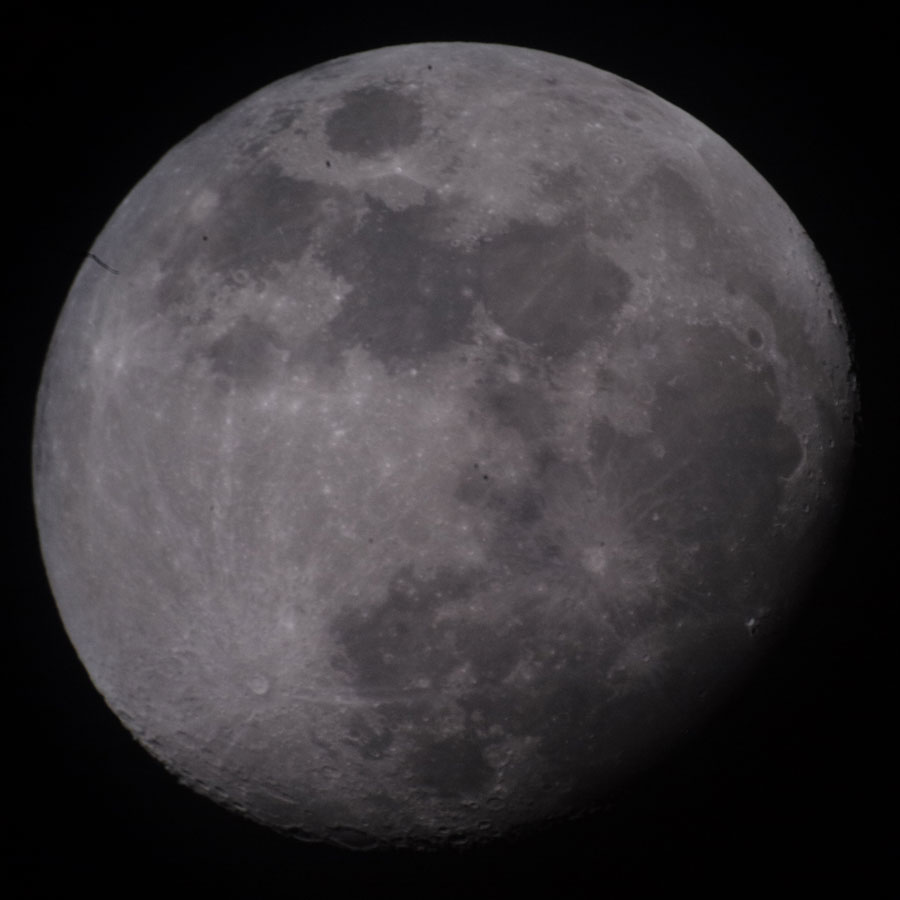
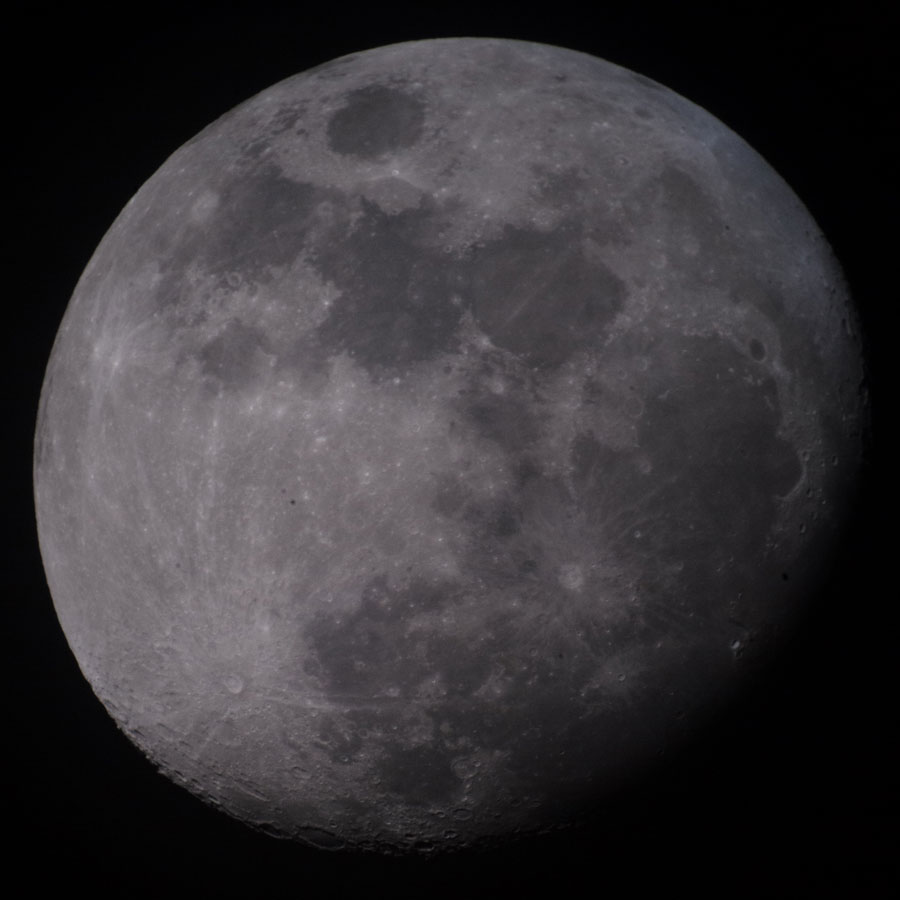
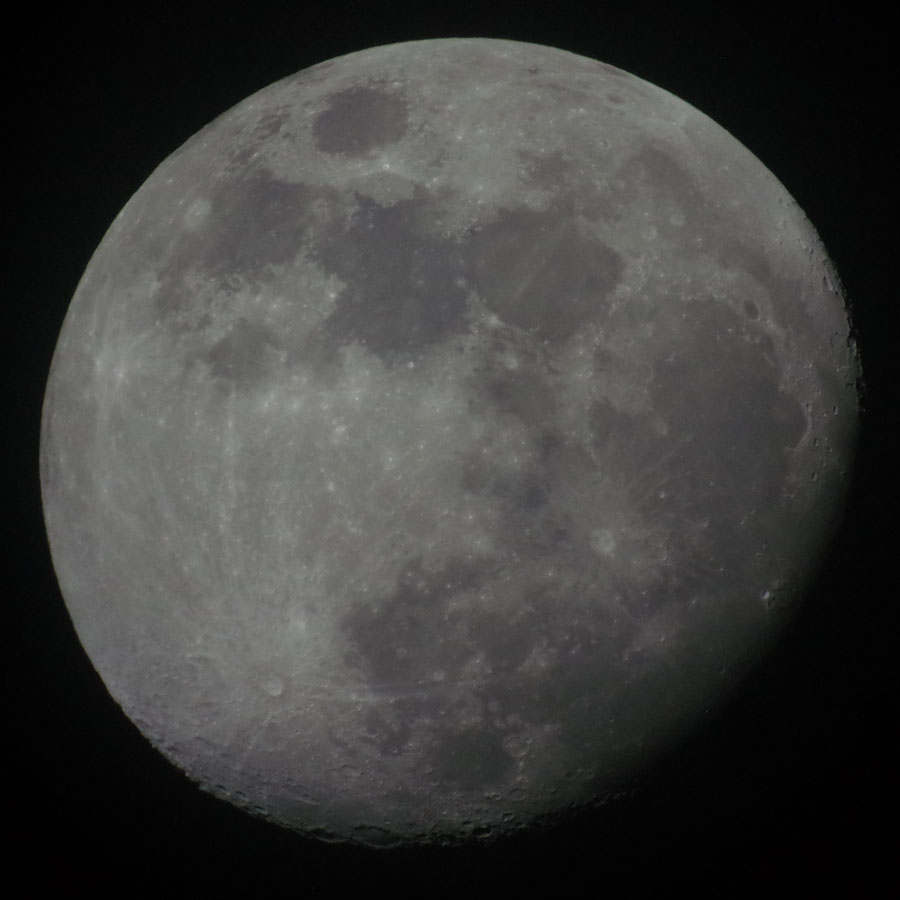
So, the final question for me was, how will both fare, when the sky is darker and the moon is brighter? Here are the respective photos (or a few samples...):
 |
 |
 |
||
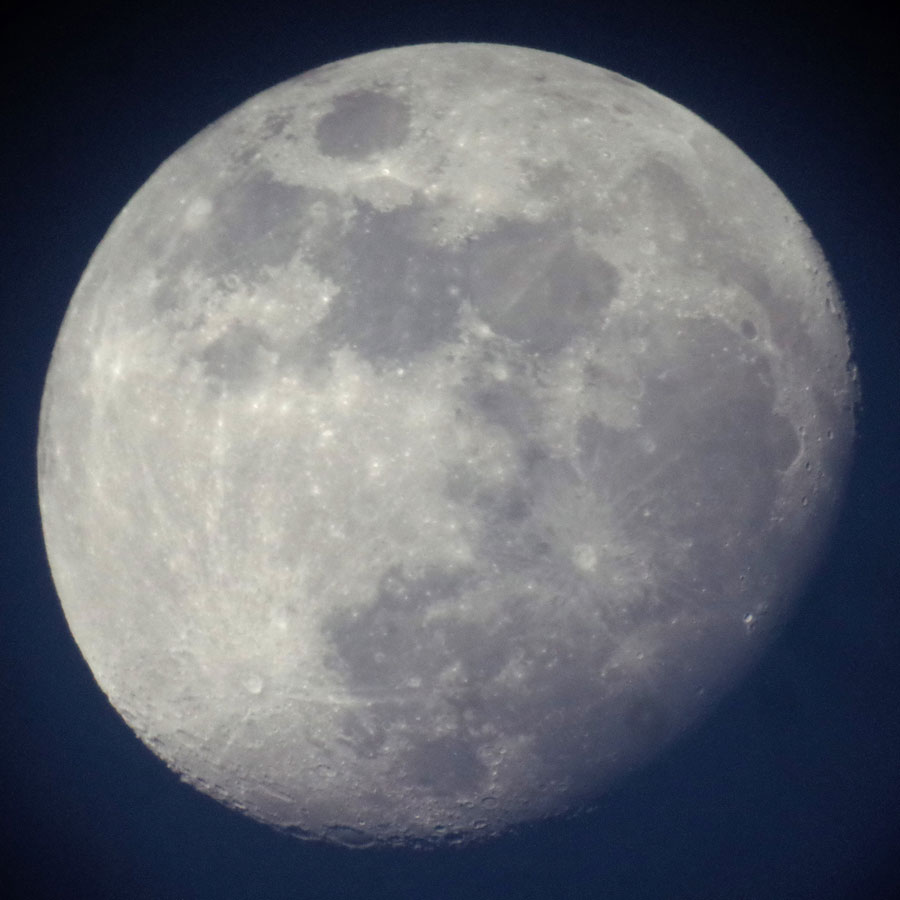
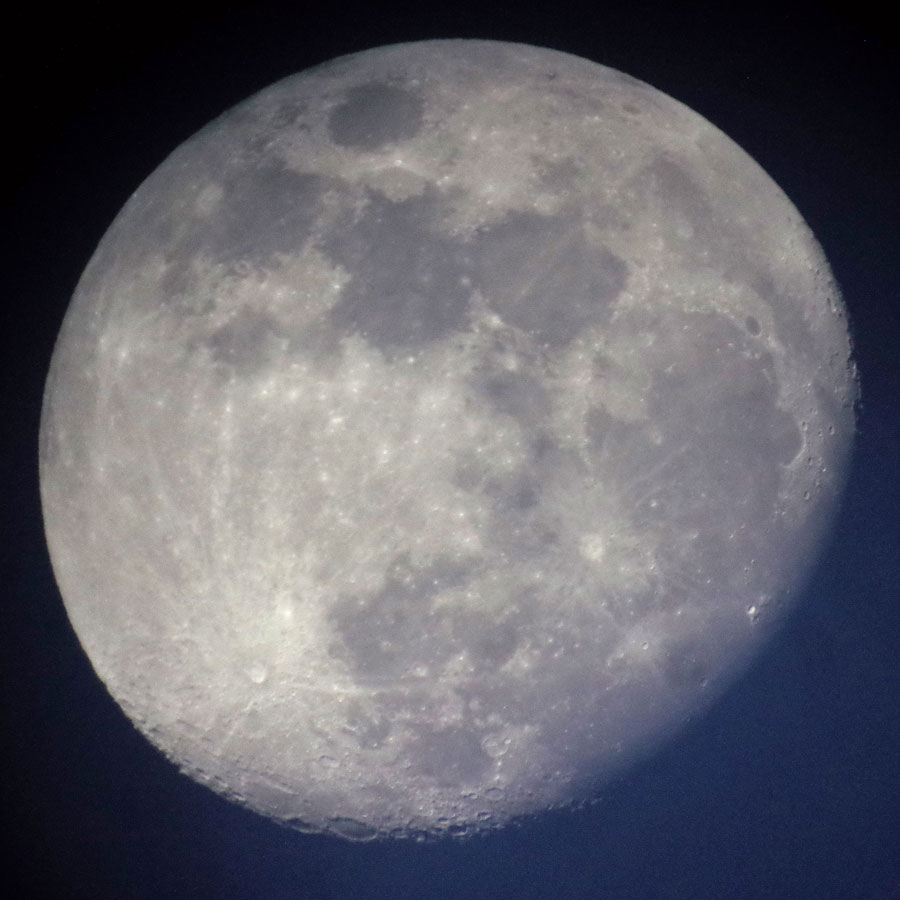
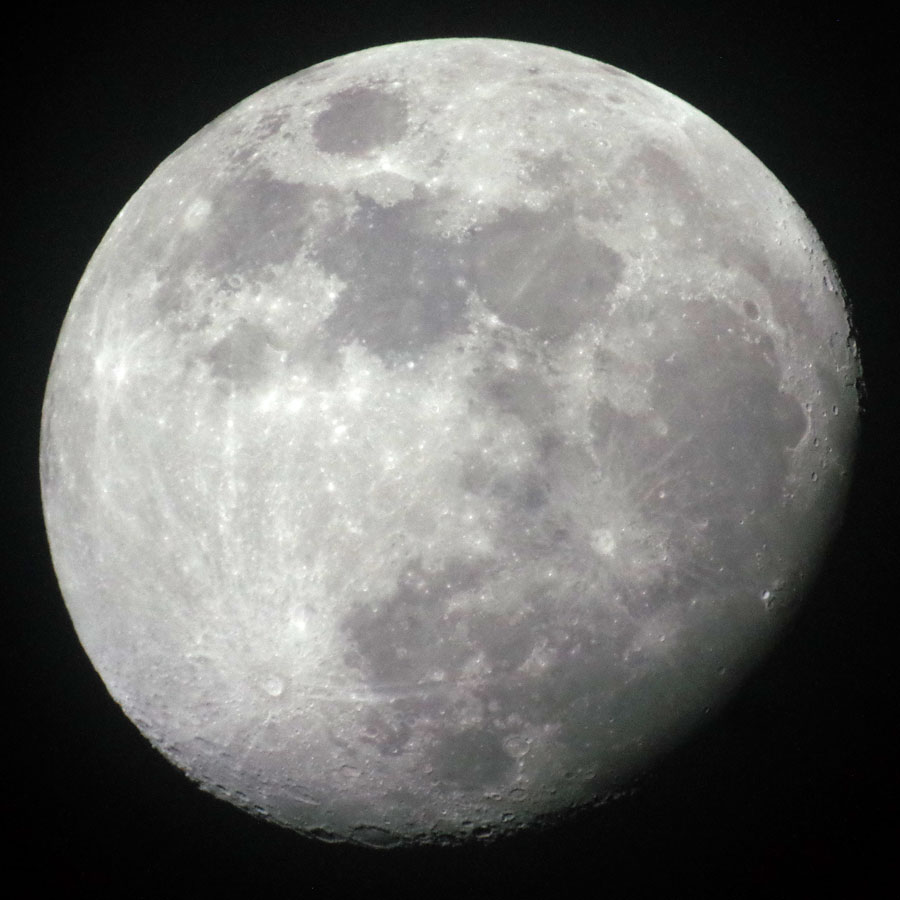
Leica M - 2700 pixels |
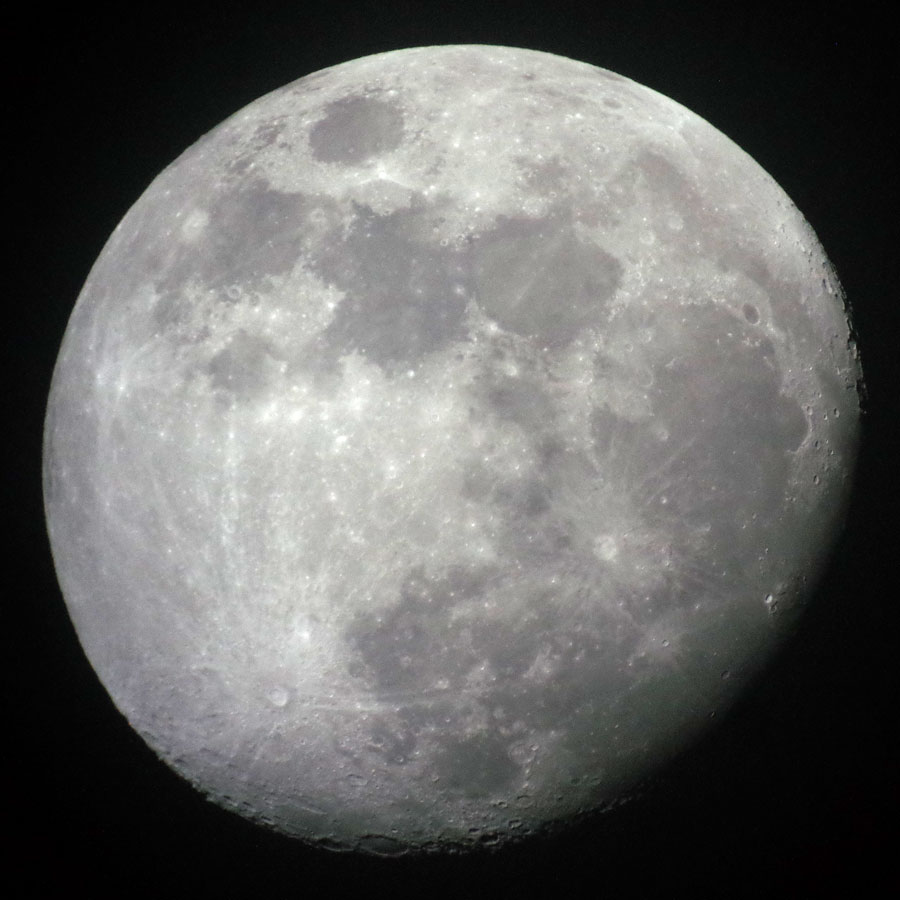
Ricoh GR - 2400 pixels |
Ricoh GR, darker - 2400 pixels |
||
 |
 |
 |
||
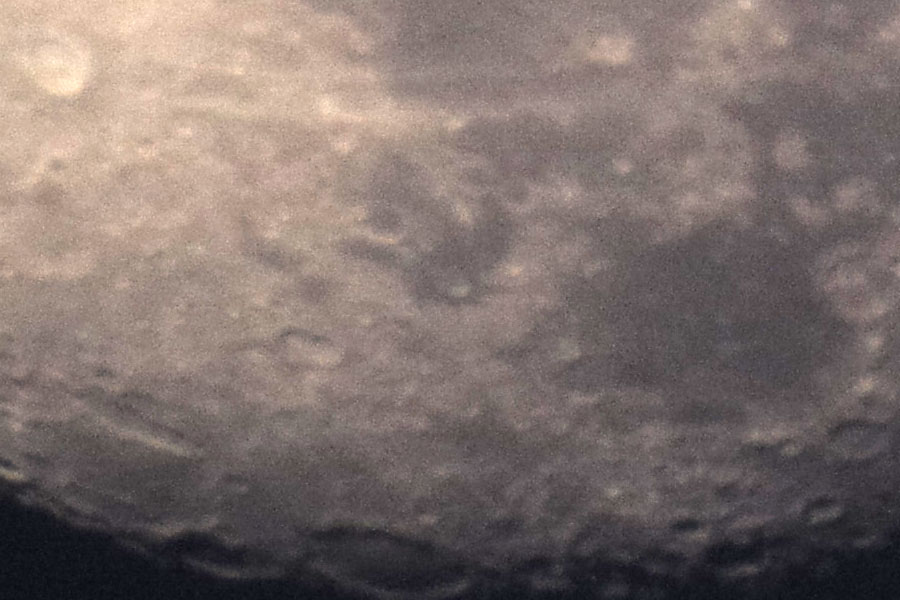
Leica M - Northern section from the photo above |
Ricoh GR - Northern section from the photo above |
Ricoh GR - Northern section from the photo above |
||
 |
 |
 |
||
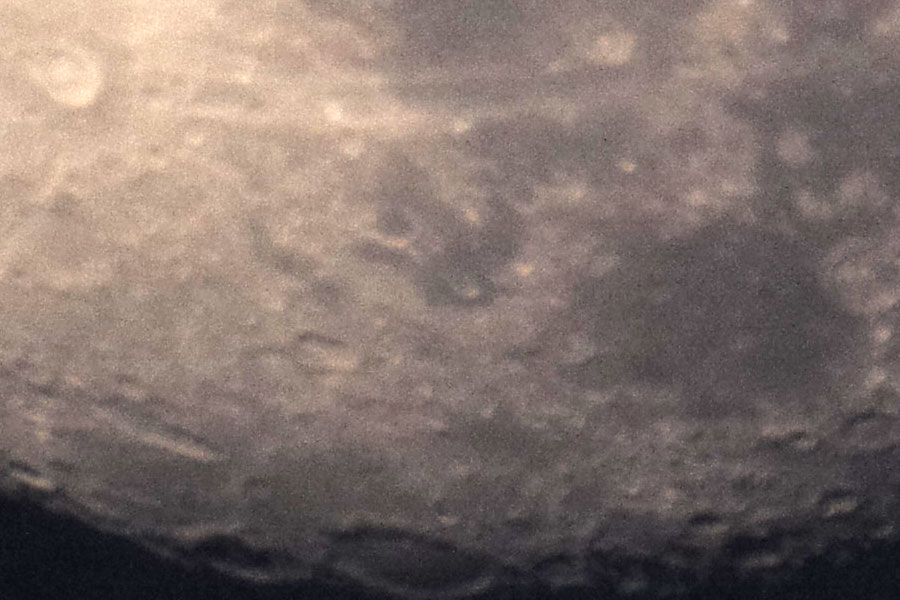
Leica M - Southern section from the photo above |
Ricoh GR - Southern section from the photo above |
Ricoh GR - Southern section from the photo above |
Once again, the Ricoh GR shows a better noise behaviour than the Leica M, although perhaps not as clearly as for less light.
Test 2: At least, Somewhat More Comparable Conditions...
This is a subsequent test in which both cameras were held to the eyepiece of the Skymax-102. On the Leica M, I used an f/2.8-28 mm lens that was set to f/2.8. The Ricoh GR has a fixed f/2.8 lens with an equivalent focal length of 28 mm. Both cameras were fixed to infinity (the Minolta lens was set manually to infinity). Both cameras were also set to -2 EV underexposure.
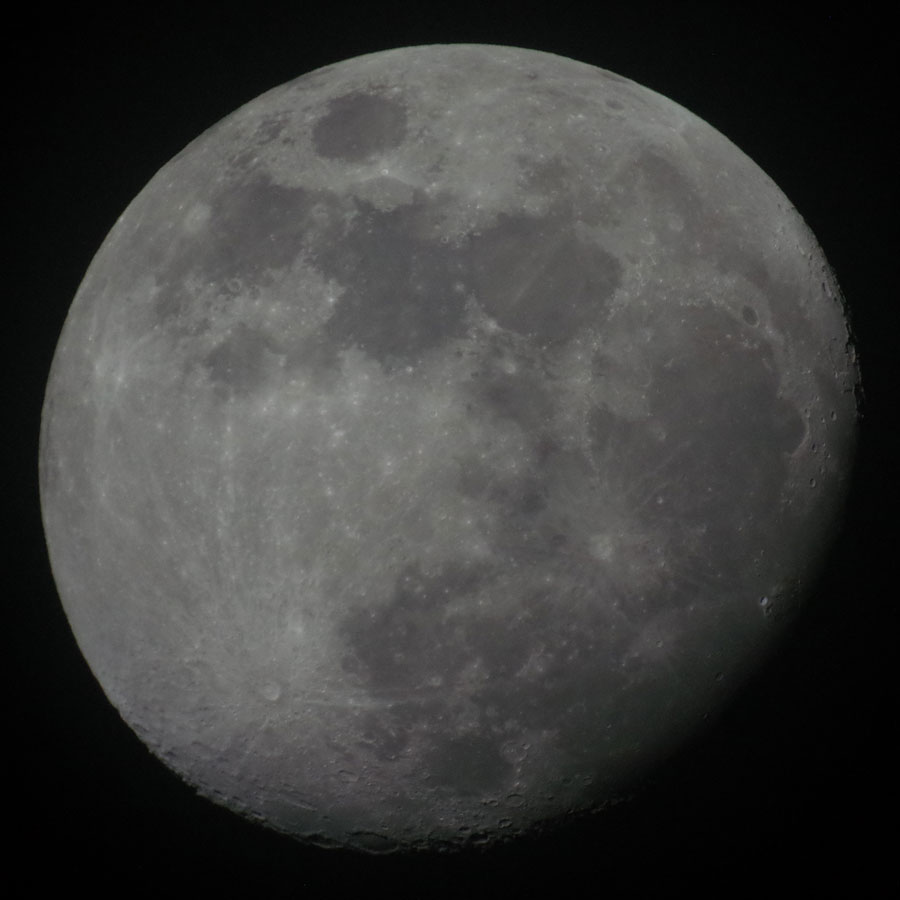
Lighter Sky
Since the Ricoh GR photos were a bit "dull" and differently exposed, I post-processed them; the Leica M photos were well exposed (I did not remove sensor dust).
 |
 |
 |
||
Leica M - 3000 pixels |
Leica M - 3000 pixels |
Leica M - 3000 pixels |
||
 |
 |
 |
||
Ricoh GR - 2400 pixels |
Ricoh GR - 2400 pixels |
Ricoh GR - 2400 pixels |
||
 |
 |
 |
||
Ricoh GR, post-processed - 2400 pixels |
Ricoh GR, post-processed - 2400 pixels |
Ricoh GR, post-processed - 2400 pixels |
Section
I present sections of the photos above for an easier evaluation of the noise behavior. However, I recommend to download the large sections or photos for a more accurate evaluation.
 |
 |
 |
||
Leica M - 3000 pixels |
Leica M - 3000 pixels |
Leica M - 3000 pixels |
||
 |
 |
 |
||
Ricoh GR - 2400 pixels |
Ricoh GR - 2400 pixels |
Ricoh GR - 2400 pixels |
||
 |
 |
 |
||
Ricoh GR, post-processed - 2400 pixels |
Ricoh GR, post-processed - 2400 pixels |
Ricoh GR, post-processed - 2400 pixels |
Overall, the Leica M seems to show more noise than the Ricoh GR, but the difference seems to be smaller than in the case that the Leica M is directly attached to the telescope. Under the given conditions, sharpness is worse than under a dark sky for both cameras (see below).
Darker Sky
 |
 |
 |
||
Leica M - 3000 pixels |
Leica M - 3000 pixels |
Leica M - 3000 pixels |
||
 |
 |
 |
||
Ricoh GR - 2400 pixels |
Ricoh GR - 2400 pixels |
Ricoh GR - 2400 pixels |
||
 |
 |
 |
||
Leica M, post-processed - 3000 pixels |
Leica M, post-processed - 3000 pixels |
Leica M, post-processed - 3000 pixels |
||
 |
 |
 |
||
Ricoh GR, post-processed - 2400 pixels |
Ricoh GR, post-processed - 2400 pixels |
Ricoh GR, post-processed - 2400 pixels |
Section
I present a sections of the photos above for an easier evaluation of the noise behavior. However, I advise you to download the large sections for a more accurate assessment.
 |
 |
 |
||
Leica M, post-processed - 3000 pixels |
Leica M, post-processed - 3000 pixels |
Leica M, post-processed - 3000 pixels |
||
 |
 |
 |
||
Ricoh GR, post-processed - 2400 pixels |
Ricoh GR, post-processed - 2400 pixels |
Ricoh GR, post-processed - 2400 pixels |
||
|
||||
Leica M, post-processed, 3rd section (right) |
||||
|
||||
Ricoh GR, post-processed - 3rd section (right) |
||||
Overall, the noise of the Leica M seems to be comparable to that of the Ricoh GR. In any case, the difference seems to be less than when the Leica M is directly attached to the telescope.
The enlarged section of the Leica M shows more details than the Ricoh GR's counterparts (this, of course, applies to the whole photo). In principle, more sharpness seems possible with the Leica M, but in practice this is rarely or never achieved (slightly more sharpness should also result from the higher sensor resolution of the Leica M). I will explain the reasons for the Leica blurring elsewhere. Obviously the blur is caused by camera shake.
|
made by |
| 17.11.2024 |