Astronomy | GXR · GR · RX100 M1 · RX100 M4 · RX10 M3/4 · TZ202 · X Vario · M240 · General | Photos | Conf. Places | Calendars | Art
Leica X Vario: Tips and Tricks
Image Review (Auto Review): "Zoom" Setting | Enforce Aperture to Be Always Wide Open | Autofocus Help | Reduce the Fuzziness of Images Caused by Camera Shake in Low Light | Aperture Preview | Exposure/Aperture Preview in Manual Mode | Extend the Camera's Close-Up Range
Archive
On this page, I collect "tips and tricks" - one might as well just call them "usage suggestions." These may be specific to the X Vario (or not...) and help me overcome some of the camera's shortcomings - or make working with the camera even "smoother."
Notes
- There is some overlap with my FAQ and other pages in the Leica X Vario section.
- There is a very helpful thread in the Leica forum at dpreview, in which users post their tips and tricks for the Leica X Vario.
Image Review (Auto Review): "Zoom" Setting
Elsewhere, I discuss the image review function, which is called "Auto Review" in the X Vario manual (or camera menu). This function has settings for 1, 3, and 5 seconds, for permanent view ("Hold"), and no review at all ("Off") which are all self-explanatory. However, there is also a "Zoom" setting, for which I could not find an explanation. Through experimentation, I found out that it displays the review image for 1 second (at least when you shoot JPG only...) and then the enlarged center fullscreen for about one second (I do not know at which magnification).
Elsewhere, I also bemoan the AF behavior of the Leica X Vario and the fact that I sometimes lose shots because I took only one shot, and this was regrettably out of focus. Of course, I can press the "Play" button after each shot and enlarge the photo to check whether focus is correct. But this is cumbersome, and admittedly, I am too lazy for such a procedure. Here the "Zoom" setting of the auto review function comes in handy - at least, if you're not in a hurry. Based on the magnified view, I am usually able to decide whether a photo was in focus or not. Thus, the "Zoom" setting is indeed of great help for me.
Enforce Aperture to Be Always Wide Open
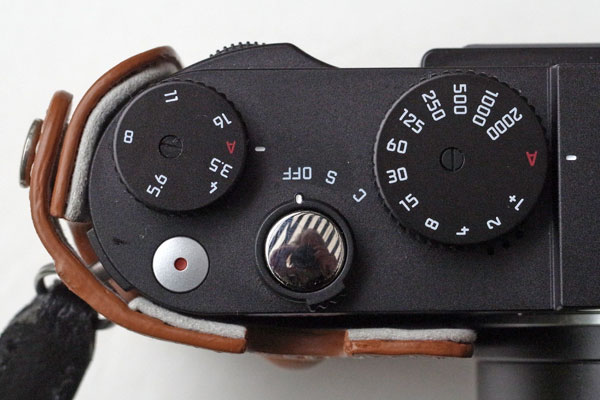
The "automatic program" exposure mode tends to select an aperture that is wide open. However, when you want to be sure that it is maximally open, just set the aperture dial to "3.5". The camera will then, depending on the focal length, select the possible maximum aperture and expose the photos correctly.
 |
 |
Turn the aperture dial from "A" to "3.5" to do the trick...
Autofocus Help
The reliability of the X Vario's autofocus (AF) was a matter of heated debates in the Leica forums. Some people blamed the camera, others, satisfied X Vario owners, blamed the people who had AF issues. I discuss this issue elsewhere. Here, I would like to offer a few suggestions for how you can help the AF to become more reliable - or the camera to focus more reliable (for example, by not using AF).
Avoid 11-Point AF
Many users resort to single-point or even spot AF instead of the 11-point AF. I have to admit that, initially, I did not trust both a lot. Particularly spot AF had the "reputation" of being unreliable because of the small measurement area. However, after I have switched to 1-point AF, the number of fuzzy images has decreased, although there are still instances in which AF misses its target (but tells me that it found focus).
A number of X Vario users also suggested to use MF instead. This suggestion may be valid in some cases, particularly for static objects, but is unusable in many others, particularly when speed is required. Generally, I have problems with this camera when things have to go fast (particularly when taking photos of people in action).
Prevent Autofocus from Being Irritated by Near-By Objects
Often, the X Vario's AF (and also that of other cameras) is irritated when there are near-by objects such as grass, wires, branches, and so on. I found sample images, where such objects were at the edges of the image, far away from any focus field, but nevertheless they had irritated the AF.
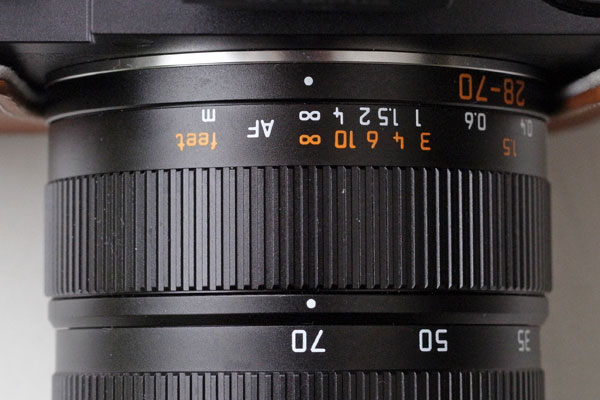
For this case, my suggestion is: Do not use AF at all, use manual focus (MF) instead. In many cases, particularly for wide-angle shots, it it usually sufficient to set the manual focus to infinity (just a turn of the distance ring beyond the "click"). Between 50mm and 70 mm this may put the near limit of the depth of field range too far to the background.
 |
 |
|
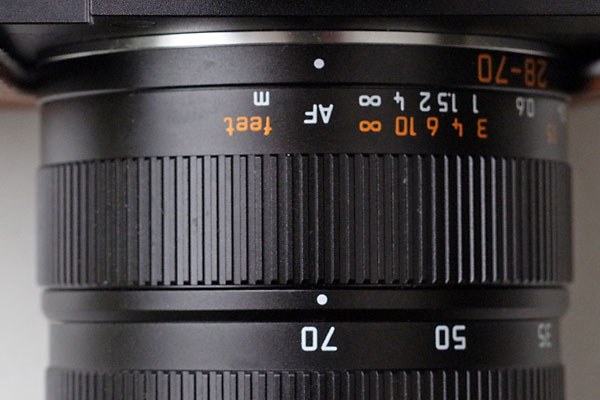
Focus set to AF |
Focus set to infinity |
Regrettably, there are no depth of field scales on the X Vario lens. So, you might want to use my tables of hyperfocal distances and my depth of field tables but they may not be of much help given the sparce distance marks on the lens. Here are, at least, two quick and dirty recommendations taken from my Hyperfocal Distance page:
- 35 mm (equiv.): At about f/6.4 you reach the magical "4 m" mark. Thus, setting distance a little bit beyond 4 m and aperture to f/6.4 can be helpful in certain cases.
- 28 mm (equiv.): At f/4 you reach the magical "4 m" mark. Thus, you can set aperture to f/4 and distance to 4 m, or you use f/3.5 and move the distance ring a little bit beyond 4 m to set the hyperfocal distance (meaning that you will get everything sharp from 2 or 2.5 m to infinity). Both settings may be a useful option for street photographers.
Reduce the Fuzziness of Images Caused by Camera Shake in Low Light
There are typically the following measures that you can take - alone or in combination - to reduce camera shake in low light conditions: (1) use a tripod, (2) use the self-timer, (3) increase the ISO value. The X Vario's ability to use higher ISO values is an often-mentioned consolation for its slow lens. However, it depends on your personal taste, how much image degradation you are willing to accept (some say 1600, others may go up to 6400)... Finally, the X Vario offers a so-called image stabilization function that, according to the manual (p.156) normally results in sharp pictures even with very slow shutter speeds. You need to select "Image Stabilization" in the menu to activate this function. With this function, the camera automatically takes two pictures in succession (the shutter noise can be heard twice) and then combines the pictures into one by digital processing. As the function uses two exposures, it can only be used for static subjects (from the manual, adapted). I did not use this function and therefore, cannot report on its effectiveness.
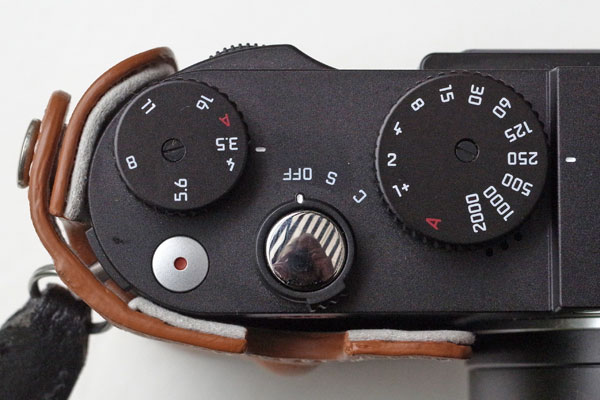
Here, I would like to suggest a fast quick-and-dirty approach, which can also be combined with increasing the ISO value (this suggestion is not my invention...): using continuous shooting. For this approach you need not dive into menus, you just turn the main switch to the "C" (continuous) position. You can take up to seven photos in one burst (thereafter, speed slows down), which should be sufficient in most cases. Just select the best image and delete all the others afterwards...
Figure: Here the main switch is set to "off" - setting it to "C" does the trick...
Aperture Preview
Some cameras offer a dedicated button for getting an aperture preview in the viewfinder/on the LCD screen (see the Ricoh GR, for example). For the Leica X Vario, the manual does not mention anything about such a possibility. By accident, however, I found out that, under certain circumstances, the X Vario indeed offers an aperture preview in the viewfinder/on the LCD screen.
Whenever you set the camera to aperture priority (shutter speed set to "A") or manual mode (that is, specific settings for aperture and shutter speed are used) , you can get an aperture preview while you half-press the shutter release button (or "shutter button" as the manual calls it).
Exposure/Aperture Preview in Manual Mode
When you set the Leica X Vario to manual mode (that is, to specific settings for aperture and shutter speed) you will get an image preview with standard brightness and obviously with maximum aperture. This does not allow you to check exposure and depth of field (aperture preview). However, as long as you half-press the shutter-release button, you will get such a preview - plus a light balance scale (+/- 3 EV in 1/3 EVs) that allows you to adjust the exposure settings to values that the cameras recommends.
Note that the light balance scale will stay on the screen after you first half-pressed the shutter release button and reacts to changes in the settings even without having to half-press the shutter release button.
Thus, in manual mode, you will get an exposure and aperture preview while you press the shutter release button half-way down (or to the "pressure point" as it is called in the manual)..
Extend the Camera's Close-Up Range
The Leica X Vario offers the greatest magnification of 0.2 (1:5 = 12 cm x 8 cm object size) at 30 cm distance and a focal length of 70 mm (equivalent). This close-up ability is quite useful for taking photos of larger flowers. If you want to extend the camera's close-up abilities easily and fairly cheaply, I suggest to buy one or two Marumi +5 achromats or similar solutions (the Marumi achromat costs about 50 EUR; see photo below). There are also very good achromats from Leica, but these are much more expensive. Note that the Marumi achromats have a filter thread of 52 mm and require you to buy a 43 mm to 52 mm step-up ring.
The achievable magnification with one +5 achromat is 0.4 (6 cm x 4 cm), with two +5 achromats (= +10) it is 0.6 (4 cm x 2.7 cm).
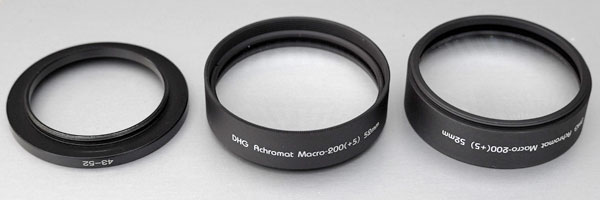
Photo: 43-53 mm step-up ring and two Marumi +5 achromats
For details see page Close-up Lens Experiments - Summary (and many more...).
Sample Photos

Photo: X Vario at closest distance of 30 cm (focal length 46 mm / 70 mm equiv.)

Photo: X Vario at closest distance with Marumi +5 achromat (focal length 46 mm / 70 mm equiv.)

Photo: X Vario at closest distance with two Marumi +5 achromats (= +10; focal length 46 mm / 70 mm equiv.)

Photo: X Vario at closest distance of 30 cm (focal length 46 mm / 70 mm equiv.)

Photo: X Vario at closest distance with Marumi +5 achromat (focal length 46 mm / 70 mm equiv.)

Photo: X Vario at closest distance with two Marumi +5 achromats (= +10; focal length 46 mm / 70 mm equiv.)
|
made by |
| 03.04.2019 |