Astronomy | GXR · GR · RX100 M1 · RX100 M4 · RX10 M3/4 · TZ202 · X Vario · M240 · General | Photos | Conf. Places | Calendars | Art
Ricoh GXR: M-Mount Lens Settings
Introduction: How You Can Adapt a Lens to the GXR or Vice Versa... | Setting Lens Data | Correcting Lens Characteristics | Complete Set of Custom Settings | Conclusions | Links
Archive
On this page, I describe how you can adapt the GXR M-mount expansion unit to M-mount lenses in two respects:
- Record information about the M-mount lens that is used on the Ricoh GXR with M-mount expansion unit in the Exif data so that you know later, which lens was used.
- Apply corrections to a lens to minimize corner hue shift and distortion.
Notes: The process of using custom settings for recording lens data is described on page Recording the Lens in Exif, the general process of using custom settings is described on page Custom Settings.
Introduction: How You Can Adapt a Lens to the GXR or Vice Versa...
Before you start using an M-mount lens or an M39 screw-mount lens with LTM adapter at the Ricoh GXR expansion unit, you need to check whether this lens is usable at the unit at all. There are several ways to find this out:
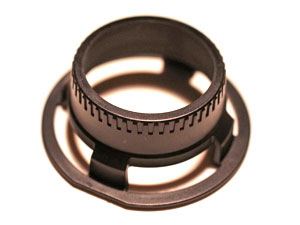
- Do it your self: Check the lens's compatibility using the "check device" that Ricoh supplies with the M-mount expansion unit (see photos below). With this tool, you can check whether the rear part of a lens protrudes too far so that it might damage the sensor.
- Consult the lens compatibility list that is provided by Ricoh. You can find their list of approved lenses at the bottom of their M-mount unit page (Mounting Check Results for Each Lens).
- Consult the lens compatibility list on the Ricohforum. It was continually updated for a while and is much more useful than Ricoh's list.
- Search Ricoh and GXR specific forums and/or ask in the respective forums.
 |
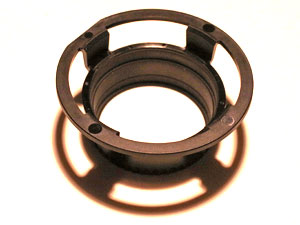 |
Photos: The check device that Ricoh supplies with the M-mount expansion unit
Once you have made sure that your lens is compatible with the M-mount expansion unit, you may want to do two things:
- Record information about the M-mount lens that is used on the Ricoh GXR with M-mount expansion unit in the Exif data so that you know later, which lens was used.
- Apply correction data to a lens to minimize corner hue shift and distortion.
Lens data can only be recorded in a set of custom settings (or settings set, for short) and assigned to one of the three "MYx" positions on the mode dial for easy access. Lens correction data can be entered either in the "Shooting" menu, or as part of a set of custom settings. But it makes more sense to use the latter so that everything is together in one set.
In the following, I will focus on these two bits and pieces of information to provide you with an overview of what is possible and assume that you are basically familiar with using custom settings. You can find more information on using custom settings for this purpose on page Recording the Lens in Exif.
Setting Lens Data
Often, you may want to record information about the M-mount lens that is used on the Ricoh GXR with M-mount expansion unit in the Exif data so that you know later, which lens was used.
Below are the options for registering lens data (lens name, focal length, f-stop) for the M-mount expansion unit.
First, press the "MENU/OK" button, select the "Key Custom Options" tab (the second tab), select "Edit My Settings", and finally select the set of custom settings that you want to edit. Go to screen four to enter the lens data:
 |
||
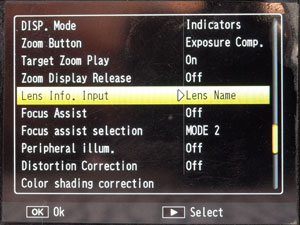
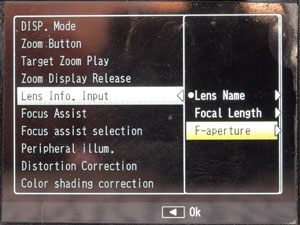
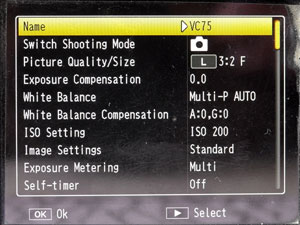
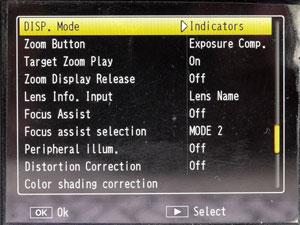
| Settings screen 4: Item "Lens Info. Input" allows you to set three lens characteristics, lens name, focal length, and aperture (select this item, move cursor to the right to select and enter the settings). | ||
|
 |
|
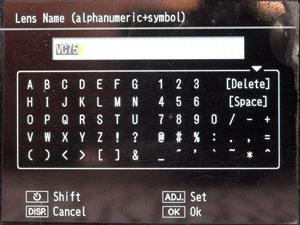
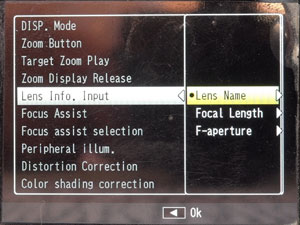
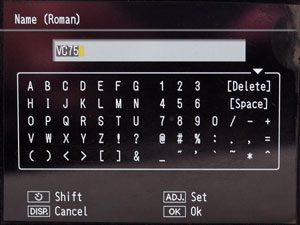
| Lens Name: Move the cursor to the right to enter the lens name | Small alphanumeric keyboard for entering the lens name (the same keyboard is used for entering the settings name). | |
|
 |
|
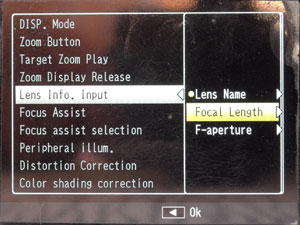
| Focal Length: Move the cursor to the right to enter the focal length of the lens | Small numeric keyboard for entering the focal length of the lens name (the same keyboard is used for entering the F-aperture). | |
 |
 |
|
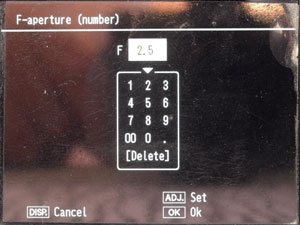
| F-Aperture: Move the cursor to the right to enter the F-aperture | Small numeric keyboard for entering the F-aperture length of the lens name (the same keyboard is used for entering the focal length). | |
Correcting Lens Characteristics
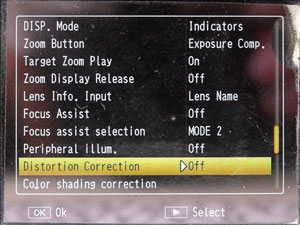
The two lens correction functions are available in "Edit My Settings," where they are located on the fourth screen, as well as in the "Shooting" menu (screen three).
Both functions are available in "Edit My Settings": |
||
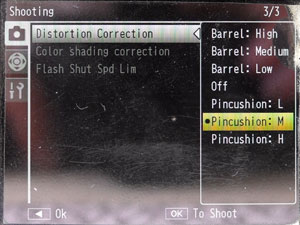
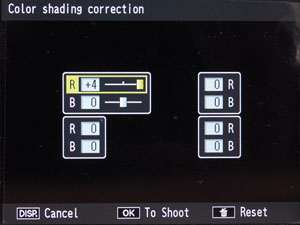
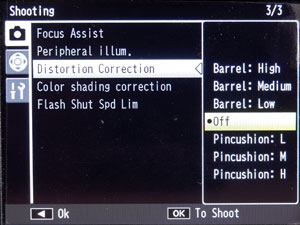
| Distortion Correction: | Color Shading Correction: | |
 |
 |
|
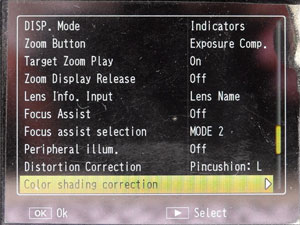
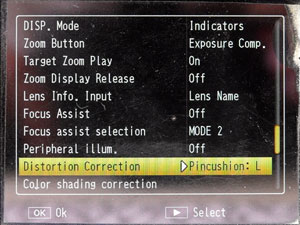
Settings screen 4: Item "Distortion Correction" allows you to minimize distortion, item "Color Shading Correction" to minimize hue shift in all four corners. |
||
 |
 |
|
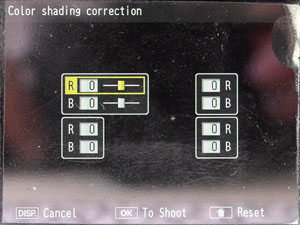
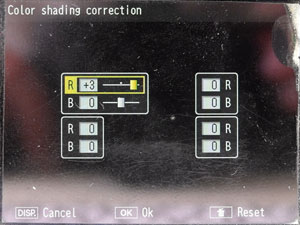
| Low pincushion correction selected... | For each of the four corners, the R(ed) and B(lue) values can be adapted between -4 and +4 (whatever that means...). | |
 |
 |
|
| ...and shown on the settings screen. | Example: Top left correction for R(ed) | |
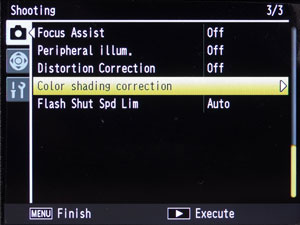
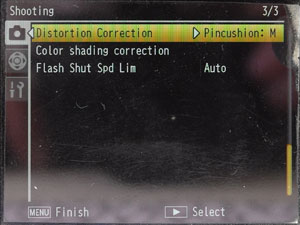
Both functions are also available in the "Shooting" menu: |
||
| Distortion Correction: | Color Shading Correction: | |
|
 |
|
| Move the cursor to the right to enter the lens name to change the correction | Move the cursor to the right to enter the correction screen | |
|
 |
|
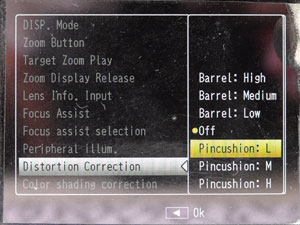
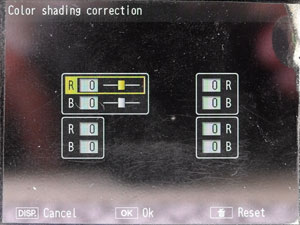
| Distortion correction can be "off" or one of three degrees of barrel or pincushion distortion correction. | For each of the four corners, the R(ed) and B(lue) values can be adapted between -4 and +4 (whatever that means...). | |
 |
 |
|
| Medium pincushion correction selected... | Example: Top left correction for R(ed) | |
 |
||
| ...and shown on the settings screen. | ||
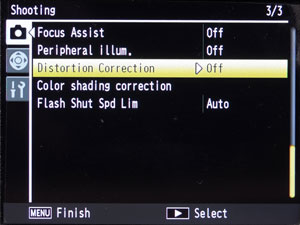
Note: The reason for the variation in the location of the functions on the "Shooting" menu screen is unknown...
Complete Set of Custom Settings
Below are the settings screens for the M-mount expansion unit. Other camera units may have slightly different settings screen depending on their technical characteristics.
I do not go into the details of setting the lens name and correcting lens characteristics, because these screen are shown above.
First, press the "MENU/OK" button, select the "Key Custom Options" tab (the second tab), select "Edit My Settings", and finally select the set of custom settings that you want to edit. Below, are the screens that are at your disposal:
 |
 |
|
| Settings screen 1: Here I set the name for the settings set (short name of the lens) (first item); ISO is set to 200 | Move the cursor to the right to enter the settings name using a small alphanumeric keyboard. | |
 |
 |
|
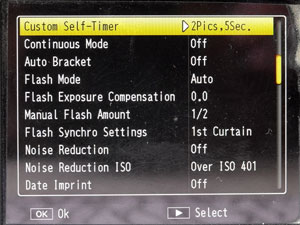
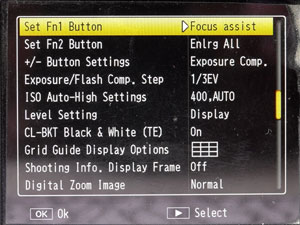
| Settings screen 2: Nothing special here... | Settings screen 3: The first two items assign focus aids to the function buttons Fn1 and Fn2 |
|
 |
 |
|
Settings screen 4: Item "Lens Info. Input" allows
you to set three lens characteristics, lens name, focal length, and aperture
(select this item, move cursor to the right to select and enter the settings). In addition, I set focus assist to MODE 2 (high pass filter). Also note that I do not use the options to correct distortion and color shading. At the bottom of this screen are the two options for correcting lens
characteristics (distortion, color shading). |
Settings screen 5: Nothing special here... |
Conclusions
Up to now, I did not find it necessary to correct my M-mount lenses for distortion and color shift in the corners. Nevertheless, here you find what you can do...
Finally, there is another "setting" that might trouble you, the DOF marks on the lens, because M-mount/M39 lenses are full-format lenses. If you use these markers for zone focusing, please note that you have to apply the DOF marks of the aperture one f-stop more open* than the aperture that you set. For example, use the f/5.6 marks when you set an aperture of f/8 on the lens.
*) Or more exactly, 1.3 to 1.5 f-stops more open (but one f-stop is OK)
Links
- Ricoh: Mounting Check Results for Each Lens
- Lens compatibility list on the Ricohforum
|
made by |
| 19.11.2020 |