Astronomy | GXR · GR · RX100 M1 · RX100 M4 · RX10 M3/4 · TZ202 · X Vario · M240 · General | Photos | Conf. Places | Calendars | Art
Leica M (Typ 240): Sensor Cleaning
Introduction | Some Words Beforehand... | Overview of Cleaning Methods | Dry Cleaning | Wet Cleaning. | "Post" Cleaning: Removing Dust Spots in Photos in Post-Processing | Dry Cleaning Practice: First Test of the VisibleDust Arctic Butterfly SL 707 Sensor Brush | Wet Cleaning Practice: VisibleDust EZ Mini-Kit 1.0 | Post-Processing Practice | Conclusions | References
On this page I collect more general information about sensor cleaning and first personal experiences with cleaning the sensor of my Leica M (Typ 240).
Introduction
When I sold my DSLR equipment at the end of 2009, I thought that I would get rid of a nasty problem for the rest of my life as a photographer: the issue of sensor dust (I then also gave away my dust cleaning equipment...). The Ricoh GXR that I had bought was based on the concept of camera units, in which sensor and lens were combined, and Ricoh claimed that dust on the sensor would be a non-issue with this approach. Of course, or regrettably, this was not quite true, at least for some of the camera units. The folding and "wobbly" lenses of the S10 and P10 camera units tended to "suck in" dust, and the M-mount expansion unit even exposed the sensor like any system camera or DSLR does. Luckily, I was not affected by these issues, but many other Ricoh owners, including those of the GX and GR models. My wife's Ricoh CX1, which is a close "relative" to the S10 camera unit, was, however, affected by dust on the sensor. And in 2015, even my Leica X Vario showed dust on the sensor, even though it has a "classical" lens construction (see page Damages to the Camera > Dust in the Lens or on the Sensor?).
And now (October 2015) I bought a Leica M (Typ 240), which definitely exposes its sensor to the outside when you exchange lenses. But, as I have learned, it may also collect dust, oil, and debris (from the manufacturing process or from shutter actuations) from the inside on its sensor... Not surprisingly, very soon after the purchase my photos revealed that there was indeed dust on the sensor - and that I should better get rid of it in order not to spoil my photos with dust spots.
Since the dust issue did not come as a surprise to me, I was not in panic this time (as I was when I discovered my first dust spots on a sensor years ago...). Reading threads in camera forums, I learned that I would have to live with this issue. So the question was: What can I do to get rid of the dust and have a clean sensor? When I waded through the postings in the forums, I not only learned that there are various approaches to this issue, such as dry and wet cleaning methods, but also, that there is more than just dust than can show up in the photos. And I also learned that dust has a tendency to immediately reappear after you cleaned the sensor (probably in different locations)...
All in all, I thought that it would be a good idea to collect what I have leaned about this issues over time on a specific Web page, not only for me, but also for other people who might profit from it. And as soon as I have made my own experiences, I will add these here, too.
But first of all, a word of warning: In the camera forums, people report very different results for the various methods as well as for the same method. The reasons for the differences are often unclear. In many cases, it may just be that they had different types of particles on their cameras' sensors: dust, oil, or debris.
Some Words Beforehand...
Dust ON the Sensor?
Usually, people speak of dust "on the sensor". In reality, the sensor itself is covered by glass (no AA filter) or by a AA filter and glass (with AA filter). The glass cover may be very thin, though, as is the case for Leica M cameras. So you can never scratch the sensor itself, but you may scratch the cover glass (or even break it) if you assert too much force when cleaning the sensor or use metal tools for the cleaning.
All in all, some care is in place when touching the surface of the sensor assembly with a tool, but panic is also inappropriate.
Dust, Oil, Debris, ...
Usually, people speak of "dust"on the sensor. In reality, it can be dust that entered somehow the room between lens and sensor, but it can also be oil or debris.
Particularly for the Leica M9, oil stemming from the manufacturing process can be an issue, most of all when the camera is new. Oil may combine with dust and can make it hard to remove the dust. It can also pollute your dry cleaning tools and make the situation after cleaning worse than it had been before cleaning.
Debris can be remainders from the manufacturing process, but can also originate from using the camera. Some posters point out that it can be the result of shutter actuations and thus, "a normal thing to appear."
All in all, "dust removal" would be much easier if it were only dust that has assembled on the sensor surface...
How to Ensure a Clean "Work Place"...
Initially, I thought that it would be a good idea to go outside for the cleaning of the sensor, because our rooms appear rather dusty to me. But in the forums all posters warned of going outside for the cleaning. So you better look for a room in your house or flat that is as dust free as possible. jaapv suggested to go into the bathroom and have the shower running for some time. According to him, moisture is no problem, but this may very much depend on the specific conditions.
Many posters also say that you should hold the camera so that the lens mount points downward so that the dust can fall out. This may be useful for some dry cleaning methods using air pressure, but it is more or less impossible to use wet cleaning methods this way.
The company Visible Dust, which offers a variety of products for sensor cleaning, offers an antistatic mat on which you can put the camera. It is assumed to collect the dust and keep it off the camera. In a video, however, I observed that the dealer put the camera on its back when he put it on the mat, something that many posters warn against. But I do not know what else you can do here...
How to Ensure a Clean Sensor (Camera)
One major step towards a clean sensor is, of course, keeping your camera as clean and dust free as possible. Of course, this is an illusion in many natural environments, but even for "dusty" environments posters report completely different experiences as to the dust sensibility of their cameras. Anyway, a few tips here are:
- Keep the lens mount and the back of your lenses dust free
- Do not carry your lenses in your trouser or jacket pockets around (at least not without a cover)
- Exchange you lenses as quickly as possible
- Point the lens mount downwards when exchanging lenses
- Avoid changing lenses* (which somehow defeats the idea of a camera with exchangeable lenses...)
- Avoid live view mode because it opens the shutter and thus, makes the sensor accessible for dust.**
*) Some posters report that they had dust even without changing lenses. Thus, either the camera sucked in dust via other channel that the lens mount, or the camera came with dust on the sensor from the factory. The latter seems to be the case, as some posters report, but the dust also seems to have increased without any lens being changed. On the other hand, some users report that they did not have any dust issues over years of use and lens exchanges. Maybe they did not look closely enough at their photos...
**) This advice may be correct, but for me as a "live view shooter" it is of little help...
All in all, there are some things that you can do to prevent too much dust invading your camera, but this should all be done modestly in order not to spoil the pleasure of taking photos...
How to Give Dust No Chance
You can also use a shooting style that is less susceptible to dust.
- One advice would be to use the rangefinder and do without live view mode.
- Another advice that is given now and then is to avoid f-stops from f/8 and smaller (f/11, f/16, ...). Preferably, you should shoot with aperture at its maximum opening. Yes, this was meant as a serious proposal by the posters who wrote this! And with respect to Leica/Leitz lenses that are optimized for being used wide open, it also makes sense. But for me, with my "cheap" Zeiss and Voigtländer lenses, it may make less sense, though. And there may also be motifs where a little more depth of field may be needed...
All in all, following these advices may help but may also conflict with your shooting style...
Overview of Cleaning Methods
In this section, I give just a "tour the force" of the sensor cleaning and dust removal methods. There are far too many of them to cover or even list them all. Basically, we can distinguish between three approaches:
- Dry cleaning: Addresses primarily dust on the sensor (that is, dry dust)
- Wet cleaning: Addresses primarily debris and oil of all sorts, but of course, also removes dry dust
- Dust removal in post-processing (without touching the camera...)
Here is a brief overview of methods than can be subsumed under these three items:
- Dry cleaning
- The simplest thing: Shaking the camera with lens mount pointing to the ground
- Air pressure: Sprays, bellows
- Air suckers: Vacuum cleaners (specific ones for photography, of course)
- Brushes (preferably antistatic ones that attract dust)
- Rubber "Q-tips" to pick up dust
- Wet cleaning
- Swabs with cleaning fluids for general use
- Swabs with specific cleaning fluids for oil
- ...
- "Post" Cleaning: Removing dust spots in photos in post-processing
- Clone stamp (clone and copy)
- Healing brush (clone and merge)
- Spot healing brush (merge)
- ...
In the following, I take a brief look at these approaches. Further down, I will report my own experiences with them.
Dry Cleaning
The term "dry cleaning" methods for camera sensors comprises a larger number of techniques, all of which do without some sort of cleaning liquid. They may use some sort of mechanical force by shaking the camera, blowing air into it or sucking it out of it, brushing it, stamping it with sticks that have some sort of adhesive tip, using static electricity to attract the dust, and so on. Here is an incomplete list of methods and devices that you can use for dry cleaning:
- The simplest thing: Shaking the camera with lens mount pointing to the ground
- Air pressure: Sprays, bellows
- Air suckers: Vacuum cleaners (specific ones for photography, of course)
- Brushes (preferably antistatic ones that attract dust)
- Rubber "Q-tips" to pick up dust
Further down, I present the dry cleaning tools that I purchased and my first experiences with them.
Wet Cleaning
The term "wer cleaning" methods for camera sensors comprises a number of techniques, all of which use some sort of cleaning liquid. Typically, some sort of "swabs" are used that are covered with paper that accepts the fluid and releases it to the sensor surface when the swap is moved across it:
- Swabs with cleaning fluids for general use
- Swabs with specific cleaning fluids for oil
- ...
There are a multitude of swabs abailable for different sensor sizes and idfferent fluids. Fluids are a topic of heated debates and differ with respect to which sort of dusr or oil they are meant to remove. Some fluids seem to leave residuals as has been shown over the years. So some people swear on using simply iso-alcohol.
Further down, I present the wet cleaning tools that I purchased and will also present my first experiences with them in due course.
"Post" Cleaning: Removing Dust Spots in Photos in Post-Processing
Many users remove dust spots in post-processing because this is less risky and fairly easy, depending on the context of the dust spots. In the following, I will just list the basic dust removal techniques and the respective tools that some photo applications that I own offer. Note that all of these basic techniques offer variants and thus, zillions of options to configure them...
I would like to suggest that you study the description for the dust removal tools of your own photo application(s) for more details.
Basic Techniques
Cloning (Copying)
Cloning copies pixels from a location in the image that look likes an appropriate replacement for the dust spot to the dust spot. You indicate the to be sampled location with the cursor, move the cursor to the dust spot, and then "paint" the sampled (or copied) pixels over the spot. Thus, cloning duplicates the sampled image area to the selected area, which is, in our case, a dust spot. You can adapt the opacity of the paint so that the repair is less visible.
 Name (Adobe Photoshop Elements): Clone Stamp (Kopierstempel)
Cloning and Merging (Healing)
Healing also copies pixels from an appropriate sampling area, but merges the original pixels with the new ones. Therefore, we can also call it more generally "cloning and merging." Healing matches the texture, lighting, and shading of the sampled area to the selected area, therefore minor differences in color and lighting are not as relevant as with closing..
Healing, or the Healing Brush Tool, can be used to fix large areas of imperfections, when you drag over them. You can remove objects from a uniform background, such as an object in a field of grass. Typically, you sample the pixels from a suitable area in the image (but some tools also allow you to select predefined patterns).
 Name (Adobe
Photoshop Elements): Healing Brush (Reparatur-Pinsel)
Name (Adobe
Photoshop Elements): Healing Brush (Reparatur-Pinsel)
Merging (Spot Healing)
Spot Healing is similar to Healing, but uses only pixels from the direct surround of the dust spot - there is no sampling area to be selected (for dust spots, I use "proximity match" healing). Spot healing works best on small objects, such as dust spots, blemishes, or other imperfections. You can either click once on a blemish, or drag to smooth away imperfections in an area.You can also remove unwanted objects or figures with "content-aware" healing.
 Name (Adobe
Photoshop Elements): Spot Healing Brush (Bereichsreparatur-Pinsel)
Name (Adobe
Photoshop Elements): Spot Healing Brush (Bereichsreparatur-Pinsel)
Overview of Different Photo Applications and their Dust Removal Tools
The following table lists dust removal tools for the photo applications that I own and that I use on the Apple Macintosh. Most of the applications are available for Windows and should offer the same tools there.
Here I use the short descriptions from the applications' help to describe the tools.
Tool Technique |
|||
| Application | Cloning (Copying) | Cloning and Merging (Healing) | Merging (Spot Healing) |
| Adobe Photoshop Elements* | Clone Stamp (Kopierstempel) The Clone Stamp tool paints with an image sample, which you can use to duplicate objects, remove image imperfections, or paint over objects in your photo. |
Healing Brush (Reparatur-Pinsel) The Healing Brush fixes large areas of imperfection when you drag over them. You can remove objects from a uniform background, such as an object in a field of grass. Healing matches the texture, lighting, and shading of the sampled area to the selected area (says LR help...). |
Spot Healing Brush (Bereichsreparatur-Pinsel) The Spot Healing Brush quickly removes blemishes and other imperfections from your photos. You can either click once on a blemish, or drag to smooth away imperfections in an area. Proximity Match uses the pixels around the edge of the selection to find an image area to use as a patch for the selected area. You can remove unwanted objects or figures from your photos without destroying the photos. Using the Content-Aware option with the Spot Healing Brush tool, you can remove selected objects from a photo. Photoshop Elements compares nearby image content to seamlessly fill the selection, realistically maintaining key details such as shadows and object edges. |
| Adobe LightRoom | Spot Removal
The Spot Removal tool in Lightroom lets you repair a selected area of an image by sampling from a different area of the same image. For example, you can clean up a picture of a landscape by removing any objects that are unnecessary (people, overhead electrical wiring, and more). |
||
| Spot Removal: Clone
Duplicates the sampled area of the image to the selected area. |
Spot Removal: Heal
Matches the texture, lighting, and shading of the sampled area to the selected area. |
||
| DxO OpticsPro | n.a. | n.a. |
Dust (Staub)
Removes dust from a photo (paint = drag or point) This tool lets you eliminate spots, dust, and other small undesirable elements, by "painting" over them with a line or point (of adjustable thickness or diameter). If a spot appears on several images in a row, correct the first one in the series, and then create a preset so that you can correct the entire batch. You can also copy and paste the correction settings. |
| Affinity Photo** | Clone Brush
(Klonen) The Clone Brush Tool paints samples from one part of an image onto another. It's useful for removing defects, general photo retouching and duplicating parts of an image. Like all brush tools, it is pressure sensitive to create natural looking strokes when using a pressure-sensitive device. The Clone Brush Tool copies pixels from one part of an image (or layer) to another. The tool uses a source to clone from; this moves in relation to the tool's cursor with its position being able to be redefined as you clone from different areas. |
Healing Brush (Reparieren)
The Healing Brush Tool enables you to repair and retouch unsightly areas of an image. The Healing Brush Tool paints samples from one part of an image onto another. It's useful for removing defects and for general photo retouching. In many respects it works like the cloning, however, it blends the target pixels with the sample pixels by matching the texture, tone, and transparency of the sample pixels with the target pixels. |
Blemish Removal (Flecken entfernen)
The Blemish Removal Tool enables you to remove small imperfections from images with a single click. You can save presets of the applied blemish fixes, which can be useful for reapplying saved fixes to other images, e.g. when correcting images where the camera had dust on its sensor. Inpainting Brush (Restaurieren) Inpainting (image interpolation) is the process by which lost or deteriorated image data is reconstructed, but within the context of digital photography can also refer to replacing or removing unwanted areas of an image. For example, you can remove or replace dust spots and scratches. |
*) Probably similar for Adobe Photoshop Elements; **) Available for Apple Macintosh only
Dry Cleaning Practice: First Test of the VisibleDust Arctic Butterfly SL 707 Sensor Brush
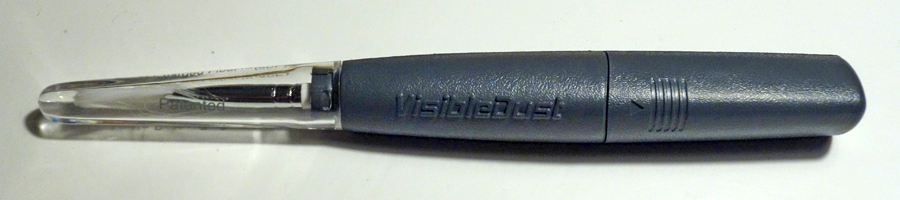
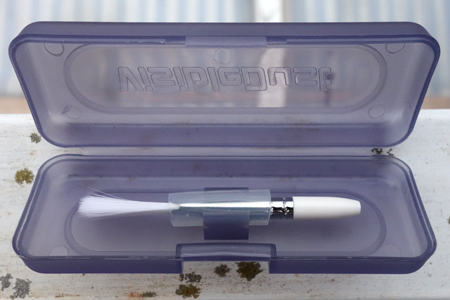
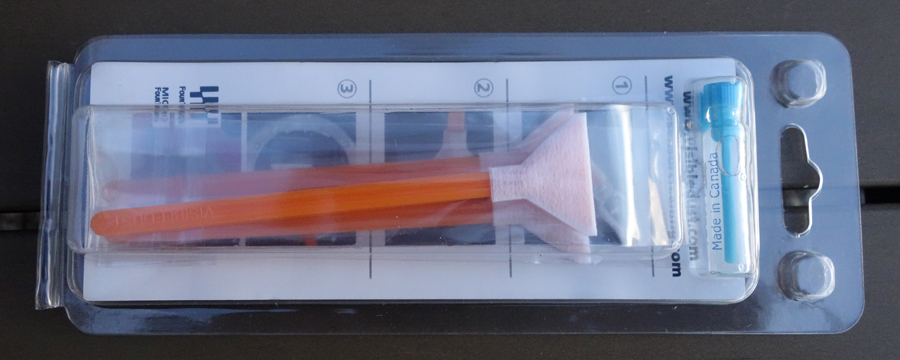
In December 2015, I ordered the VisibleDust Arctic Butterfly SL 707 sensor brush, which is the smallest and cheapest in the Arctic Butterfly product range (ca. 73 EUR in my case):
 |
 |
Photos: the VisibleDust Arctic Butterfly SL 707 with the brush in its cover
A First Disappointment...
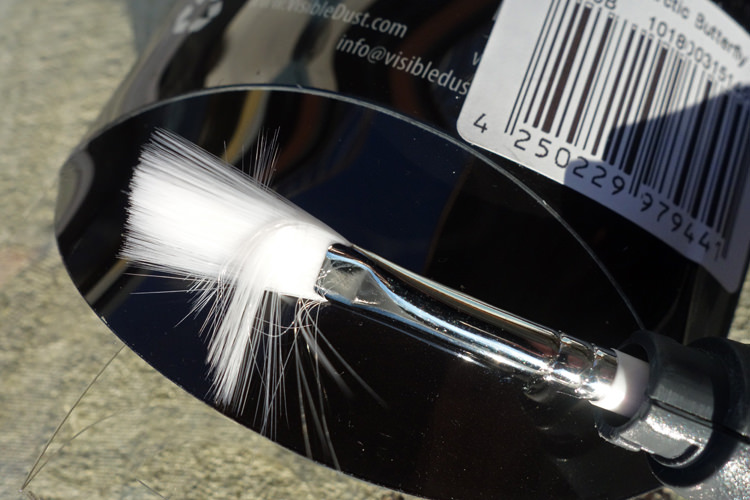
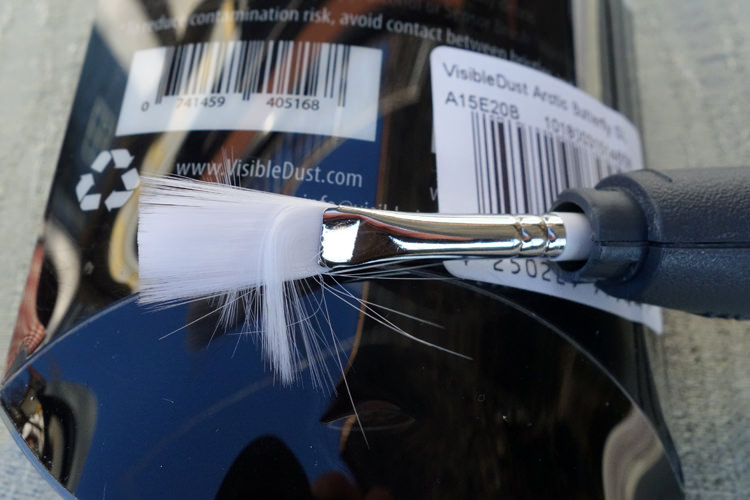
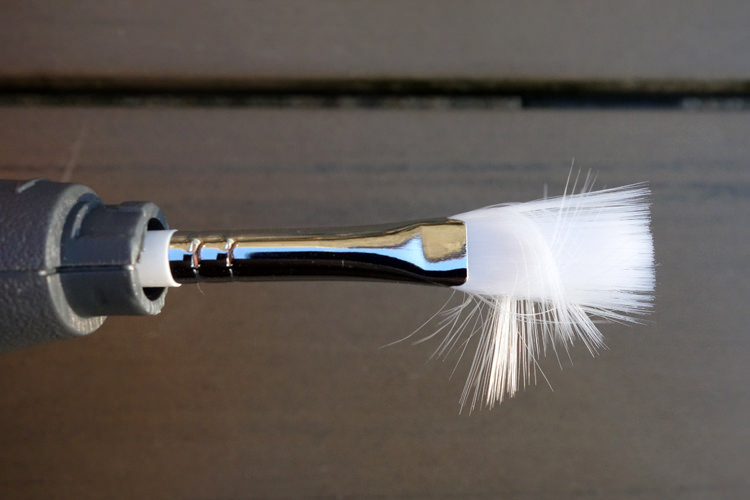
Regrettably, the brush had not been put correctly into its cover so that hairs were bent to the side and backwards:
 |
 |
 |
||
 |
 |
 |
Photos: Bent hairs of the VisibleDust Arctic Butterfly SL 707 shortly after unpacking (top row left and center) and in detail from different sides
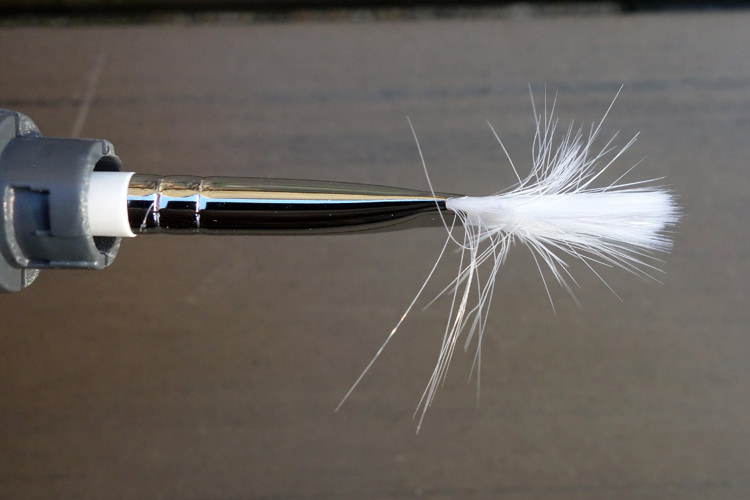
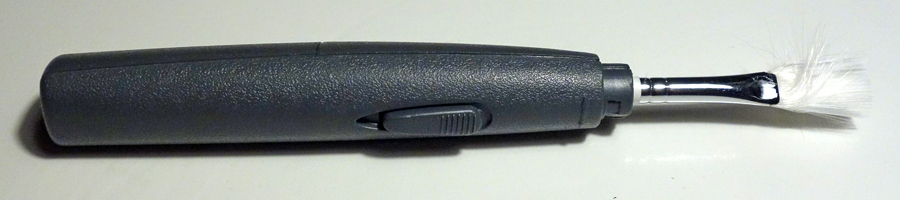
Here are two more "complete" photos of the Arctic Butterfly showing the brush uncovered and with bent hairs:
 |
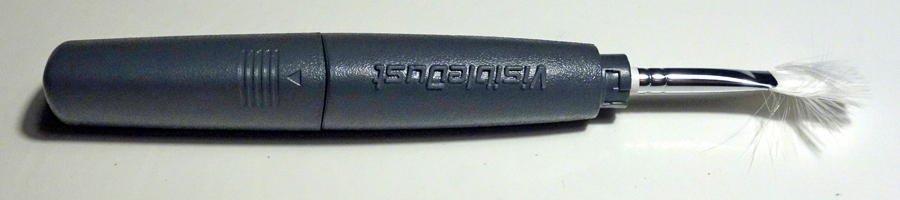 |
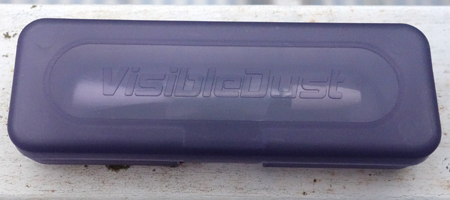
I was really disappointed about getting a new products in this state, emailed the dealer and asked for a replacement brush. Two days later, the replacement brush arrived in a case of its own and looked much better:
 |
 |
This has also the advantage that I can store the brush in its separate case and am not in danger to damage the brush by squeezing it into the small cover of the Arctic Butterfly...
A First Quick Test...
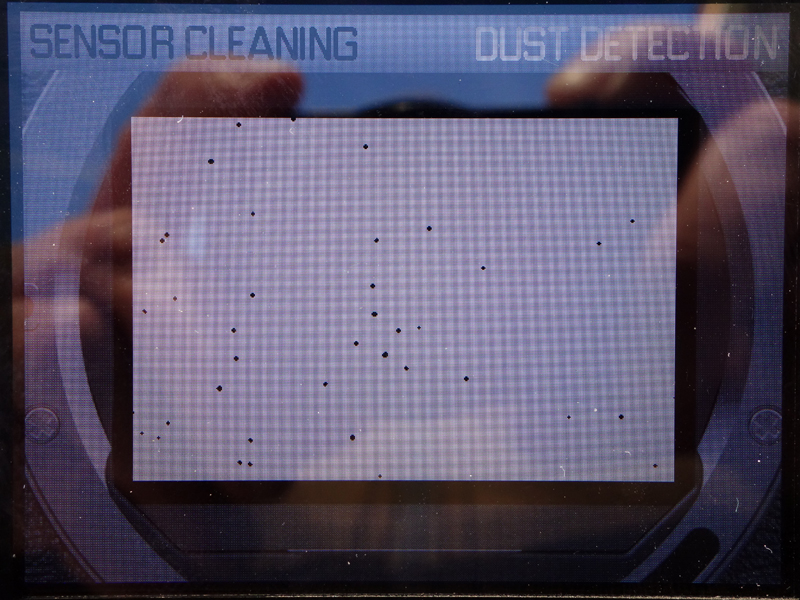
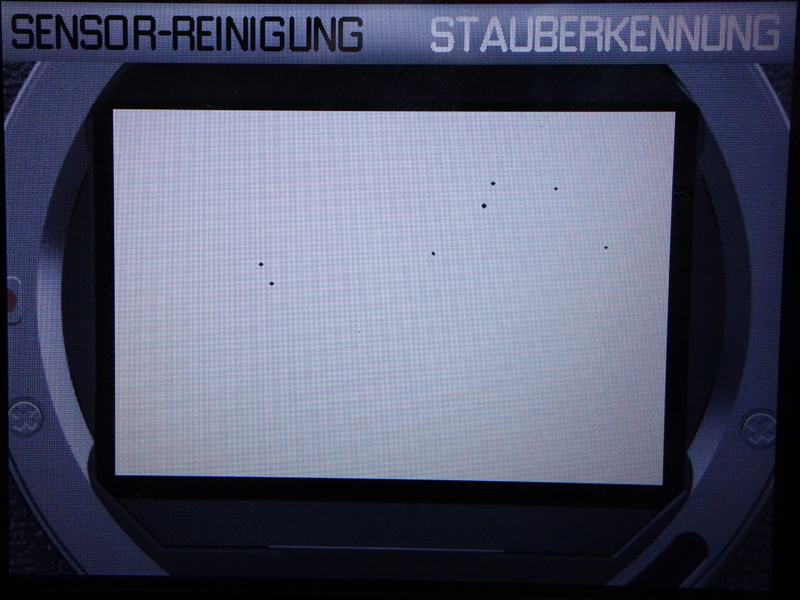
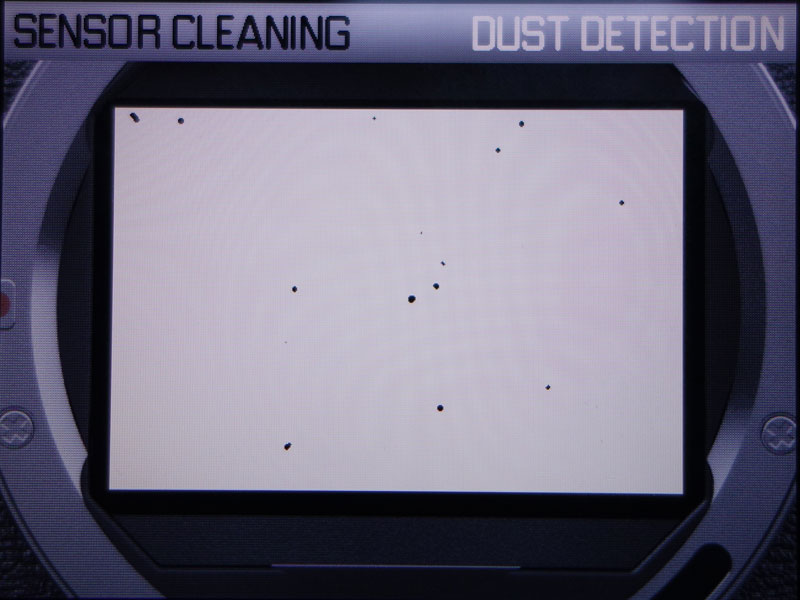
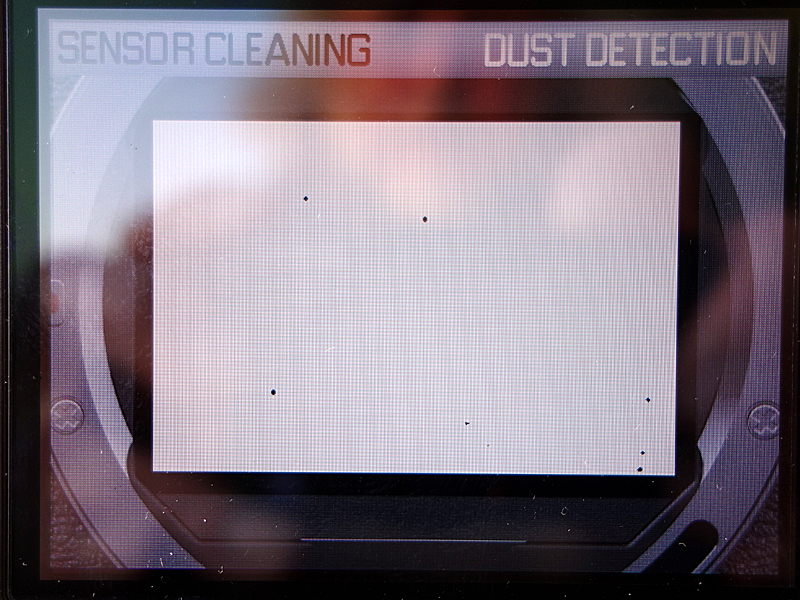
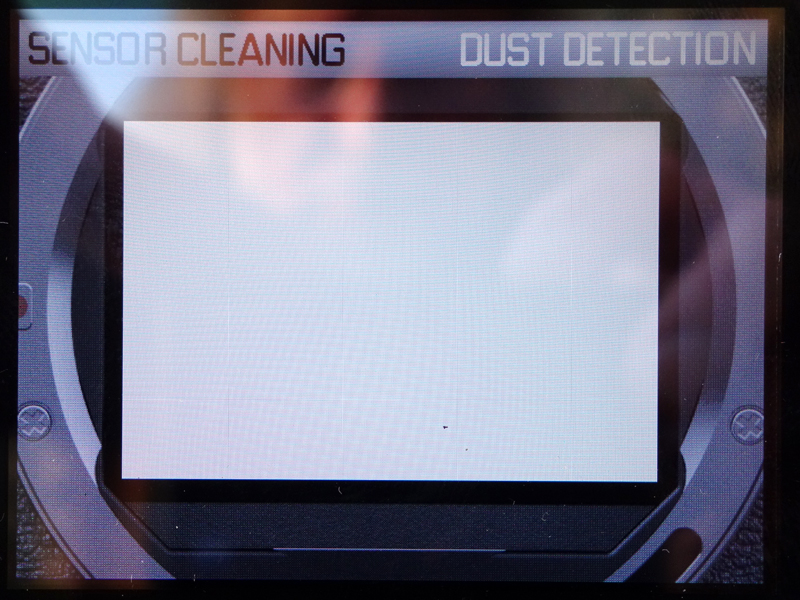
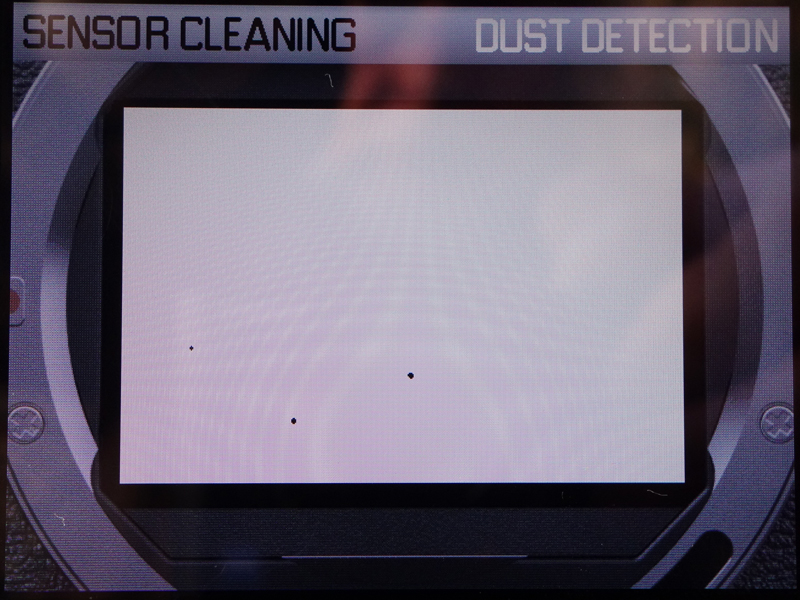
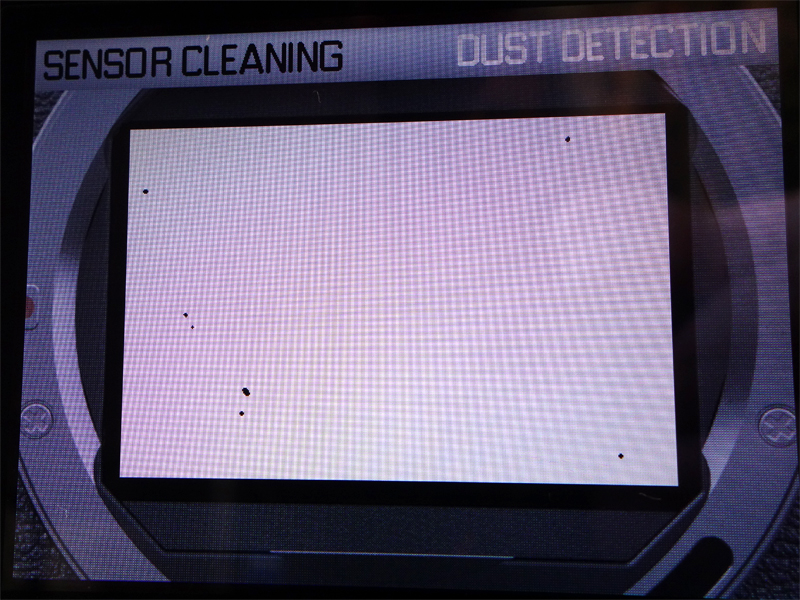
Nevertheless, since putting the brush back in its cover correctly was not possible for me because of the bent hairs (at least, without touching the hairs with my hands), I decided to do a first quick-and-dirty test with the Arctic Butterfly. A first look at the sensor revealed already, that there were some spots that cannot be removed with dry cleaning methods. So I expected some dust to remain on the sensor. This was exactly what happened as the following "before" and "after" photos of the Leica M's "dust detection" functionality demonstrate:
 |
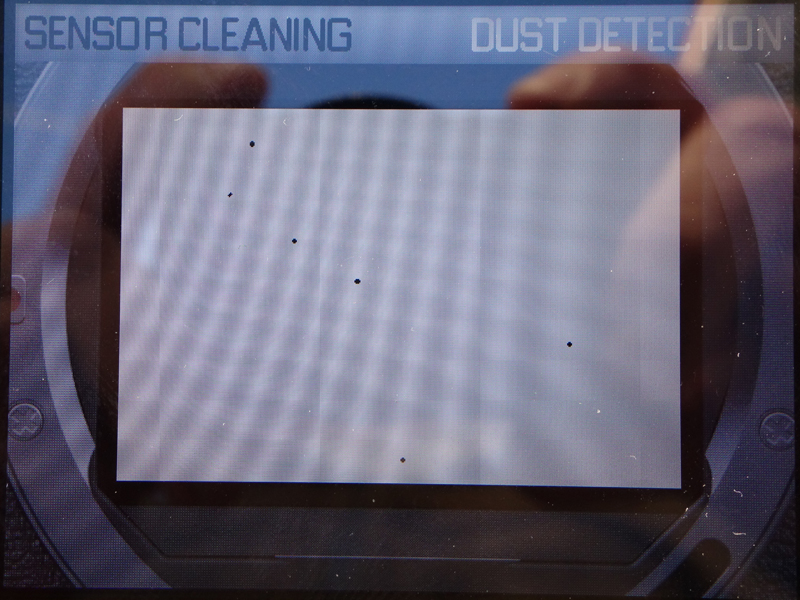 |
Photos: Dust detection results before (left) and after (right) using the VisibleDust Arctic Butterfly SL 707 (for several times)
After the cleaning, there was considerably less dust on the sensor, albeit still enough, and some dust spots seemed to have moved. At least, the dust situation had not become worse, as some posters in the forums reported...
All in all, this first test confirmed that you need both, dry and wet cleaning, to remove most of the dust/oil/debris spots from your sensor.
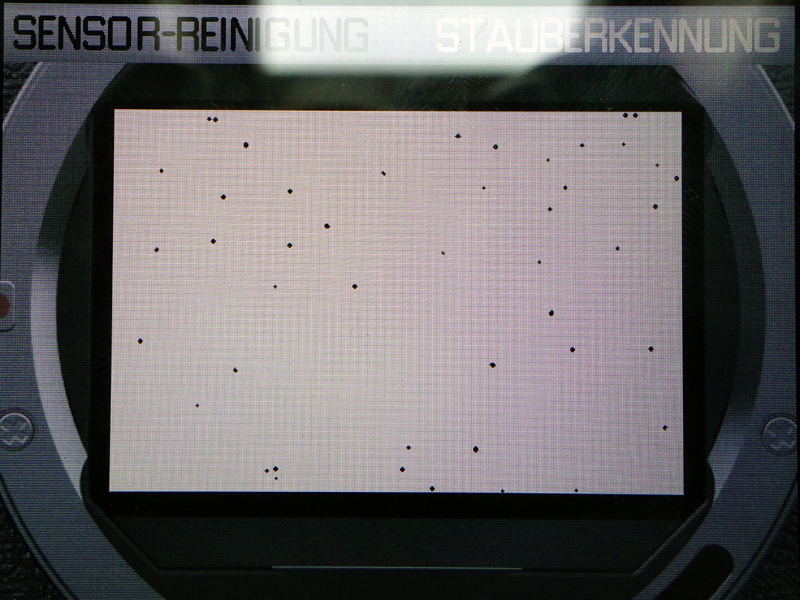
A Second Test
 |
 |
Photos: Dust detection results before (left) and after (right) using the VisibleDust Arctic Butterfly SL 707 (for several times)
The second test in February 2016 showed similar results - before and after the cleaning.Thus, this test, too, confirms that you need both, dry and wet cleaning, to remove most of the dust/oil/debris spots from your sensor.
One More Example: A Third Test
A third test in December 2016 showed a little better results than the previous tests (before and after the cleaning). In this case, dry cleaning seemed to be sufficient, although a few dust spots still remained.

Photo: Photo of the sky with f/16 and 50mm lens showing the dust spots as they would appear in uniform areas. The most prominent dust spot was located at about the center; when the aperture was opened, the spot got soft and increased considerably in size (not shown here).
 |
 |
Photos: Dust detection results before (left) and after (right) using the VisibleDust Arctic Butterfly SL 707 (for several times)
Wet Cleaning Practice: VisibleDust EZ Mini-Kit 1.0
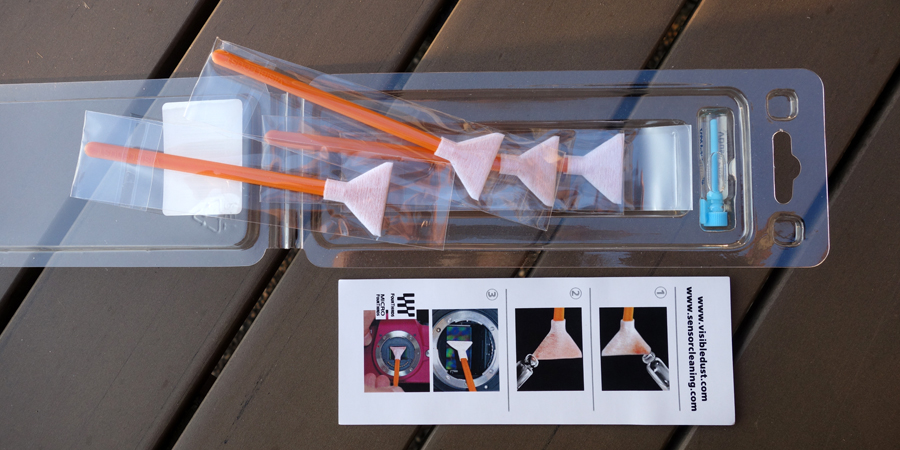
I asked the dealer where I bought the Arctic Butterfly for a recommendation for a wet cleaning product that can be uses with the Leica M, which has a full-format sensor without AA-filter. He recommended the VisibleDust EZ Mini-Kit 1.0 consisting of 1ml VDust plus 4x VSwab Sensor Cleaning Swab orange. I ordered the kit and it already arrived.
 |
 |
Photos: The VisibleDust EZ Mini-Kit 1.0 consisting of 1ml VDust plus 4x VSwab Sensor Cleaning Swab orange
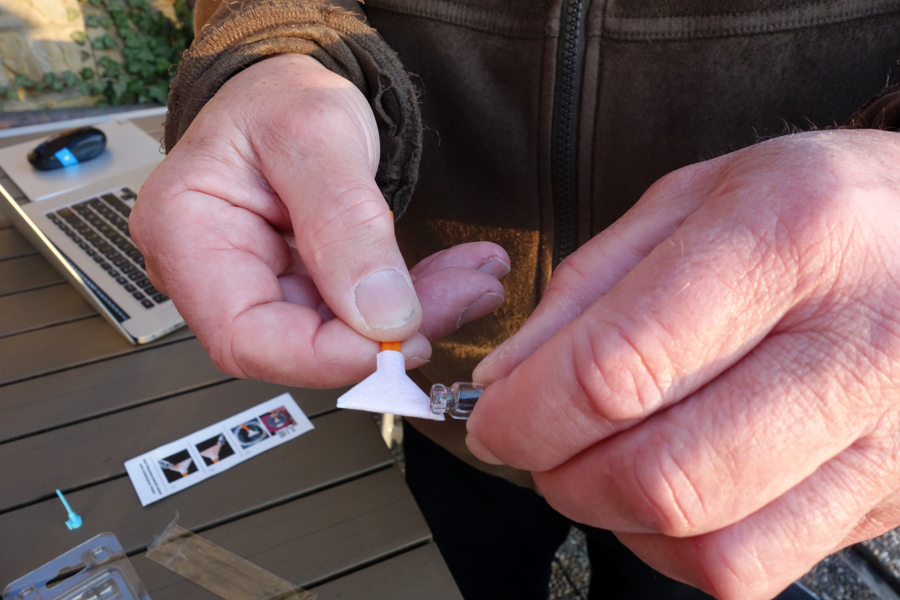
The Kit in Action for the First Time
 |
 |
|
Opening the kit |
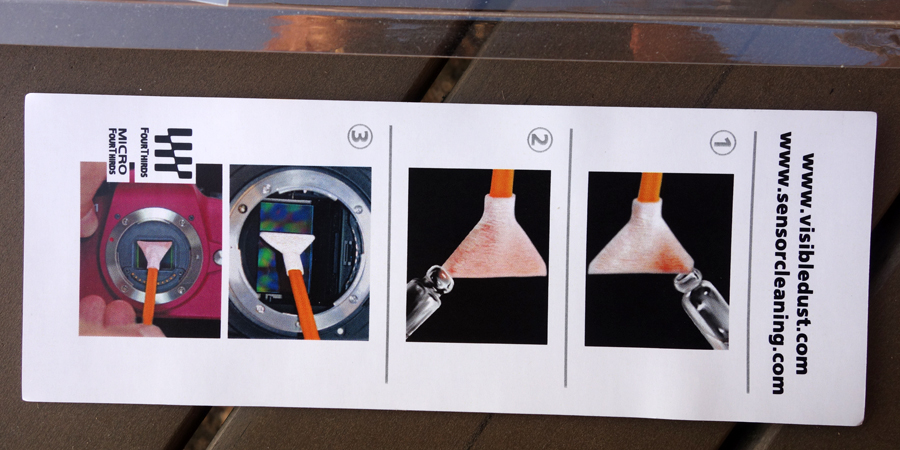
The instructions |
|
 |
 |
|
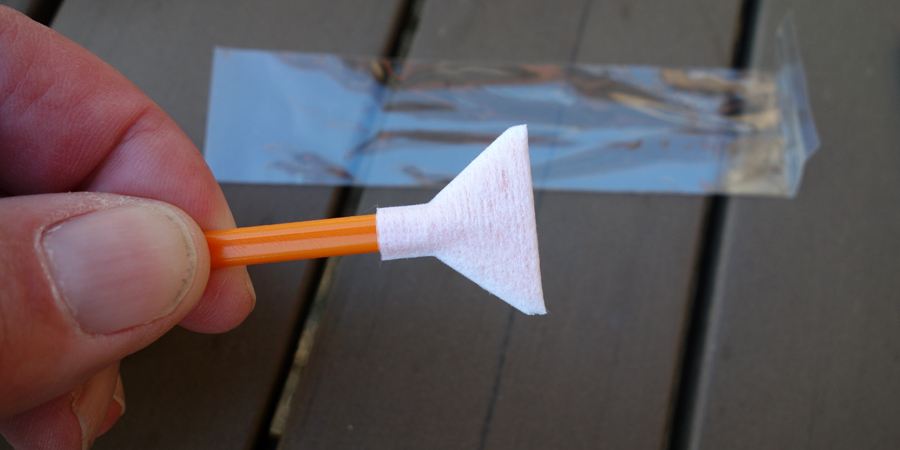
A swab |
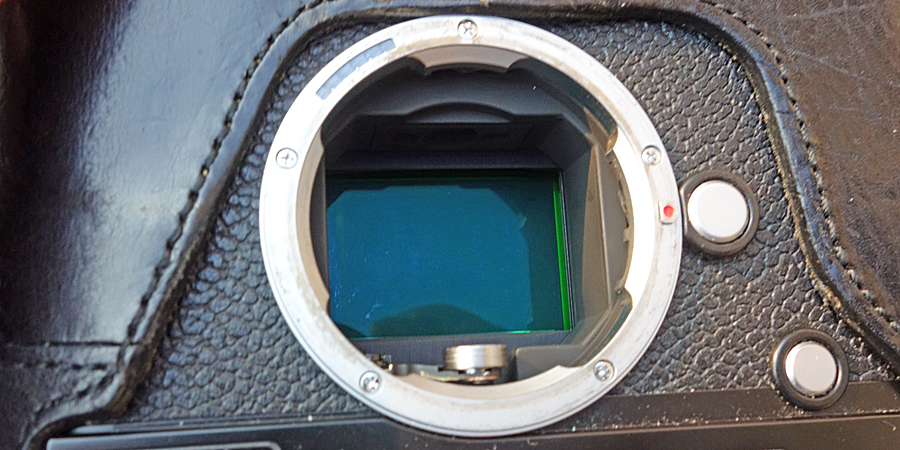
The smeary sensor of my Leica M |
|
 |
 |
|
| Trying to get the liquid on the swab - but it did not come out of the bottle... | Next try with more force - now about a third of the bottle content was released. Oh my dear! |
Photos: Preparations for using the swabs of the VisibleDust EZ Mini-Kit 1.0 to clean the sensor of my Leica M (Typ 240)
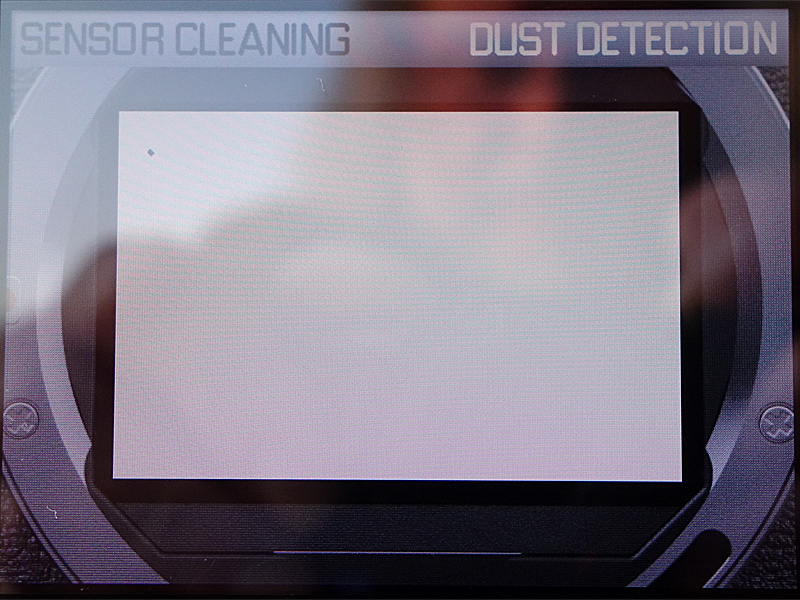
The Results of my First Wet Cleaning Attempt
The swab's width is about the sensor's height. So I just moved it straight along the wider side from end to end. I did this more than once, until the sensor looked less "smeary." Then I tested the sensor once again for dust particles. Here is what happened:
 |
 |
|
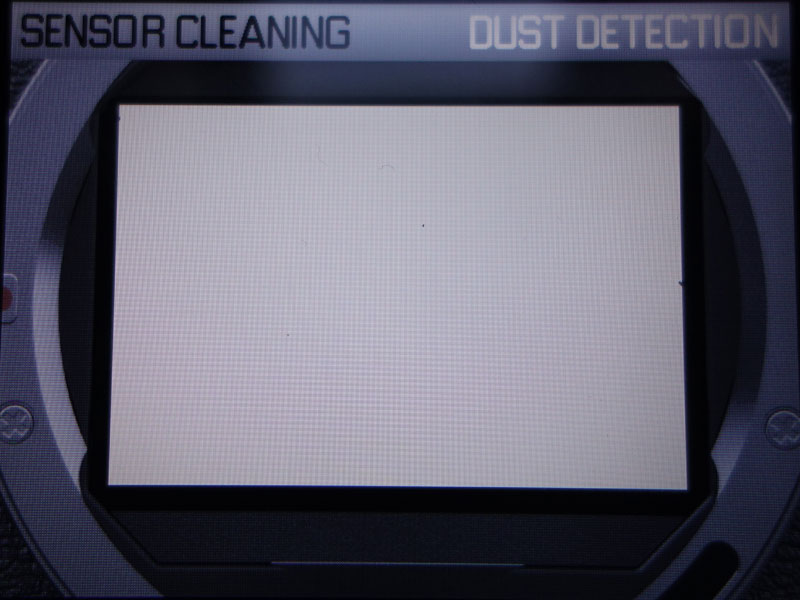
This was the state of the sensor before I started wet cleaning: fairly clean this time, but some upper dust particles might appear on photos with larger sky (or uniform) areas. |
After the wet cleaning, I found just one dust spot - but it turned out that it was on the LCD screen! I removed it from the screen, but when I wanted to show my wife the clean sensor image, the image went away... |
|
 |
 |
|
So I did another dust test to demonstrate the clean sensor. But now appeared a dust spot at the upper left corner - without that I had even exchanged the lens. |
To save effort, I decided to wipe that dust spot away using the Arctic Butterfly (that is, with a "dry cleaning" method). This is the result. Oh dear! |
|
 |
 |
|
| So I did another try with the Arctic Butterfly. It was frustrating - the more often I used the brush, the more dust particles appeared. The brush seemed to be a dust producer, although I cleaned it (turning the motor on) before each use... | I gave up and used the swab once again - it was still wet enough. No dust after using the swab! So I will not exchange the lens to have dust again (at least for this day)... |
All in all, wet cleaning usually seems to remove most dust particles, at least in this case. Others may have different experiences, depending on what type of debris is on the sensor. The Arctic Butterfly was, however, a huge disappointment in this episode. Perhaps, it should not be used in conjunction with wet cleaning or only after the sensor surface is really dry (I thought that it was...).
Post-Processing Practice
Removing dust in post-processing is the only option that you have "after the fact". Some day you may inspect your photos and realize that there must be dust on the sensor because there are some black spots in the images. This can even happen with some cameras with fixed lenses, particularly with those the have a "wobbly" telescope lens design and easily suck in dust when the lens protrudes or retracts.
Some people then decide that it is time for sensor cleaning (or sending the camera to repair...). Others may be anxious to clean the sensor themselves and may decide to turn to or stay with dust removal in post-processing.
In the following, I would like to briefly report my first attempts at removing dust in post-processing, using the tools that Adobe Photoshop Elements offers, which is still my primary image processing application. Admittedly, I rarely removed dust in my images in the past when I had my DSLRs (between 2005 and 2009), because I was too lazy for the effort involved with this. Then, a fairly dust-free era followed, until I purchased a Leica M (Typ 240) (the exceptions to this are mentioned elsewhere on this site.) Thus, many years have passed since my first attempts at removing dust in Adobe PSE. Since then, new tools were added to PSE, and I in the following, I try them out to see whether they make dust removal easier. But I begin this exploration with the old tools.
 Brush
Brush
At the beginning, you simply could take a brush tool , take the dropper sample a color and lightness value close to the spot, and then brush over the spot. Using soft edges and an opacity lower than 100% help make the repair more or less invisible.
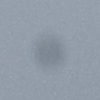
This was the theory, but when I went into practice, I was a little bit surprised: The brush repair of a dust spot in the sky (gray clouds)was too "clean" because the brush picked just one color and, by painting with this color, did not take care of the grain in the image:
Figures: The spot, the spot brushed over once with opacity 100% and brushed over with opacity 50% for three times (details do not matter) - all at 100% |
Figure: The repair from the right sample enlarged and with environment at 200% (screen shot); you can now clearly see that the repaired region is too "clean" because the brush picked just one color and, by panting with this color, ignored the grain in the image. |
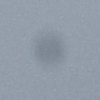


This "small fault" in the repaired image may only be evident at larger magnifications. Nevertheless, for me, it ruled out the brush as a repair tool for dust spots.
Clone Stamp
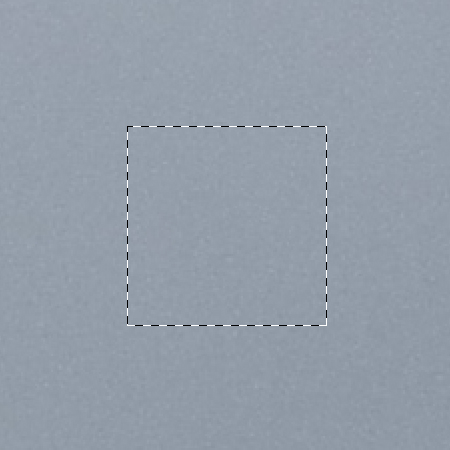
Then came the clone stamp tool. Here, you sample a "clone" region with the dropper that you find suitable to covering up the spot area (you can use this tool to cover larger regions or duplicate objects, hence the name clone stamp tool). Here you can also use soft edges and lower opacity to make the copy and cloning process more or less invisible. There are a few caveats with the close tool, though. Firstly, when I clone larger areas, I often copy unwanted details and have to start anew with a new clone center. But this is less of a problem when using the tool for covering small dust spots. Another one is, that when you select an area to be cloned, there may be a slight lightness or color gradient in the image that you did not realize and thus, the cloned area stands out of its surround because of that. An opacity of less than 100% may make things less severe here as well. I used this tool for the same spot in a similar image and got the following results:
Figures: The spot (left), the spot brushed over once with opacity 100% (second left), several times over with opacity 100% (second right), and brushed over with opacity 50% for several times (right) - all at 100% (details do not matter) |
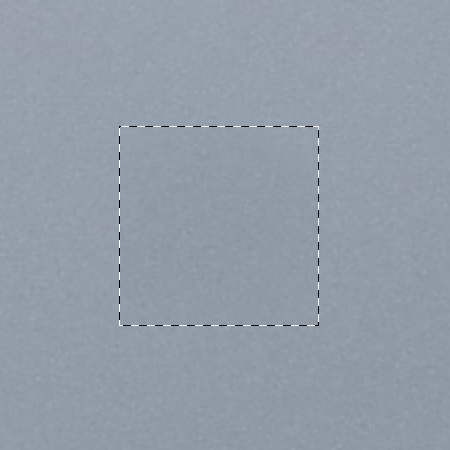
Figure: The repair from the right box enlarged and with surround at 200% (screen shot); you can clearly see that the repaired region now shows more or less the same grain pattern as the surround. The repair may not be perfect, but it should be more or less invisible even at larger magnifications. |


Healing
Brush, Spot Healing Brush
There are two newer tools in PSE that I never used in the past: the healing brush, and the spot healing brush. Both tools are primarily targeted at removing smaller (such as dust spots or blemishes in faces) or larger imperfections (unwanted objects or persons) in photos. The healing brush samples a "cover up" area similarly to the clone stamp, whereas the spot healing brush can sample directly from the neighborhood of the dust spot. In my first investigation on the same spot in the image used with the brush, the spot healing brush required a little bit more work, because I needed to drag around the brush a little before the result was OK (brush size was identical in both cases).
 |
 |
 |
Figures: The spot (left), the spot brushed over (just one tip) once with healing brush (center), and brushed over and dragged with spot healing brush (right) - all at 100%
 |
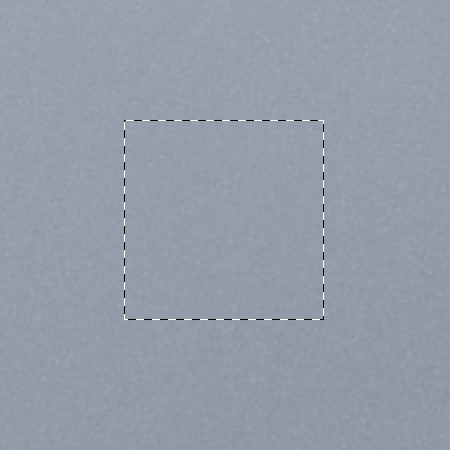 |
Figure: The repair from the right box enlarged and with environment at 200% (screen shot); you can clearly see that, after the application of both tools (left: healing brush, right: spot healing brush), the repaired region now shows more or less the same grain pattern as the surround. The repair may not be perfect, but it should be more or less invisible even at larger magnifications.
All in all, both repair brushes did their work well and preserved the grain that was in the image. But are there any caveats with these tools or differences between them that might be important to know? Yes, there are!
First, if you use the spot healing brush, make sure that "Content-Aware" is selected to restore the image with the correct texture. If you select "Approximate" you will get a uniformly colored area after the repair, just as I did with the brush.
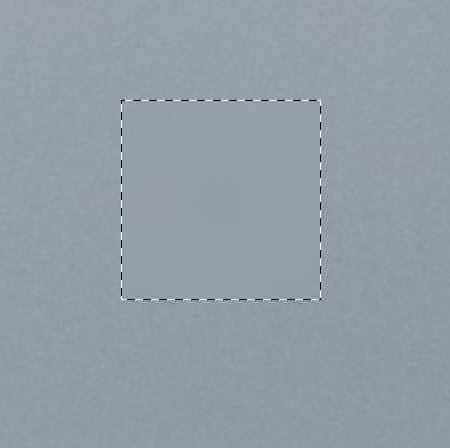
Secondly, at the beginning, I did not know that you have to pick up a background for the healing brush, just as you have to for the clone stamp. The healing brush worked, because I had picked up an area for the clone stamp tool, which was OK for the dust spot, because it was the same image. However, when I changed the image, I suddenly got a gray background pattern for the repair and did not know why (this is actually the same dust spot in another image):

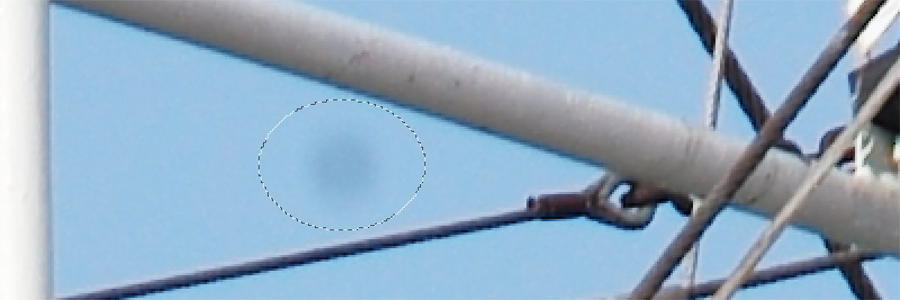
In this case, the healing brush sampled a gray region (probably from the metal handrail) as cover for the dust spot, which was, of course, unusable. When I restarted PSE (for whatever reason...) and resumed repairing this image with the healing brush, I received an error message telling that no background had been sampled (because it got lost in between...). Now I knew what went wrong! After sampling from a blue area (the source needs to bet set to "Sampled"), I was able to remove the dust spot - but only after inserting another step. Since the spot lies close to wires and the handrail, these get also "repaired" when the brush is too large. I therefore put an oval selection (marquee) around the spot so that the repair was restricted to this area:
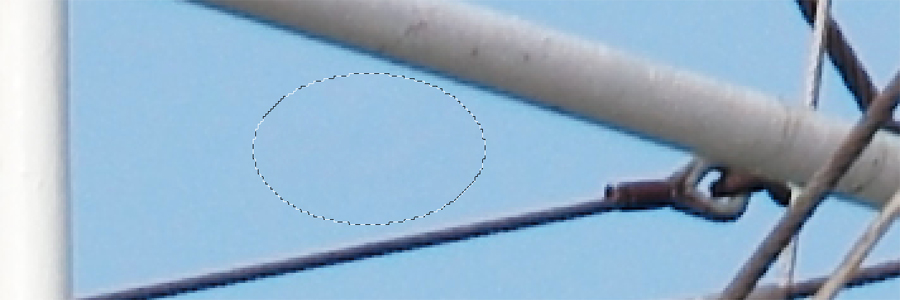
Now I was finally able to remove the dust spot successfully. In the end, however, I made the repair with the spot healing brush:
I think, I will use the spot healing brush in the future to remove dust spots in my images, even though this may require some dragging... If this tools does not work satisfyingly, I will try the "regular" healing brush and pick up an appropriate region for the repair. And I will, of course, also do some dry and wet cleaning of the camera sensor...
Conclusions
There is no either...or, with respect to dust removal, I assume. Dust that has already made its way into your images has to be removed in post-processing, or at least, can be. Dust spots are most annoying in the sky or in other uniformly colored areas. Elsewhere you may not even notice that they are there... All in all, it depends on you, whether you will invest the effort or just leave the images "as is" (as I mostly do...). The tools as such are easy to use these days and therefore should not create major obstacles for you. But you may need to know one or the other specialty...
Before, however, your images are full of dust spots, you have to turn to sensor cleaning, either on your own, or by sending the camera to a repair center. There, it will be cleaned both dry and wet. If you are anxious of cleaning the sensor with a wet method yourself, you may consider cleaning it with dry methods as long as this is feasible. If the sensor can no longer be cleaned with dry methods, you eventually have to "bite the bullet" and either clean your sensor wet yourself, or have it cleaned by someone else.
References
- Thread started by bobaronoff (l-camera-forum): First foray in (the art of) sensor cleaning (www.l-camera-forum.com/topic/210598-first-foray-in-the-art-of-sensor-cleaning/)
- Thread started by balifoods (l-camera-forum): Leica M 240 what is going on (www.l-camera-forum.com/topic/209650-leica-m-240-what-is-going-on/)
|
made by |
| 17.12.2016 |