Astronomy | GXR · GR · RX100 M1 · RX100 M4 · RX10 M3/4 · TZ202 · X Vario · M240 · General | Photos | Conf. Places | Calendars | Art
Leica X Vario: Controls and Functions
Introduction | Overall Appearance | "Menu" Buttons | Direction Pad, Setting Dial (Thumb Wheel)
Archive
On this page, I would like to provide an overview of the Leica X Vario's camera controls and their functions.
Overall Appearance
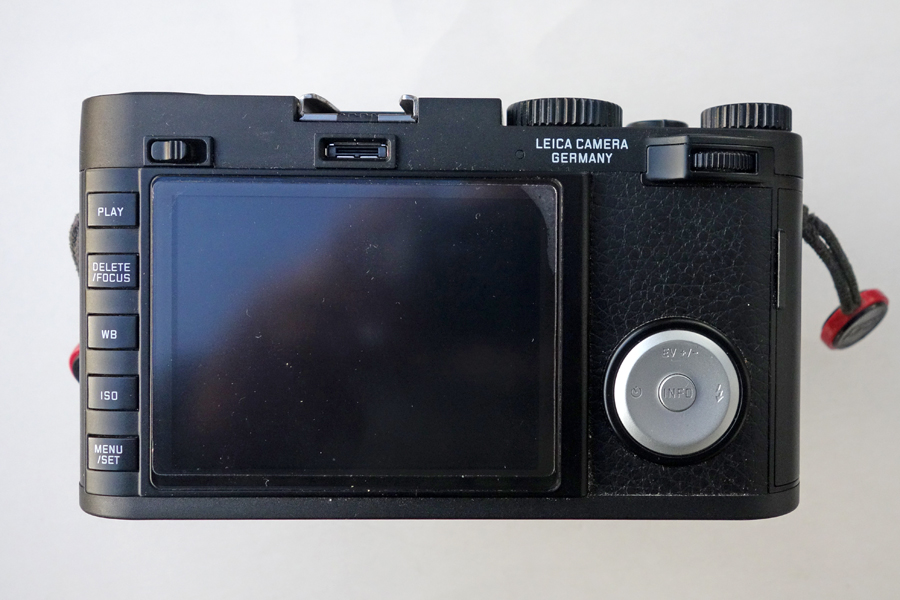
The following photos are meant to provide an overview of the camera controls so that they can be discussed.
 |
 |
|
 |
 |
|
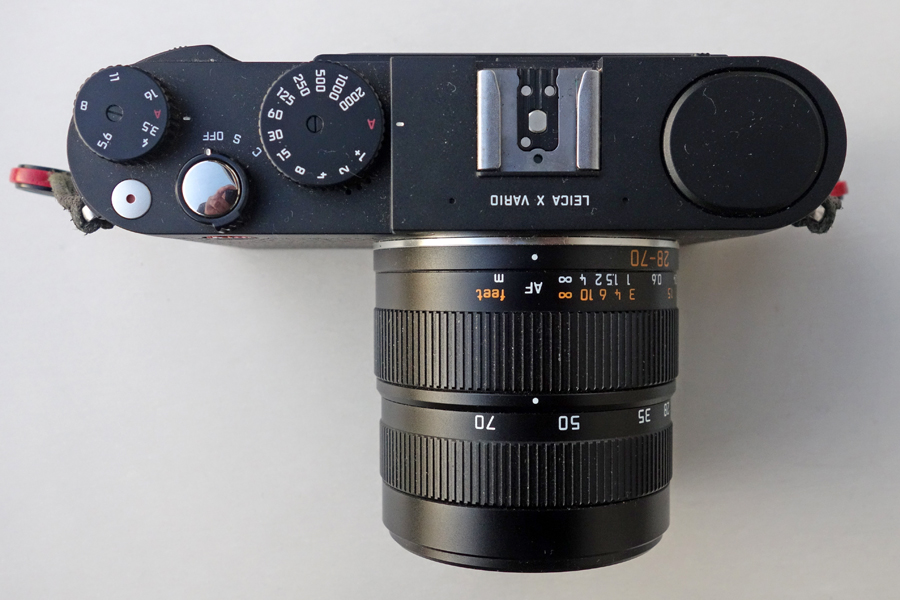 |
Photos: Views of the Leica X Vario
"Menu" Buttons
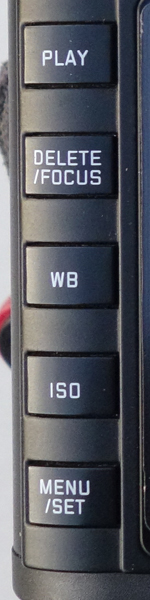
Here is an overview of the "menu" buttons at the left edge on the LCD on the back of the camera.
| Button | Functions | Comment | ||
|
PLAY | Opens the (continuous) review screen | Half-pressing the shutter release button cancels the review | |
DELETE/ FOCUS |
Deletes images (Play mode)
Focus button (Record mode) |
Focus button:
|
||
| WB | Sets the white balance | Has to be pressed only briefly; also sets the value | ||
| ISO | Sets ISO sensitivity | Has to be pressed only briefly; also sets the ISO value | ||
MENU/ SET |
Calls and closes the menu screen (incl.
submenus)
Applies the selected menu option |
Calls and closes the menu screen
Applies the selected menu option and returns to the main menu (INFO on the direction pad does the same*) |
*) Since firmware update 1.1.
Menu options can be cancelled by half-pressing the shutter release button
Direction Pad, Setting Dial (Thumb Wheel)
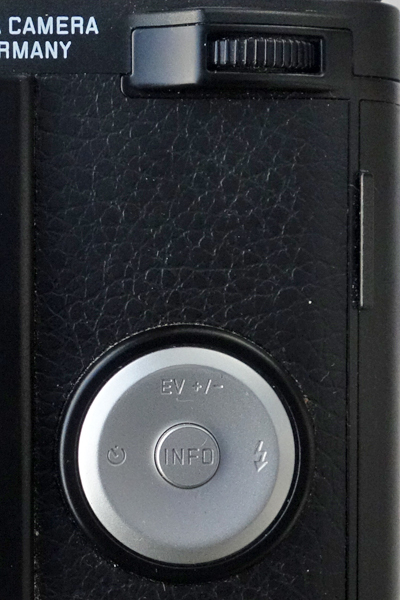
Here is an overview of the direction pad buttons and the setting dial/thumb wheel on the back of the camera .
| Button/Control (Symbol) |
Functions | Comment | |
 |
Direction Pad | The direction pad is used for
|
See the button descriptions below for details |
| INFO* | The INFO button is used for
|
*INFO: Toggles between different screen modes in picture and play mode | |
| EV +/- (Up)* | Exposure compensation
The up button is also used for
|
Menu use: You can also use the thumb wheel (setting dial) | |
| none (Down)* | The down button is used for
|
You can also use the thumb wheel (setting dial) | |
| Selftimer (Left)* | Opening / making settings in the self timer
menu / exiting menus and submenus without saving the menu settings
(Selftimer)
The left/Selftimer button is also used for
|
||
| Flash (Right)* | Flash: Opening / making settings in the flash
mode menu / opening submenus (Flash) The right/Flash button is also used for
|
||
| Thumb Wheel (Setting Dial) |
The thumb wheel is used for
|
*1 second and longer
**Added by me (somewhat redundant with the "scrolling" item) ***Exposure compensation: In P mode, up (EV +/-) has to be pressed briefly, before the value can be selected in P mode (in A and T mode not needed; not available in M mode); further presses lead to bracketing and flash exposure compensation ???In the manual there is also the item "Manual distance setting." It seems to be a leftover from the X1/X2 manuals; at least, I cannot confirm this. |
*) On the direction pad
**) Since firmware update 1.1.
|
made by |
| 03.04.2019 |